![]()
Quick Start Guide
 CAUTION
 CAUTION
RISK OF ELECTRIC SHOCK
DO NOT OPEN
WARNING: SHOCK HAZARD – DO NOT OPEN
The lightning flash with arrowhead symbol, within an equilateral triangle is intended to alert the user to the presence of uninsulated “dangerous voltage” within the product’s enclosure that may be of sufficient magnitude to constitute a risk of electric shock to persons.
The exclamation point within an equilateral triangle is intended to alert the user to the presence of important operating and maintenance (servicing) instructions in the literature accompanying the appliance.
Important Safety Instructions
1) Read these instructions.
2) Keep these instructions.
3) Heed all warnings.
4) Follow all instructions.
5) Do not use this apparatus near water.
6) Clean only with dry cloth.
7) Do not block any ventilation openings. Install in accordance with the manufacturer’s instructions.
8) Do not install near any heat sources such as radiators, heat registers, stoves, or other apparatus (including amplifiers) that produce heat.
9) Do not defeat the safety purpose of the polarized or grounding-type plug A polarized plug has two blades with one wider than the other. A grounding type plug has two blades and a third grounding prong. The wide blade or the third prong are provided for your safety. If the provided plug does not fit into your outlet, consult an electrician for replacement of the obsolete outlet.
10) Protect the power cord from being walked on or pinched particularly at plugs, convenience receptacles, and the point where they exit from the apparatus.
11) Only use attachments/accessories specified by the manufacturer.
12) Use only with the cart, stand, tripod, bracket, or table specified by the manufacturer, or sold with the apparatus. When a cart is used, use caution when moving the cart/ apparatus combination to avoid injury from tip-over.

13) Unplug this apparatus during lightning storms or when unused for long periods of time.
14) Refer all servicing to qualified service personnel.
Servicing is required when the apparatus has been damaged in any way, such as power-supply cord or plug is damaged, liquid has been spilled or objects have fallen into the apparatus, the apparatus has been exposed to rain or moisture, does not operate normally, or has been dropped.
CAUTION
To prevent electric shock hazard, do not connect to mains power supply while grille is removed, minimum distances 10cm around the apparatus for sufficient ventilation; the ventilation should not be impeded by covering the ventilation openings with items, such as newspapers, table-cloths curtains, etc.; no naked flame sources, such as lighted candles, should be placed on the apparatus; attention should be drawn to the environmental aspects of battery disposal; the use of apparatus in moderate climates, the apparatus shall not be exposed to dripping or splashing and that no objects filled with liquids, such as vases, shall be placed on the apparatus Where the MAINS plug or an appliance coupler is used as the disconnect device, the disconnect device shall remain readily operable. Batteries (battery pack or batteries installed) shall not be exposed to excessive heat such as sunshine, fire or the like. “To reduce the risk of fire or electric shock, do not expose this apparatus to rain or moisture” Caution Marking and rating plate was located at rear enclosure of the apparatus.
CAUTION
Danger of explosion if battery is incorrectly replaced. Replace only with the same or equivalent type.
FCC warning:
This device complies with part 15 of the FCC rules. Operation is subject to the following two conditions: (1) this device may not cause harmful interference, and (2) This device must accept any interference received, including interference that may cause undesired operation.
Any Changes or modifications not expressly approved by the party responsible for compliance could void the user’s authority to operate the equipment. Note: This equipment has been tested and found to comply with the limits for a Class B digital device, pursuant to part 15 of the FCC Rules. These limits are designed to provide reasonable protection against harmful interference in a residential installation. This equipment generates uses and can radiate radio frequency energy and, if not installed and used in accordance with the instructions, may cause harmful interference to radio communications. However, there is no guarantee that interference will not occur in a particular installation If this equipment does cause harmful interference to radio or television reception, which can be determined by turning the equipment off and on, the user is encouraged to try to correct the interference by one or more of the following measures:
-Reorient or relocate the receiving antenna
-Increase the separation between the equipment and receiver.
-Connect the equipment into an outlet on a circuit different from that to which the receiver is connected.
-Consult the dealer or an experienced radio/TV technician for help.
This equipment complies with FCC radiation exposure limits set forth for an uncontrolled environment. This equipment should be installed and operated with minimum distance 20cm between the radiator & your body.
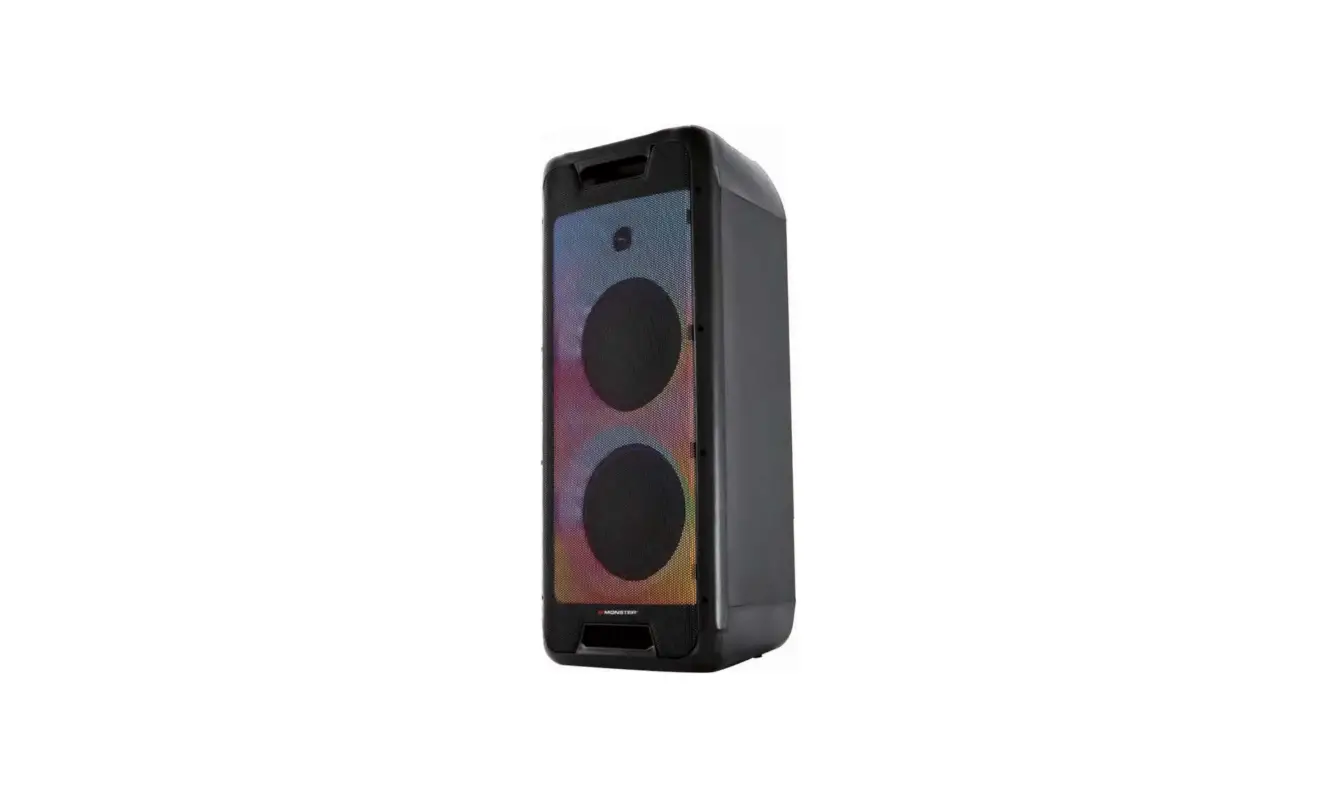
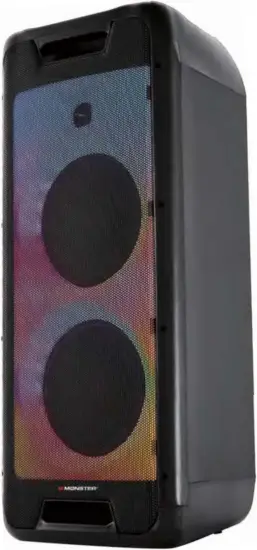
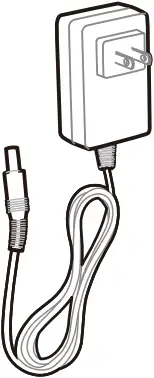
What’s in the box

![]()


Overview
3.1 Top panel
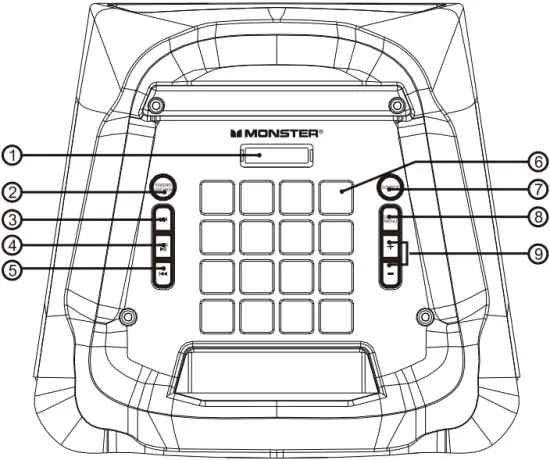
1) LED DISPLAY
• Display speaker status.
2) STANDBY/LIGHT SHOW
• Press to Light Show mode, LED1,LED2,LED3, LED4,OFF
• Press and hold for 3 second to Standby on or off.
3) ![]()
• Press to play the next track.
• In FM mode, Press to finetune(increase) the frequency manually.
• Hold down to skip to the next preset station.
4) ![]() /TWS:
/TWS:
• Press to play or pause the music.
• Press and hold for 1 second to TWS (true wireless stereo) mode on or off.
• In FM mode press to the full automatic search.
5) ![]()
• Press to play the previous track.
• In FM mode, Press to finetune(decrease) the frequency manually.
• Hold down to skip to the previous preset station.
6) ![]()
• DJ control keys
7) SOURCE
• Press to change the source between USB, LINE, BT, FM
8) DJ MODE / MENU
• Press once to MIC.VOL(GUITAR, microphone).
• Press twice to MIC.ECHO.
• Press three times to X BASS on or off.
• Press and hold for 1 second to DJ MODE
DJ1 (DRUM) → DJ2 (Keyboard) → DJ3(Piano) → DJ4 (DJ EFFECTS) → DJ OFF.
9) + /-
• Press to decrease or increase the volume level.
• After pressing MENU, press +/- to adjust M.Vol, M.ECHO X.BASS ON or OFF
-Display “![]() ” mean for MIC/GUITAR VOL 10, press +/- to adjust 0-30.
” mean for MIC/GUITAR VOL 10, press +/- to adjust 0-30.
-Display “![]() ” mean for ECHO VOL 10, press +/- to adjust 0-30.
” mean for ECHO VOL 10, press +/- to adjust 0-30.
3.2 DJ pad
Sound effects
Press MENU and hold for 2 seconds to Enter color control mode.
Press ![]() repeatedly to select a sound effect (DJ1/DJ2/DJ3/DJ4).
repeatedly to select a sound effect (DJ1/DJ2/DJ3/DJ4).


Drums Keyboard


Piano DJ effects
3.3 Back panel
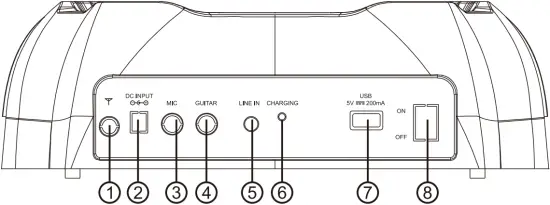
1) FM ANTENNA
• Connect to FM antenna
2) DC INPUT
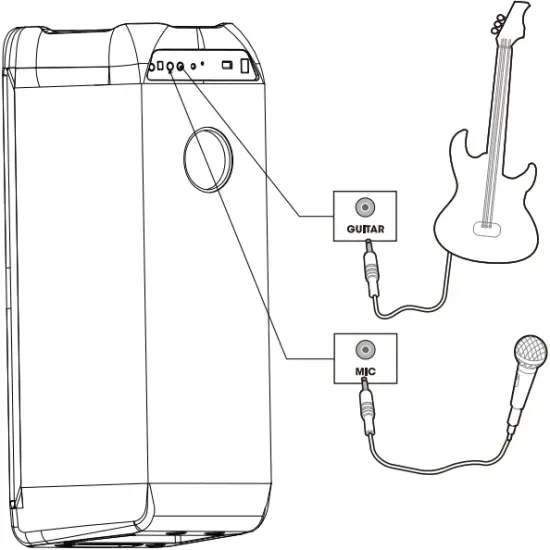
3) MIC
• Connect to a microphone.
4) GUITAR
• Connect to a guitar (not provided).
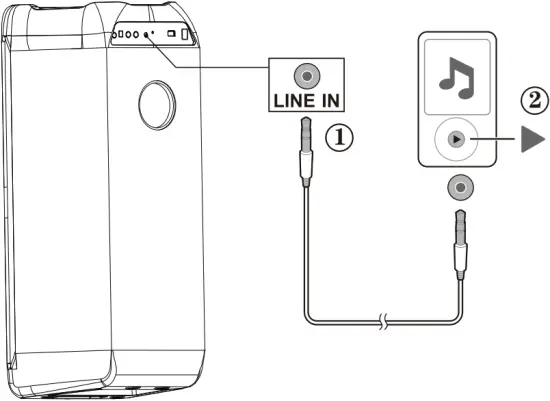
5) LINE IN
• Connect to the analog audio output jacks of an analog device through RCA audio cable.
6) POWER LED
• Power light
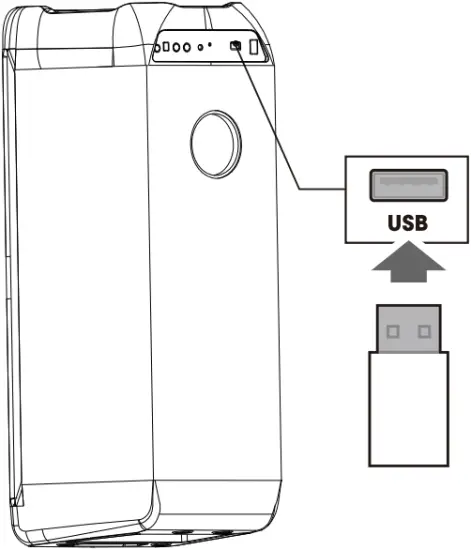
7) USB
• Connect to a USB storage device.
8) POWER SWITCH
• Switch power to on or off.
NOTE The unit will charge when plugged in DC Adapter cable.
Power on
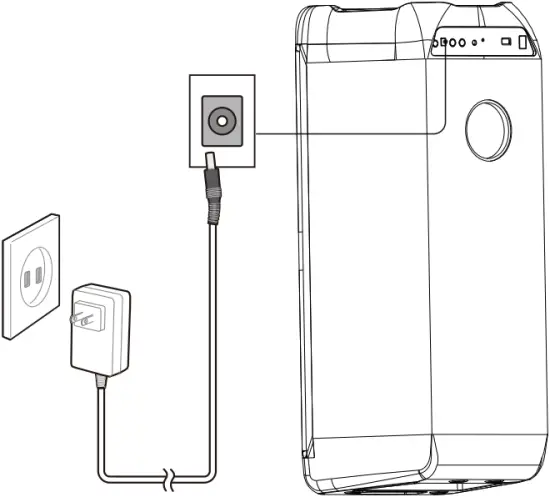
Connections
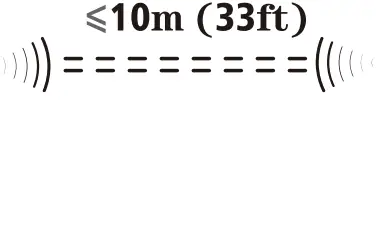
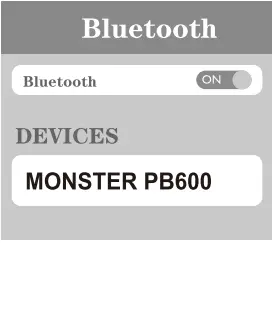
5.1 Bluetooth

5.2 USB
5.3 LINE IN
Mixing sound with microphone/ guitar (not provided)
Plug in a mic to activate Karaoke mode.
TWS (true wireless stereo) mode
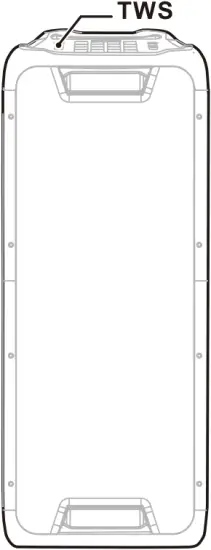
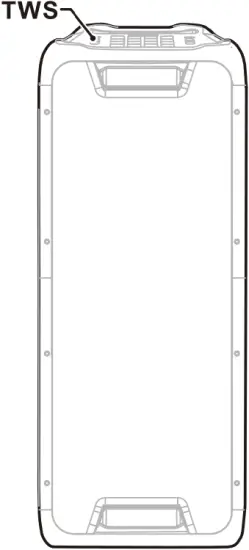
1) Turn on speakers and select INPUT modes as Bluetooth.
2) Turn on the Bluetooth feature on your mobile phone to search for Bluetooth devices and select “MONSTER PB600” from the search result. Select OK or YES to pair this unit with your mobile phone and a steady BT in display will indicate a successful connection. Once connected you can play music from your mobile phone.
3) Turn on another “MONSTER PB600” if you have, and select Bluetooth mode. Press and hold “![]() ” key on speaker set for 2 seconds and “
” key on speaker set for 2 seconds and “![]() ” will be displayed.
” will be displayed.
When the display light is “![]() ” or a tone is heard from another device, the TWS is established. (The “LEFT” channel will be the speaker unit of first default connection with Bluetooth devices, the other speaker connected with Bluetooth devices will be the “RIGHT’ channel.)
” or a tone is heard from another device, the TWS is established. (The “LEFT” channel will be the speaker unit of first default connection with Bluetooth devices, the other speaker connected with Bluetooth devices will be the “RIGHT’ channel.)
4) Press “![]() ” key on the speaker unit for 2 seconds . Turn off the TWS features when “
” key on the speaker unit for 2 seconds . Turn off the TWS features when “![]() ” is displayed.
” is displayed.
Note: Step 2 is normal BT cell phone connection ( no TWS)
Remote Control
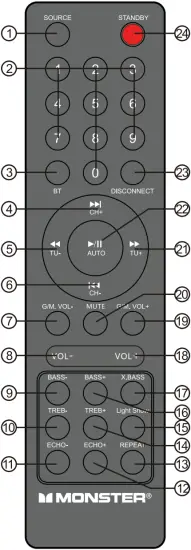
1) SOURCE
Press to change the source between USB, LINE, BT, FM.
2) 0~9 NUMERIC KEYS
These keys are used to play a track directly in USB source mode.
Eg: To play 12th track in the USB playlist press the numeric key “1” followed by “2”.
3) BT
Press to enter Bluetooth pairing mode.
4) ![]() /CH+
/CH+
Play the next song by pressing “![]() /CH+” at USB/BT input mode.
/CH+” at USB/BT input mode.
Adjust next channel by pressing “![]() /CH+” at FM input mode.
/CH+” at FM input mode.
5) ![]() /TU-
/TU-
Fast rewind a song by pressing “![]() /TU-” at USB input mode.
/TU-” at USB input mode.
Adjust radio frequency by pressing “![]() /TU-” at FM input mode.
/TU-” at FM input mode.
6) ![]() /CH-
/CH-
Play the previous song by pressing “![]() /CH-” at USB/BT input mode.
/CH-” at USB/BT input mode.
Adjust previous channel by pressing “![]() /CH-” at FM input mode.
/CH-” at FM input mode.
7) GUITAR/MIC VOL-
To decrease the GUITAR and MIC volume.
8) VOL-
To decrease the volume.
9) BASS-
To decrease the bass effect.
10) TREB-
To decrease the Treble effect.
11) ECHO-
To decrease the MIC/GUITAR echo effect.
12) ECHO+
To increase the MIC/GUITAR echo effect.
13) REPEAT
Choose repeat mode by pressing “REPEAT” at USB input mode.
14) TREB+
To increase the Treble effect.
15) LED SHOW
To change the light mode between LED1,LED2,LED3,LED4,OFF
16) BASS+
To increase the bass effect.
17) X.BASS
Press this key to turn ON/OFF the extra bass effect.
18) VOL+
To increase the volume.
19) GUITAR/MIC VOL+
To increase the GUITAR and MIC volume.
20) MUTE
Press this key to MUTE/UNMUTE the speaker volume.
21) ![]() /TU+
/TU+
Fast forward song by pressing ” ![]() /TU+” at USB input mode.
/TU+” at USB input mode.
Adjust radio frequency by pressing “![]() /TU+” at FM input mode.
/TU+” at FM input mode.
22) ![]() /AUTO
/AUTO
• Play / pause in USB/BT mode.
• In FM mode press for the full automatic search.
23) DISCONNECT
Press to disconnect and pair with a new device.
24) STANDBY
Stand by ON/OFF key.
Tuner applications
- Before using the radio functions, you must attach the supplied antenna. Adjust the antenna to obtain optimum reception.
Press [SOURCE] repeatedly to select FM mode. - Press the CH+/CH- key on the remote control or Hold down the key “
 /” on the top panel to skip to the preset station.
 - Press the TU+/TU- key on the remote control or press the key “/” on the top panel to adjust the radio frequency manually.
The number key on the remote control can directly select the frequency - Press the AUTO key on the remote control or Press the key “
 ” on the top panel, the machine will scan radio channels from low-frequency to high-frequency by itself and memorize the channels one by one.
 - Preset more than 30 station.
LED Display behavior
| AC | Red(Flashing) | |
| Green(Constant) | ||
| DC | High Battery | Green(Constant) |
| Red(Constant) | ||
| Red(Flashing) | ||
| BT | Connected | |
| Unconnected | ||
| X.BASS | X.OF | Off |
| On | ||
| TWS | T.OF | Off |
| On | ||
| LED MODE | Off | Off |
| On | ||
| DJ MODE | Off | On |
| DRUMS | ||
| KEYBOARD | ||
| PIANO | ||
| DJ EFFECT |
Specifications
- AC power input: 100-240V ~ 50/60Hz
- Power consumption: 120W
- USB output: 5V ⎓ 200mA
- Speaker drivers 1 x8″ Sub woofer + 1 x 8″ Mid-range +1 x 1″ Tweeter
- Speaker impedance: Sub woofer 2ohm / Midrange 4ohm x1 /Tweeter 8 ohm x1
- Total output power: 600W
- Frequency response: 30Hz -20kHz(-6dB)
- Signal-to-noise (S/N) ratio: 80 dBA
- Bluetooth version 5.0
- Bluetooth transmitter frequency range: 2402-2480MHz
- Bluetooth maximum transmitter power: 7dBm (EIRP)
- Bluetooth transmitter modulation: GFSK, π/4 DQPSK all paker types
- Bluetooth range: Approx. 10m (33feet)
- USB file format. .mp3
- Dimensions (W x H x D): 300 x 720 x 280 mm / 11.8 x 28.3 x 13.4in
- Net weight: 10 kg / 22 lbs
CAUTION
- The apparatus shall not be exposed to dripping or splashing and that no objects filled with liquids, such as vases, shall be placed on the apparatus.
- Minimum distances 10 cm around the apparatus for sufficient ventilation.
- The ventilation should not be impeded by covering the ventilation openings with items, such as newspapers, table-cloths, curtains, etc.
- No naked flame sources, such as lighted candles, should be placed on the apparatus.
- When the mains plug or an appliance coupler is used as the disconnect device, the disconnect device shall remain readily operable. To be completely disconnected the power input, the mains plug of apparatus shall be disconnected from the mains completely.
- The main plug of apparatus should not be obstructed or should be easily accessed during intended use.
- The use of apparatus in tropical climates.
- Attention should be drawn to the environmental aspects of battery disposal.
- Batteries shall not be exposed to excessive heat such as sunshine fire or the like.
- Excessive sound pressure from earphones and headphones can cause hearing loss.
 CAUTION
RISK OF ELECTRIC SHOCK
DO NOT OPEN
This unit contains no user serviceable parts inside.
Do not attempt to repair the unit yourself.
Please refer servicing to a qualified service personnel.
LIMITED WARRANTY
This Monster-branded product, marketed as new, in the original carton to the original purchaser (“Product”), is warranted by Russell Distribution Company, LLC against manufacturing defects in materials and workmanship for a limited warranty period of Ninety (90) Days for Labor and One (1) year for Parts This Limited Warranty is conditioned upon proper use of Product by you, the Purchaser.
This Limited Warranty does not apply to store display products and product sold as a “marked down” special, in as is condition, “close outs”, “Liquidation and clearance sales”, “open box”, products missing accessories, or no fault found.
Proof of purchase in the form of a Bill of Sale, Receipt or Receipted Invoice is evidence the Product is within the limited warranty period. The Bill of Sale, Receipt or Receipted Invoice must be presented as a pre-condition to obtaining the limited warranty service.
This limited warranty begins on the original date of purchase and is valid only on Products purchased through authorized dealers and used In the United States, and Puerto Rico, by the original Purchaser. To receive warranty service, the Purchaser must first contact us for problem determination and service procedures. The original dated bill of sale, receipt or receipted invoice must be presented upon request as proof of purchase.
We will repair your product or if repairs cannot be made, we will replace it at no charge with the same or similar product. If the Product is defective as specified in this limited warranty during the limited warranty period, we may use new or remanufactured parts to repair the Product. All replaced parts and products become our property and must be returned to us. Replacement parts and products assume the remaining original limited warranty, or ninety (90) days, whichever is longer.
Product freight must be prepaid by you, the original Purchaser and shipped in either its original packaging or packaging affording an equal degree of protection. We will not be responsible for or obligated to replace damaged Products.
If the Product is received damaged, it is your responsibility as the consumer to file a claim against the carrier. We will only store the damaged Product for 30 days and reserve the right, in our sole discretion, to dispose of the damaged Product or ship it back to you at your expense after 30 days.
This limited warranty covers manufacturing defects in materials and workmanship encountered in normal, and except to the extent otherwise expressly provided for in this statement noncommercial use of this Product, and shall not apply to the following, including, but not limited to: Damage which occurs in shipment; deliver and installation; applications and uses for which this Product was not intended; altered Product or serial numbers; cosmetic damage or exterior finish: accidents, abuse, neglect, fire, water, lightning or other acts of nature; use of products equipment, systems, utilities, services, hardware, supplies, accessories, application installations, repairs, external wiring or connectors not supplied or authorized by u or the manufacturer, which damage this Product result in service problems: incorrect electrical line voltage, fluctuations and surges: customer adjustments and failure follow operating instructions, cleaning, maintenance and environmental instruction that are covered and prescribed in the instruction book; reception problems and distortion related to noise, echo, interference or other signal transmission and delivery problems, burned-in images. Uninterrupted or error-free operation of the Product is not warranted.
THERE ARE NO EXPRESS OR IMPLIED WARRANTIES OTHER THAN THOSE LISTED AND DESCRIBED ABOVE, AND NO WARRANTIES WHETHER EXPRESS OR IMPLIED, INCLUDING, BUT NOT LIMITED TO, ANY IMPLIED WARRANTIES OF MERCHANTABILITY OR FITNESS FOR A PARTICULAR PURPOSE, SHALL APPLY AFTER THE EXPRESS WARRANTY PERIODS STATED ABOVE, AND NO OTHER EXPRESS WARRANTY OR GUARANTY GIVEN BY ANY PERSON, FIRM OR CORPORATION WITH RESPECT TO THIS PRODUCT SHALL BE BINDING ON US. REPAIR OR REPLACEMENT AS PROVIDED UNDER THIS LIMITED WARRANTY IS YOUR EXCLUSIVE REMEDY AS THE CONSUMER. WE SHALL NOT BE LIABLE FOR ANY INCIDENTAL OR CONSEQUENTIAL DAMAGES FOR BREACH OF ANY EXPRESS OR IMPLIED WARRANTY ON THIS PRODUCT; EXCEPT TO THE EXTENT PROHIBITED BY APPLICABLE LAW, ANY IMPLIED WARRANTY OF MERCHANTABILITY OR FITNESS FOR A PARTICULAR PURPOSE ON THIS PRODUCT IS LIMITED FOR THE DURATION OF THIS LIMITED WARRANTY THIS LIMITED WARRANTY SHALL NOT EXTEND TO ANYONE OTHER THAN THE ORIGINAL PURCHASER OF THIS PRODUCT, IS NONTRANSFERABLE AND STATE YOUR EXCLUSIVE REMEDY.
Some states do not allow limitations on how long an implied warranty lasts, or the exclusion or limitation of incidental or consequential damages, so the above limitations or exclusions may not apply to you. This Limited warranty gives you specific legal rights and you may also have other rights, which vary from state to state. Any provision contained herein which is found contrary to state or local law shalt be deemed null and void and the remaining provisions shalt continue in full force and effect.
To obtain warranty service, please contact technical support with questions
Phone: 1-800-976-0677 • Email: support©mymonsteraudio.com
DO NOT return this product to the store. Visit: MyMonsterAudio.com


