![]() Installation Guide
Installation Guide
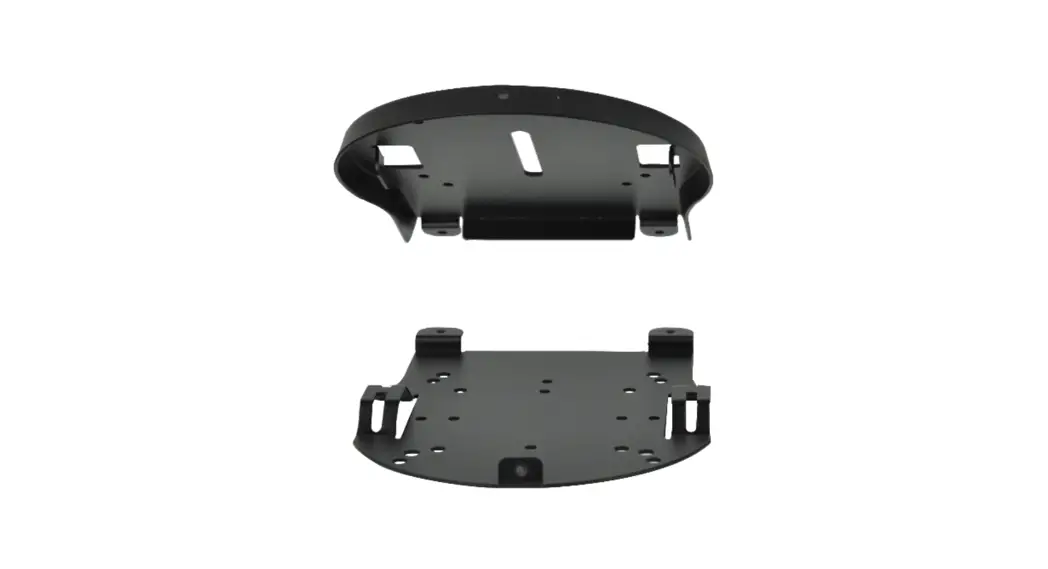
MS-C01 Ceiling Mount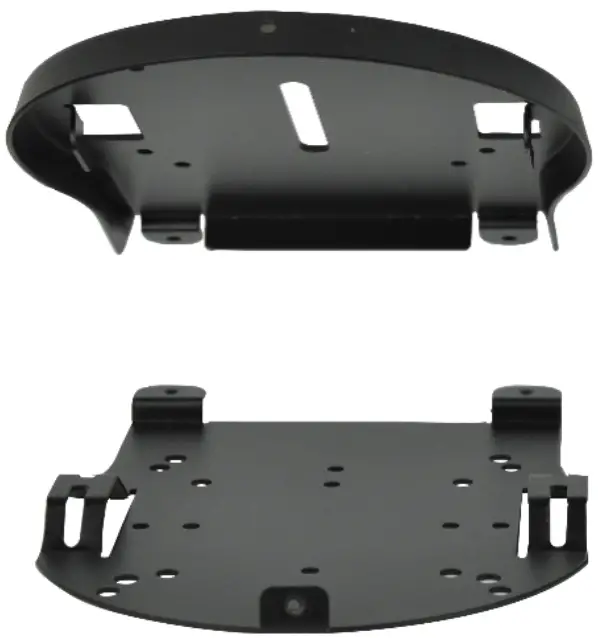
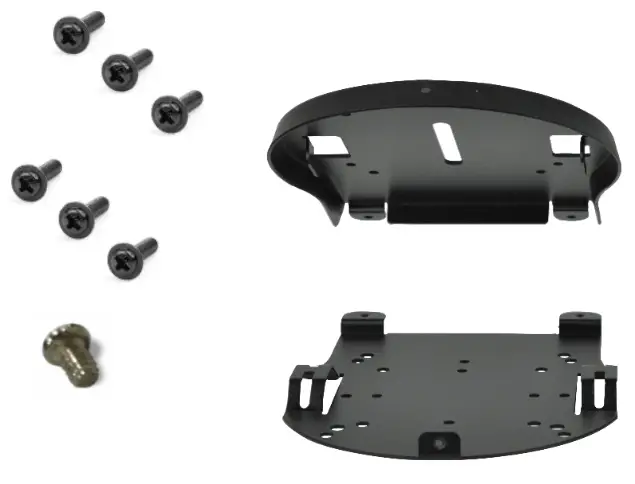
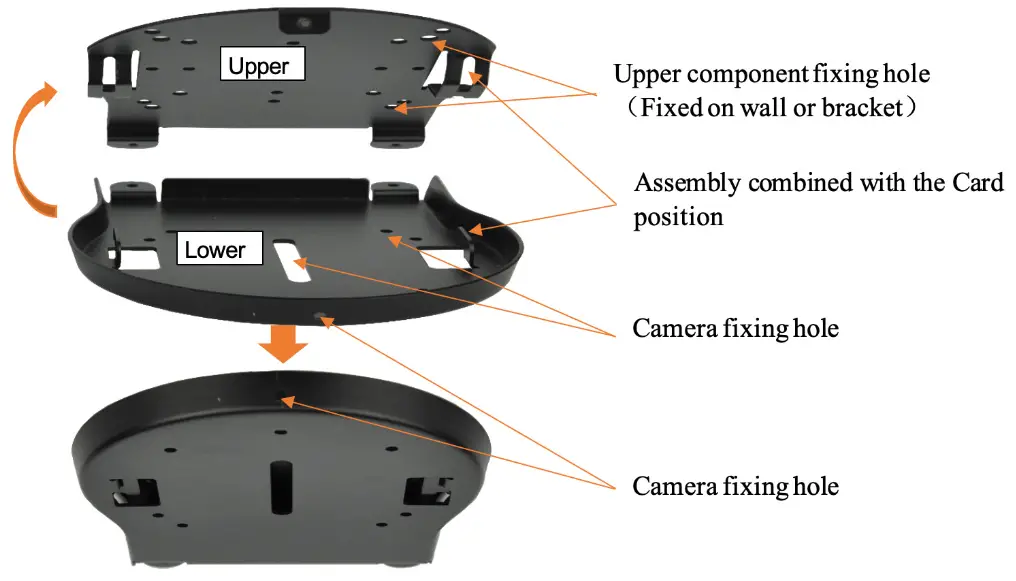
What’s Included
| Pieces | Item |
| 1 | Ceiling Mount |
| 1 | Cross recessed, pan head with tail machine teeth screw, UNC 1/4’’-20*8 |
| 6 | Pan head, flat tail, self-tapping lock screws, M3*6 |
Not Included
| Pieces | Item |
| 4 | *M5 Expansion screws |
* These screws need to be provided by the installer based on the thickness of the ceiling.
Caution: It is the responsibility of the installer to ensure the camera and its mounting hardware are firmly secured, so that the camera does not fall. Anchoring hardware appropriate to the wall type must be selected and provided by the installer.
Installation
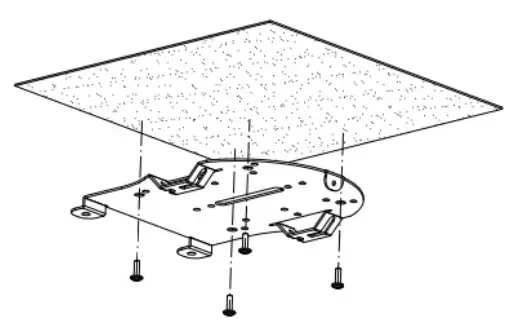
Step 1.
a) Position upper component of anchor on ceiling, and mark ceiling for placement (markers indicated in steps 2 and 4).
b) Pre-drill holes in ceiling.
NOTE: Check depth of the mounting holes by inserting a straw or toothpick, and measure against the length of screws.
Step 2.
a) Please top component of mount back over marking on ceiling.
b) Secure using M5 expansion screws (not included).
 Step 3.
Secure bottom component of mount to the bottom of the camera, using included M3*6 screws.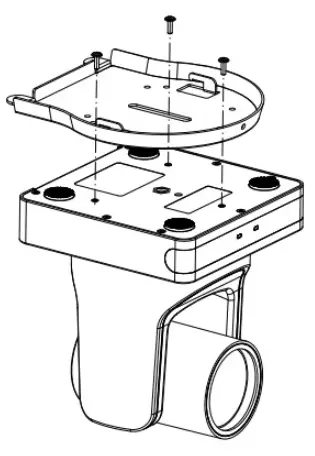 Step 4.
a) Attach camera to mount.
b) Secure using M3*6.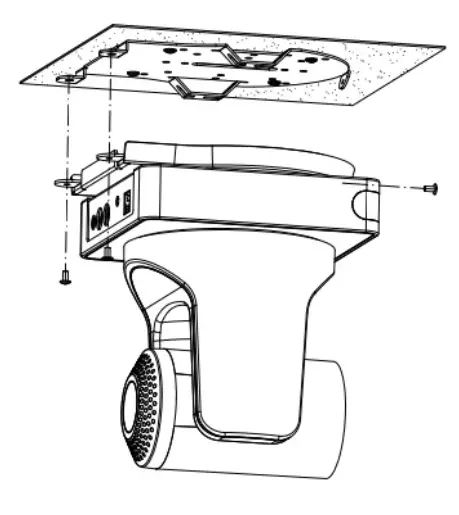
![]() www.m4sol.com
www.m4sol.com
[email protected]| www.m4sol.com


