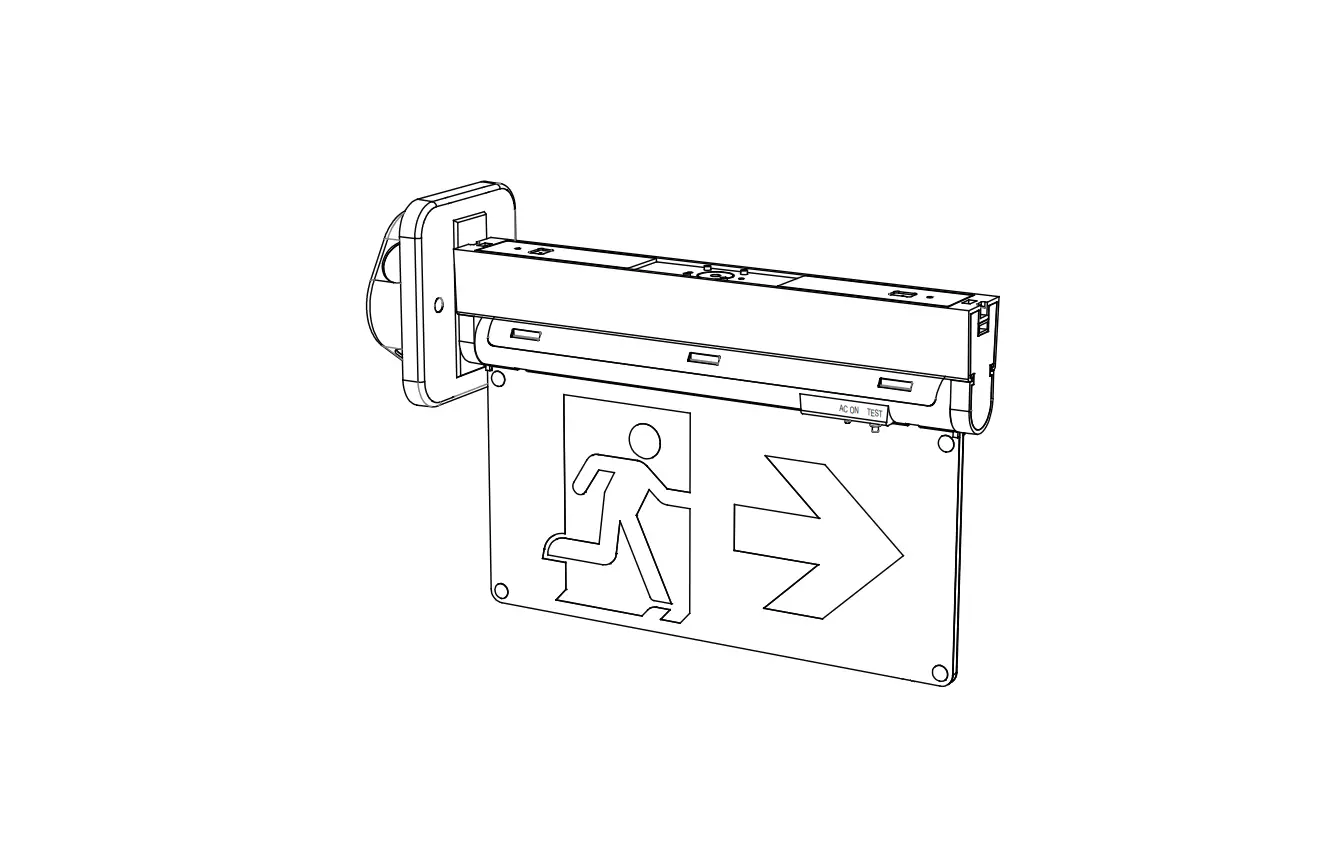
Simply VO-115RM-SP Slim Running Man Emergency Light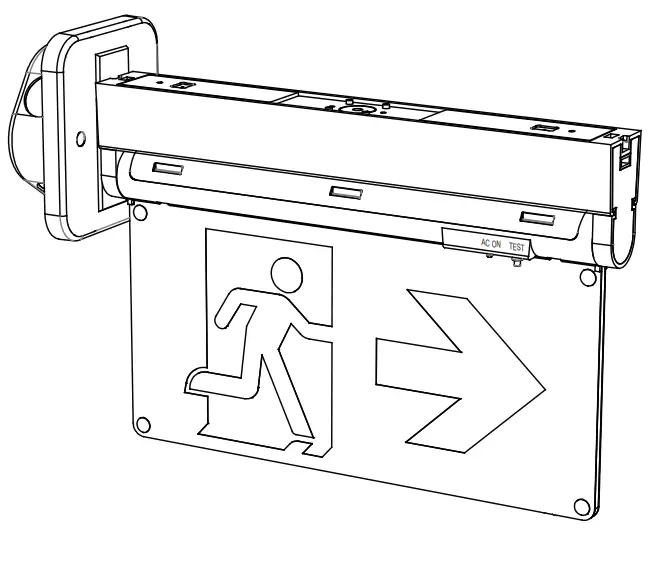
IMPORTANT SAFEGUARDS
READ AND FOLLOW ALL SAFETY INSTRUCTIONS
- Review the diagrams thoroughly before beginning.
- All electrical connections must be in accordance with local codes, ordinances and the National Electric Code.
- Disconnect power at fuse or circuit breaker before installing or servicing.
- Do not use outdoors.
- Do not mount in hazardous locations or near gas or electric heaters.
- Do not let power cords touch hot surfaces.
- Equipment should be mounted in locations and at heights where it will not be subject to tampering by unauthorized personnel.
- The use of accessory equipment is not recommended by the manufacturer.
- Do not use this equipment other than intended use.
- All servicing should be performed by qualified personnel only.
- Allow battery to charge for 24hrs before first use
CIRCUITRY
- Emergency duration: ≥ 3 hours
- Recharge time: 24 hours
- Output Wattage: 1.5W
- Light Source: Ultra bright LED
- Color temperature: 6500K
- Ni-cad Battery: 3.6V 900mAh
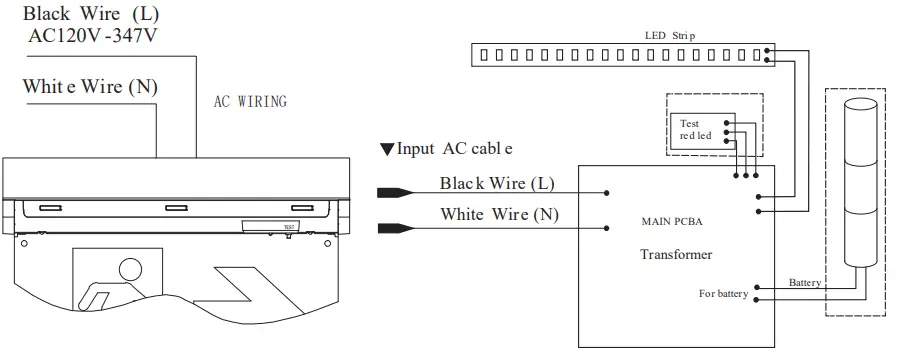
WIRING DIAGRAM
AC WIRING
AC WIRING
Working Voltage: AC120V – 347V 50/60Hz
Black Wire (L)
White Wire (N)
CEILING MOUNT
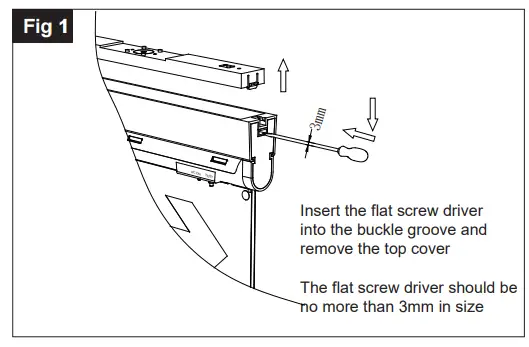
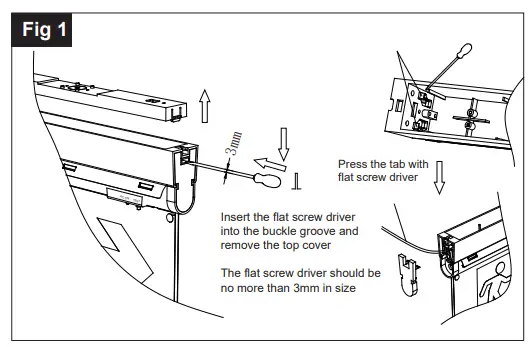
- Remove the top cover using flat driving(Fig1)

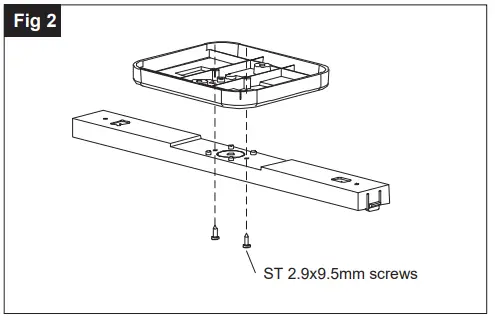
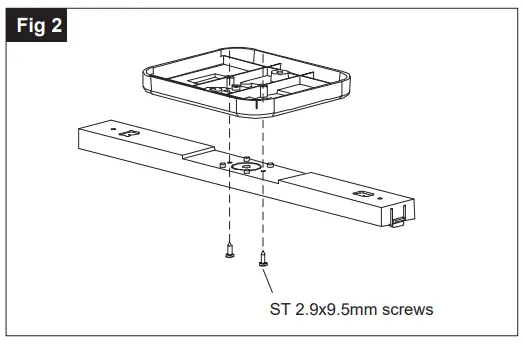
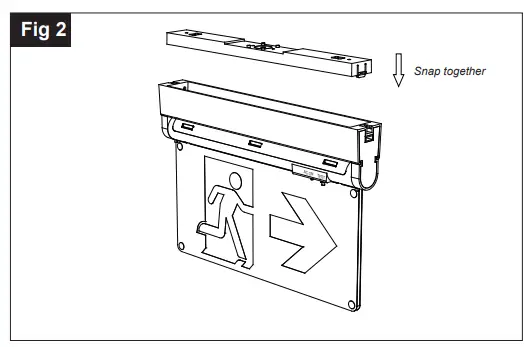
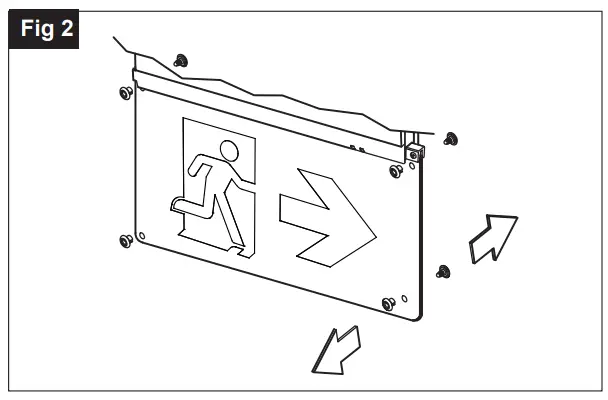
- Connected the top cover with the canopy using the screws(Supplied) .(Fig2)

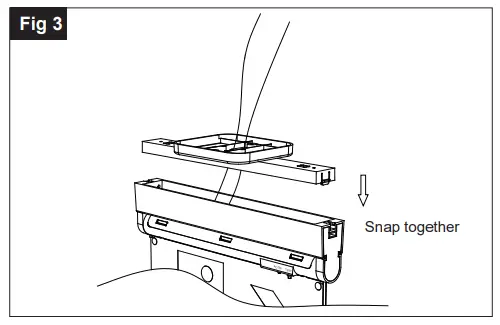
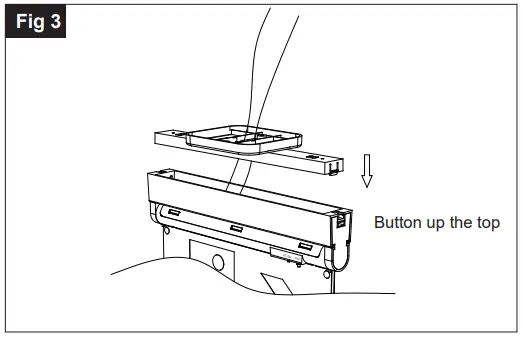
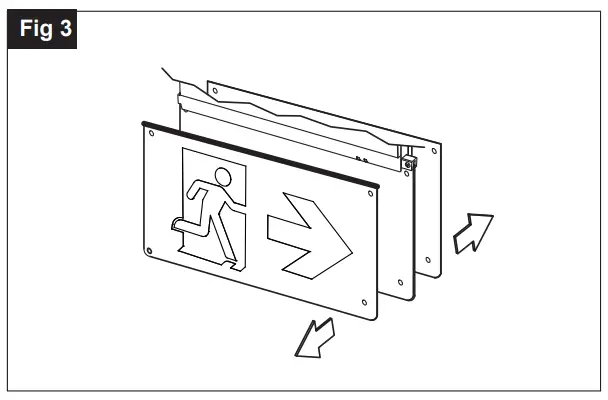
- Feed AC supply wire through top cover and canopy center hole,snap top cover and the fixture together.(Fig3)

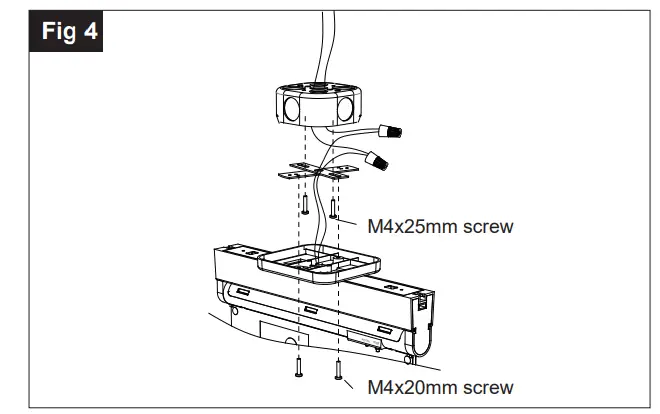
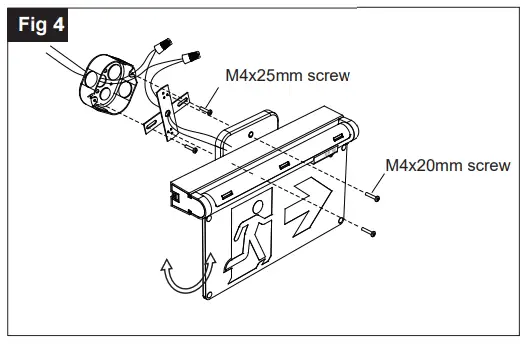
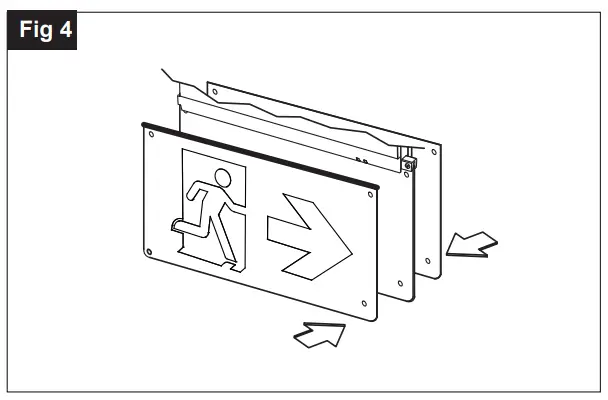
- Assemble canopy onto Junction box with screws (supplied) and make proper
wire connections.
Black Wire (L); White Wire (N);(Fig4
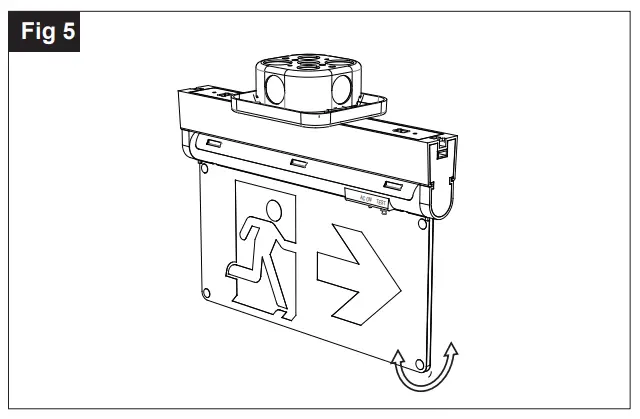
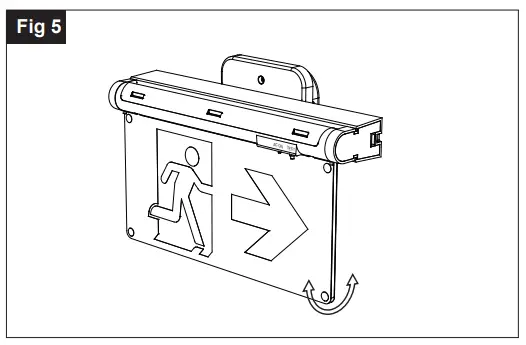
- Use screws (supplied) to tighten canopy to mounting plate (spider plate/cross bar)(Fig5)
- The unit can be installed on any surface, you may rotate the Acrylic panel in any angle from 0 degrees to 180 degrees.(Fig5)

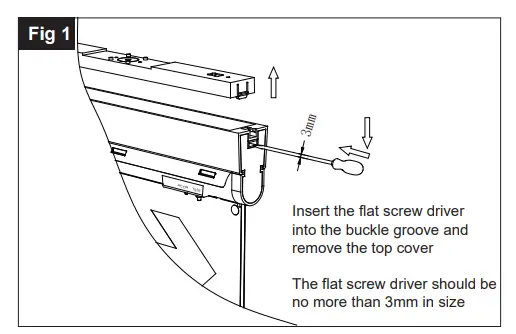
WALL MOUNT
- Remove the top cover using flat driving(Fig1)

- Connected the top cover with the canopy using the screws (Supplied) .(Fig2)

- Feed AC supply wire through top cover and canopy center hole, snap top cover and the fixture together.(Fig3)
- Assemble canopy onto Junction box with screws (supplied) and make proper wire connections.Black Wire (L); White Wire (N);(Fig4)

- Use screws (supplied) to tighten canopy to mounting plate (spider plate/cross bar)(Fig5)
- The unit can be installed on any surface, you may rotate the Acrylic panel in any angle from 0 degrees to 180 degrees.(Fig5)
WALL SIDE MOUNT
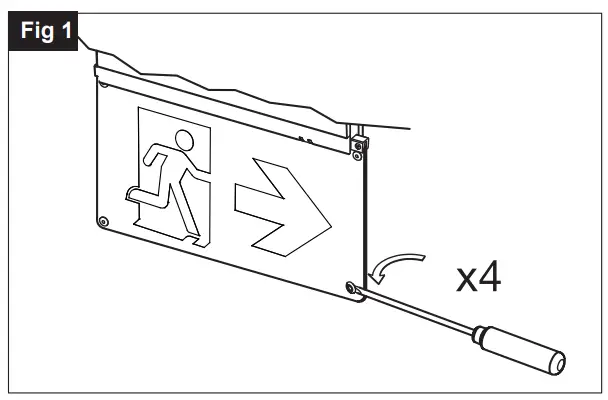
- Remove the top cover scerw driver and remove the end cap. using a flat screw Pull out the wires through the side.(Fig1)

- Snap the top cover into the fixture.(Fig2)
- Pullout all AC supply wires and feed the wires through the holes of end cap and then canopy.(Fig3)
- Assemble canopy and end cap to metal bracket with screws (supplied) and make proper wire connections.(Fig4)
- Using screws (supplied) tighten canopy to spider plate (crossbar). (Fig5)
- The unit can be installed on any surface, you may rotate the +Acrylic panel in any angle from 0 degree to 180 degree. (Fgi 1)

CHANGING OR REPLACING PICTOGRAM
- Remove the button(Fig1.Fig2)
- Change to desired pictogram(Fig3)
- Reinstall buttons and snap them together together(Fig4)
Slim Running Man Emergency Light