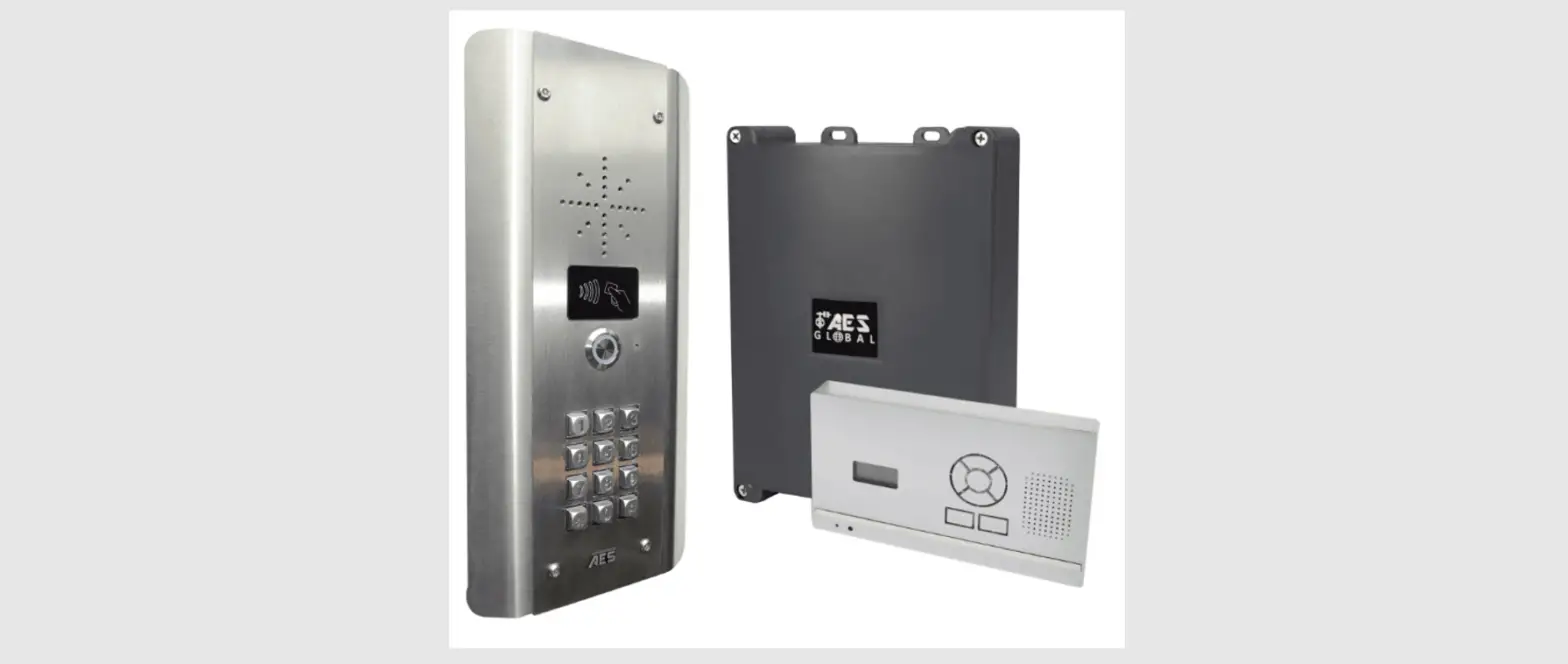
 AES GLOBAL 603 Wall Desk Mount Audio Handset

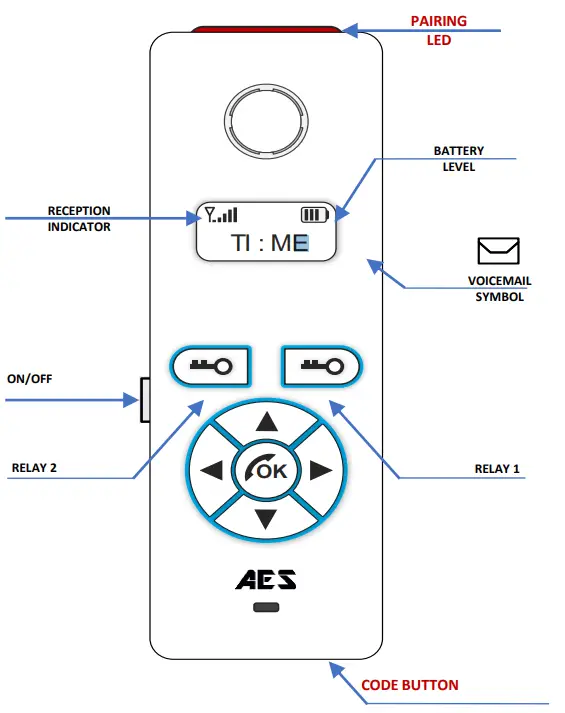
Portable Audio Handset
Call Another Handset
- Press
 and the unit will display ‘HS1’, ‘HS2’, ‘HS3’, ‘HS4’ depending on how many handsets are coded in the system.
 - Then use the
 you can select the handset you wish to call and then press
 to start the call.
Change Ring Volume
Press![]() and
and ![]() to increase or decrease the ring volume and then press
to increase or decrease the ring volume and then press![]() to save.
to save.
Adjusting Relay time
- Press Relay 2 button for 3 seconds, scroll through menu until you see ‘ti’.
- Press to select ‘ti’ and adjust your relay times. Press to select your relay time. Press to end the process. Both relays will have the same relay time.

Voicemail
When a call is not answered within 40 seconds, the visitor can leave a message. Once complete, the handset will display the![]() symbol. The unit can store up to 16 voice messages.
symbol. The unit can store up to 16 voice messages.
Change Ring Tone
Press![]() and the handset will ring with its currently selected tone. Then you can press the
and the handset will ring with its currently selected tone. Then you can press the![]() and
and![]() keys to cycle through the available ring tones. Then press
keys to cycle through the available ring tones. Then press![]() to select and save the tone To listen to a voicemail, press
to select and save the tone To listen to a voicemail, press ![]() . If there is more than 1 use
. If there is more than 1 use![]() and
and![]() to select the message required and press
to select the message required and press![]() to play. Press
to play. Press![]() once to Delete the message or press and hold to delete all.
once to Delete the message or press and hold to delete all.
RE-CODING/ADDING EXTRA HANDSETS
Occasionally the system may need to be re-coded once installed. If the handset does not ring when the call button is pressed, the system may need to be re-coded.
- ( ● = FULL RE-CODE : STEP 1-5 )
- (● = ADDING A HANDSET : STEP 3-5 )


Steps
- Step 1) Press and hold the CODE BUTTON inside the Transmitter Module for 5 seconds until the audible tone is heard from the Intercom speaker (On 603 Transmitter the blue LED marked Di7 should also flash.)
- Step 2) Then press the CODE BUTTON 14 times and wait until the melody is heardor the LED turns off. Performing this step will remove ALL handsets currently synced (or partially synced) to the system. (Note: Doing this step will also clear ALL voicemails after reset. )
- Step 3) Press and hold the CODE BUTTON inside the Transmitter Module for 5 seconds until the audible tone is heard from the Intercom speaker. (On 603 Transmitter the blue LED marked D17 should also flash.)
- Step 4) Then press and hold the CODE BUTTON on the handset until the red LED at the top begins to flash, after a few seconds you will hear a melody play to let you know it has Successfully connected. (Repeat Steps 3 & 4 for each new handset. ,
- Step 5) Finally you should test the kit to ensure that everything is working as expected by pressing the Call Button on the CallPoint to ensure the handset and/or wall mounted unit receives the call and that the two way speech is functioning correctly.
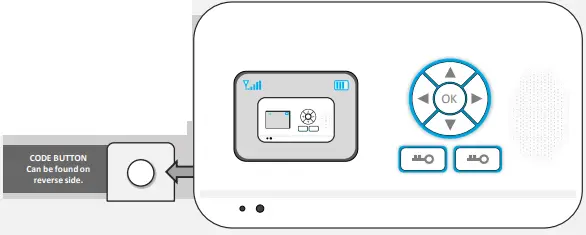
Wall/Desk Mounted Audio Panel (603 / 703 / 705)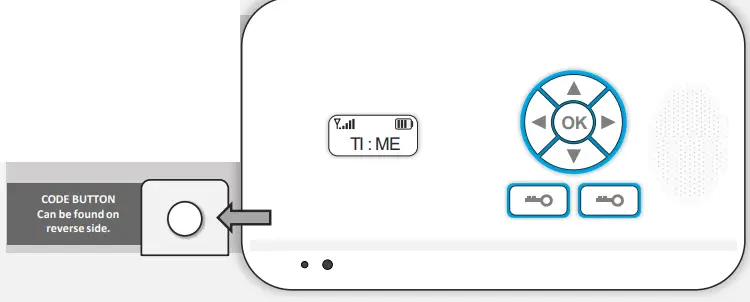
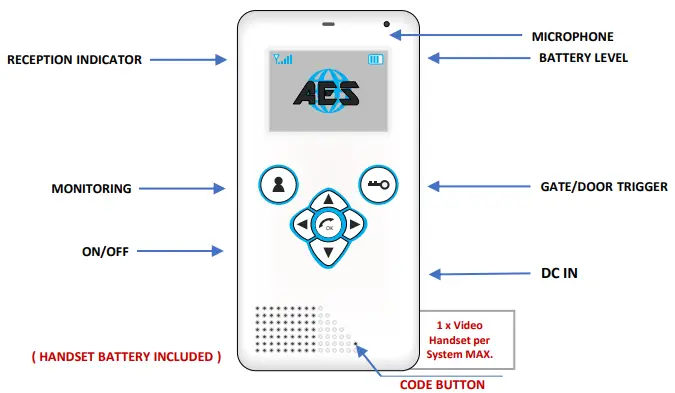
Portable Video Handset
- When the intercom is being called, identify the visitor on the screen.
- Press the button to answer the incoming call.
- Speak clearly into the top of the handset at a distance of 10-20cm.
- During the call press or increase or decrease the volume.
- Press the
 to release the door/gate and press to end the call.
CHANGING SETTINGS
The following settings can be changed on the handset at any time.
- Adjusts brightness.
- English, French or German.
- Listen or delete Voicemail.
- Change the ring tone.
- Change screen colour.
- Use up and down arrows to navigate, press OK to select.
- Press right arrow at any time to exit or cancel change.
- Brightness
- Language
- Messages
- Bell
- Colour
RE-CODING/ADDING EXTRA HANDSETS
Occasionally the system may need to be re-coded once installed. If the handset does not ring when the call button is pressed, the system may need to be re-coded.
- ( FULL RE-CODE: STEP 1-5)
- (ADDING A HANDSET : STEP 3-5)

- Step 1) Press and hold the CODE BUTTON inside the Transmitter Module for 5 seconds until the audible tone is heard from the Intercom speaker. (On 603 Transmitter the blue LED marked D17 should also flash.)
- Step 2) Then press the CODE BUTTON 14 times and wait until the melody is heard or the LED turns off. Performing this step will remove ALL handsets currently synced (or partially synced) to the system. (Note: Doing this step will also clear ALL voicemails after reset.)
- Step 3) Press and hold the CODE BUTTON inside the Transmitter Module for 5 seconds until the audible tone is heard from the Intercom speaker. (On 603 Transmitter the blue LED marked D17 should also flash.)
- Step 4) Then press and hold the CODE BUTTON on the handset until the red LED at the top begins to flash, after a few seconds you will hear a melody play to let you know it has successfuly connected. (Repeat Steps 3 & 4 for each new handset.)
- Step 5) Finally you should test the kit to ensure that everything is working as expected by pressing the Call Button on the CallPoint to ensure the handset and/or wall mounted unit receives the call and that the two way speech is functioning correctly.

( Video Handsets must be added first and 1 MAX )