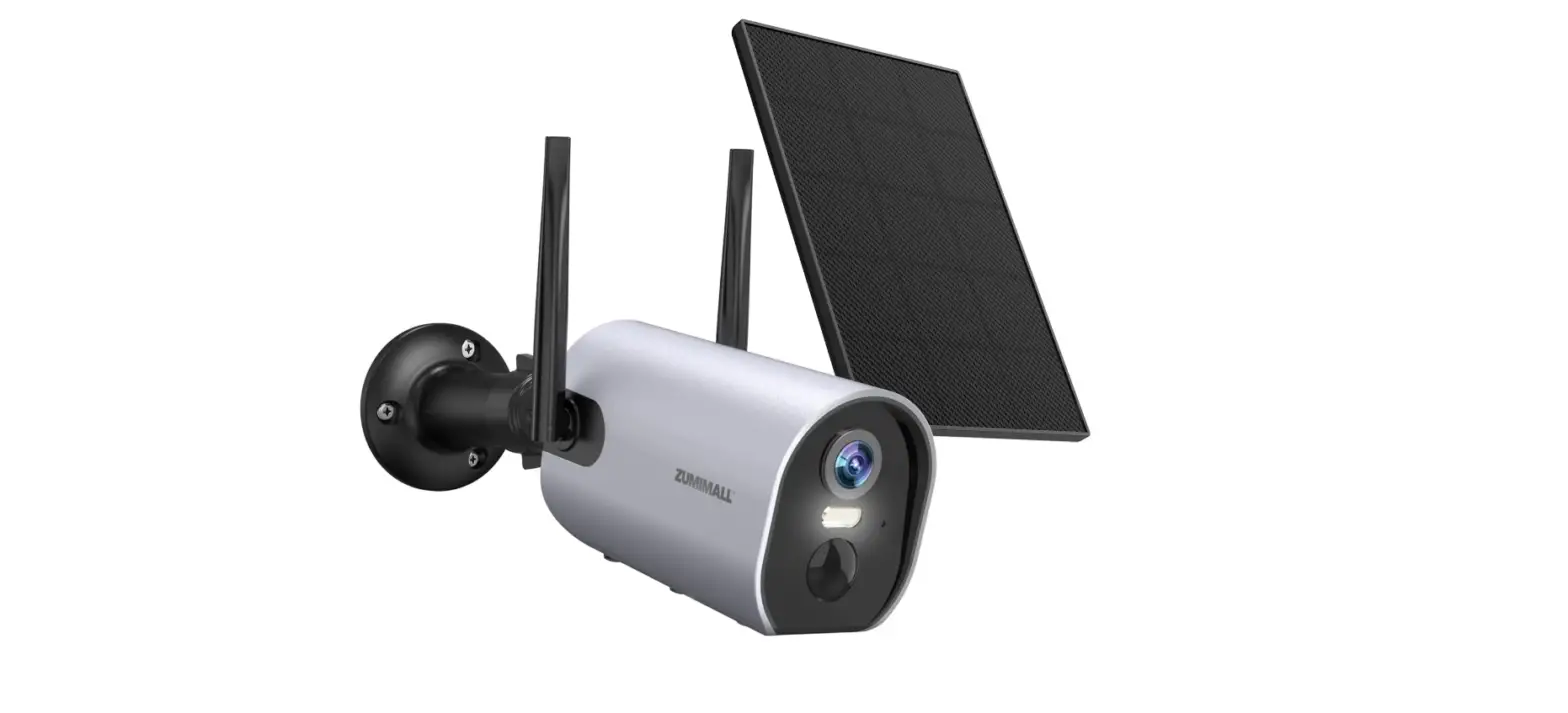
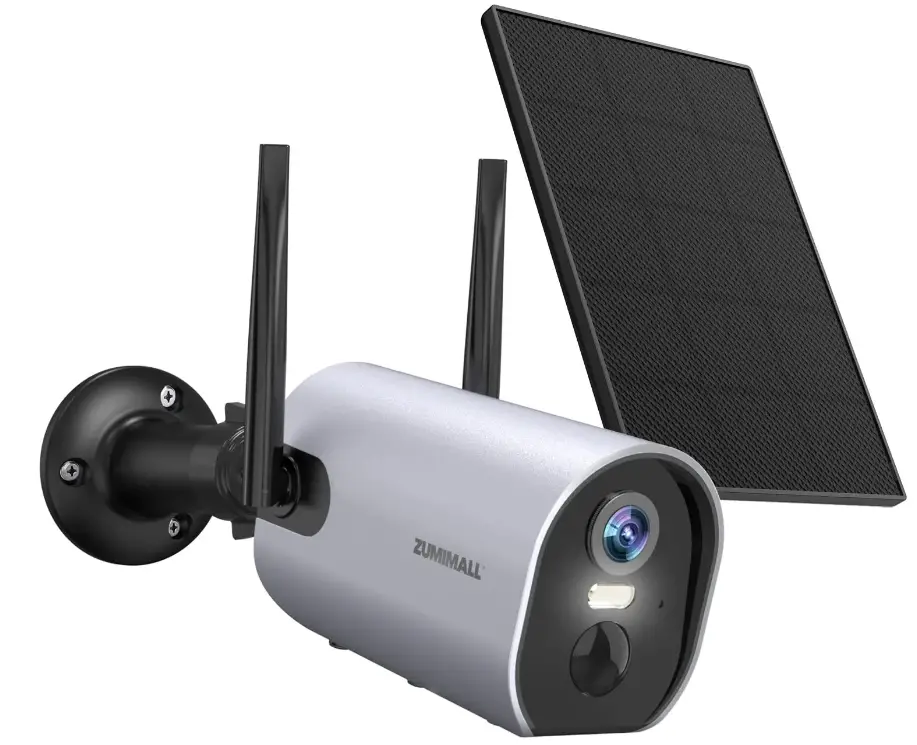
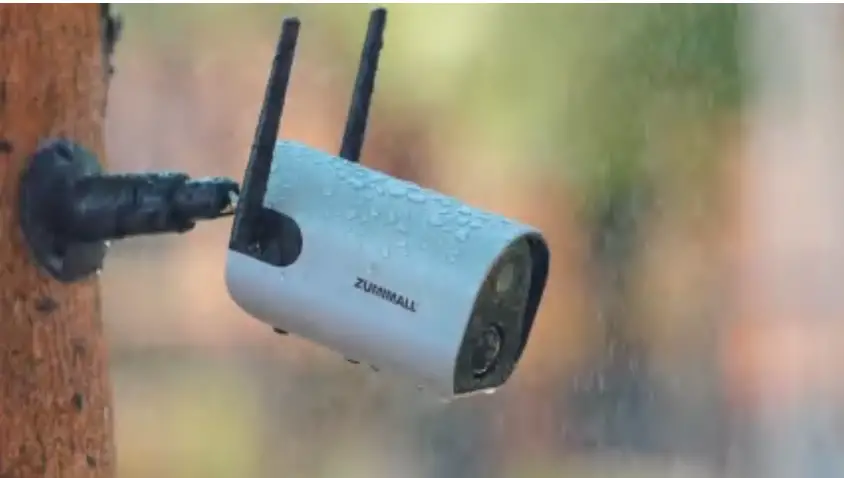
ZUMIMALL ZS-GX1S Wireless Outdoor Security Cameras
What’s in the Box
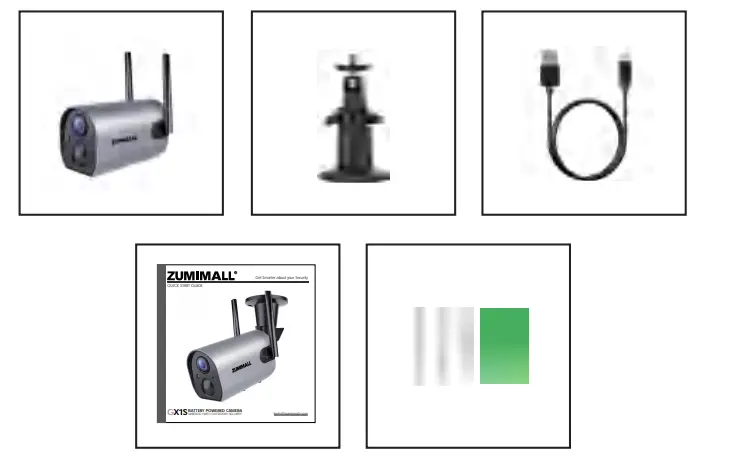
- ZUMIMALL Battery Camera*1
- Outdoor Metal Mount*1
- Quick User Guide*1
- Screws Set*1
- USB Cable*1
Product Diagram
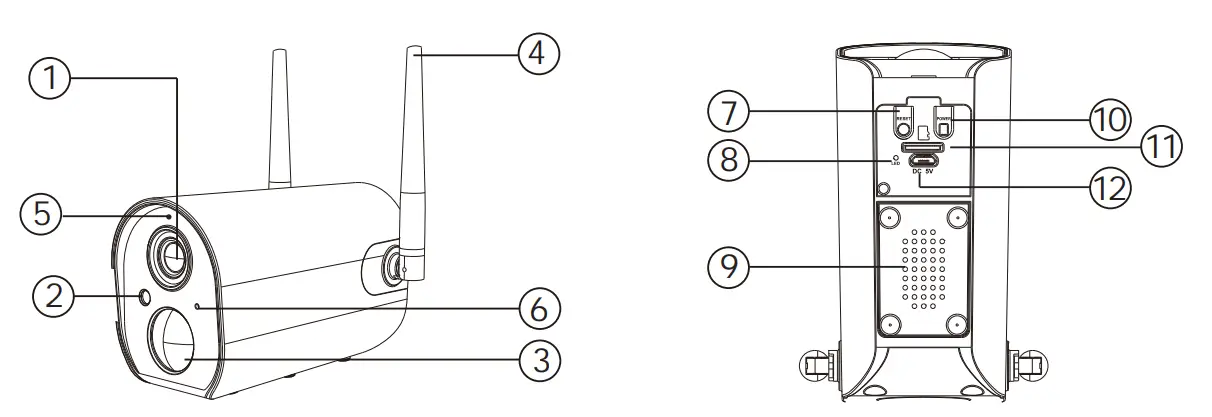
- Camera Lens
- IR
- PIR Sensor
- Antenna
- Camera Mode Indicator
- Microphone
- Reset Button
- Charging Indicator
- Speaker
- Power Button
- SD Card Slot
- USB Port
Download & Install App
Download ZUMIMALL App from Google Play™ or App Store™. Or scan the QR codes as below, with QR code scanner in your smart phone.
NOTE: Google Play™ is a trademark of Google Inc.
App Store™ is a service mark of Apple Inc.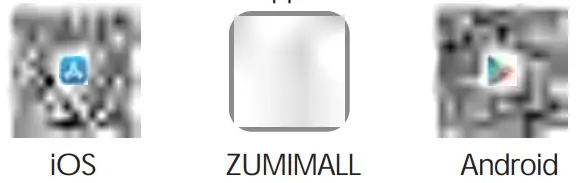
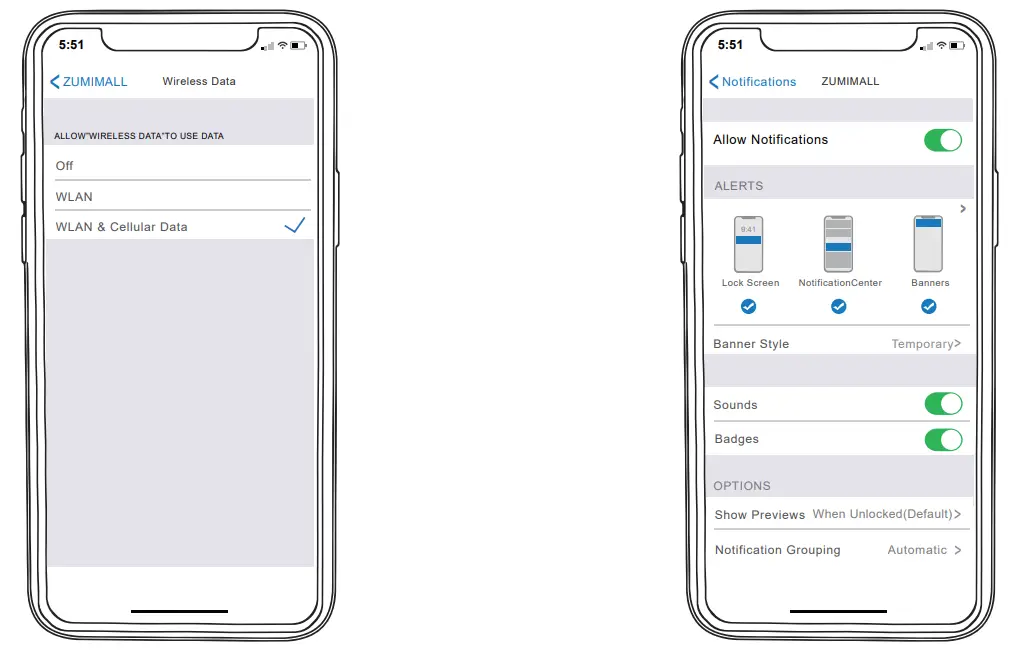
Tips: Please turn on both of the following permissions.
- Allow ZUMIMALL to access mobile cellular data and wireless LAN. Otherwise, it will fail to connect the camera.
- Allow ZUMIMALL to receive pushed messages. Otherwise, the phone will not receive alarms when motion is detected.

Account Registration
New user needs to sign up ‘ZUMIMALL’ App with email. Click ‘Sign up’ to create a New
Account and follow the steps to complete registration.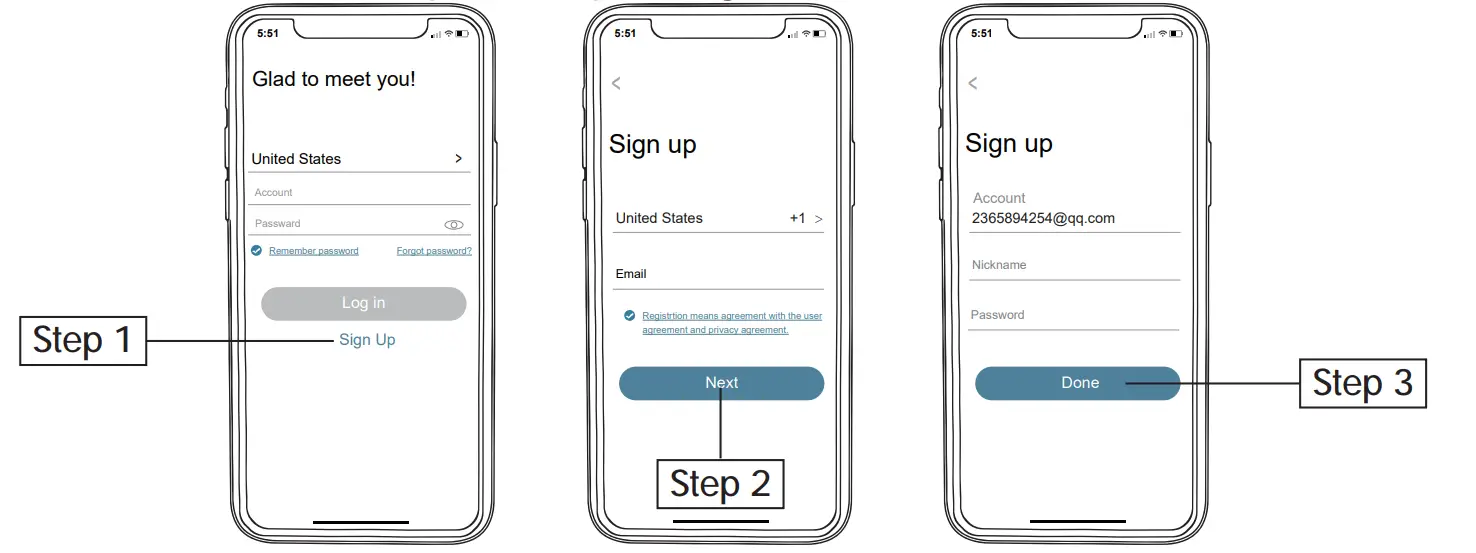
Camera Setup
Preparations for connection
- Insert a Mirco SD Card into the camera to save video clips (Card not included; Up to 128G) or you can start the 7-day free cloud service. Without an SD Card or cloud service, no video will be saved.
- Fully charge the camera before first use.
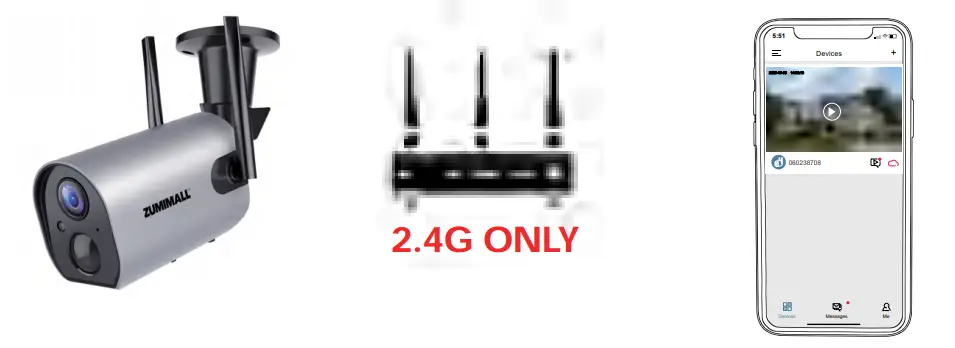
- Connect your phone with the same 2.4 G Wi-Fi network you are to connect your camera to. The camera only works with 2.4G Wi-Fi, does not support 5G.

Connect Camera to App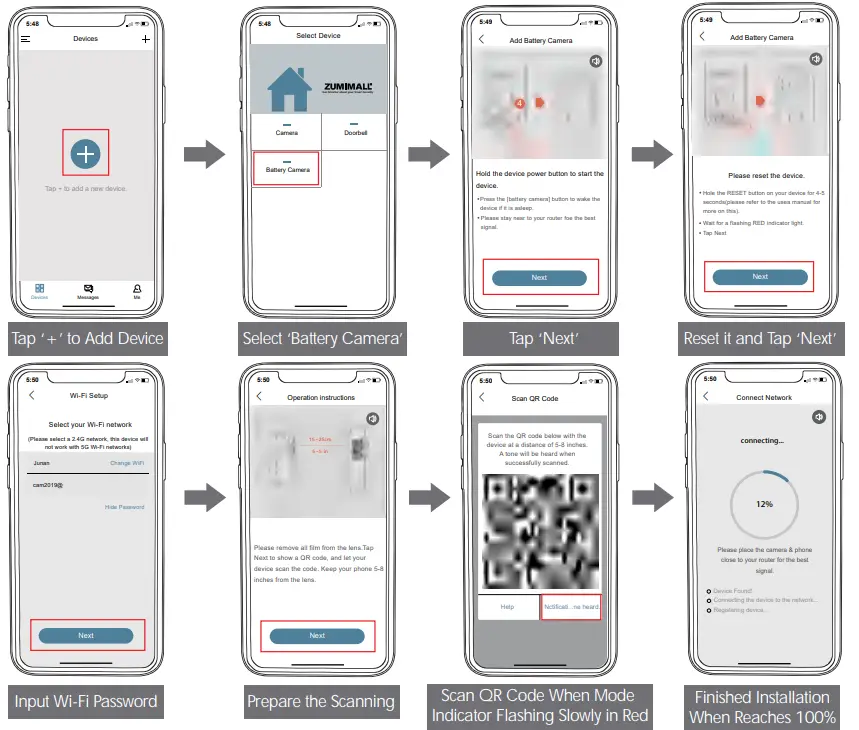
Camera Installation
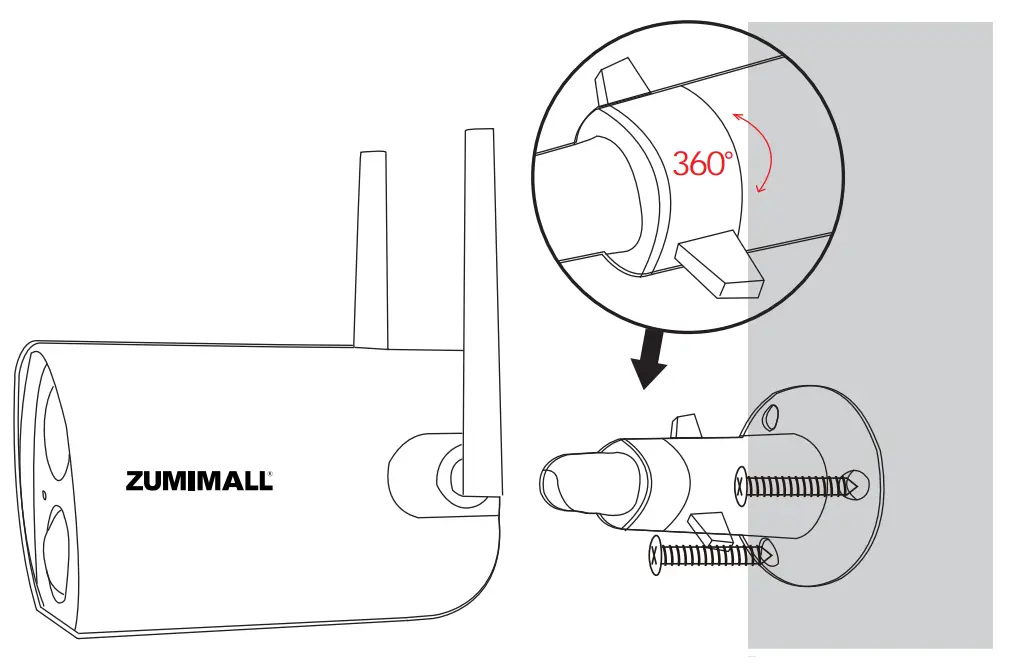
- For wooden wall, it’s recommended to screw the bracket on.
- For cement or ceramic tile wall, it’s recommended to drill holes in the wall and fasten with provided explosion screws; Rotate the button counterclockwise to take off the camera.
- It’s suggested to test Wifi signal strength (at least 80-85%) before you choose the place to install the camera to ensure camera functions normally.
Monitoring Area
Adjust an angle greater than 10 degrees between the camera PIR lens and the moving objects.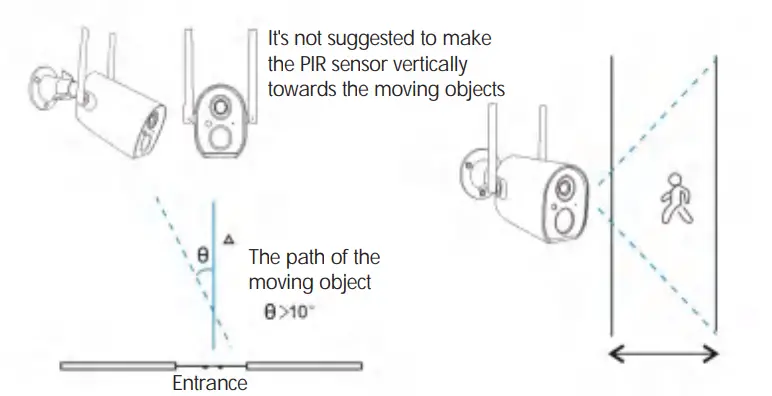
Important Notes for Reducing False Alarms
To reduce false alarms, please note that:
- Do not install the camera in a position facing strong lights/mirror/window/swimming pool.
- Do not place the camera too close to any angel with busy traffic.
- Recommended distance between the camera and motion objects is within10M (32ft).
- Stay away from the outlets, including air conditioner vents, humidifier outlets, the heat transfer vents of the projectors, etc.
- Keep the camera at least 1 meter away from any wireless devices to avoid interference, such as microwave stove, Wi-Fi routers and etc.

Device Menu
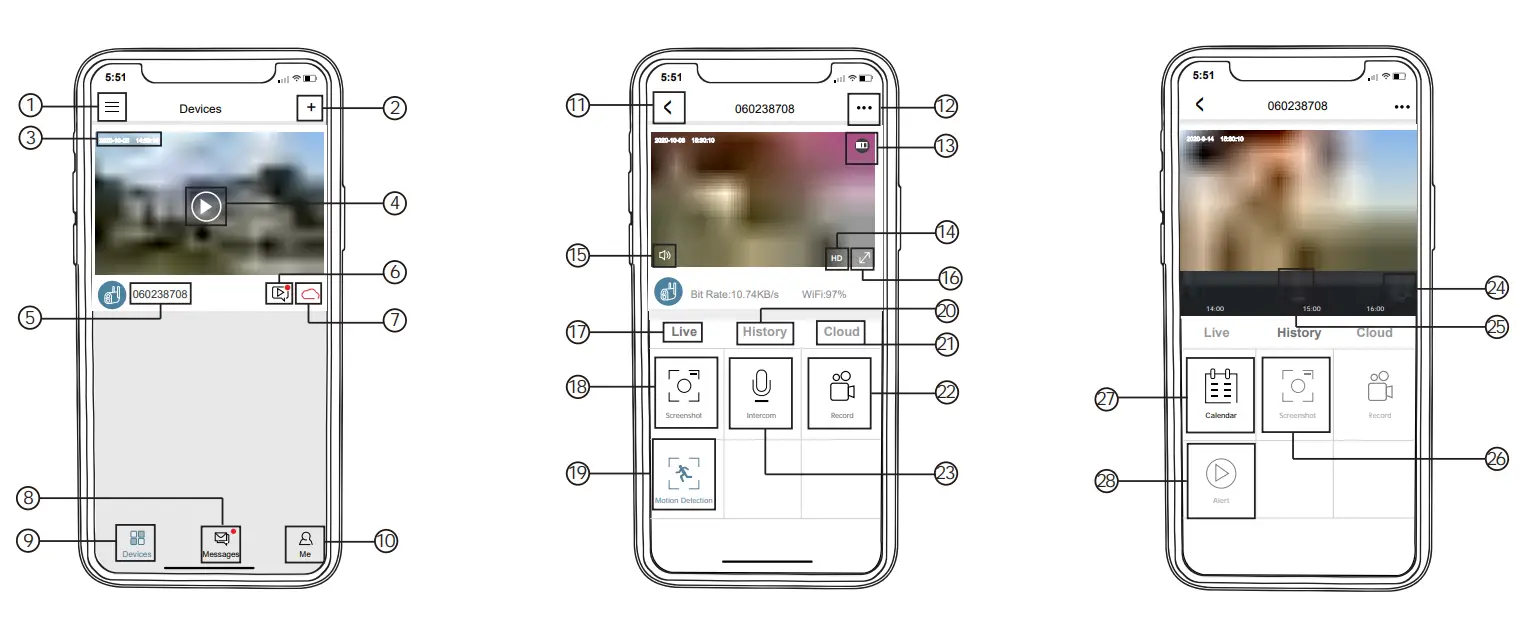
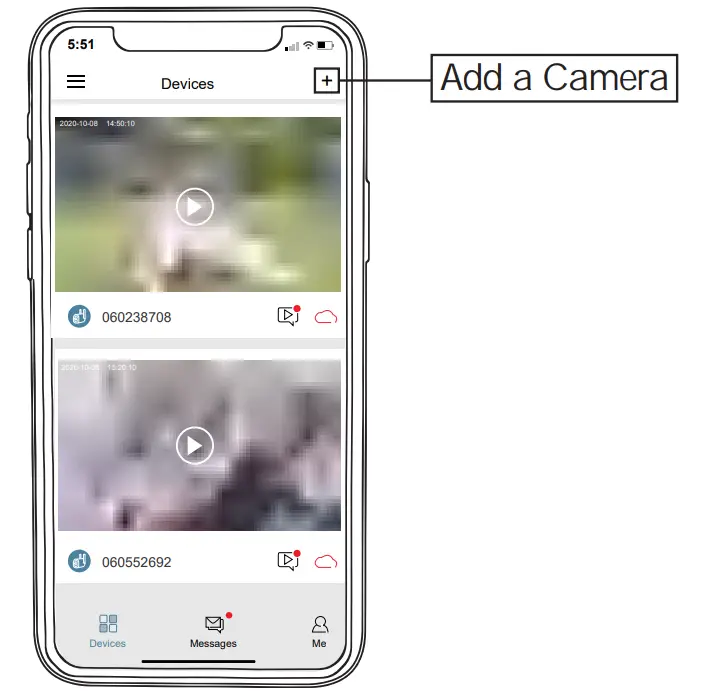
- Device List
- Add Camera
- Real-Time
- Live View Button
- Camera Name
- History Playback
- Cloud Storage
- Messages
- My Device List
- Personal Homepage
- Quit Live Viewing
- Camera Setting
- Battery Status
- HD/SD Switch
- Volume On/Off
- Full Screen
- Preview
- Screenshot Button
- Body Detection On/Off
- Recording in SD Card
- Cloud Storage
- Record Video to Phone
- Two-Way Talk
- Zoom
- Time Bar
- History Screenshot
- Alarm Record Album
- Date of History Record
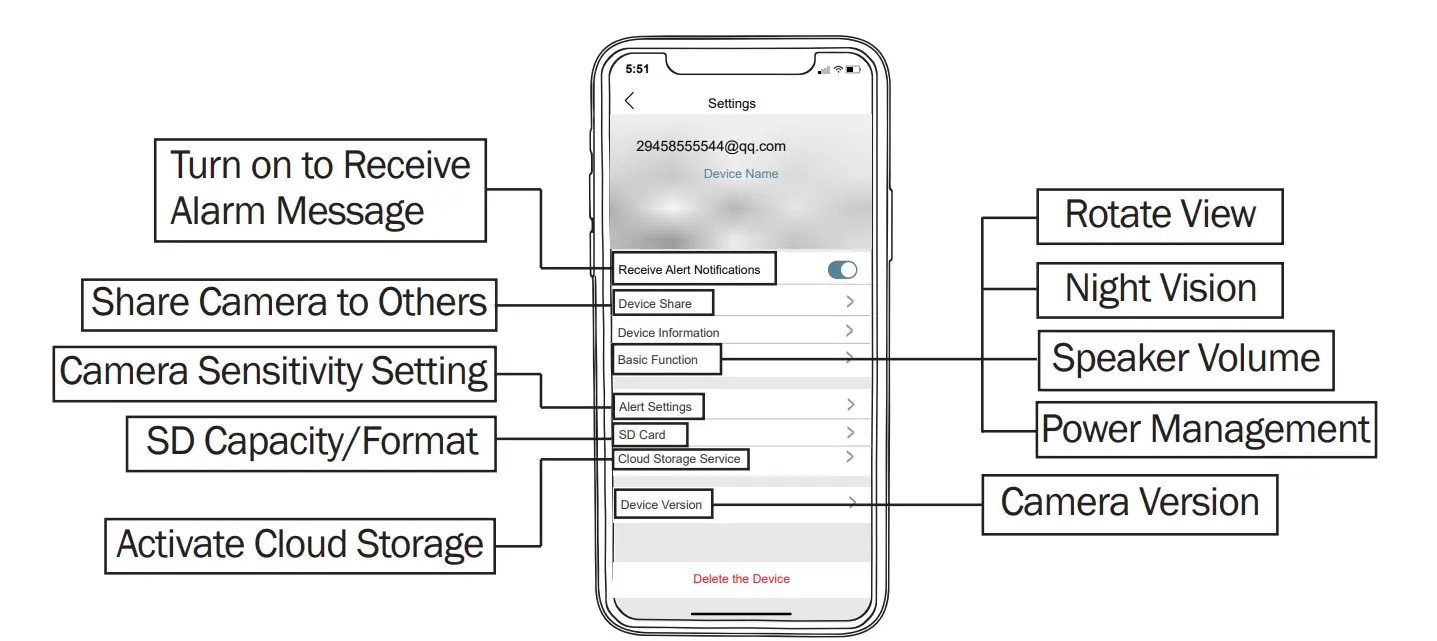
Camera Settings
PIR Body Detection
Body Detection Alarm Setting
PIR ’Body Detection‘ is default to be on ‘High’ level. But it is adjustable. Please refer to the pictures below.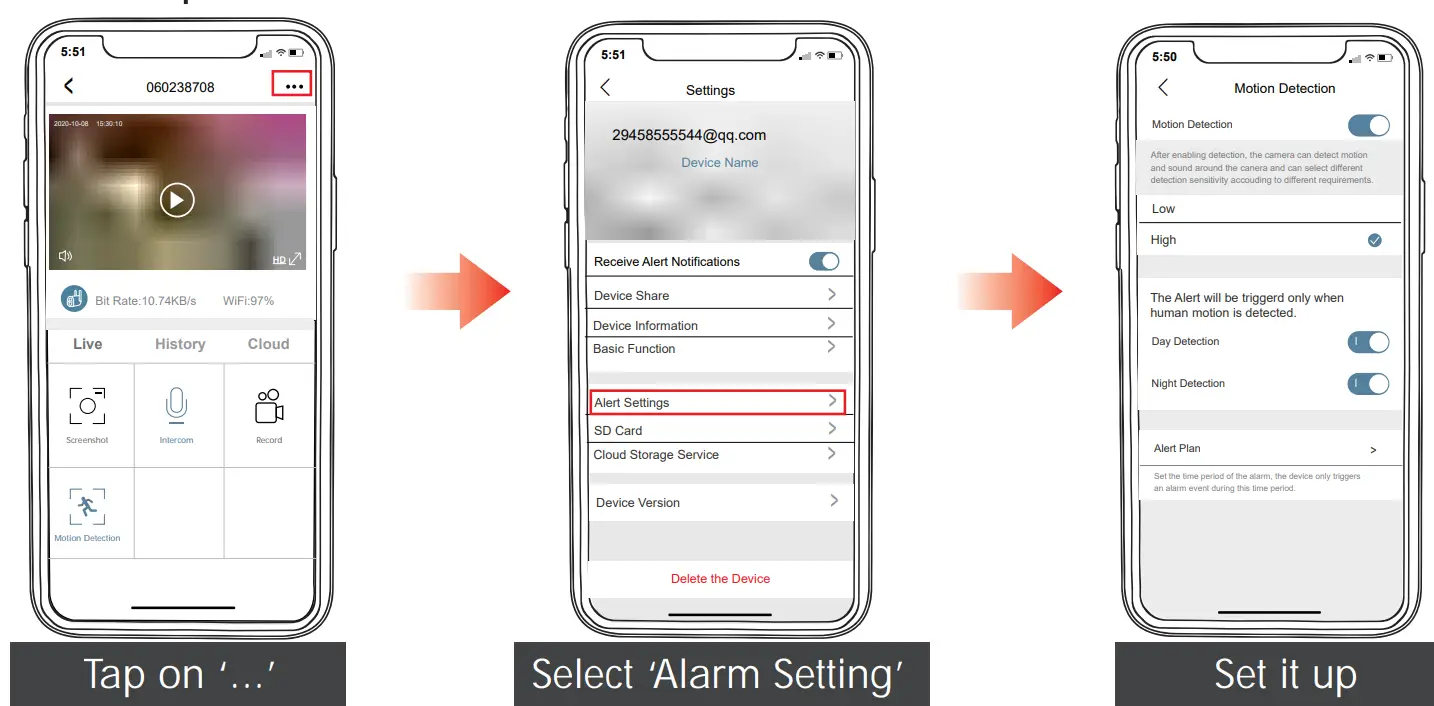

Tips: Higher sensitivity offers longer detection distances and more alarms.
Alarm Notification
This camera is not designed for 7×24 full-day recording. It is only triggered when body motion is detected. Here are the system’s reactions:
- Alarm notifications with sounds from App.
- Pictures/videos are automatically stored in SD Card or Cloud.
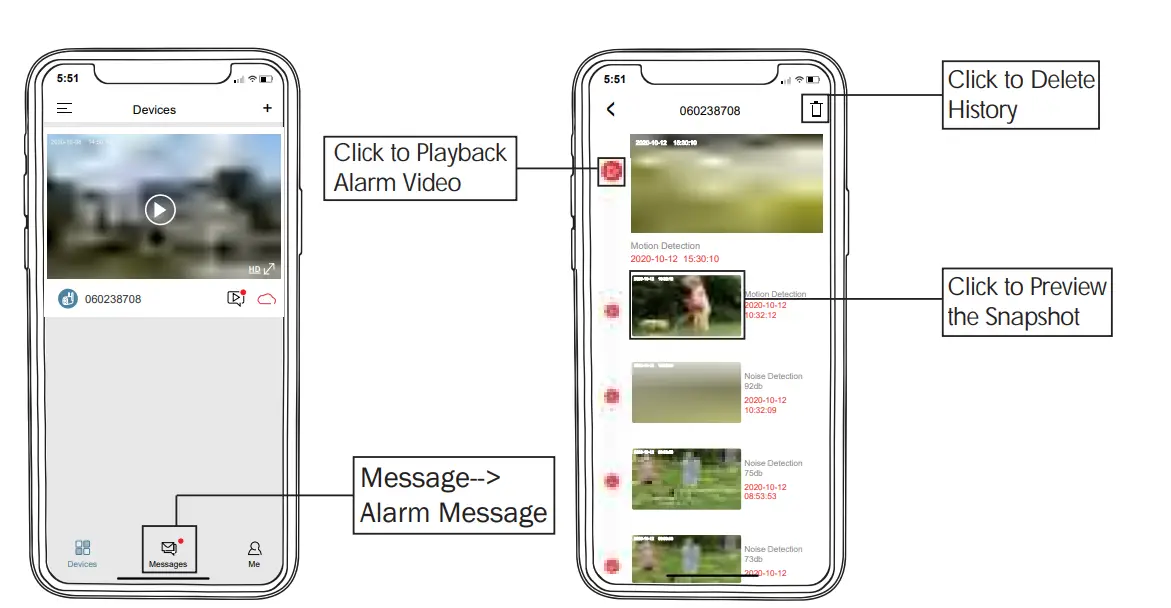
Records/Playback/Delete
- On the messages page, click ‘Alarm Messages’, and you can view all the records listed.
- Click the following buttons to playback or delete.

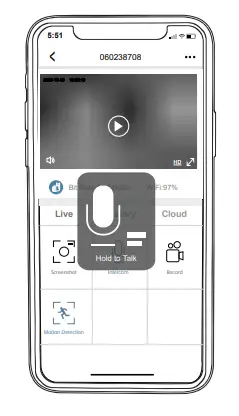
Two-Way Audio
- Step 1: Activate the audio option.
- Step 2: Press and hold the intercom button to speak.
- Step 3: Release the button to listen.

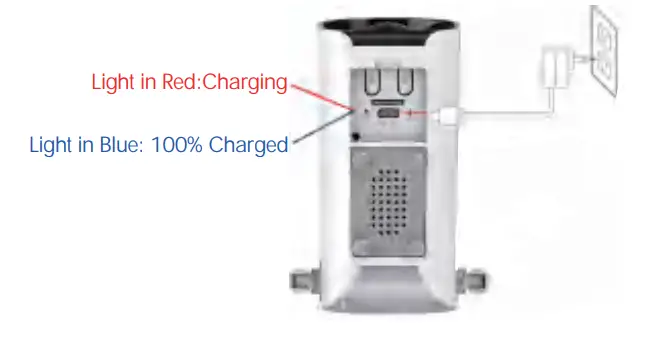
Battery Management
- The camera comes with a built-in Large Capacity battery. Assuming the camera wakes up 15 times/day, the battery can last 3-6 months after fully charged.
- Charger Standard: DC 5V 1/2A (not included). The camera will be fully charged after 8-16 hours.
- When the battery level is less than 20%, the App will send you a prompt message to charge in time.

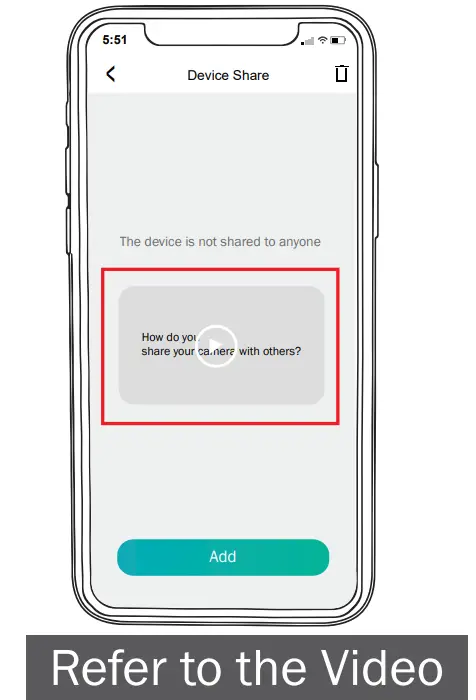
Multi-Device Management
- Multi-Camera Management

- Multi-User Sharing
Notice: One App account (A) can’t log in on multiple devices at the same time.
One camera can’t be connected to multiple App accounts either.
But camera can be shared from A to B account.
- Create another new App account (B) and log in on another Phone.
- Click ‘share’ on the main phone (A account phone)
- Use A to scan the QR code or Input the account ID of B.
- Accept sharing on the B account and refresh the page to check.

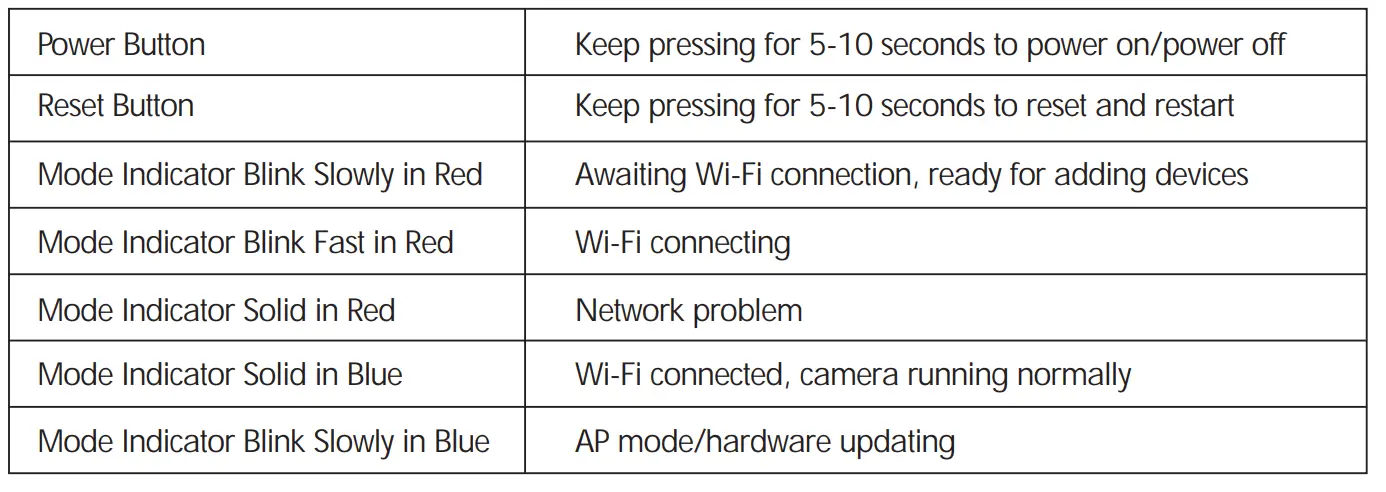
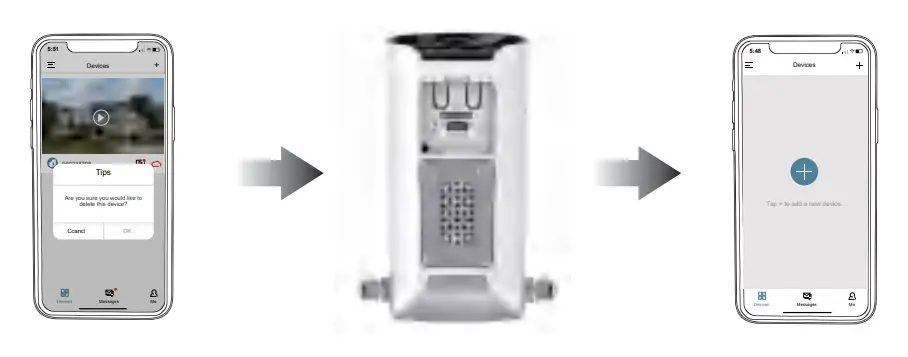
Reset
- Keep pressing to remove the device
- Press the reset button for 5-10s until hearing the ‘Boogu’ sound
- Reconnect as a new camera

Storage Methods
Micro SD Card
If you choose a Micro SD Card to save videos, please kindly check:
- It must be Micro SD Card, reaching at least 10MB/S to transfer. (class 10)
- The camera can support up to a 128G Micro SD Card.
- It needs to be inserted when the camera is off, otherwise, the camera can’t detect the SD Card.
- It can be recycling used, meaning the newest video will be saved automatically to replace the oldest one when it is full.
Cloud Storage
- Each camera has a 7-day free trial for Cloud service, then you can decide whether to continue using it or not. If yes, you need to pay for the subscription. Attached table for a subscription fee.
- the subscription is based on the camera ID, not referring to the App account. If you have multiple cameras, it requests you to subscribe for each one separately.

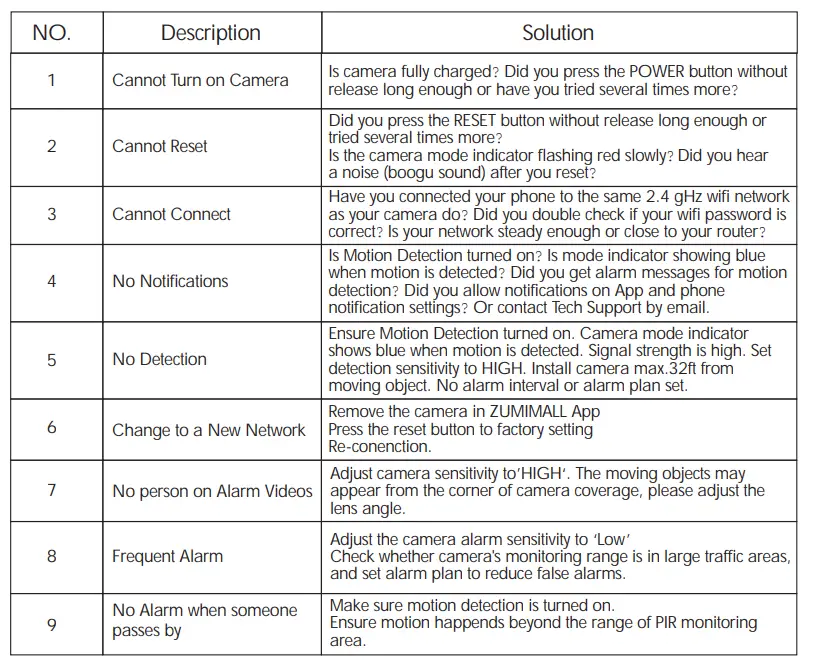
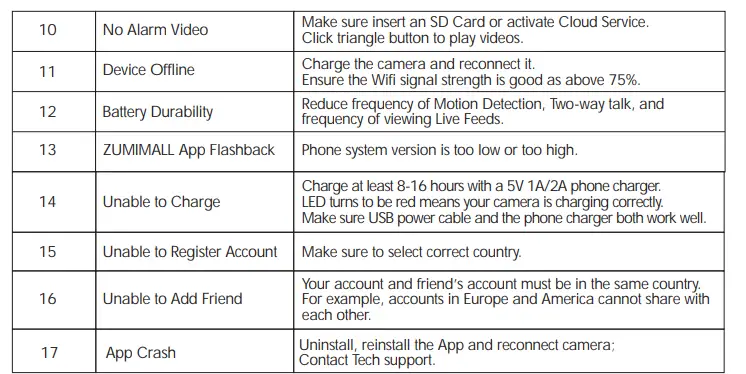
Troubleshooting

Warranty Service
Thanks for your shopping and trust.
We are keeping to optimize product and improve our lifetime customer service to offer you a better shopping experience. If you have any problems, please feel free to send us an E-mail. We will solve your problems within 24 hours. Besides, your advice or suggestions will be much appreciated and welcomed.
Register via link below to get 3 Years Warranty Extension.
http://bit.ly/zuReg
Product Service
Email: [email protected]
Distributor: [email protected]
Cell/iMessage/SMS/Whatsapp/Wechat:+86 18938687483
More About Us
Official Web: www.zumimall.com
Facebook: www.facebook.com/zumimalloffice
Amazon Office Store: www.amazon.com/zumimall
Please Email us for Better Solution
Before Returning any Unqualified Product to Amazon
[email protected]
FAQS
Yes, you can download video from Cloud.
The 3-day circular cloud cover is 2.99$ a month ,30$ a year
The 7-day circular cloud cover is 4.99$ a month and 50$a year
The 30-day circular cloud cover is 15.9$a month and 160$ a year
It reads package includes:
2 x Cameras
2 x Wall Bracket
2 * 1.2m USB Cable (no charger)
2 * Screws Sets
1 x User Manual
It keeps my Zumimall (1080p) outdoor camera fully charged with 50% sun exposure.
It’s 850 nm
No, it is not 24/7 record. It is only recording when motion is detected.
Yes, the security camera provides two-way intercom service to make your life smarter
in front of the camera?
No mine does not. Sends nothing but a text beep and getting the video to load is so slow the crook could be gone before I get the pic loaded. It is NOT sending to my sim card. Just history and won’t record very long even when set to 30 seconds. So far I hate these 2 cameras.
It’s about 10 fts. You can adjust the solar panel angle to make a maximum sunesposion.
Yes, on the Cloudedge App supported by Zumimall you can add multiple cameras.
Yes, videos on an SD card can be played on your phone, no matter what network you are on
128GB should work. Just use the app to format it.
Yes, It can.


