Saramonic Vlink2 TX-XLR 2.4GHz Wireless Plug On Transmitter User Manual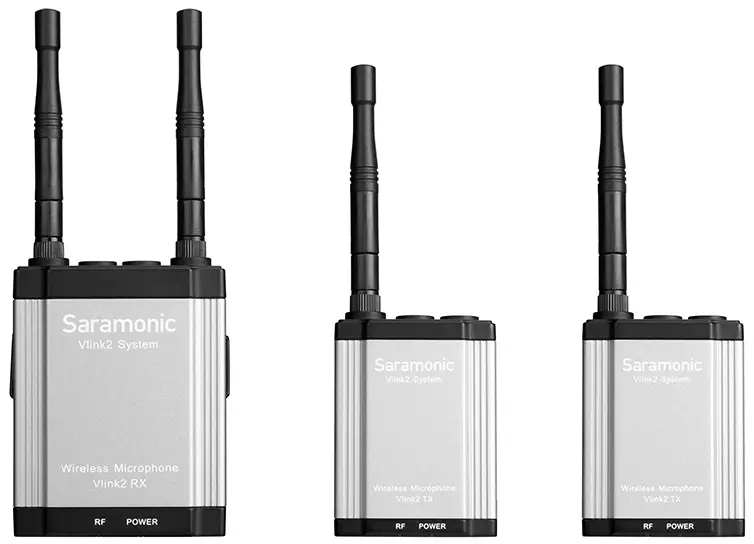
Statement
Please read this manual carefully before use and operate and store in strict accordance with the instructions provided. Please retain for future reference. For any issues that cannot be resolved with the user manual, please refer to your retailer for help or contact us at: [email protected].
General Introduction
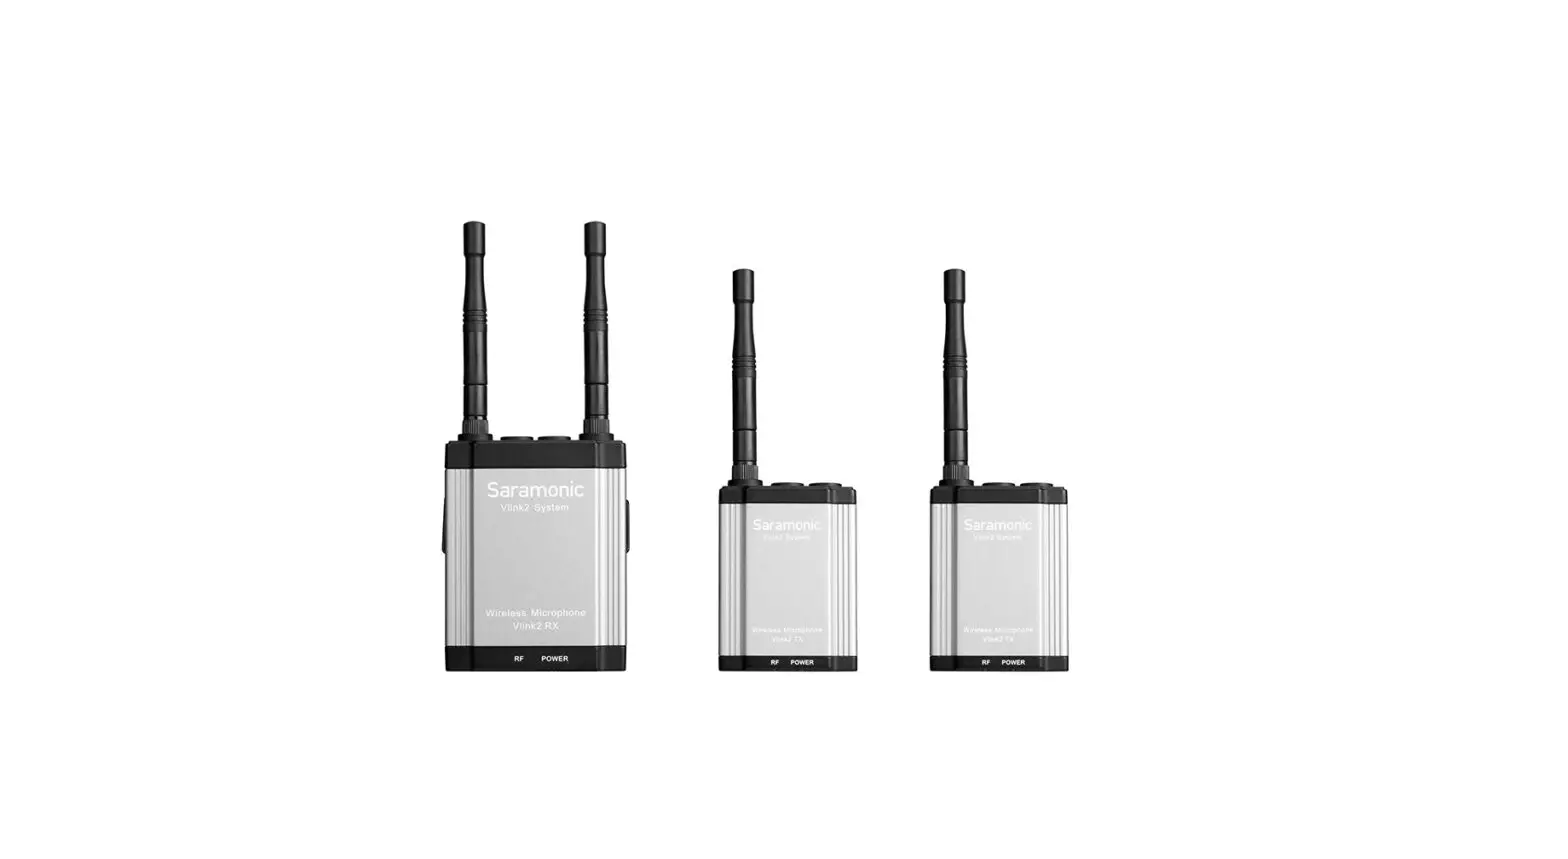
The Saramonic Vlink2 TX-XLR is a 2.4GHz wireless XLR transmitter that features an easy-to-use OLED display, 48V phantom power supply and mute function. It can be powered by a rechargeable Li-ion battery or two AA batteries. The Vlink2 TX-XLR works with Vlink2 RX receiver for wireless audio transmission in a wide range of applications.
Product Structure

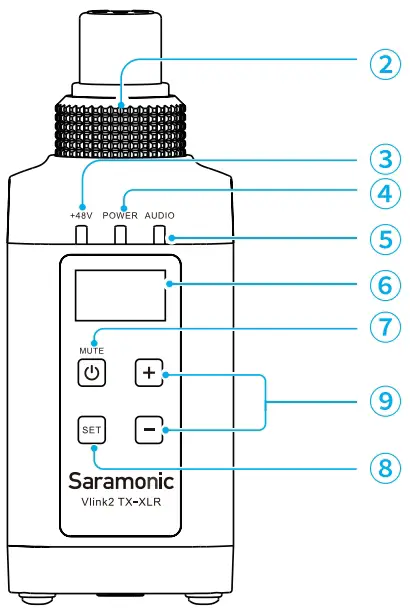

- XLR audio input jack
- Locking ring
- 48V phantom power indicator
Status Indicator
48V power
Sold blue light 48V power supply disabled Light off
- Power Indicator
Status
Indicator
Sufficient battery Level
Solid blue light Low battery Flashing red light
Charging
Solid red light Fully charged Solid blue light
Charging error occurs
Quickly flashing red light
- Audio indicator
Status
Indicator
Unpaired
Light off Pairing Quickly flashing blue light
Successfully paired
Solid blue light Mute ON (Paired Successfully) Slowly flashing blue light
- OLED display
For more details, please refer to “OLED Display Operation Guide”. - Power/Mute button
Status
Operation Power On/off Long press
Mute On/Off
Short press
- SET button
Long press the SET button to enter the displayed menu. Then, short press the SET button to confirm your setting, or long press again to exit without saving. - +/- button
Short press + or – button to select different functions or values shown on the display.
Long press + and – buttons simultaneously to enter pairing mode. - USB-C charging port
- Battery compartment cover
- Cover release
OLED Display Operation Guide
Home screen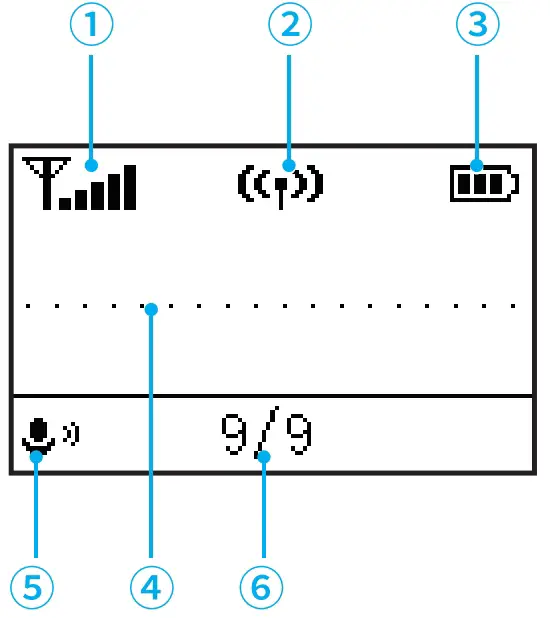
If no operation is performed within 20 seconds on menu screens, the display will automatically return to home screen.
- Signal strength indicator
 Signal is strong
 Signal is weak
 Unpaired
 - Pairing status indicator
 Successfully paired
 (Flashing indicator) Pairing
 Unpaired
 - Battery level indicator
Displays the battery level. Please recharge the transmitter immediately as soon as the indicator starts flashing. - Audio input level meter
Displays the audio input level. - Mute indicator
 Mute ON
  Mute OFF
 - Mic gain
48V Phantom Power Setting
Enable/disable the 48V phantom power supply function. When set to “Enable” 48V phantom power is provided to the connected microphone, and the 48V indicator lights up. Default is “Disable”.
Pairing
Select “Yes?” to pair the transmitter with Vlink2 RX receiver. For details of operation, please refer to “Pairing the transmitter with Vlink2 PX receiver”.
Mic Gain Setting
Adjust the microphone’s input gain level (0-9).
Default is “9”.
Backlight Setting
Set backlight to always on or on for 10/30/ó0 seconds.
Default is “ON”
Mute Key Setting
Enable or disable mute key button function. If “Enable” is selected, short press the mute button can mute/unmute the microphone. If “Disable” is selected, the mute key function is disabled, and shot press the button won’t mute the microphone.
Default is “Enable”.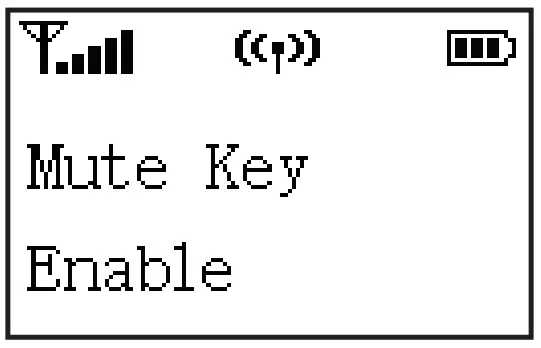
Language Setting
English and Chinese are available.
Default is English.
Restore Default Setting
Version of the Vlink2 TX-XLR
Attaching a microphone to the transmitter
Connect the microphone to the transmitter’s XLR female jack, and then tighten the locking ring as shown.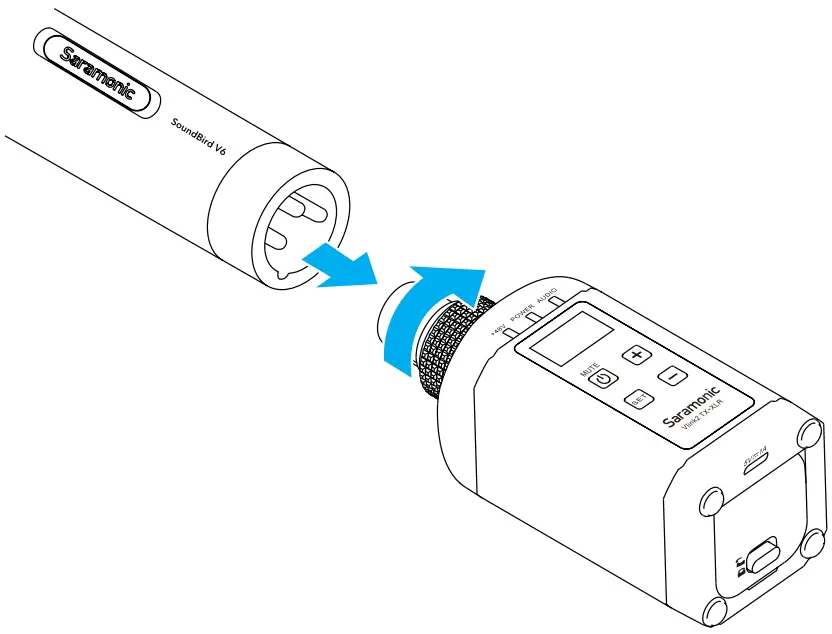
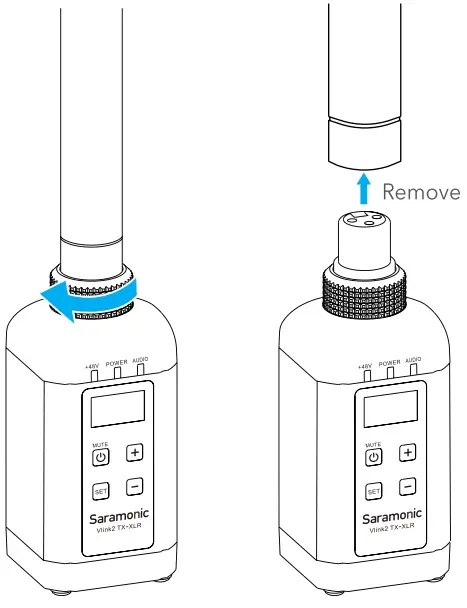
Note:
To remove the microphone,please unlock the ring first.
Inserting batteries
The transmitter is powered by a rechargeable Li-ion battery or two AA batteries. To install batteries, please follow the steps below:
- Slide the cover release as shown to open the compartment cover.

- Insert two AA batteries or the supplied Li-ion battery into the battery
compartment, respecting the polarity indicated inside the compartment. - Close the battery cover.

Note:
- Replacing the batteries during operation may generate a large noise. Be sure to turn off the unit before replacing the batteries.
- When not using the device for a long period of time, please remove the batteries.
Charging the supplied Li-ion battery
- Insert the supplied Li-ion battery into the battery compartment.(see previous instructions)
- Plug the supplied USB-C charging cable into the U5B-C port of the transmitter, then connect the other end of the cable to a power source.
Note:
AA batteries can not be charged via this unit. Please do not charge the unit when two AA batteries are inserted. The power indicator will hash red quickly when this error occurs.
Pairing the transmitter with Vlink2 RX receiver
Pair the plug-on transmitter with a Vlink2 receiver in the following Mo ways:
- Using the + and – buttons
- Turn on the receiver and the transmitter.
- Long press the “+” and “-” buttons at the same time to enter pairing mode.
- The system is paired successfully when transmitter’s Audio indicator and receiver‘s RF indicator turn solid blue.
- Using the Pair menu
- Turn on the receiver and the transmitter.
- Use the -button to display the Pair menu on both transmitter and receiver.
- Long press the SET button to enter the menu.
- Select Yes, and short press the SET button to confirm.
- The system is paired successfully when transmitter’s Audio indicator and receiver*s RF indicator turn solid blue.
Specifications
| Modulation | GFSK |
| Transmission type | 2.4GHz |
| Operating range | Up to 230’(70m) (without obstacle) |
| Audio input connector | 3-pin XLR female |
| Battery Capacity | 1600mAh Li-ion batteri or 2”AA batteri |
| Battery Life | > 10 hours |
| Power requirements | Li-ion batteri or USB-C DC 5V or 2*AA batteri |
| Signal-to-noise ratio | > 7ódB |
| RF output power | < 10mW |
| Frequency response | 35 Hz-18KHz |
| Operating temperature | -10 °C to 50 °G |
| Storage temperature | -20 °C ta +55°C |
| Dimensions | 44”43.5”113mm |
| Weight | 179g (ó.31 oz) |
Package List
- 1x Vlink2 TX-XLR Transmitter
- 1x USB-A to USB-C Charging Cable
- 1x Rechargeable Li-ion Battery
- 1x Leather Pouch
Contact Us
For better recording experience, the application SmartRecorder is recommended.
Scan The QR Code and follow Us!
Shenzhen Jiayz Photo Industrial., Ltd
A16 Building, Intelligent Terminal Industrial Park of Silicon Valley Power, Guanlan, Longhua District, Shenzhen, China![]() 400-613-1096
400-613-1096![]() www.saramonic.com
www.saramonic.com![]() [email protected]
[email protected]
QR Code: