Lumens DC200 LED Work Light

Important
Please activate your warranty at https://www.MyLumens.com/reg
Please visit our website https://www.MyLumens.com/en/Page/70 to download latest version of Software, User Manual and Quick Start Guide.
I/O Interface
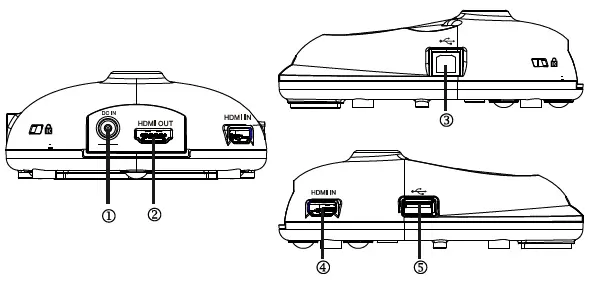
| NO. | Item | Function description |
| 1. | Power socket | Use the power adapter from enclosed accessories for power supply |
| 2. | HDMI Output | Connect the HDMI output equipment |
| 3. | USB Type-B port | Use the USB cable to connect DC200 and the computer; install Lumens™ software to retrieve images |
| 4. | HDMI Input | Connect the HDMI input signal source |
| 5. | Flash drive slot | Allow the flash drive to plug in and to store videos and photographs recorded by DC200 |
Getting Started
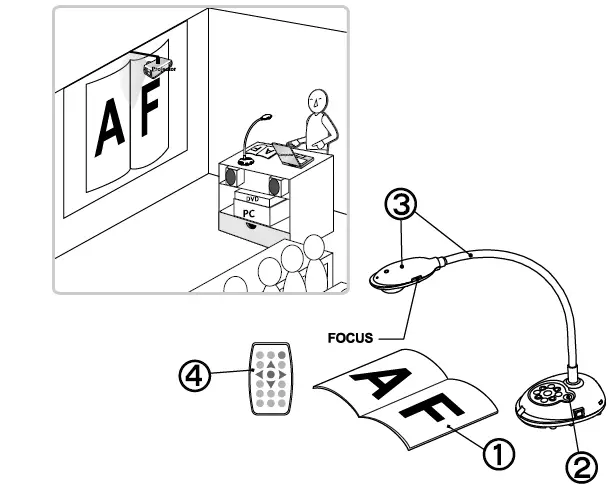
- O Place an object to be displayed under the camera.
- Turn the power on
 .
. - Adjust the gooseneck and lens to appropriate position.
- Press the [ AUTO TUNE ]
 button to optimize the image.
You are ready to teach/ present.
Each time the camera head is moved, press the [ FOCUS ] button to refocus the lens.
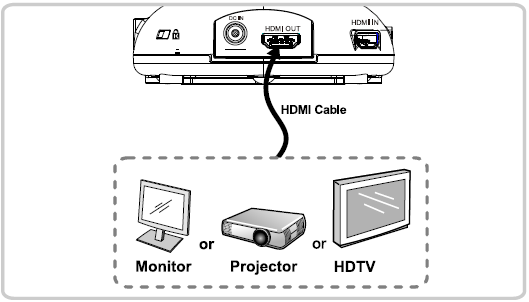
Installation & Connection
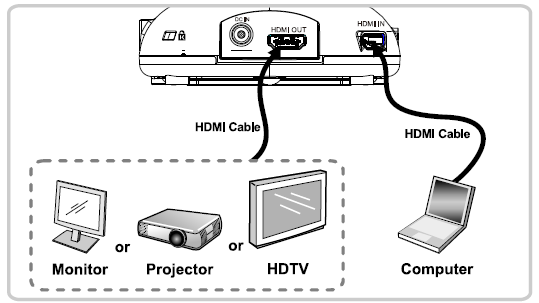
Connect a Projector, Monitor or HDTV
Connect to a Computer and Use Lumens’ Software
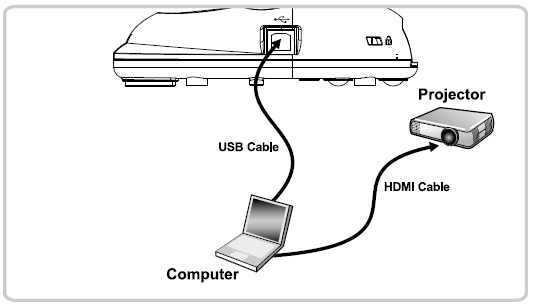
Software can be downloaded from Lumens website.
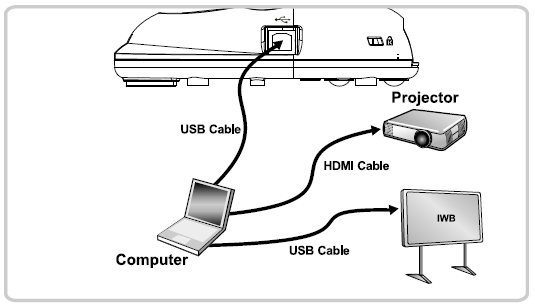
Connect a Computer, Projector, Monitor or HDTV simultaneously
Connect to an Interactive Whiteboard (IWB)
Press [ SOURCE J button to switch the image source.


