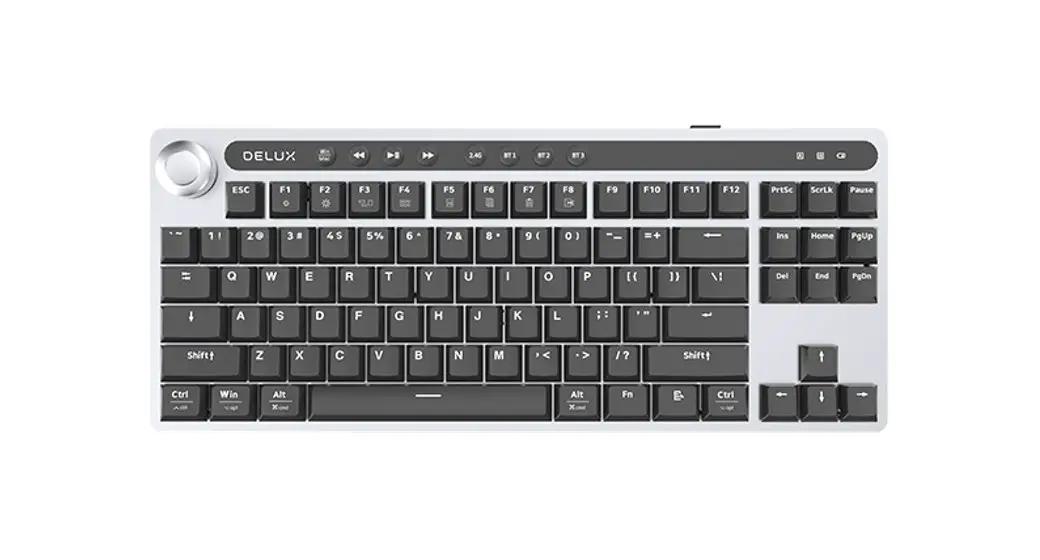
![]() DELUX KS200D Mechanical Keyboard
DELUX KS200D Mechanical Keyboard
User Manual
KS200D Mechanical Keyboard
Thank you for choosing this mechanical keyboard. For better use, please read the user manual carefully before use it.
Package Content
![]()
![]() Scroll button with volume and brightness adjustment
Scroll button with volume and brightness adjustment
Fn combination keys
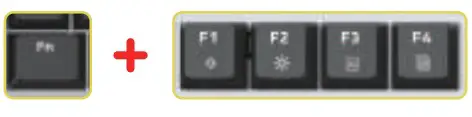
Fn+F1: Brightness reduce
Fn+F2: Brightness increase
Fn+F3: Select ALL
Fn+F4:Copy
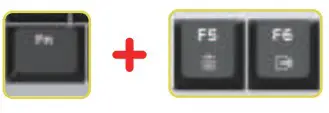
Fn+F5: Paste
Fn+F6: Cut
Fn + ↑/↓to adjust brightness
Fn + ←/→to switch the speed of backlight
Fn+ Win: lockWin function
Fn + Backspace 3s to reset
| Key function | Indicator Icon |
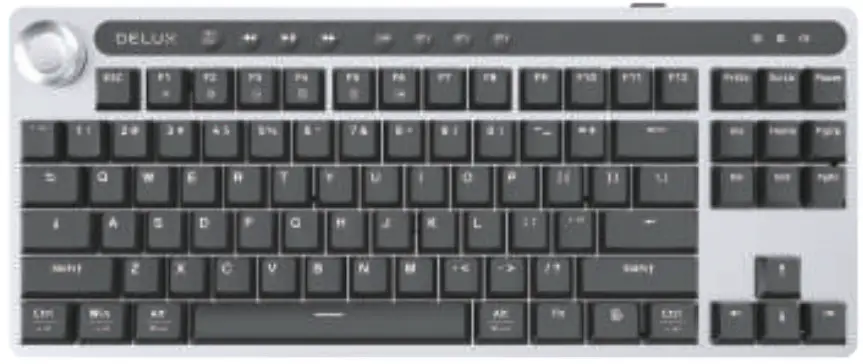
Keyboard Usage
Charging method
Connect data cable to keyboard and plug it into USB port for charging. When charging, the indicator light will turn red, and indicator light will go off when fully charged.
Connection way
Wired mode: switch to the wired mode, connect data cable to keyboard, insert the USB port to computer, and use it when the device is recognized normally.
2.4G mode: switch to wireless mode, press 2.4G mode button shortly, button indicator will flash slowly, insert the receiver, and use it when button indicator keeps on. (If you need to re-code: long press 2.4g mode key for 3 seconds, and button indicator light will flash quickly, and the key indicator light keeps on after it is connected).
BT mode: switch to wireless mode, short press BT1/BT2/BT3 button, and indicator will flash slowly. After BT pairing is successful, indicator light keeps on, and you can use it.(BT code: long press BT1/BT2/BT3 for 3 seconds, and key indicator flashes. search BT Keyboard “BT3.0 Keyboard” or “BT5.0KB” from BT device, click for pairing, and key indicator keeps on after it is connected).
System switching
The light is off by default, and the![]() keyboard defaults to Win system mode. Press the button, light is always on, and the keyboard switches to Mac system mode.
keyboard defaults to Win system mode. Press the button, light is always on, and the keyboard switches to Mac system mode.
Wheel function
Default volume adjustment mode. Press wheel button to switch to brightness adjustment mode. Clockwise rotate to increase volume/light, counterclockwise rotate to decrease volume/light.
| Multimedia Button | MAC | Win |
| Brightness- | Brightness- | |
| Brightness+ | Brightness+ | |
| Select all | Select all | |
| Copy | Copy | |
| Paste | Paste | |
| Cut | Cut |
*Above multimedia keys need combine with FN keys together.
Driver installation instructions
Driver installation Download the driver from the official website or obtain the driver from the CD attached to the package(optional), and use it after installation. After configuring the driver, the keyboard can be set to key settings, macro settings, and light settings.
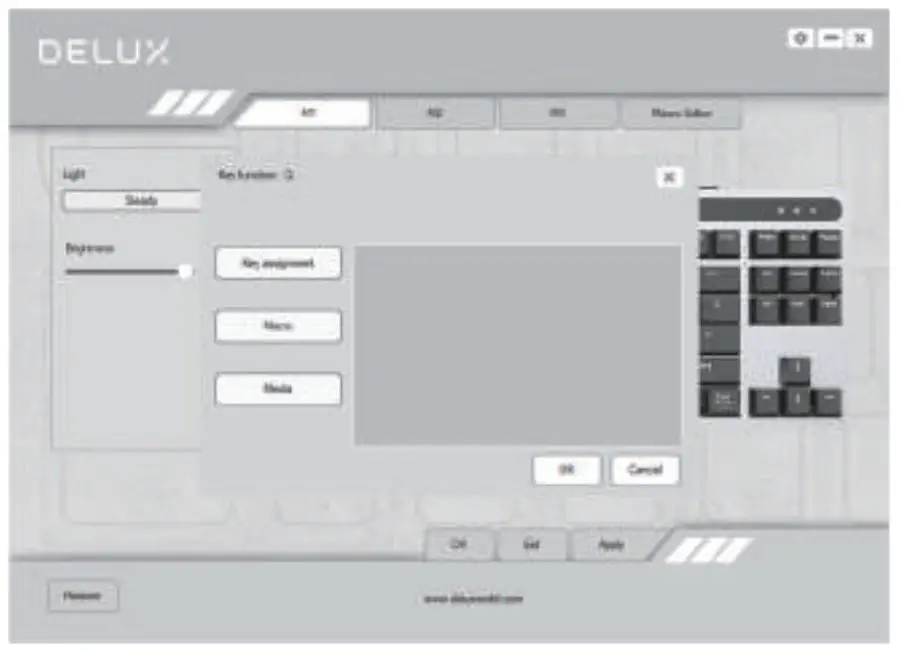
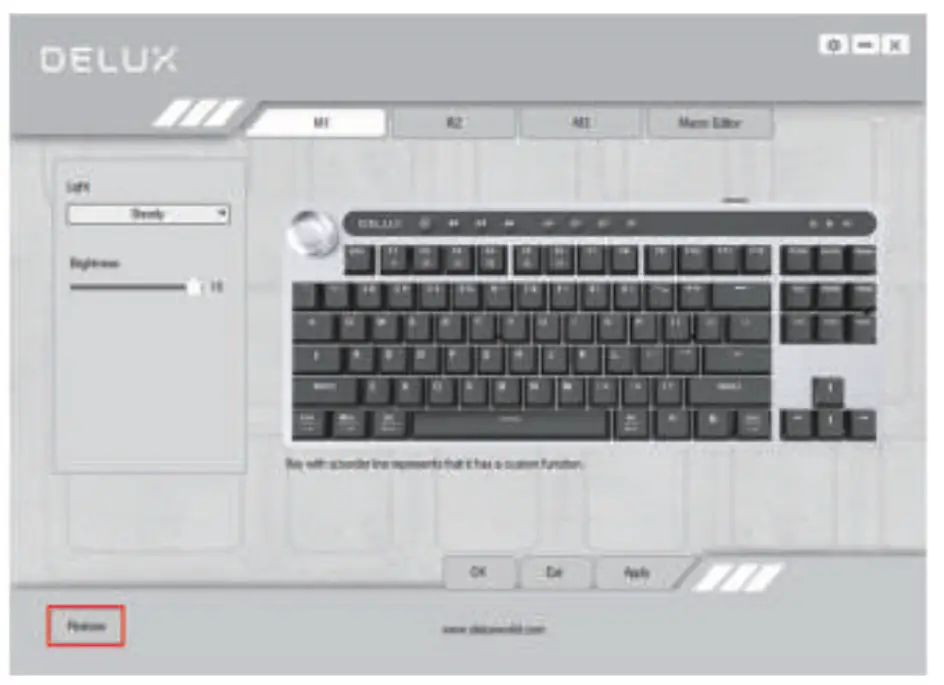
Driver Settings Open the driver setting interface (need to insert Type-C cable to connect the device, otherwise the driver cannot be turned on), button setting, macro setting and light setting can be performed. Multiple groups of configuration files can be set in M1/M2/M3 mode, and the top of the interface is a menu.
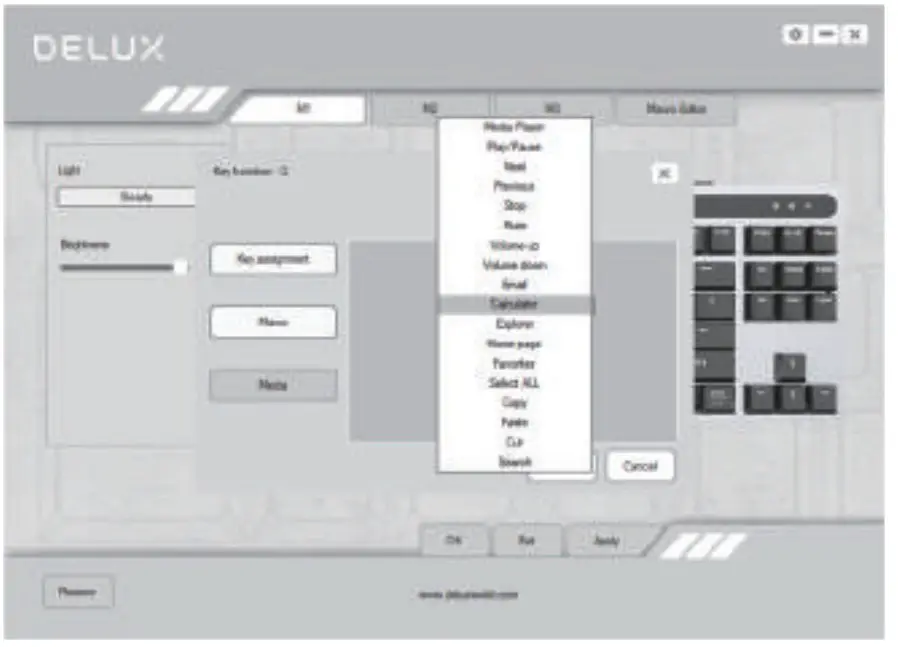
Button setting
At the top of interface, click M1/M2/M3, click the button to be set, and then click the left keyboard/macro definition/multimedia to set. Enter the button you want to set or in the drop-down menu Select the multimedia function settings. After the setting is successful, click OK and Apply to complete the setting.

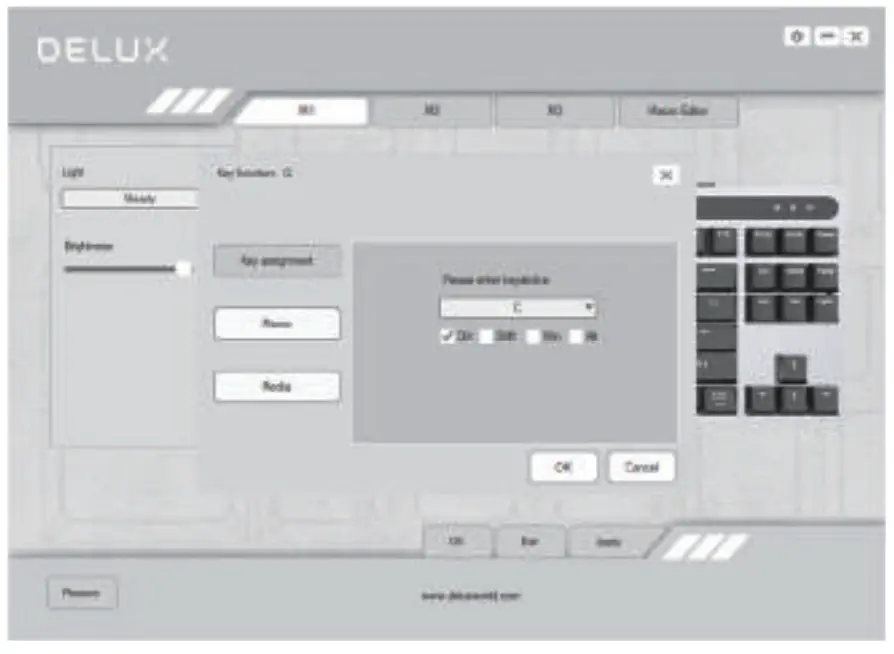
Keyboard key setting
Click the button to be set, select “keyboard” to input the button you want to set, click OK and apply to complete the setting.
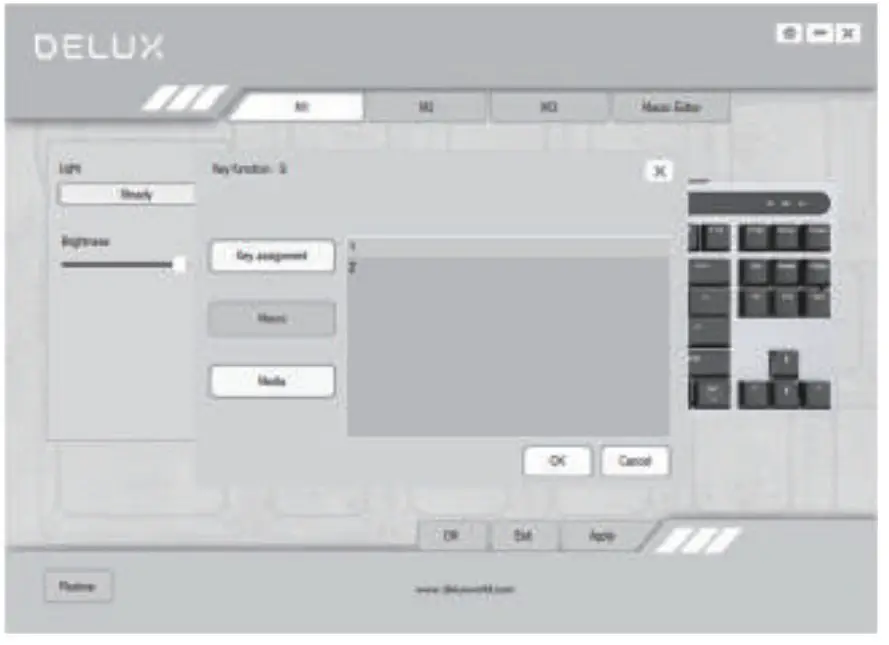
Macro key settings
Click the button to be set, select “Macro Definition”, select the macro command that has been set, and click OK and apply to complete the setting. (Refer to B macro setting)
Multimedia key Settings
Click the button to be set, select “Multimedia”, select the multimedia function in the drop-down menu to set, click OK and apply to complete the setting.
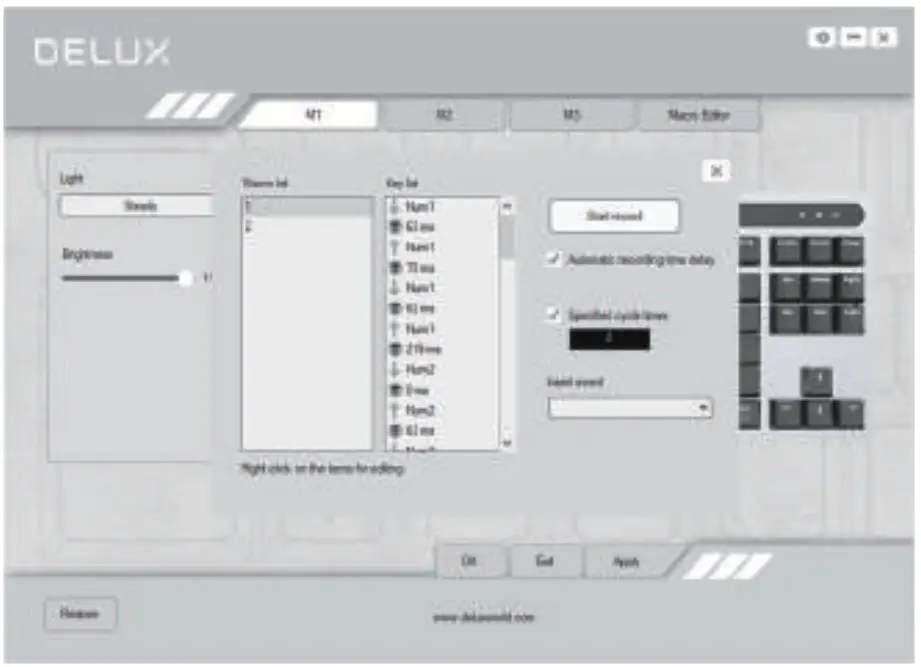
Macro settings
Under the corresponding configuration file, click “Macro Editor” to enter the macro setting interface, right-click in the “Macro List” position and select “New Macro” to enter the macro name, select the corresponding macro name, and click “Start Recording Macro”. During the recording process, you can Enter the required keys on the keyboard, and then click “Stop Recording Macro”, set the properties, and click Save. Import macro operation instructions: In the button setting, click the button to be set, select the macro name in the “Macro Definition”, and then click OK and apply to complete the setting.

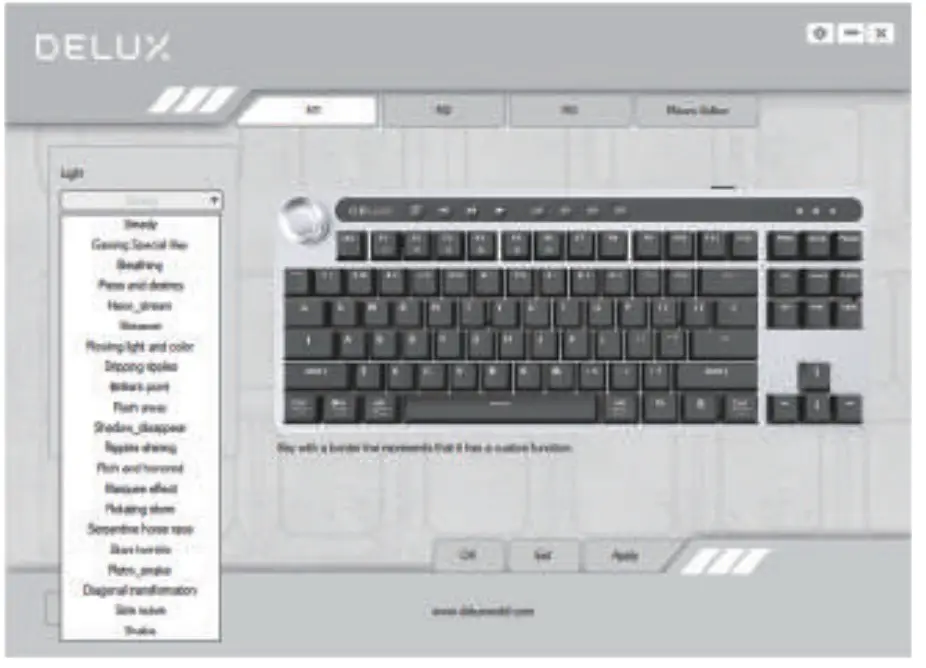
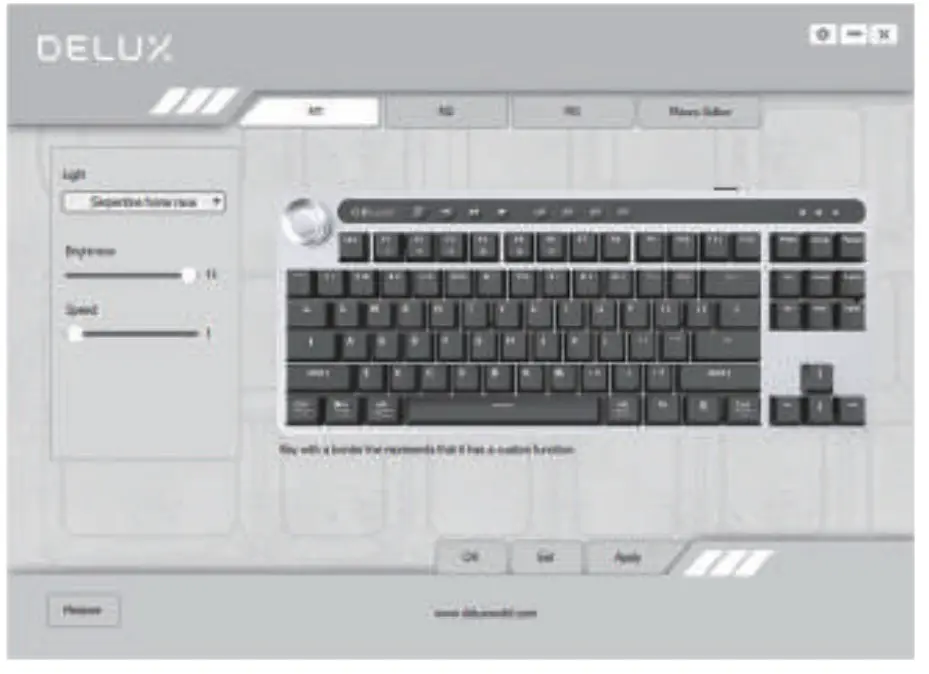
lighting settings
Click “Light” to set the overall lighting effect of the keyboard. Select different lighting modes from the drop-down menu, and click “Apply” to make the keyboard display different lighting effects. Users can adjust the brightness and speed by themselves.
Restore Settings Click
“Restore Default” in the lower left corner of the interface, and click “Apply” to restore the keyboard to the factory default setting. (In M1/M2/M3 mode, you need to click respectively to restore the factory settings in the corresponding mode)
![]()


