
![]() AT-CD1 Hybrid Meeting Room Hub
AT-CD1 Hybrid Meeting Room Hub
Installation Guide FRONTE
12 cm
AT-CD1 Hybrid Meeting Room Hub
Making screens smarter
Airtame Hub
Installation guide The optimal installation is only a few steps away
Alternative mounting options
Table setup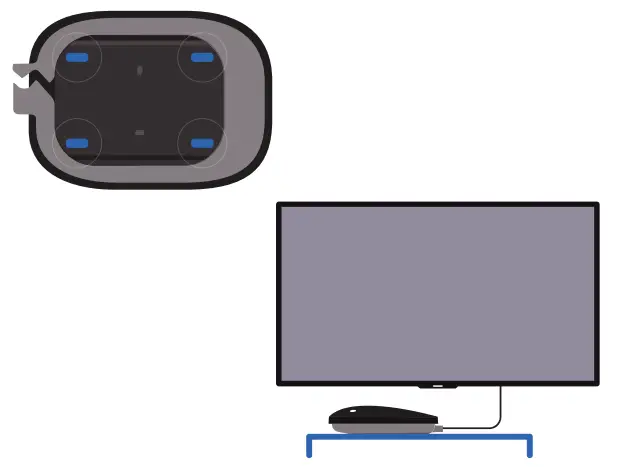 Place Airtame Hub on a flat surface.
The Friction Pads on the Mounting Plate prevent the device from sliding, and will also protect the surface against abrasion.
Adhesive setup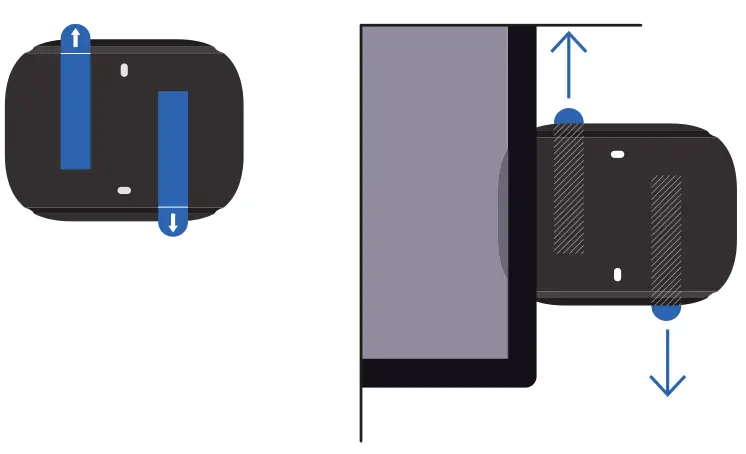 To use 3M Command Strips for mounting Airtame Hub, clean and dry the selected wall surface.
Place the strips on the Mounting Plate making sure the release tabs stick out from under the Mounting Plate as indicated by the printed guides. Remove the release liner on the Command Strips and mount the Airtame Hub on the wall.
Note: The strips cannot be reused once removed.
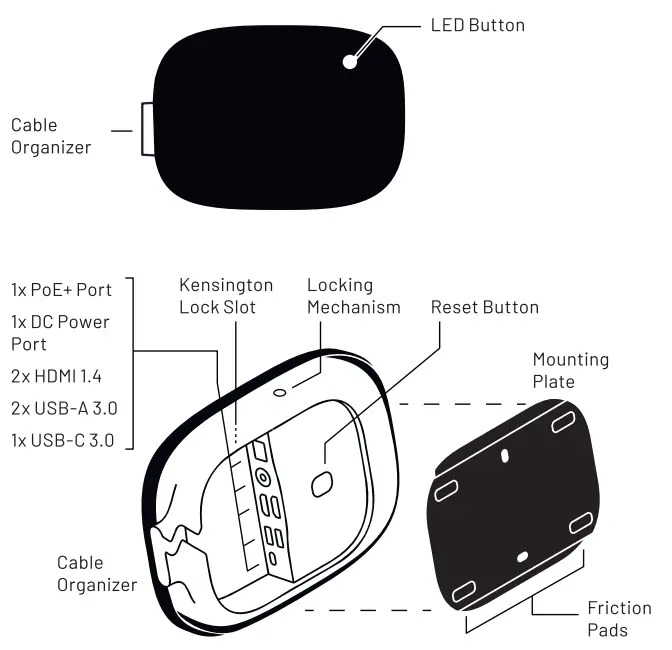
LED Button functions
- Reboot the Airtame Hub
- Wake the Airtame Hub up from Sleep Mode
- Disconnect an ongoing streaming or conferencing session
- LED light indicates power and streaming status
Reset Button functions
- Reset Wi-Fi on the Airtame Hub
- Factory reset the Airtame Hub to go back to original system settings
Power
- 1 x PoE+ port: 42.5-57V max 30W
- 1 x DC Power port: 12V — max 30W
Note: When powering the device using Power over Ethernet (PoE), the infra-structure should be compliant with IEEE802.at Type 2 (also known as PoE+) or higher, in order to provide sufficient power to the device.
Note: The DC Power port is an alter-native powering option if your network infrastructure is not PoE+ enabled.
Screens
- 2 x HDMI 1.4 ports to support two screens
Peripherals
- 2 x USB-A 3.0: 5V — max 1.3A
- 1 x USB-C 3.0: 5V — max 1.5A
Note: These ports should not be used to power Airtame Hub.
What’s in the box
Airtame Hub Mounting Plate
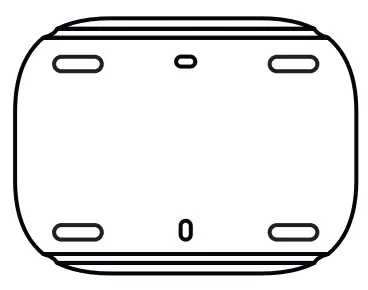 Accesory kit containing
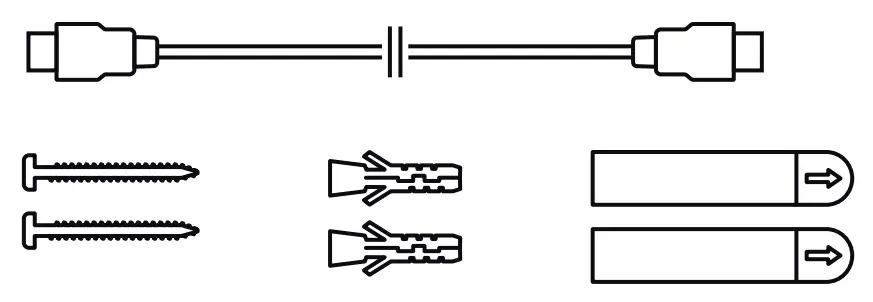
- 1 x HDMI Cable (1 meter = 3’4″)
- 2 x Wall screws2 x Wall Plugs
- 2 x 3M Command Strips L

Not in the box
DC Power Adaptor
Required if your network infrastructure is not PoE+ enabled. Can be purchased separately.
Ethernet cable
For power and/or network we Recommended Ethernet cable category for PoE+ is CAT 5e or higher.
Tools you may need
Hex key for locking mechanism Drill & Screwdriver for mounting on wall For further safety related details, please reference the Safety Manual by scanning here
  https://airtame.com/docs/hub-safetymanual
OVERVIEW
1. Select location
Select location to set up the Airtame Hub
Make sure all cables, ports and peripherals are within the right distance of the Airtame Hub.
2. Fix Mounting Plate
Remove Mounting Plate from Airtame Hub
Push down on the end of the Mounting Plate by the label
Fix Mounting Plate
Drill holes in the selected location for Wall Plugs.
Insert Wall Plugs in the holes, and fix the Mounting Plate using the Screws (can be found in the Accessory Kit). 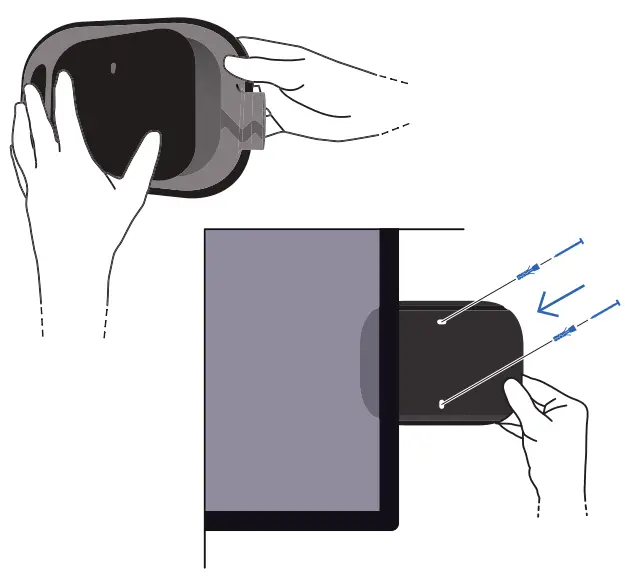
3. Connect cables to Airtame Hub
Connect conferencing peripherals to the USB ports. Connect screens to NOM! ports.
Power Airtame Hub by connecting an ethernet cable into the PoE+ port.
LED Button will light up after a few seconds when connected.
Adjust and align the cables through the Cable Organizer to ensure ports are protected.
You can secure your device with a Kensington Microsaver 2.0. by using the available Kensington lock slot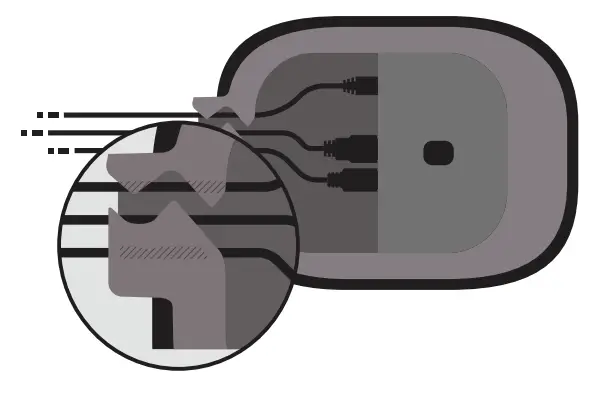 4. Place Airtame Hub
Place Airtame Hub on the Mounting Plate. The magnets will hold it in place.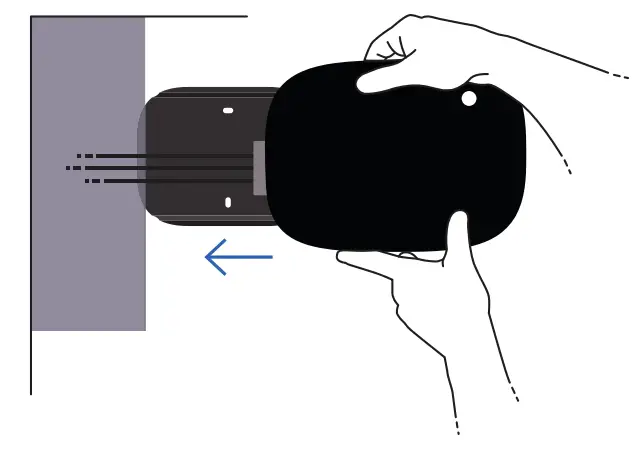 Optional: lock the Airtame Hub to the Mounting Plate.
Use the Locking Mechanism to secure Airtame Hub to the Mounting Plate.
This prevents people from tampering with the cable setup.
Use a hex key to engage the Locking Mechanism and secure the Airtame Hub to it. 
5. Get started with Airtame Hub
To get up and running with Airtame, visit www.airtame.com/setup and follow the instructions. 6. Join Airtame Cloud
Add your Airtame Hub to your cloud organization at www.alrtame.cloud to enable video conferencing, easy management and much more. 
![]()
![]() FSC
FSC
www.fsc.org
100% Paper from well-managed forests
FSC® C100351
Revision I


