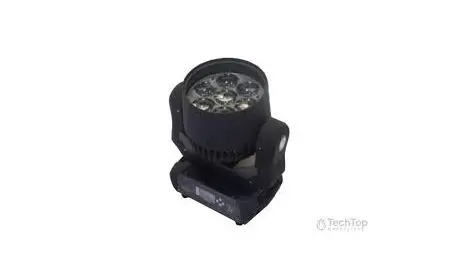
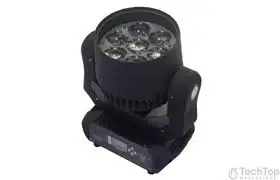
techtop LED Beam 7 Zoom
SAFETY INSTRUCTIONS
CAUTION!
Be careful with your operations. With a dangerous voltage you can suffer a dangerous electric shock when touching the wires!
Keep this device away from rain and moisture!
Unplug mains lead before opening the housing!
For your own safety, please read this user manual carefully before you initial start-up.
Features:
15°-67° zooming,with 7*high MCD Ostar RGBW 4 IN 1 15W LEDs
DMX-512 connection / connection between fixtures
Occupation of the XLR-connection:
If you are using controllers with this occupation, you can connect the DMX-output of the controller directly with the DMX-input of the first fixture in the DMX-chain. If you wish to connect DMX-controllers with other XLR-outputs, you need to use adapter-cables.
Building a serial DMX-chain:
Connect the DMX-output of the first fixture in the DMX-chain with the DMX-input of the next fixture. Always connect one output with the input of the next fixture until all fixtures are connected.
Caution: At the last fixture, the DMX-cable has to be terminated with a terminator. Solder a 120 resistor between Signal (–) and Signal (+) into a 3-pin XLR-plug and plug it in the
DMX-output of the last fixture.
Connection with the mains
Connect the device to the mains with the enclosed power supply cable.
1. DMX 512 protocol
Addressing
The LED DISPLAY on the rear side of the base allows you to assign the DMX fixture address, which is defined as the first channel from which the item will respond to the controller. If you set, for example, the address to channel 7, the item will use the channel 7 to 14 for control. Please, be sure that you don’t have any overlapping channels in order to control each item correctly and independently from any other fixture on the DMX data link. If two, three or more items are addressed similarly, they will work similarly. At DMX mode you can choose the address from 1 to 512.After you connect the item to the mains, the item starts running. When the item finishes resetting, A-OO1 will flash in the led display and then set the desired DMX address by pressing the UP or DOWN buttons.
DMX Controlling:
After having addressed all items, you may now start operating these via your lighting controller. After switching on, the item will automatically detect whether DMX 512 data is received or not.
DMX FUNCTIONS
16-channel mode
| 1 | 000 – 255 | X |
| 2 | 000 – 255 | X-Fine |
| 3 | 000 – 255 | Y |
| 4 | 000 – 255 | Y-Fine |
| 5 | 000 – 255 | XY SPEED |
| 6 | 000 – 255 | Dimmer(0-100%) |
|
7 | 000 – 009 | Shutter closed |
| 010 – 245 | Strobe effect slow to fast | |
| 246 – 255 | Shutter open | |
| 8 | 000 – 255 | Red |
| 9 | 000 – 255 | Green |
| 10 | 000 – 255 | Blue |
| 11 | 000 – 255 | White |
| 12 | 000 – 255 | Color Temp |
|
13 | 000 – 010 | closed |
| 011 – 020 | R | |
| 021 – 030 | G | |
| 031 – 040 | B | |
| 041 – 050 | W | |
| 051 – 060 | R+G | |
| 061 – 070 | G+B | |
| 071 – 080 | B+W | |
| 081 – 090 | R+B | |
| 091 – 100 | G+W | |
| 101 – 110 | R+W | |
| 111 – 120 | R+G+B | |
| 121 – 130 | R+G+W | |
| 131 – 140 | G+B+W | |
| 141 – 150 | RGBW | |
| 151 – 255 | Color changing from slow to fast | |
| 14 | 000 -255 | Color fade from slow to fast |
|
15 | 000 – 020 | Empty |
| 021 – 040 | Internal program 1 | |
| 041 – 060 | Internal program 2 |
| 061 – 080 | Internal program 3 | |
| 081 – 100 | Internal program 4 | |
| 101 – 120 | Internal program 5 | |
| 121 – 140 | Internal program 6 | |
| 141 – 160 | Internal program 7 | |
| 161 – 180 | Internal program 8 | |
| 181 – 200 | Empty | |
| 201 – 225 | Motor Reset | |
| 226 – 255 | Empty | |
| 16 | 0-255 | Focus from smallest to biggest |
LED DISPLAY CONTROL:
| 1 Addr | DMX Address | 001-512 | |
| 2 ChMd | DMX Mode | .=CH16 | |
| 3 SPMd | Speed Mode | .=High | |
| .=Low | |||
| 4 SLMd | Run Mode | .=Master | |
| .=Slave | |||
| 5 SHMd | Internal Program |
.=001 | |
| .=002 | |||
| .=003 | |||
| .=004 | |||
| .=005 | |||
| .=006 | |||
| .=007 | |||
| .=008 | |||
| 6 Soun | Sound Control | .=OFF | |
| .=ON | |||
| 7 PAN | X Reverse | .=OFF | |
| .=ON | |||
| 8 TIL | Y Reverse | .=OFF | |
| .=ON | |||
| 9 dISP | Display Reverse |
.=OFF | |
| .=ON |
| 10 rFAC | Reset Default | .=OFF | |
| .=ON | |||
| 11 Ad t | Home Position Setting |
Delt | Clear PAN and TILT Home Position(3s) |
| P(PAN) | .=0-120 | ||
| t(TILT) | .=0-120 | ||
| F(Gobo) | .=0-120 | ||
| 12 rST | Reset Motor |
Replacing the fuse
If the fine-wire fuse of the device fuses, only replace the fuse by a fuse of same type and rating.
Before replacing the fuse, unplug mains lead.
Procedure:
Step 1: Open the fuse holder on the rear panel with a fitting screwdriver.
Step 2: Remove the old fuse from the fuse holder.
Step 3: Install the new fuse in the fuse holder.
Step 4: Replace the fuse holder in the housing.
TECHNICAL SPECIFICATIONS
LED MINI-B 715 is one of the classical LED moving beam
designed and created uniquely, really ideal for clubs, bars,
disco halls, small events, musical shops, mobile DJs, cabarets, etc.
* 15°-67° zooming,with 7*high MCD Ostar RGBW 4 IN 1 15W LEDs
* LED Display,RGBW color mixing,multi color beams projecting sharply AC 100-240V 50/60Hz,Power consumption: 120W max.
separate strobe,strobe Rate: 0 to 30 Hz
DMX 512 protocol, master/slave, auto, sound active
16 DMX channel modes
Movement:Pan:X axis 540 degrees, Y axis 270 degrees
High speed of pan/tilt movement,
speed of pan/tilt movement adjustable
Scan position memory, auto repositioning after unexpected movement 8 internal program , sound mode can control by DXM 512 Environmental temperature: -20℃ to 40℃
Hanging brackets included
Net weight: 4.20Kgs,Dimensions:150*200*300mm(L*W*D)
Please note: Every information is subject to change without prior notice.


