CAMERA SERVICE KIT REPLACEMENT
Model 041-0347-000
Installation
Introduction
Your camera is accessible at the opener’s bottom side. After installing the new camera. use your myQ® app to connect your new camera to your myQ® account.
Hardware:
- Screw Qty. (3)
- Decorative Badge
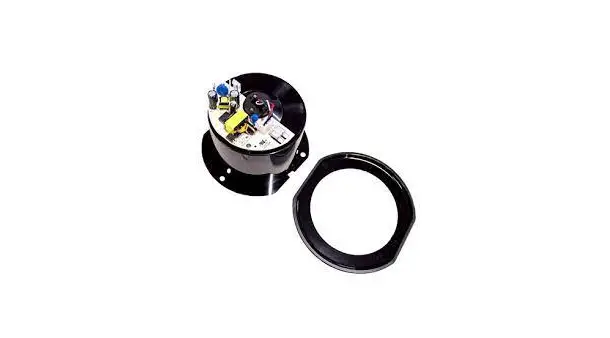
- Camera
Tools:
- Phillips Screwdriver
- Ladder
- Masking Tape (optional)
 WARNING
To prevent possible SERIOUS INJURY or DEATH:
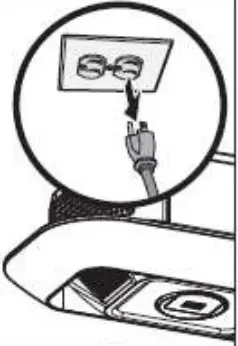
- Disconnect ALL electric and battery power BEFORE performing ANY service or maintenance.
CAUTION
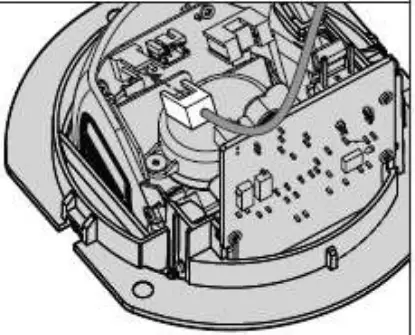
To prevent damage to the camera, push the camera lens closed when replacing, and hold it in place as you remove securing hardware. DO NOT touch the camera logic board during installation.
ALWAYS wear protective gloves and eye protection when changing the battery or working around the battery compartment.
 WARNING: This product can expose you to chemicals including lead, which are known to the State of California to cause cancer or birth defects or other reproductive harm. For more information go to www.P65Warnings.ca.gov.
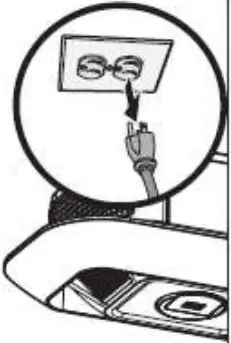
1. Disconnect power to the garage door opener, and remove the backup battery. if used.
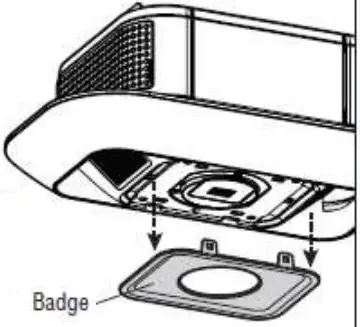
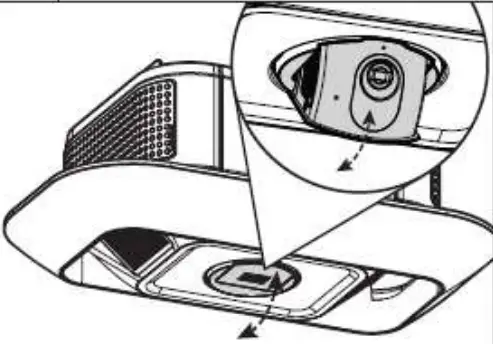
2. Using a flat head screwdriver, remove the badge at the opener’s bottom. Badge is held in by seven clips, pull badge off.
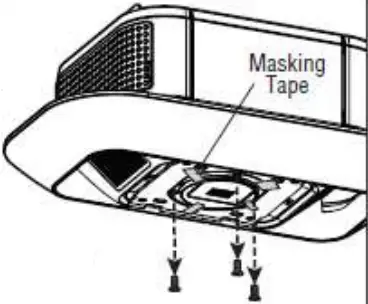
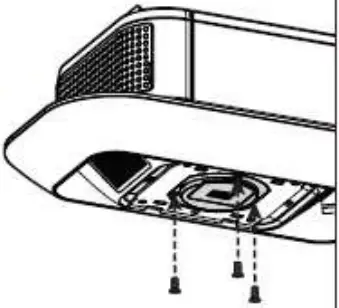
3. Unscrew the camera slowly from the opener housing by removing the three screws with a Phillips screwdriver.
TIP: Use masking tape to hold the camera in place as you remove screws.
4. Remove the two-pronged wire harness that has the black and white wires.
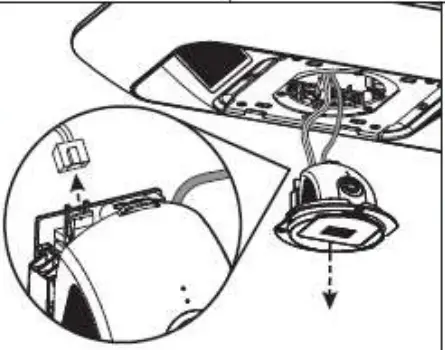
5. Open camera and remove the three-pronged wire harness that has the black, green and white wires.
6. Open new camera and place the three-pronged wire harness that has the black. green and white wires. Close camera.
7. Connect the two-pronged wire harness that has the black and white wires.
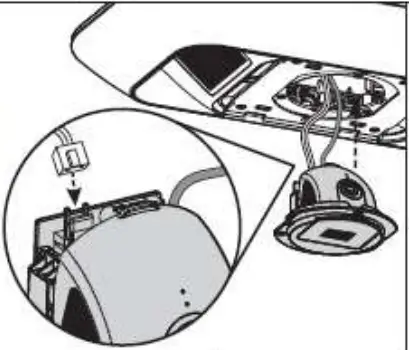
8. Align screw holes and place camera into garage door opener.
Fasten the three screws with a Phillips screwdriver.
9. Reattach the new badge. Reconnect power and battery, if used.
10. Locate the notch in the camera’s opener and pull down.
11. Follow the myQ® App instructions to add the new camera to your myQ® account.
NOTE: Only the replacement camera needs to be provisioned (not the garage door opener) using myQ® app.
NOTICE: This device complies with part 15 of the FCC rules and Innovation. Science and Economic Development Canada licence-exempt RSSs. Operation is subject to the following two conditions: (1) this device may not cause harmful interference. and (2) this device must accept any interference received, including interference that may cause undesired operation. Any changes or modifications not expressly approved by the party responsible for compliance could void the user’s authority to operate the equipment.
This device must be installed to ensure a minimum 20 cm (8 in.) distance is maintained between users/bystanders and device.
This device has been tested and found to comply with the limits for a Class B digital device, _pursuant to part 15 of the FCC rules and Industry Canada ICES standard. These limits are designed to provide reasonable protection against harmful interference in a residential installation. This equipment generates, uses and can radiate radio frequency energy and, if not installed and used in accordance with the instructions, may cause harmful interference to radio communications.
However, there is no guarantee that interference will not occur in a particular installation. If this equipment does cause harmful interference to radio or television reception. which can be determined by turning the equipment off and on. the user is encouraged to try to correct the interference by one or more of the following measures:
• Reorient or relocate the receiving antenna.
• Increase the separation between the equipment and receiver.
• Connect the equipment into an outlet on a circuit different from that to which the receiver is connected
• Consult the dealer or an experienced radio/TV technician for help.
The device for operation in the band 5150-5250 MHz is only for indoor use to reduce the potential for harmful interference to co-channel mobile satellite systems.
Camera LED Status Indicators | |
| WHAT YOU SEE | WHAT IT MEANS |
| Solid White | Camera is powering up. |
| Flashing Blue | Ready to be set up in the myQ® App. |
| Solid Blue | Connected to your mobile device. You are not yet connected to the Internet. If this persists after setup, check your home router and Internet. Connecting to Wi-Fie and connecting to the myQ® App. |
| Flashing Blue and Green | Connecting to Wi-Fi and connecting to the myQ® App. |
| Solid Green | Connected to the myQ® App. |
| Flashing Purple | Receiving firmware updates. |
| Solid Red | Camera thermal error state when the camera reaches high heat 60 °C temperature and cools down. |


