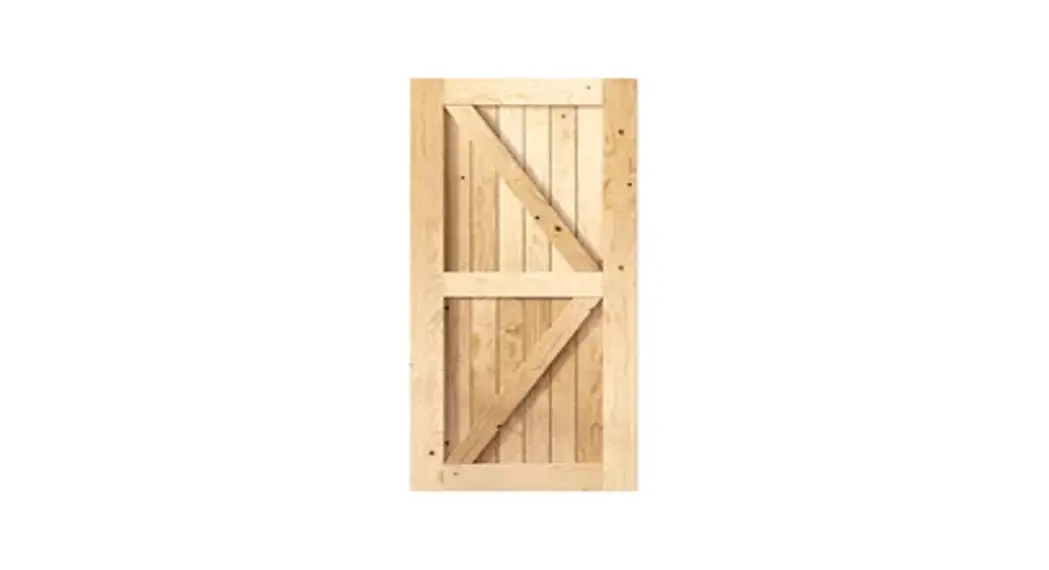
![]() 49861019 5-In-1 Pine Wood Barn Door-Frame
49861019 5-In-1 Pine Wood Barn Door-Frame
Instruction Manual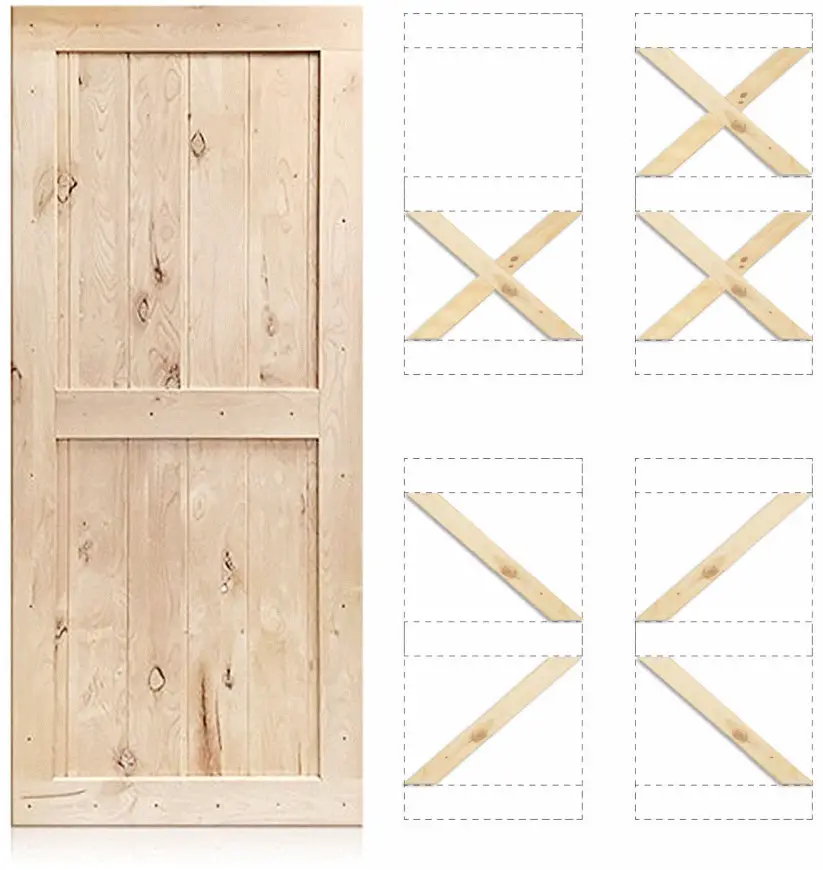
SAFETY PRECAUTIONS
!CAUTION!
- Power tools can cause serious damage if not professionally used. Safety gear must be worn before installation to prevent unexpected injuries.
- Pick an area free of hazardous condition before you start on the project. Please use tools and power tools responsibly any loss of control and accident deaths may occur due to abuse of tools.
- Big objects required in this project are needed to be carefully and responsibily moved. Be sure to wear safety gloves and shoes to prevent any serious injury.
- Be extremely careful to not put any parts of your body against a moving part of the hardware. This may cause bruising, punctures, and other results of injuries when for example when fingers are caught in the closing area of the doors.
- Precautions should be taken when opening or closing the door(s). Handles should be used when attempting to slide the door(s). Always keep you and children aware and safe from any unexpected situations.
- Any extreme uncontrolled pressure opening or closing the door(s) can damage the hardware gradually. Use handle(s) to open and close the door(s) with care at all times.
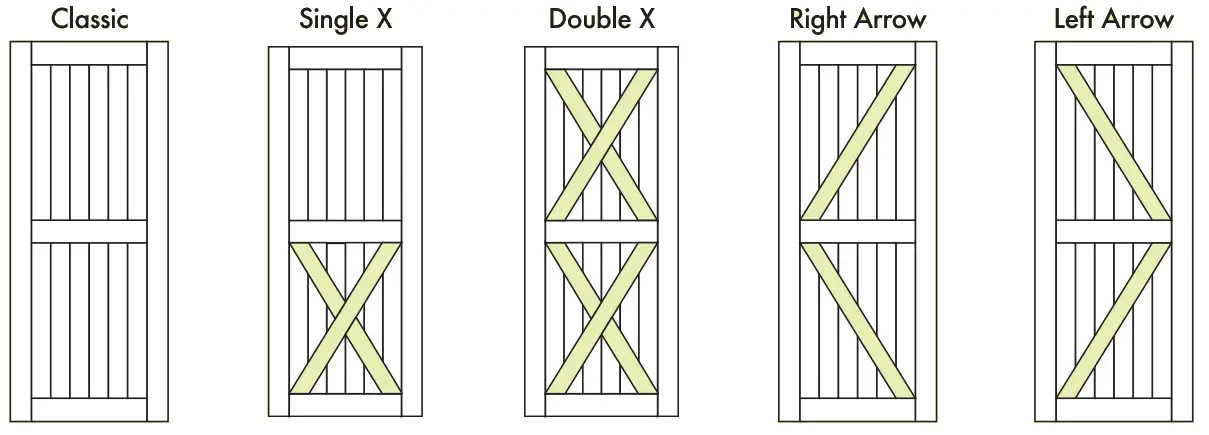
5-in-1 Frame Door Design
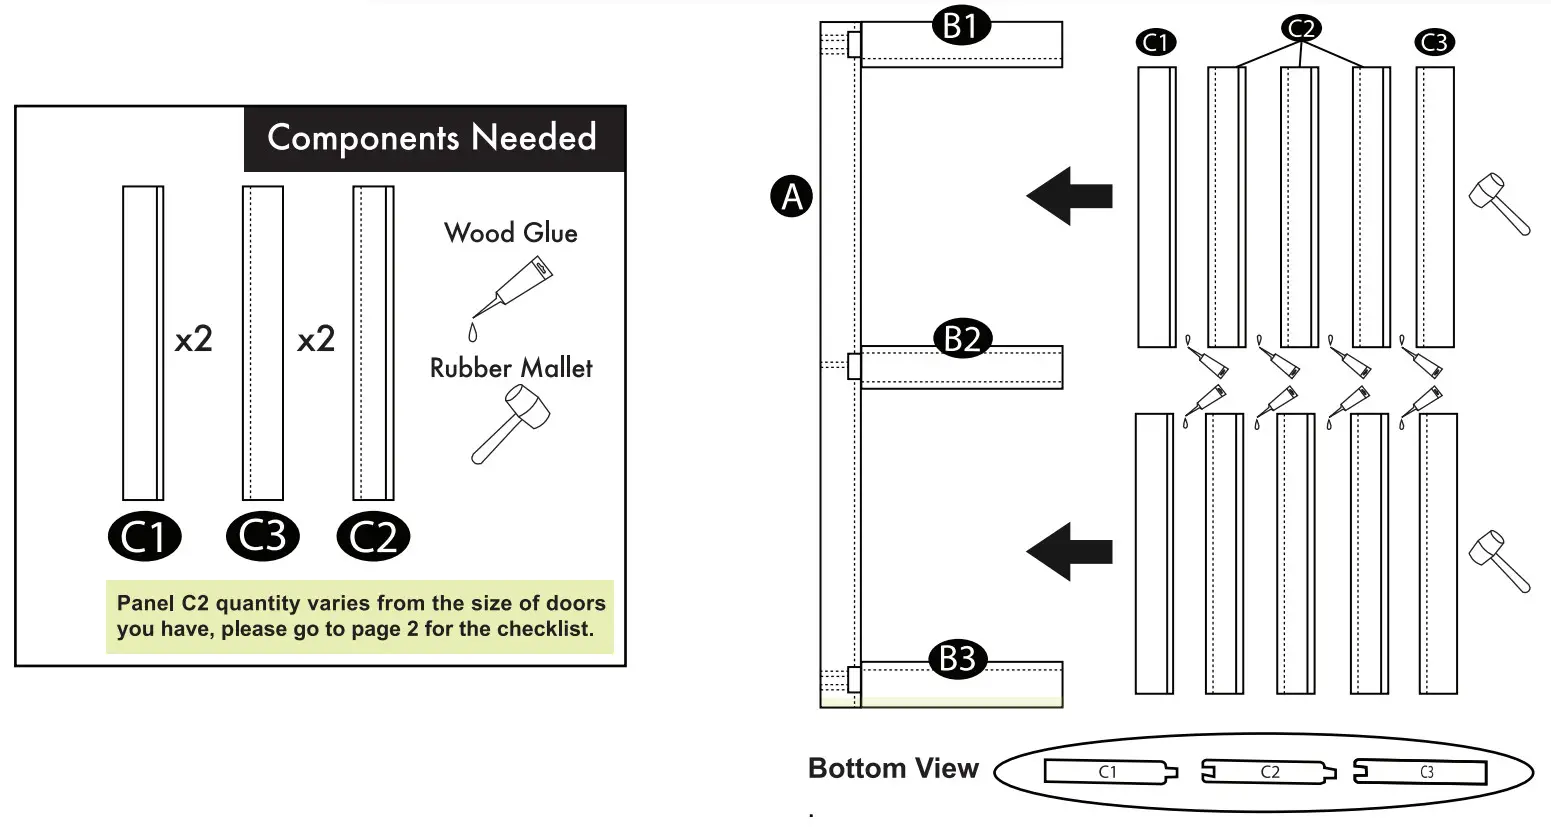
This package comes with all 5 designs panels that you can to make so please check page 5&6to build the door design you desire.
HARDWARE INCLUDED
Please check that you have the correct quantity of hardware before installation.
Different door sizes comes with different quantity of hardware. 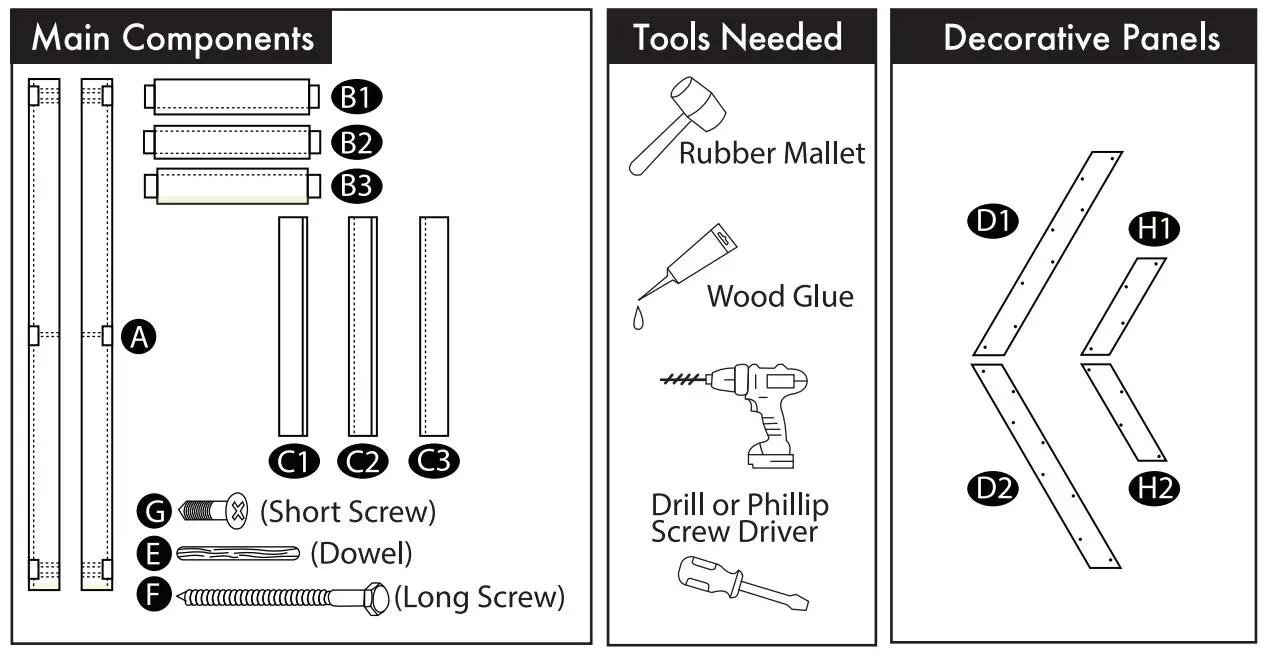
Checklist for items you should have for each door size.
| Size | A | B1 | B2 | B3 | Cl | C2 | C3 | D1 | D2 | H1 | H2 | E | F | G |
| 20in | 2 | 1 | 1 | 1 | 2 | 2 | 2 | 2 | 2 | 4 | 4 | 10 | 10 | 64 |
| 22in | 2 | 1 | 1 | 1 | 2 | 2 | 2 | 2 | 2 | 4 | 4 | 10 | 10 | 64 |
| 221in | 2 | 1 | 1 | 1 | 2 | 4 | 2 | 2 | 2 | 4 | 4 | 10 | 10 | 64 |
| 26in | 2 | 1 | 1 | 1 | 2 | 4 | 2 | 2 | 2 | 4 | 4 | 10 | 10 | 64 |
| 28in | 2 | 1 | 1 | 1 | 2 | 6 | 2 | 2 | 2 | 4 | 4 | 10 | 10 | 64 |
| 30in | 2 | 1 | 1 | 1 | 2 | 6 | 2 | 2 | 2 | 4 | 4 | 10 | 10 | 64 |
| 32in | 2 | 1 | 1 | 1 | 2 | 6 | 2 | 2 | 2 | 4 | 4 | 10 | 10 | 64 |
| 3211n | 2 | 1 | 1 | 1 | 2 | 8 | 2 | 2 | 2 | 4 | 4 | 10 | 10 | 64 |
| 36in | 2 | 1 | 1 | 1 | 2 | 8 | 2 | 2 | 2 | 4 | 4 | 10 | 10 | 64 |
| 38in | 2 | 1 | 1 | 1 | 2 | 10 | 2 | 2 | 2 | 4 | 4 | 10 | 10 | 64 |
| 40in | 2 | 1 | 1 | 1 | 2 | 12 | 2 | 2 | 2 | 4 | 4 | 10 | 10 | 64 |
| 42in | 2 | 1 | 1 | 1 | 2 | 12 | 2 | 2 | 2 | 4 | 4 | 10 | 10 | 64 |
| 44in | 2 | 1 | 1 | 1 | 2 | 12 | 2 | 2 | 2 | 4 | 4 | 10 | 10 | 64 |
| 46in | 2 | 1 | 1 | 1 | 2 | 14 | 2 | 2 | 2 | 4 | 4 | 10 | 10 | 64 |
| 48in | 2 | 1 | 1 | 1 | 2 | 14 | 2 | 2 | 2 | 4 | 4 | 10 | 10 | 64 |
| 54in | 2 | 1 | 1 | 1 | 2 | 16 | 2 | 2 | 2 | 4 | 4 | 10 | 10 | 64 |
| 60in | 2 | 1 | 1 | 1 | 2 | 22 | 2 | 2 | 2 | 4 | 4 | 10 | 10 | 64 |
All decorative panels are included in the box, please see check list below for the panels you need to build your desired door design.
| Door Design | Dl | D2 | Hl | H2 |
| Classic | 0 | 0 | 0 | 0 |
| Single X | 1 | 1 | 2 | 2 |
| Double X | 2 | 2 | 4 | 4 |
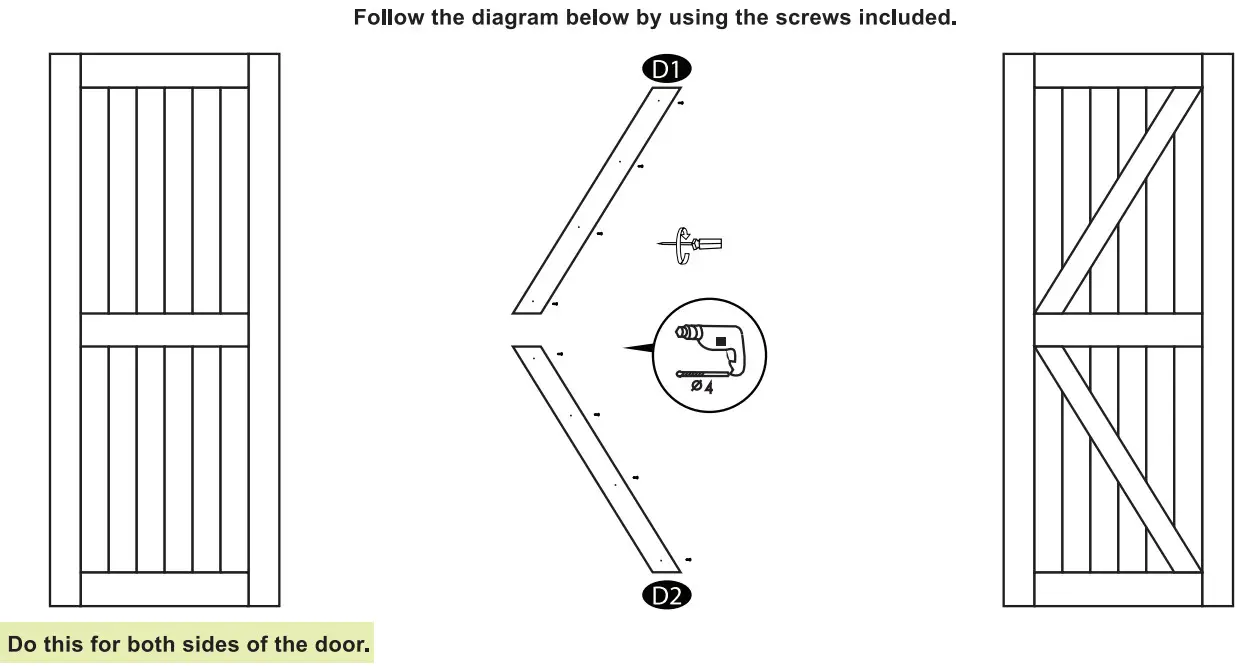
| Left Arrow | 2 | 2 | 0 | 0 |
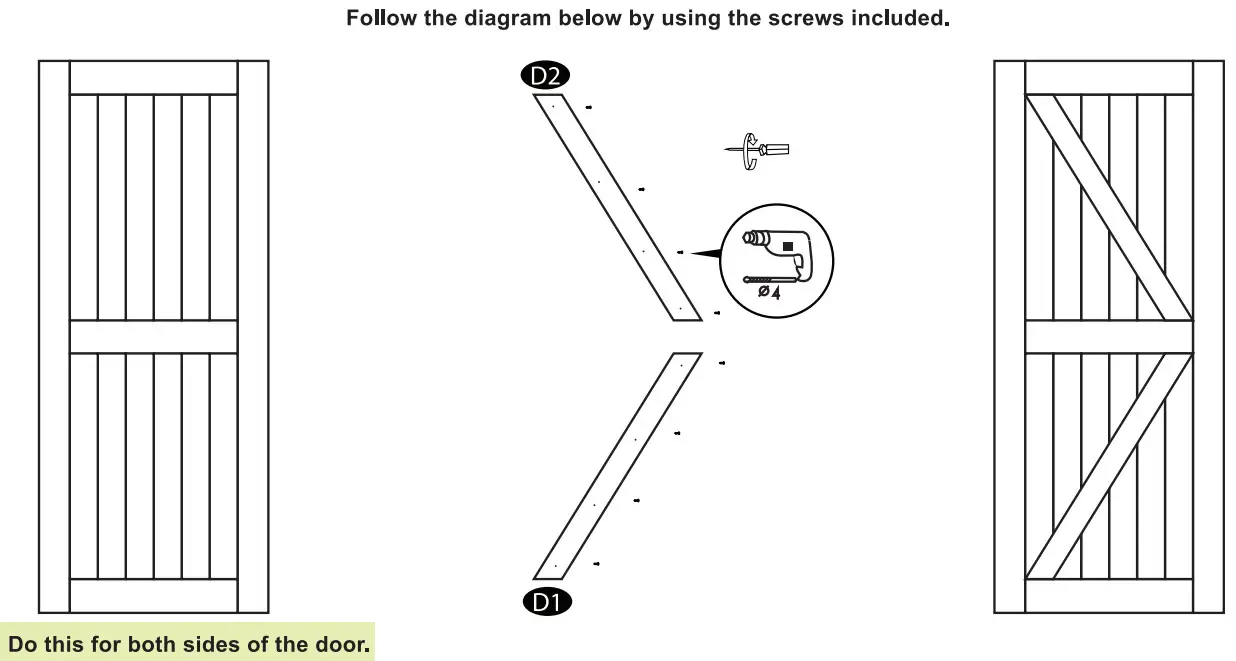
| Right Arrow | 2 | 2 | 0 | 0 |
INSTRUCTIONS
WARNING
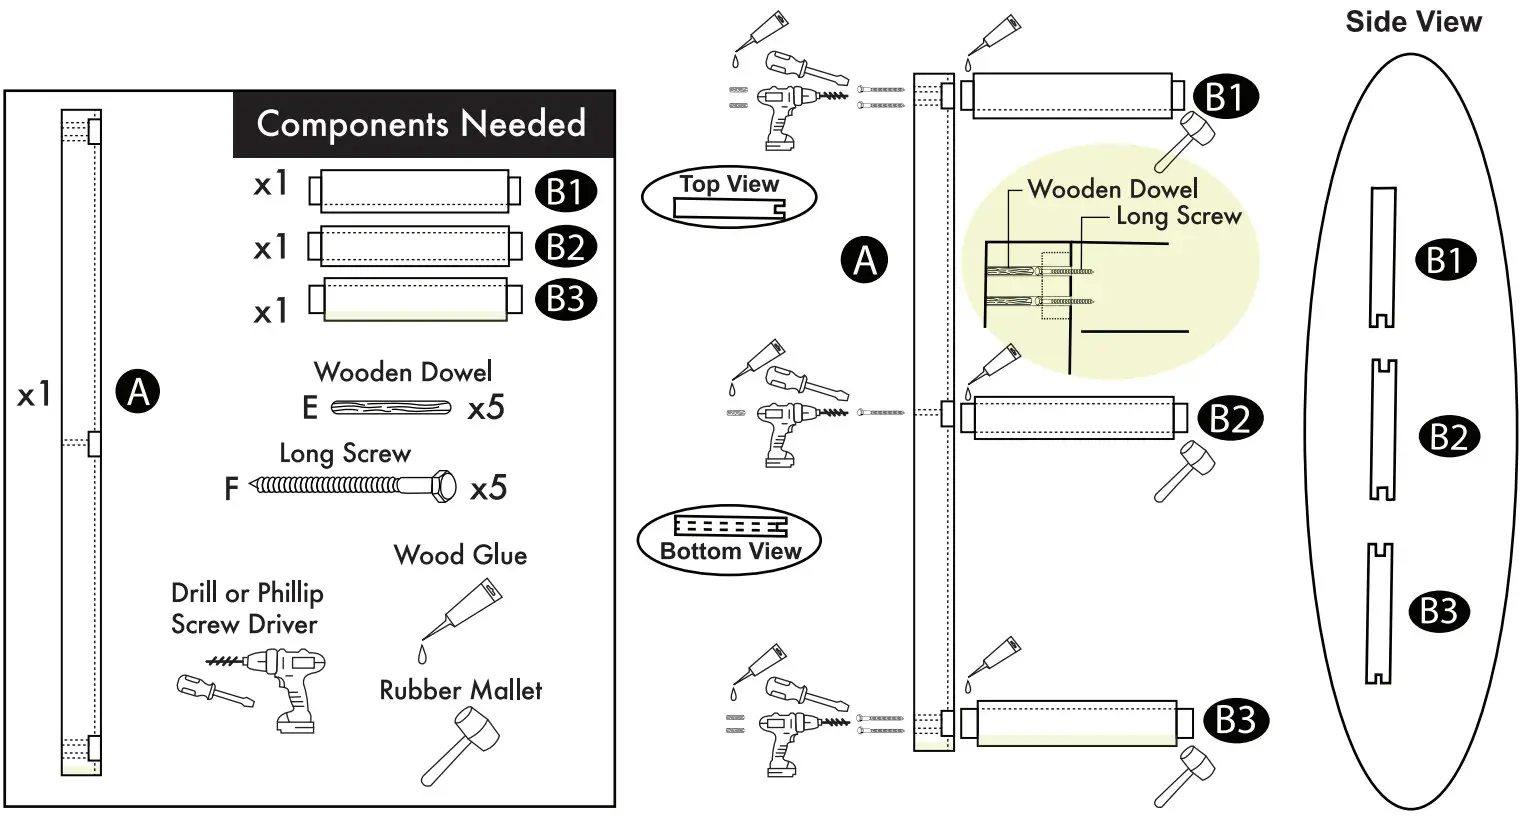
If you purchased any of our Sliding Barn Door Hardware Kit to accommodate with this door please do not install the long bolts on the first hole. This will interfere with the installation of the rollers. You may cover up the hole with the wooden dowels given only. Having one screw installed for the top horizontal slab will not interfere with the stability of the door, having wood glue used in the process of putting the slabs together will help to secure them in place.
STEP 1
STEP2
WARNING
If you purchased our Sliding Barn Door Hardware Kit to accommodate with this door please do not install the long bolts on the first hole. This will interfere with the installation of the rollers. You may cover up the hole with the wooden dowels given only. Having one screw installed for the top horizontal slab will not interfere with the stability of the door, having wood glue used in the process of putting the slabs together will help to secure them in place.
STEP3 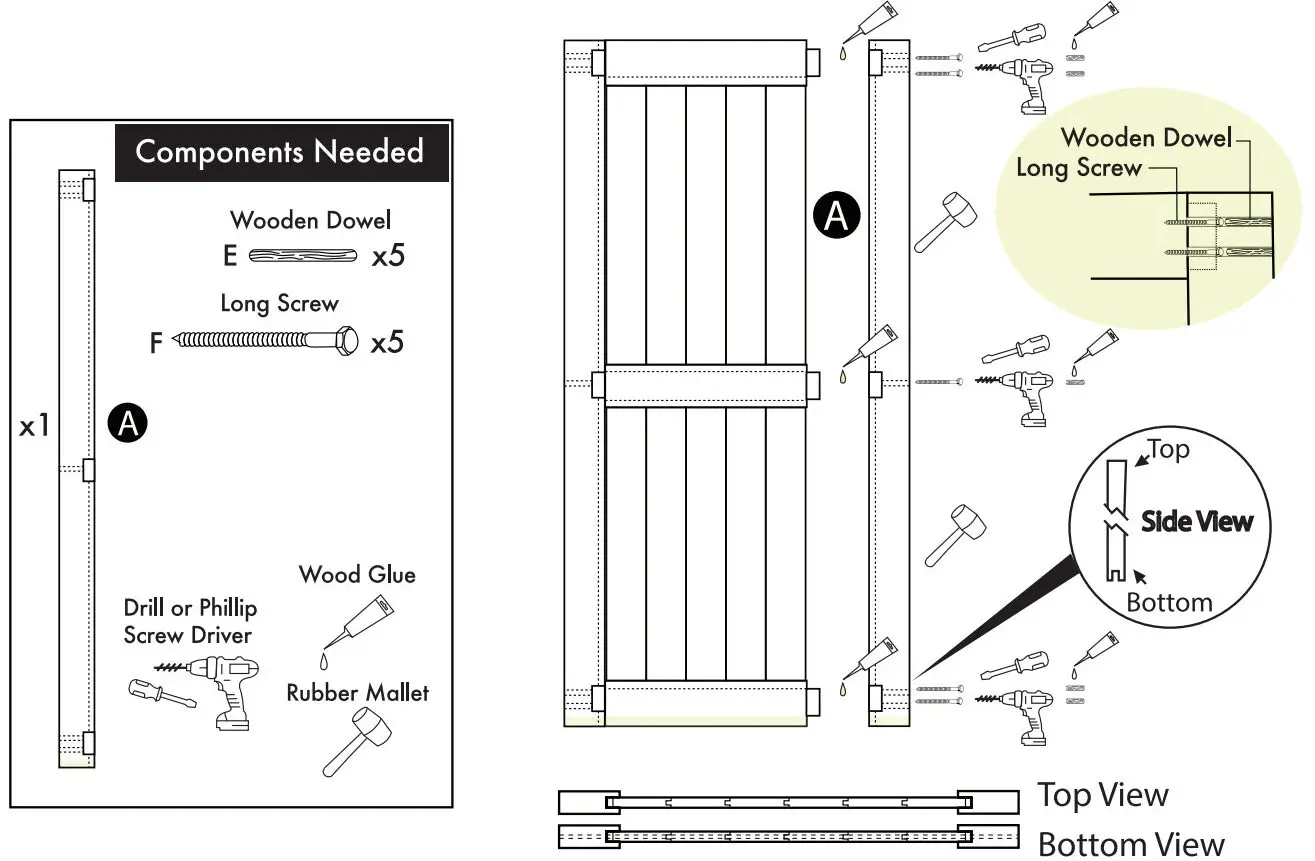
ON YOUR OWN PREFERENCE
You may fill in the extra holes left from the dowels with wood glue or cut down the dowels that is sticking out of the door after installing. Then sand off to smoothen the sides and the whole door to prepare for the finishes need for your door. This will help to make the sides of the door flawless and help camouflage the predrilled holes.
If you want the classic design, your installation is complete!
NOTICE
But if you want to build other designs besides the classic please continue to page 5.
Before Installing the decorative panels make sure to differenctiate the top and the bottom of the door(s). That way you can place the panels, and position it in the desired design.
Single X Door Design
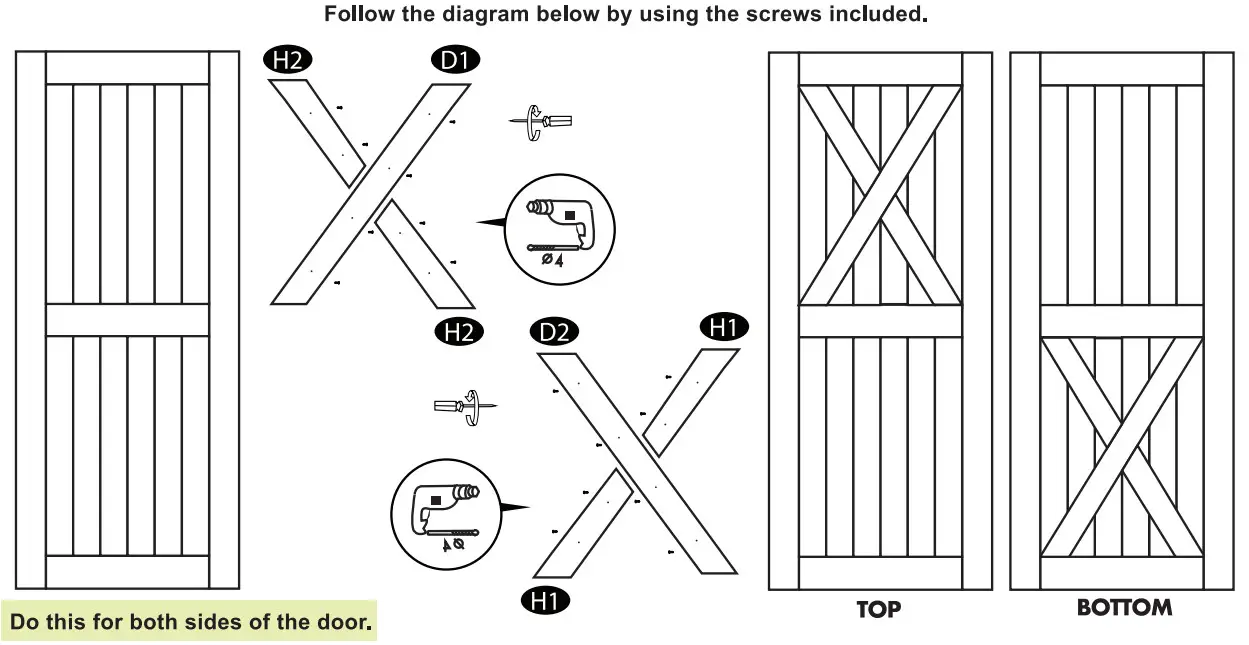
Double X Door Design 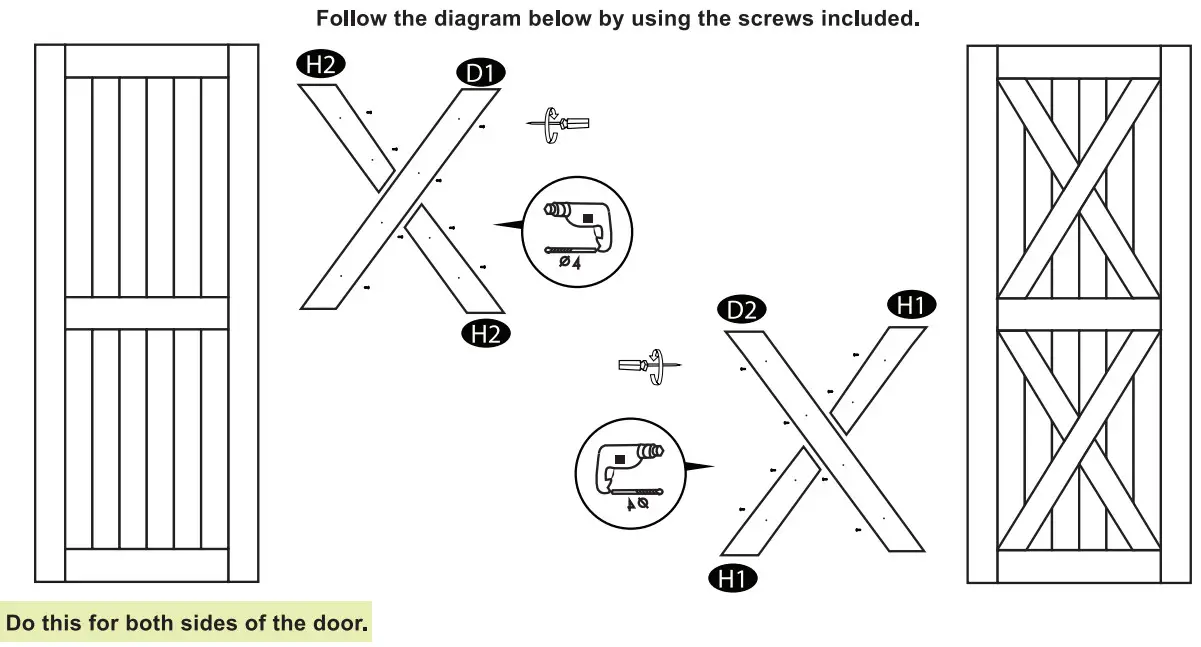
Left Arrow Door Design
Right Arrow Door Design
 YOUR INSTALLATION IS COMPLETE!
 ![]()
SLIDING HARDWARE/ BARN DOORS
High Quality • Exquisite Design • Outstanding Services
ABOUT US
At Homacer, our goal is to provide the finest sliding barn door hardware products and services for our valued customers. We keep polishing our products to make their quality better, prices lower and installation easier. We make it possible for you to get everything you need from us when you think about installing sliding barn doors.
CONTACT US
Customer Services
Office#: 1 (770) 864-5437
Website: www.homacer.com
Email us: [email protected]
Bulk Order Program
To learn more about bulk order
program you may contact us at
Office#: 1 (770)-559-5849
Website: www.homacer.com/pages/membership-program
Email us: [email protected]
LOCATION
1885 Beaver Ridge Cir, Ste A
Norcross, GA 30071


