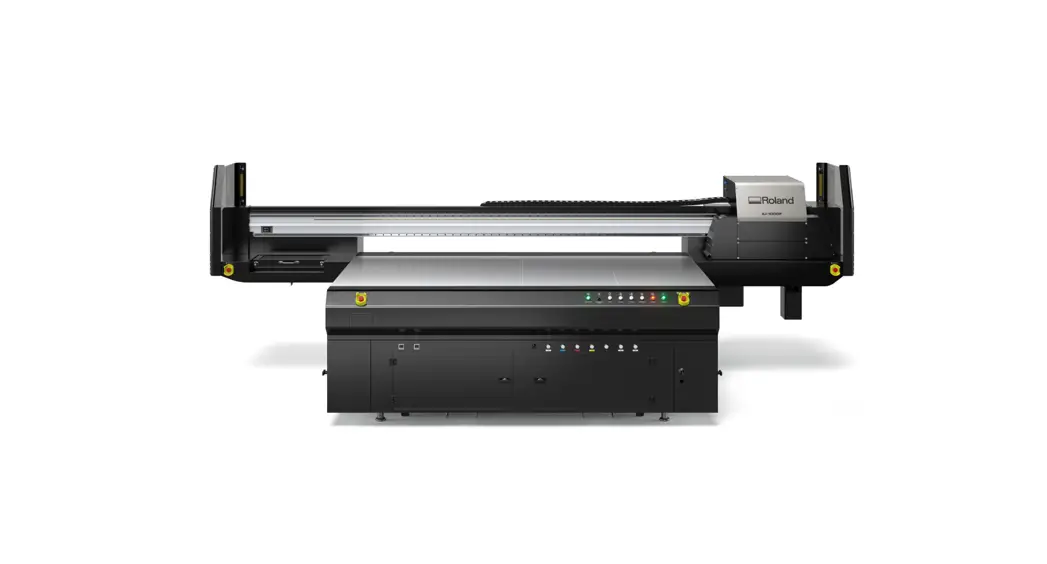
![]() EU-1000MF
EU-1000MF
Special Color Ink Guide
EU-1000MF Special Color Ink Large Format UV LED Flatbed Printer
This manual describes how to print using spot color ink.
Spot color inks such as gloss and white can be used as a base for printing color images or as a surface layer for adding gloss to color prints.
Thank you very much for purchasing this product.
- To ensure correct and safe usage with a full understanding of this product’s performance, please be sure to read through this manual completely and store it in a safe location.
- Unauthorized copying or transferal, in whole or in part, of this manual, is prohibited.
- The specifications of this product and the contents of this operation manual are subject to change without notice.
- The operation manual and the product have been prepared and tested as much as possible. If you find any misprints or errors, please inform us.
- Roland DG Corporation assumes no responsibility for any direct or indirect loss or damage that may occur through the use of this product, regardless of any failure to perform on the part of this product.
- Roland DG Corporation assumes no responsibility for any direct or indirect loss or damage that may occur with respect to any article made using this product.
Overview
Spot Color Printing
Spot color printing uses non-CMYK spot color inks. This enables printing of a color image on top of white ink to make the colors more vivid, or printing gloss ink on top of a color image to provide a gloss finish.
- Base (White ink)
- Image or illustration (CMYK)
- Finish (Gloss finish with gloss ink)
Workflow and Software Used
Workflow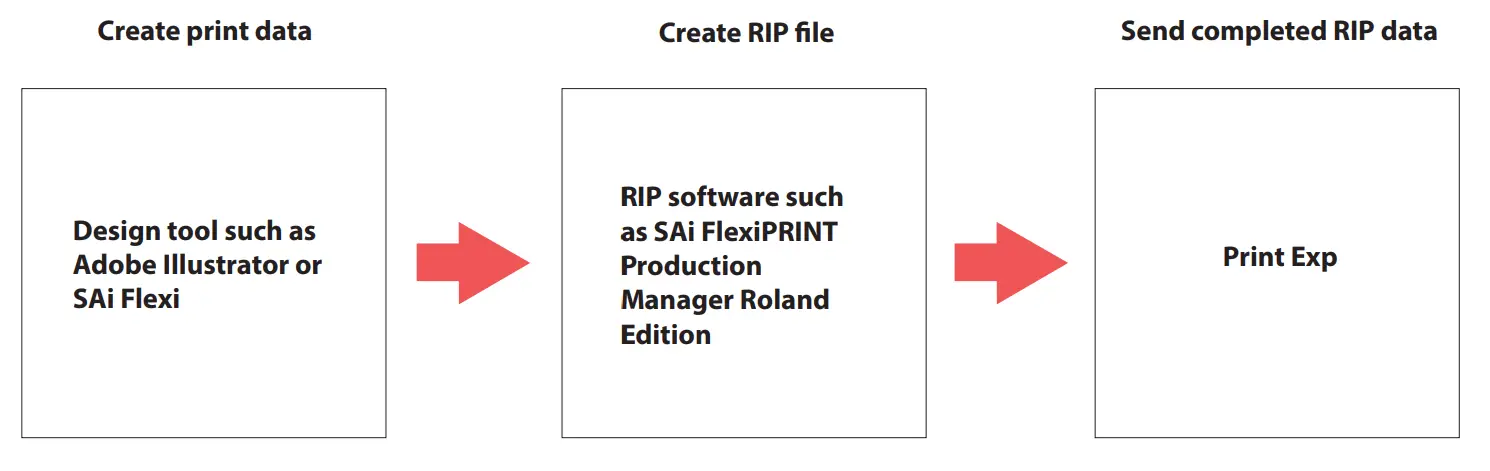
Software
| Type of software | Name of software | Function |
| Design software | Adobe Illustrator | Can be used to specify where to print white, and gloss inks within the print data. |
| RIP software | SAi FlexiPRINT Production Manager Roland Edition | Can be used to create a RIP file with registered printing conditions, layout settings, and spot color information. |
| Printing software | Print Exp | Can be used to load RIP files, configure spot color settings, and perform printing operations. |
Available Print Types
This section describes the types of printing that use white ink (Wh) and gloss ink (Gl).
Print types
Print Control can be used to specify the combination of color ink, white ink, and gloss ink. Cyan, magenta, yellow, and black are referred to as 4C.
- Gloss ink
- Color ink
- White ink
| Color set | Application example | Overview |
| [26] 4C + WV (Wh – 4C) |  | White ink is used as the base for color ink. |
| [26] 4C + WV ( 4C – GI) | | Gloss ink is applied on top of color ink. |
| [26] 4C + VW (Wh – 4C + GI) | | White ink is used as the base for color ink. Coating with gloss ink is applied on top of color ink. |
| [26] 4C + WV (4C – W) | | White ink is used on top of the color ink. This is mainly used for reverse printing on transparent media. |
MEMO
Select [[26] 4C + WV] when printing with color ink and spot color ink. Select [[26] 2 (4C)] when printing with just CMYK.
Print Data Types
Spot color print data comes in one of the following patterns.
Spot color-only printing
Print data for spot colors must be created. ” P. 5 “Creating Print Data for Spot Colors”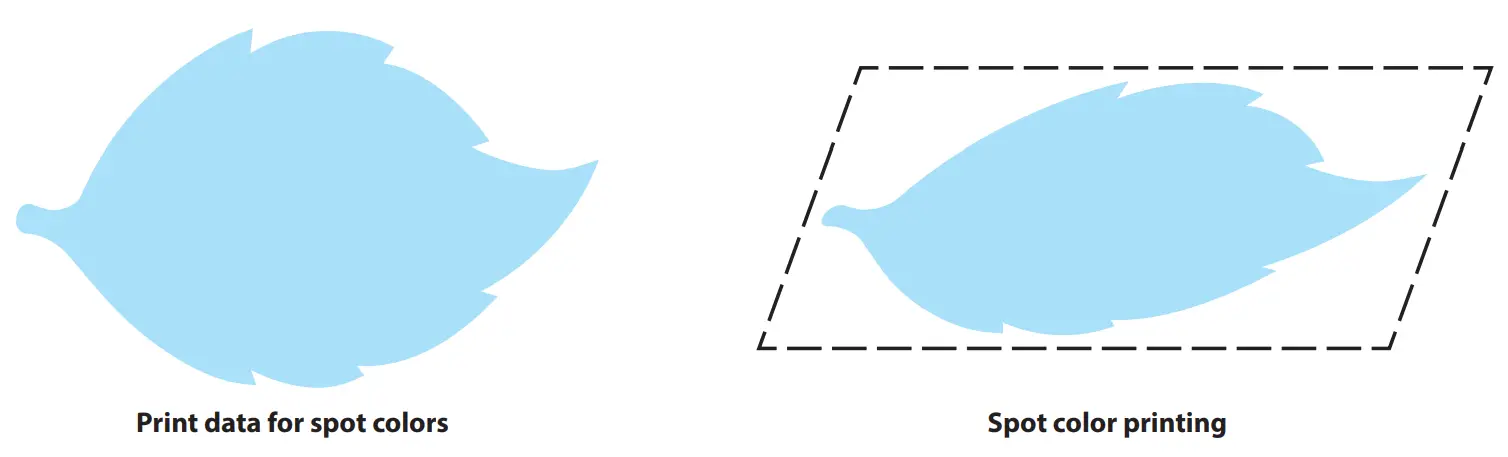
Spot color printing in layers with patterns
Print data for spot colors must be created.
” P. 5 “Creating Print Data for Spot Colors”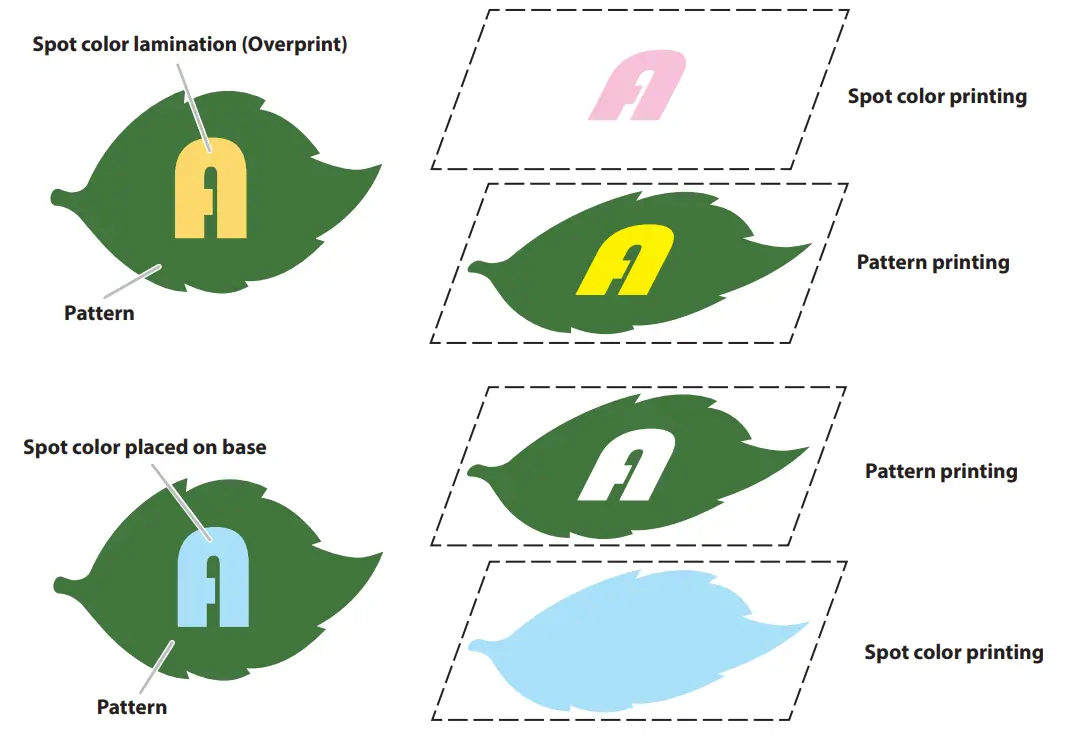
Even without creating print data for spot colors, spot color settings can be configured using the “Print Exp” printing software.
” EU-1000MF User’s manual
Printing
Creating Print Data for Spot Colors
This section describes how to create the following print data using Adobe Illustrator.
Laminate the pattern using gloss spot color, and print white spot color on the base.
- Finish (Gloss finish with gloss ink)
- Image or illustration (CMYK)
- Base (White ink)
Procedure
- Configure the layer settings.
Make three layers, and stack them as shown in the figure.
Configure the settings for each layer ([1] to [3]) as follows.
Layer name Swatch (*1) Overprint Fill (*2) Layer [1] Gloss Spot2 On Layer [2] CMYK No On Layer [3] White Spotl Off *1: Specify a swatch for each object within a layer.
*2: “Overprint Fill” in the “Attributes” window
IMPORTANT
If the overprint settings are not configured, areas that overlap the object below will not be printed. - Specify a spot color.
Create two new swatches, and configure the settings as follows.
Swatch Name Color Type Swatch [1] Spot1 Spot color Swatch [2] Spot2 Spot color IMPORTANT
A spot color must be specified for every object printed with white or gloss ink. This ensures the RIP software and the printer can recognize the print area for the spot color correctly. Configure the settings as indicated below.Spot color ink Swatch Name Color Type White Spot Spot color Gloss Spot2 - Save the print data.
Save the print data in AI or PDF format.
Creating a RIP File
This section describes how to create a RIP file using SAi FlexiPRINT Production Manager Roland Edition. For information on how to create files using other RIP software, contact the applicable software distributor.
MEMO
- Selecting an output profile that is suitable for the color set used for spot color printing from the general-purpose profiles available ensures output with optimal color
management. - For basic information on using the RIP software, such as how to set the media size and layout for print data, refer to the Help manual included with the software.
- Read the spot color print data or pattern print data using the RIP software.
Add the print data as a RIP software job. - Double-click the added job.
Double-click to open the [Job Properties] window.
- Click the [Color Management] tab.
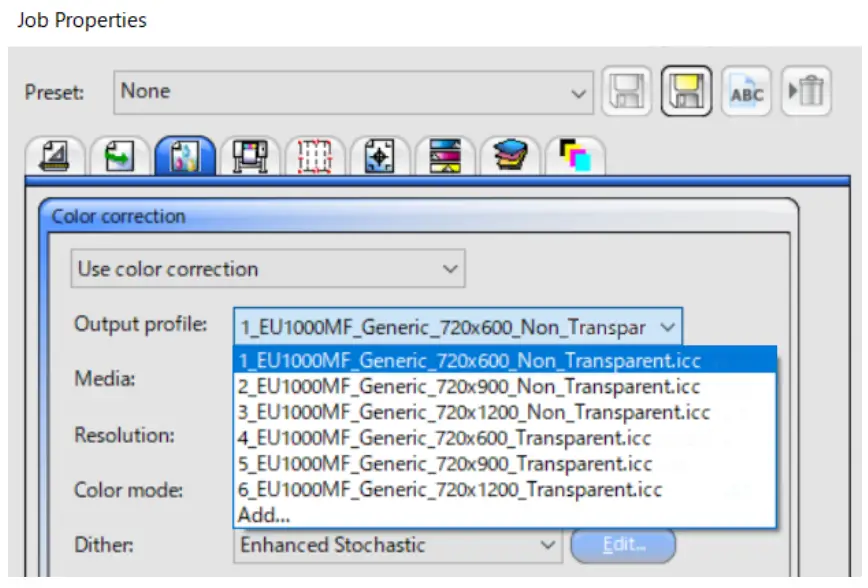
Select the best profile for [Output profile].
MEMO
Output profile names are structured according to the following rules. Refer to these rules to select the best profile.

- Printer name
- Resolution (720 × 1200 dpi, 720 × 900 dpi, Standard: 720 × 600 dpi)
- Media type (Non-Transparent: Other than transparent media, Transparent: Transparent media)

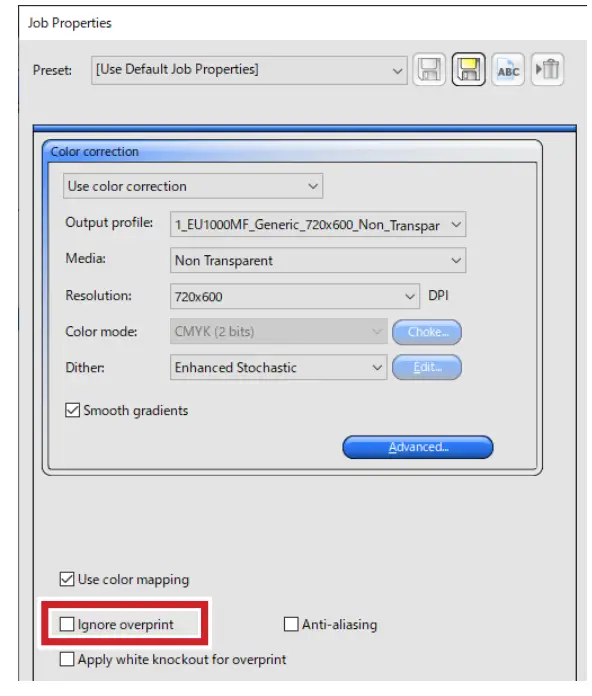
- Configure the overprint settings.
If [Overprint Fill] is set for print data objects, do not check [Ignore overprint] on the [Color Management] tab.
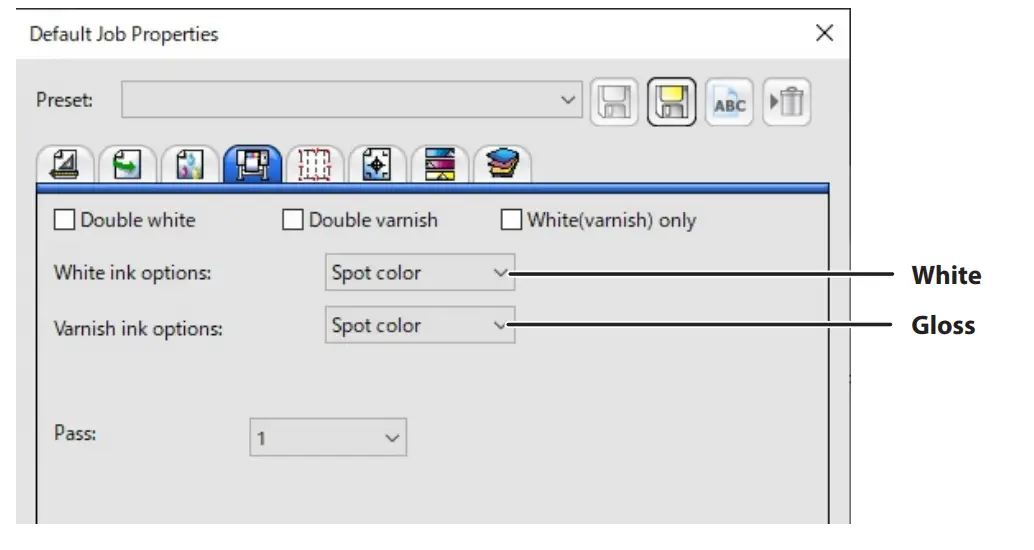
- Configure the spot color settings.
Set “White ink options” and “Varnish ink options” to [Spot color] on the [Printer Options] tab. MEMO
MEMO
When printing only gloss ink as a spot color, also set “White ink options” and “Varnish ink options” to
[Spot color]. - Click [OK].
- Perform RIP processing using the print data.
After configuring the job property settings, click the [Send] button to save the file to a folder.
 MEMO
MEMO![]()


