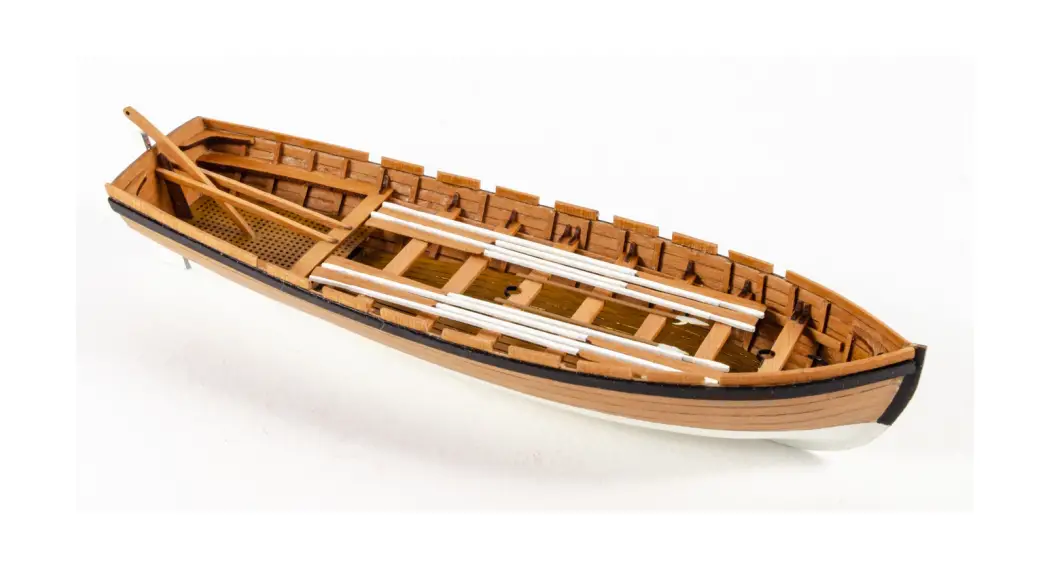
![]() **26ft Launch**
**26ft Launch**
KR-62144 26 Inch Wood Boat
Instruction Manual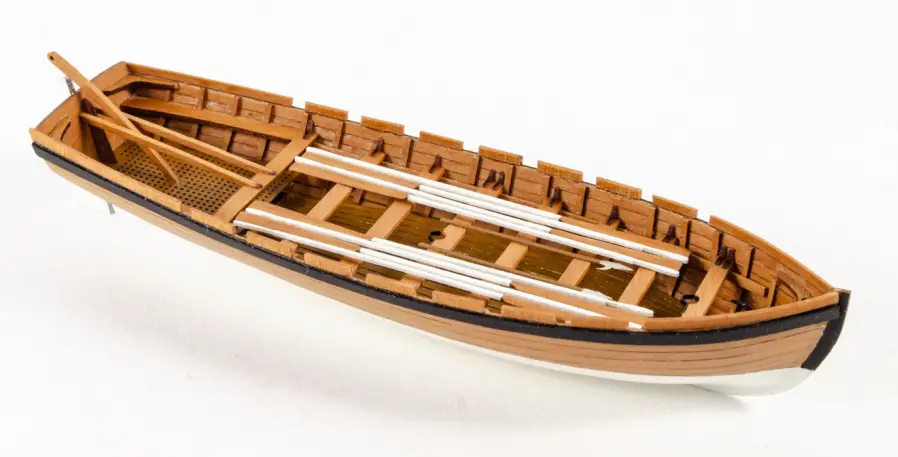
Recommended tools:
- Sharp knives such as a scalpel, X-acto, or Stanley.
- Sanding sticks or abrasive papers (110 – 320 grade)
- Steel rule
- Needle/jeweler’s files
- Small clamps
- Small tweezers
- Masking tape (Tesa, Tamiya etc.)
- Fine paintbrushes
- Titebond I/II wood glue
- Gorilla Glue CA gel
Recommended Paints etc.
- Plastikote matt white spray
- Plastikote matt black spray
- Vallejo black and brown acrylics
- Mr. Metal Colour aluminum paint
- Ronseal Matt Polyurethane varnish
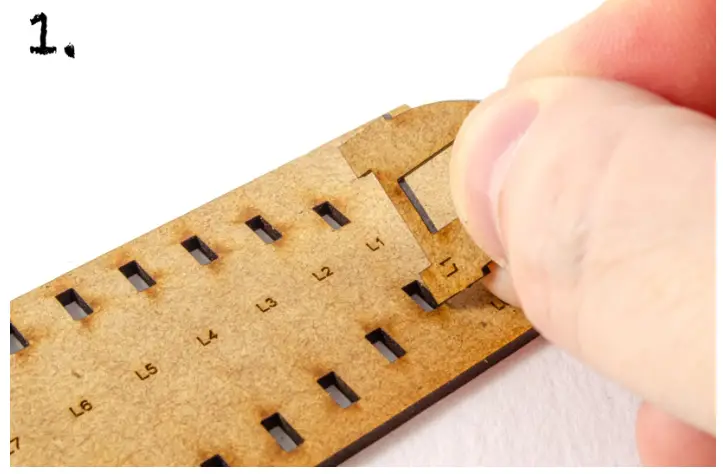
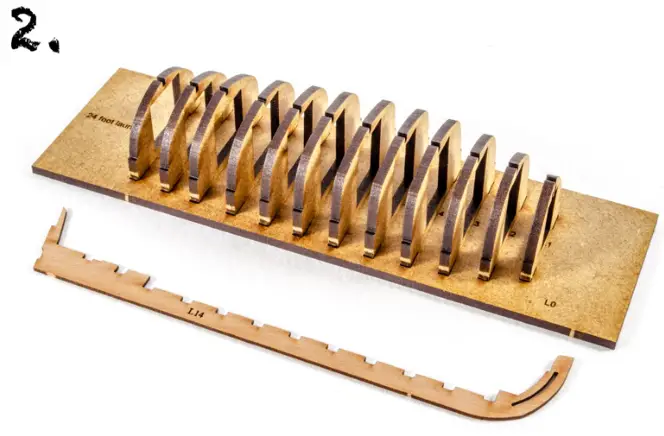
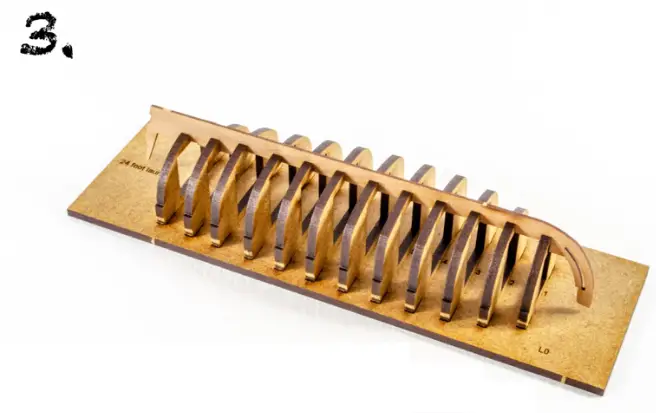
- Remove all parts from the 2mm MDF sheet and sit each bulkhead into its corresponding position on the base. Do NOT glue.

- With all bulkheads in position on the base, remove the keel 114 from the 1mm pear wood sheet.

- Sit the 1mm pear wood keel into the slots on each bulkhead. You may need to joggle things about to get it to sit. Once in position, brush wood glue into each joint and allow it to thoroughly dry.

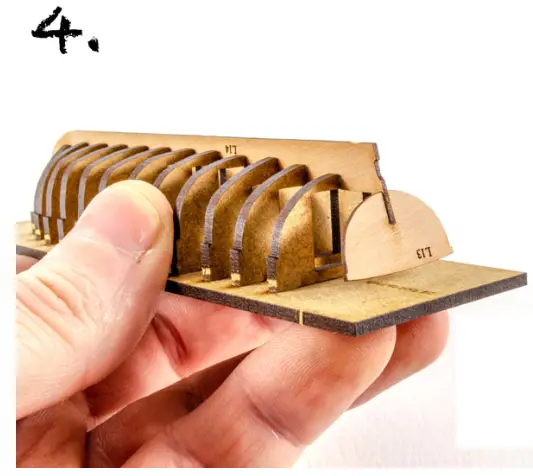
- Remove the stern board 113 from the 1mm pear wood sheet and glue it into position on the keel as shown here. Allow to thoroughly dry.
Please note that we have added fi>st+rnfatig:7crititrittjowa to provide strength to your hull as you work on it, and it will be removed later in construction.
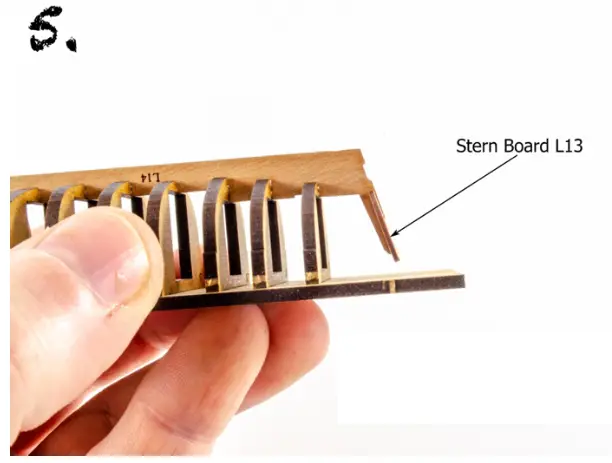
- The stem board L13, must slope at the same angle as the keel stern, and be flush with its outer edge.

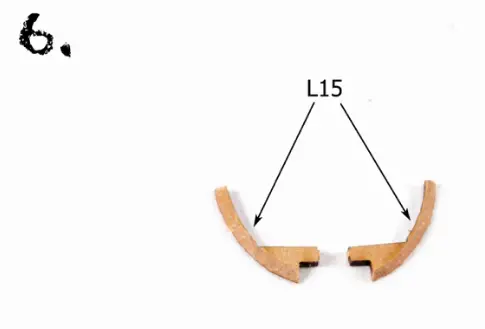
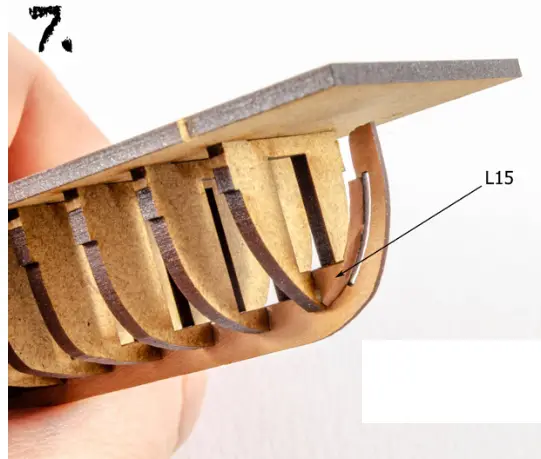
- Cut the two bow planking patterns L15, from the 1mm pear wood sheet and bevel the forward edges on one side, as seen in this photo.

- Glue the two bow planking patterns L15 into position on the keel as shown here.

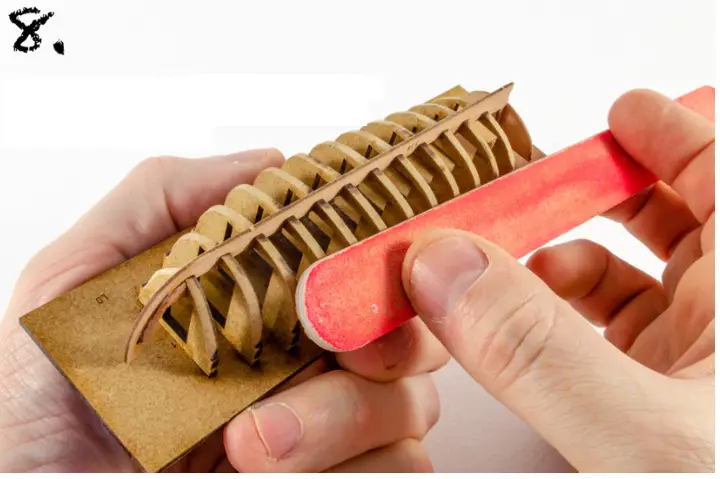
- Sand/fair the bulkheads using sandpaper or a sanding stick, so a plank will lie evenly over the beveled bulkheads.

- If you decide to soak the first planks to bend them, make sure you allow to thoroughly dry before fitting them.

Lie the first of the hull planks L29, from the 0.6mm pear wood sheet, in place as shown. This sits against the shoulders of the MDF bulkheads. We advise using wood glue for this, and not CA.

- Note that the plank sits on the bulkheads with as much surface contact as possible due to previously bevelling the bulkheads.

Using more 0.6mm planks (L29), continue to plank upwards towards the -first keel. To get maximum contact with the bulkheads, you will need to taper the planks. The pencil marks seen here are where these were tapered from. Edge-bevelling the planks will allow them to sit snugly together too. You will probably find it necessary to start planking from the keel at some point and meet up with the previous planking.

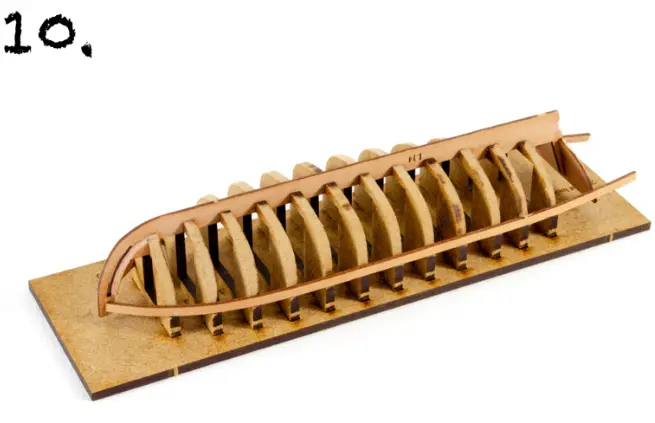
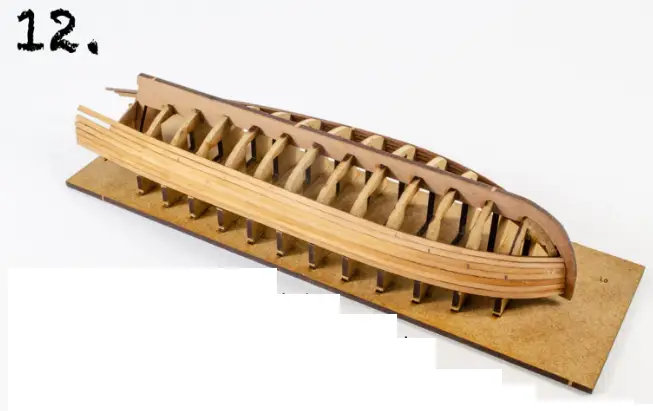
Here you can see the completed planking. It’s perfectly ok to use infill planks (stealers) to close up any gaps, as these won’t be seen underneath the paint layer. You can see the infill planks in this photograph.

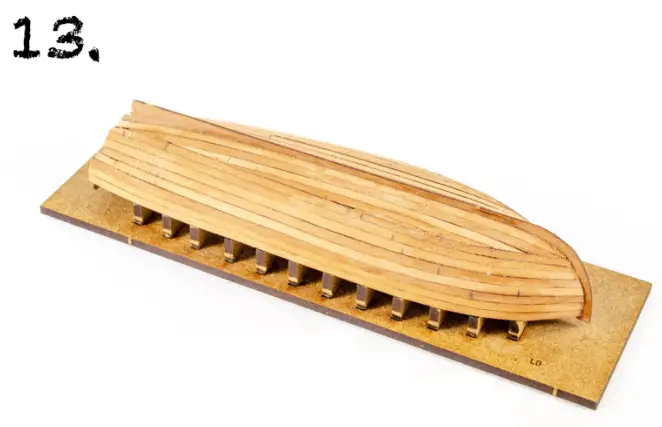
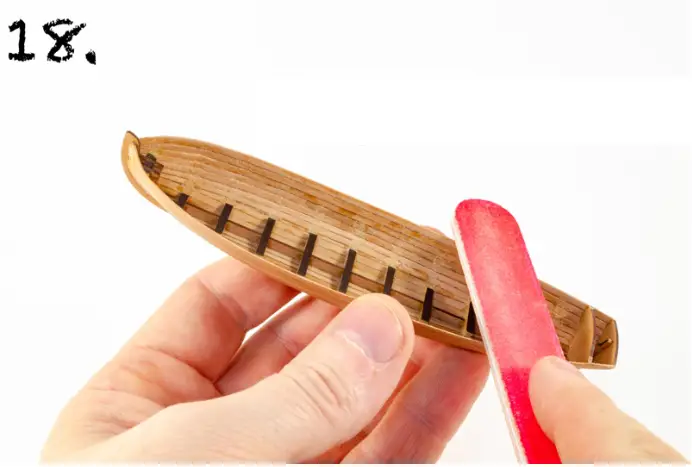
Sand the hull smoothly using 110-grade abrasive paper to start with and finish with finer grades. We suggest any imperfections are filled with an acrylic filler and diluted with water.

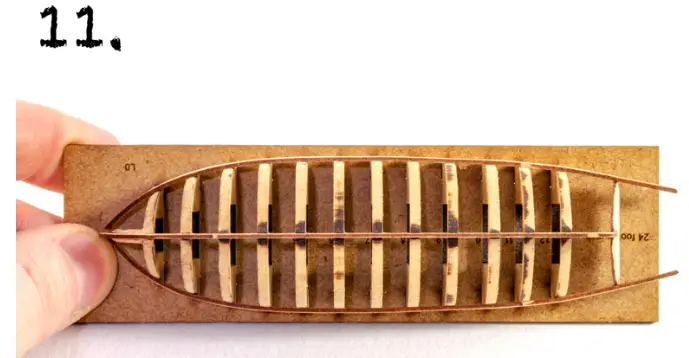
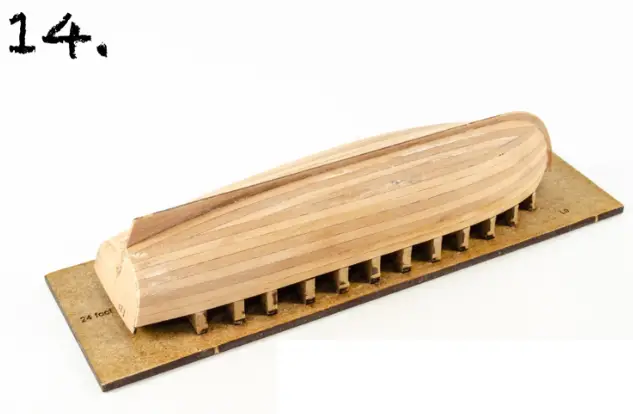
- Remove the hull from the base. You can now discard the base part.

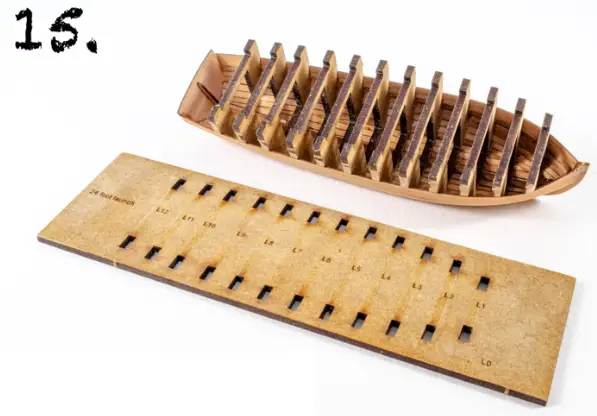
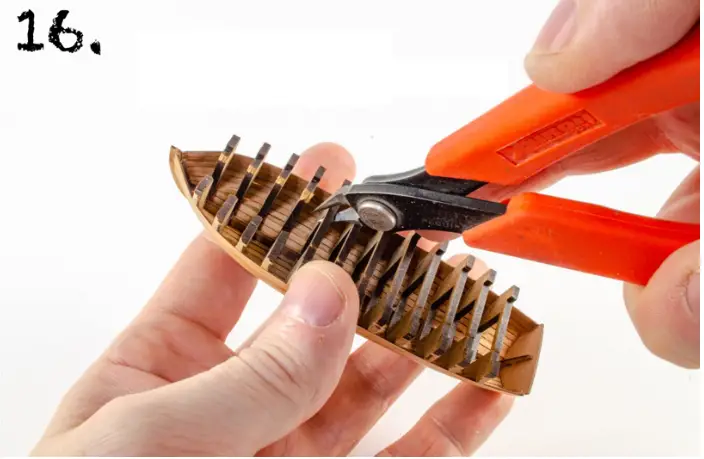
- To remove the MDF bulkheads, first, snip away the bridge on each one.

- Using pliers, twist at each bulkhead to carefully remove it.

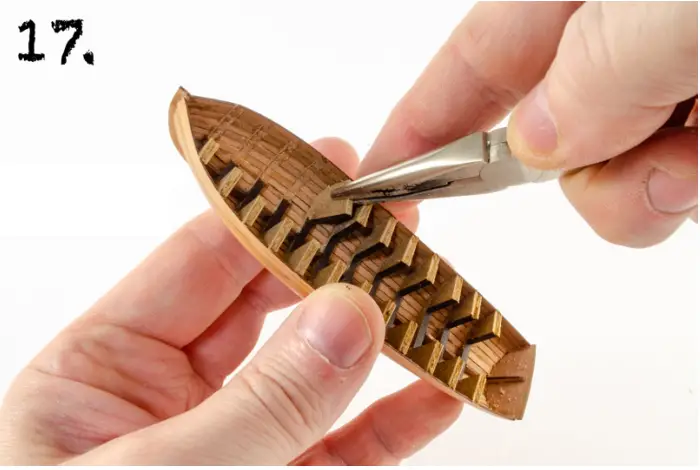
- You can now use a sanding stick to draw over the upper edges of the bulwarks, to level them evenly.

- Carefully sand the inside of the hull to smooth things out and remove any glue remnants.
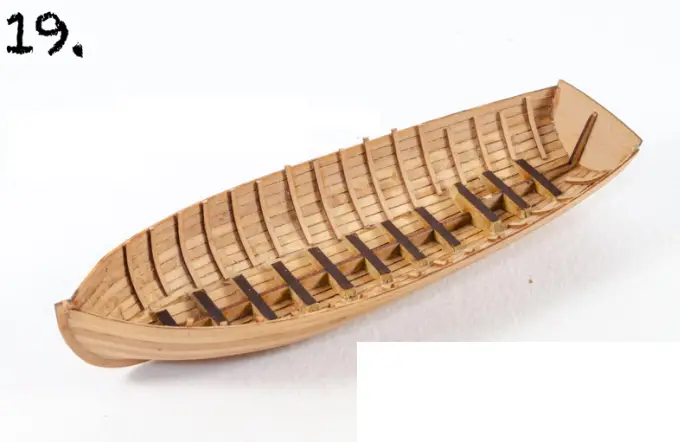
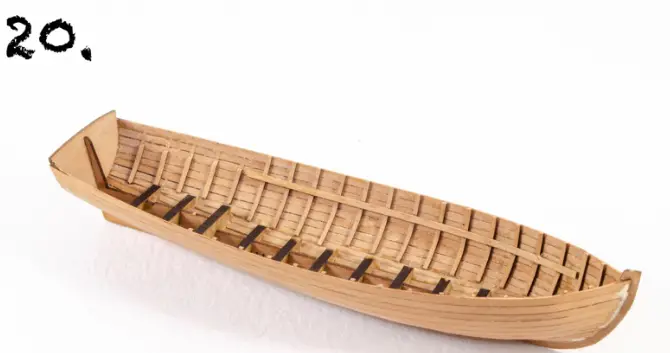
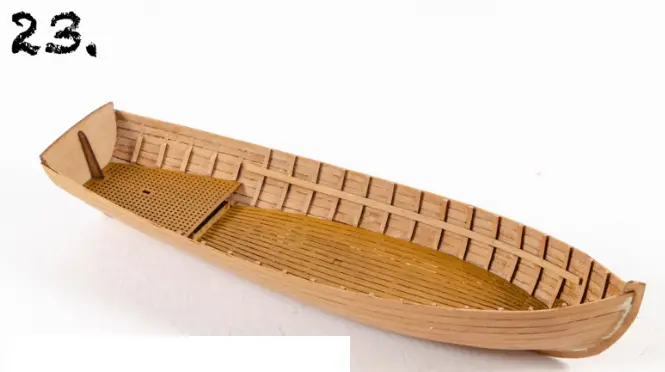
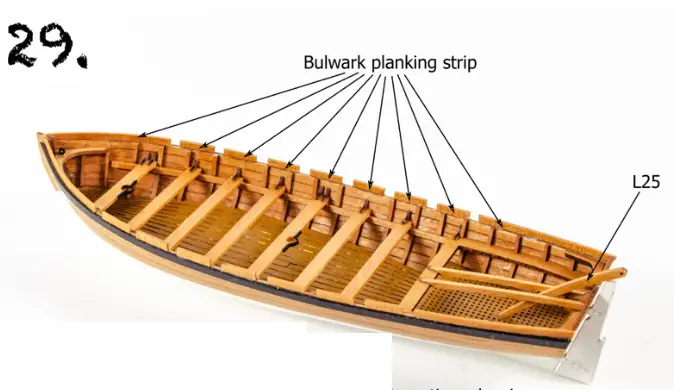
Cut the rib strips (L30) from the 0.6mm pear wood sheet and glue them into place inside the hull as seen here. Space them about 5 – 6mm apart.
Use a pencil to make a mark on the ribs which are 4.5mm down from the upper bulwark. Glue the seat support strip, 131, underneath those marks and allow to thoroughly set. Note the rear ribs have been cut down so the seat, 1_27, can sit in place.

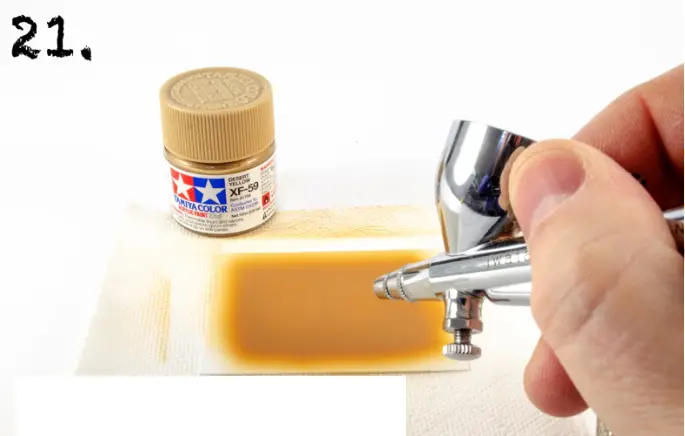
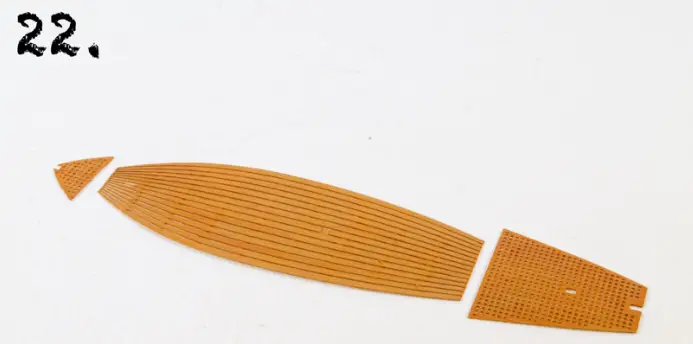
- OPTIONAL: To create a wood finish for the PE floor sections, you can first apply a coat of Tamiya XF-59 Desert Yellow.
 Spots of Raw Umber oil paint can now be randomly applied to the previous oil paint covering.
 You can make your wood effect as subtle or coarse as you wish.
 On top of the paint, you can now apply a very thin coat of Raw Sienna oil paint, using a piece of foam.
 Using your foam sponge, drag the dark oil paint spots into the lighter layer below. Keep doing this until you achieve the desired result.
 A fan brush could also be used to create knot effects and a more natural flow to the grain.
Once you have painted your photo-etch floor sections, set them aside and allow them to throughly dry. If you used the oil paint technique, you should leave the parts between 24 and 48hrs.

- Use CA to glue the deck sections into position as shown.

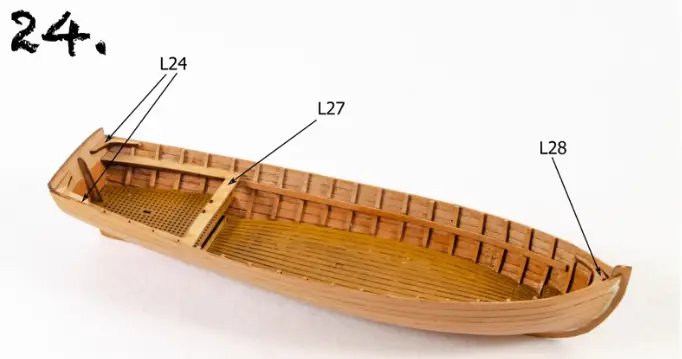
- Glue seat L27, knees L24, and the bow bracket L28 into position as shown.

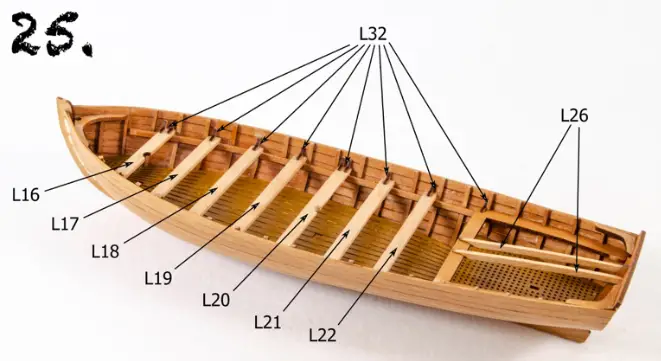
- Fit the seats L16 through to L22, and the knees L32. Also, glue parts L26 into position.

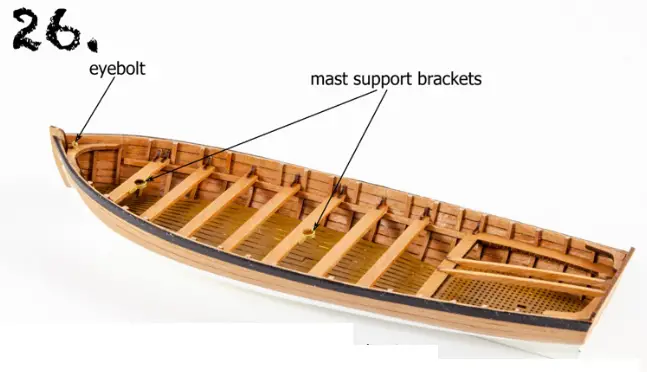
Mark a waterline on the hull and paint the lower area white. Take two planking strips and paint those black. Glue them into position so they are level with the upper bulwark. Bend and glue the mast support brackets into position and paint black. Also, fit the eyebolt and paint black.

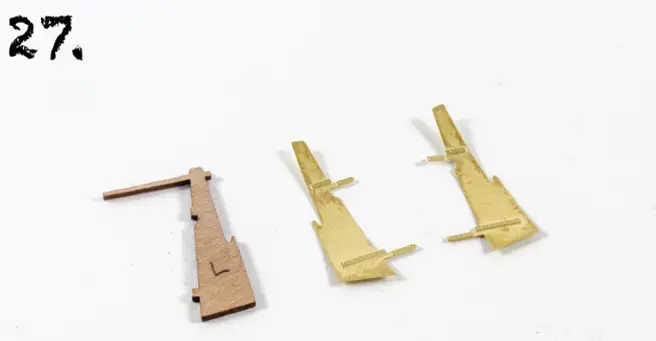
Cut the rudder (L23) from the 1mm pear wood sheet and also the rudder side patterns from the PE sheet. For this boat, you can remove the rudder tiller as there is a separate arm to be fitted within the boat. It’s up to you.

- Glue the rudder side patterns to the rudder as shown here. We recommend using CA gel as it allows time to position the parts before the glue sets.

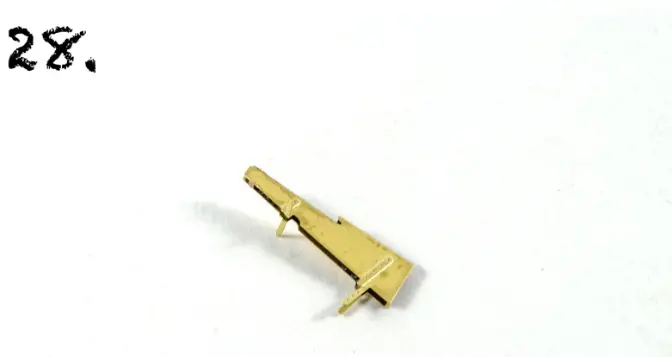
Use CA to glue the rudder in place and there’s part 1.25. L25 fits into the hole in the rear deck. Use more planking strips to add the upper bulwark sections, leaving gaps to create the rowlocks.

- Use CA to glue the anchor together and then paint black.

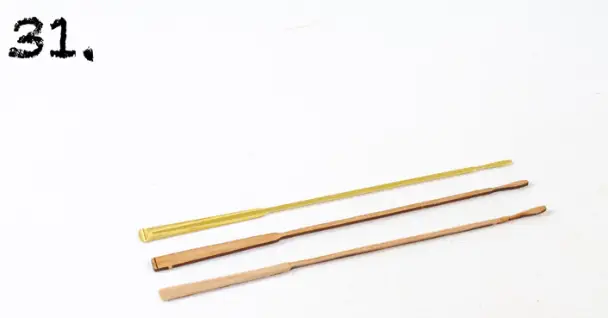
You are given the choice of using either photo-etch or wooden oars. If you use wooden ones, sand the paddle to shape and slightly round the handle. To paint, we chose white for the handle with a varnished paddle. The paddle tip is painted in copper.

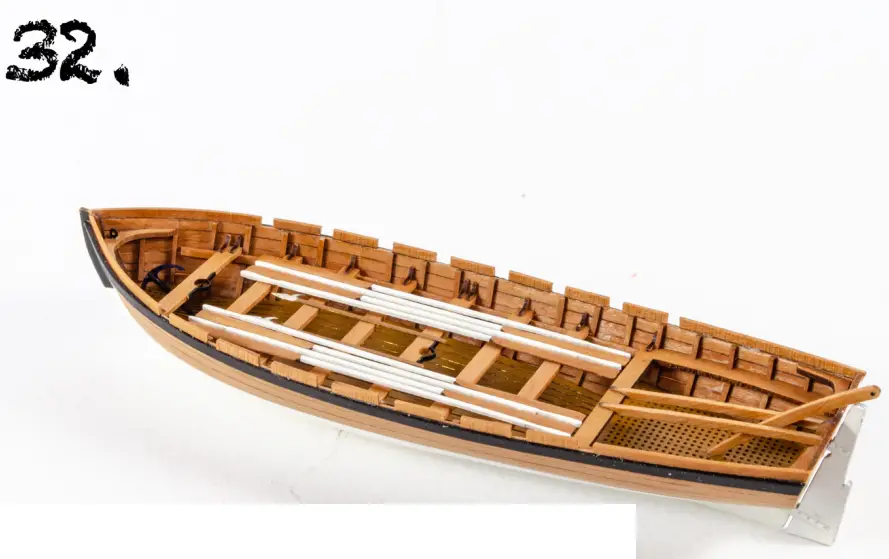
- Glue the oars and anchor into position and also the boat hooks. The latter should have wooden painted handles and metal tips.


 Spots of Raw Umber oil paint can now be randomly applied to the previous oil paint covering.
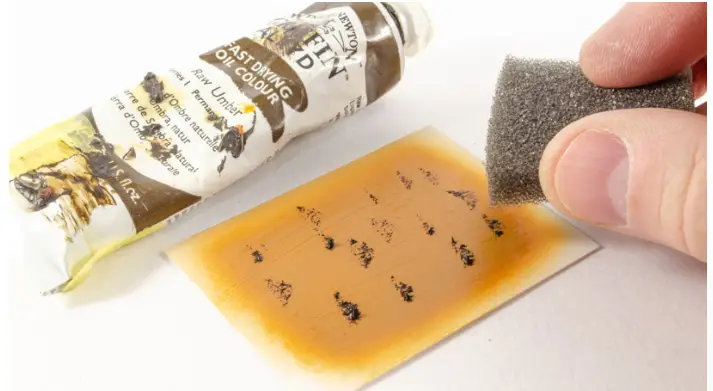 You can make your wood effect as subtle or coarse as you wish.
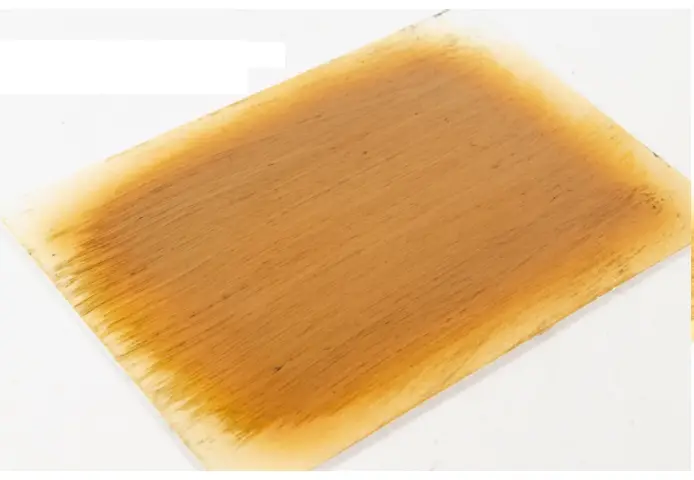 On top of the paint, you can now apply a very thin coat of Raw Sienna oil paint, using a piece of foam.
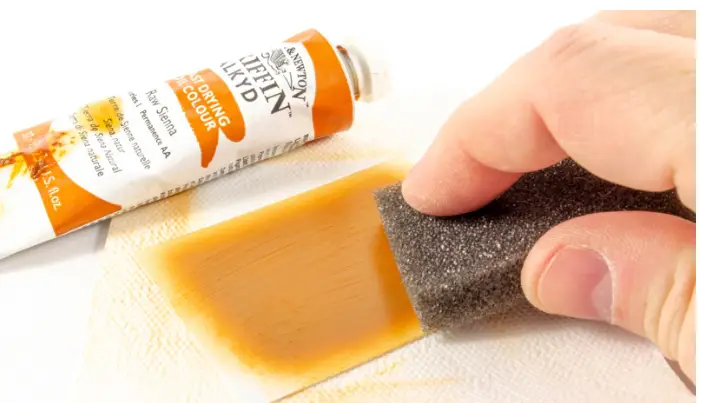 Using your foam sponge, drag the dark oil paint spots into the lighter layer below. Keep doing this until you achieve the desired result.
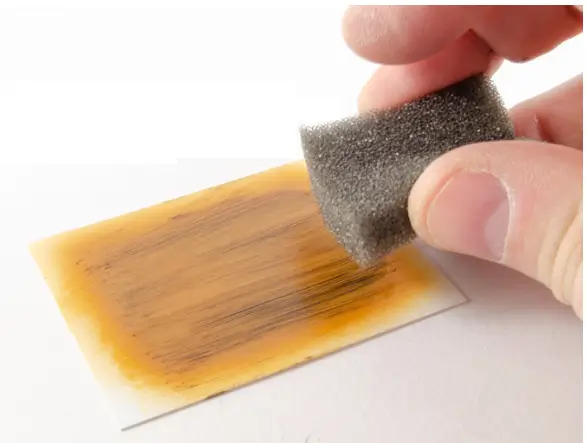 A fan brush could also be used to create knot effects and a more natural flow to the grain.

All text and images Copyright ©2021 Vanguard Models
Prototype Model built by Jaes Hatch. Actual products may vary slightly.


