![]() Z40 Desktop Laser Engraving and Cutting Machine
Z40 Desktop Laser Engraving and Cutting Machine
Instruction Manual
Z40 Desktop Laser Engraving and Cutting Machine
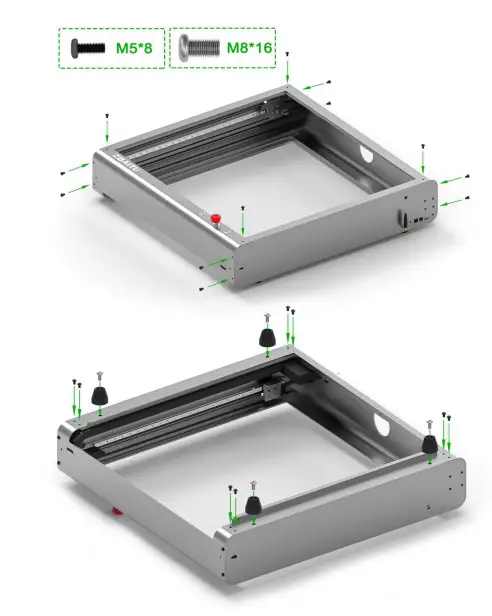
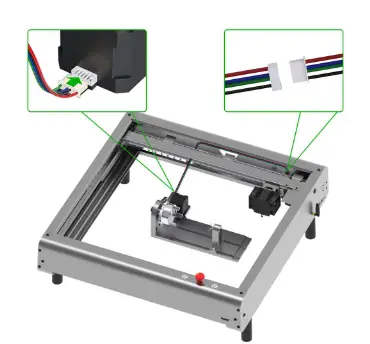
![]() The screws are used to set the tension of the timing belts. Do not fully tighten them. Otherwise, the timing belts may be damaged.
The screws are used to set the tension of the timing belts. Do not fully tighten them. Otherwise, the timing belts may be damaged. 
![]() Use hexagonal screwdriver to loosen and tighten screws, Adjustable X-axis belt tightness.
Use hexagonal screwdriver to loosen and tighten screws, Adjustable X-axis belt tightness. 
![]() If you can’t put the shaft through the timing belt, the possible cause is that the timing belt is set too tight. You can adjust its tension by turning the screw.
If you can’t put the shaft through the timing belt, the possible cause is that the timing belt is set too tight. You can adjust its tension by turning the screw. 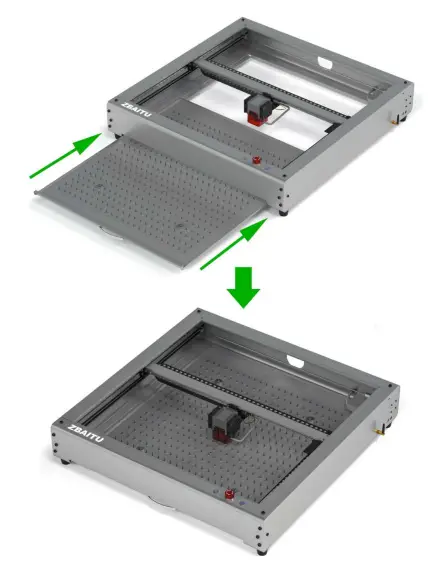
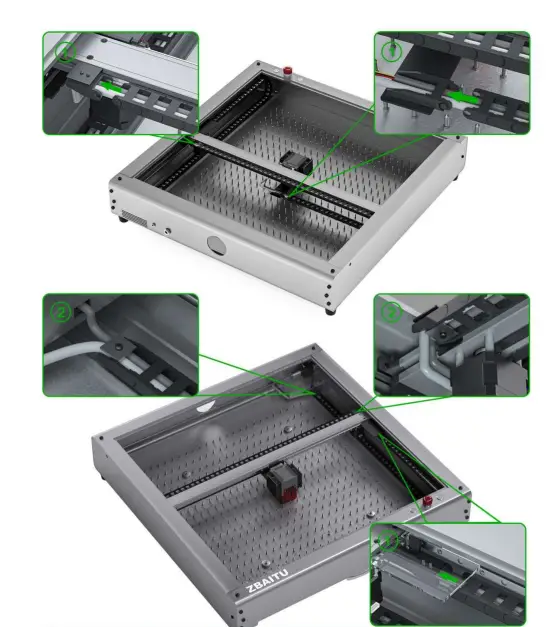
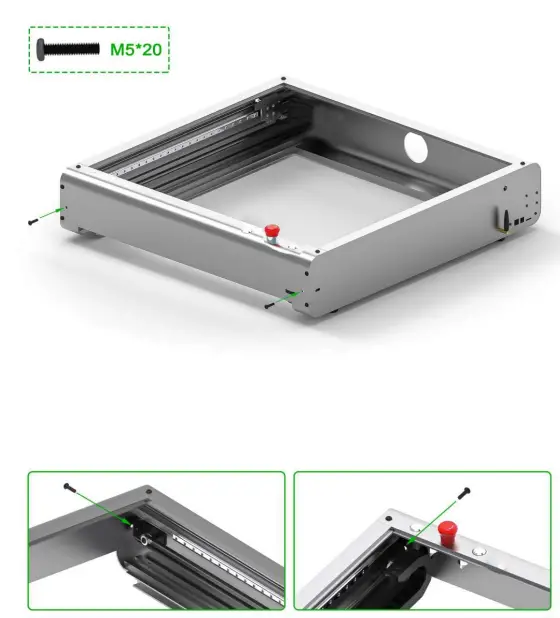
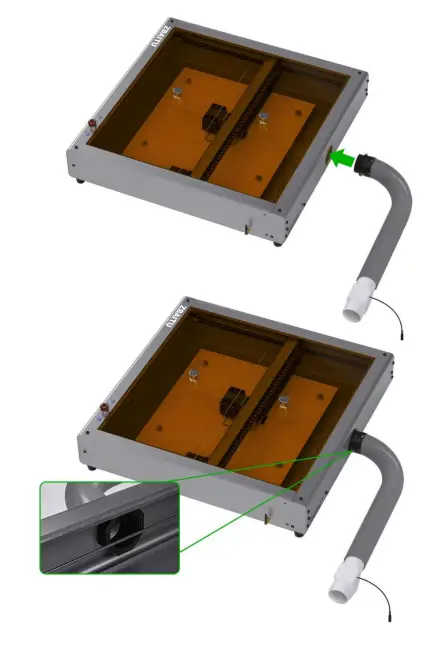
![]() Buckle up the drag chain buckle Then you can use it normally. 0 Fix the air tube & wire to avoid the movement of the air tube during the running of the drag chain.
Buckle up the drag chain buckle Then you can use it normally. 0 Fix the air tube & wire to avoid the movement of the air tube during the running of the drag chain. 

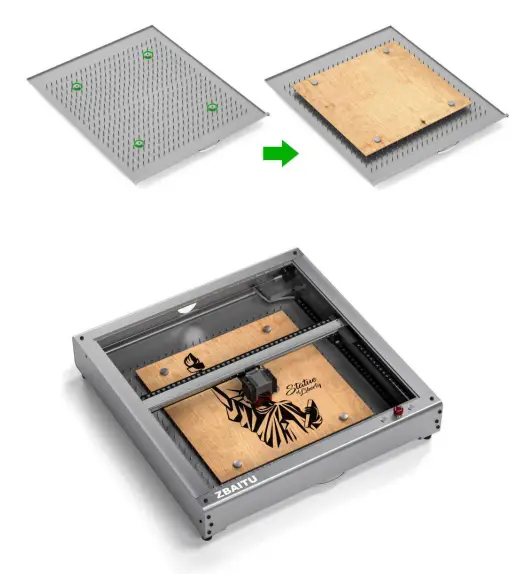
![]() Use magnets to hold engraved objects in place.
Use magnets to hold engraved objects in place. 
 Offline Button Function (make sure the machine is standby):
- Preview: press and hold for 3 seconds to start preview.
- Start: short press to start cutting/engraving.
- Pause/resume: during working, short press to pauses; press again to resume.
- Stop: during working, press and hold for 3 seconds to stop cutting/engraving.
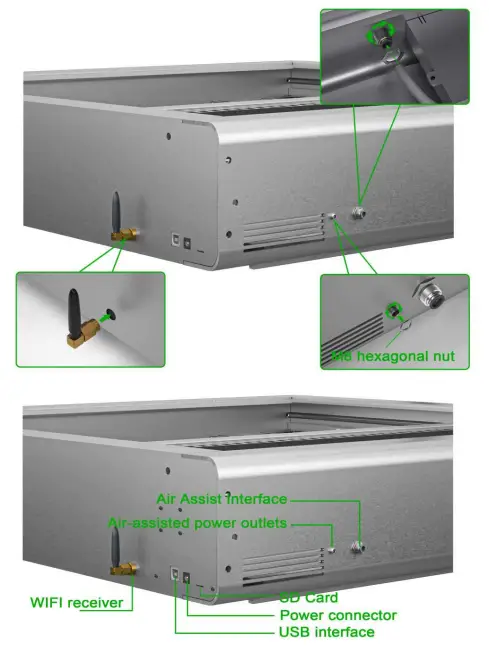
![]() Status Description Power Light: Green The light is blue and steady: Standby The light is blue and breathing: Working
Status Description Power Light: Green The light is blue and steady: Standby The light is blue and breathing: Working 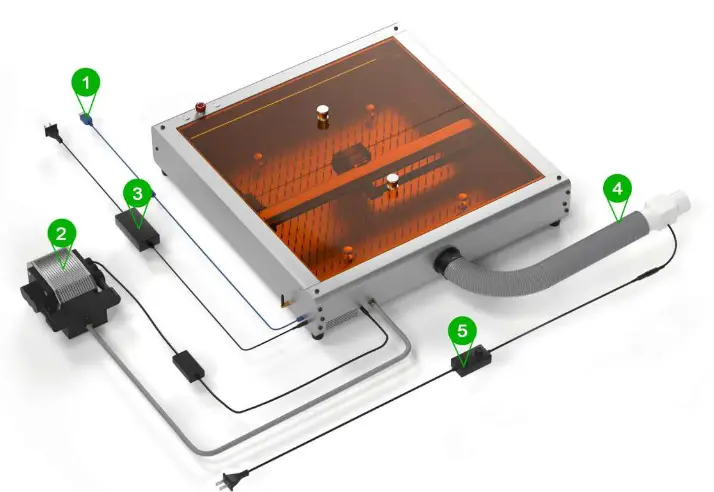
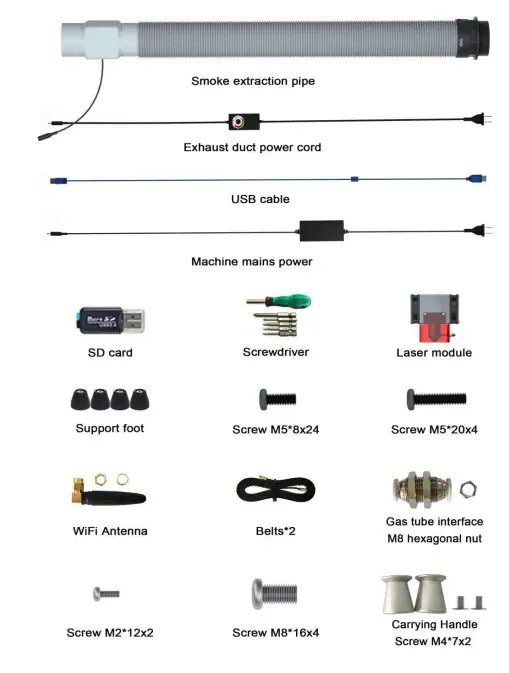
- USB connection cable
- Air Pumps
- Power cord
- Smoke extraction pipe
- Smoke evacuation tube power supply

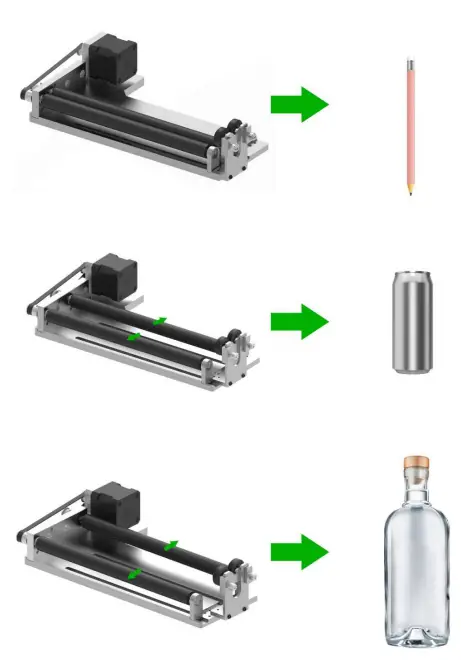
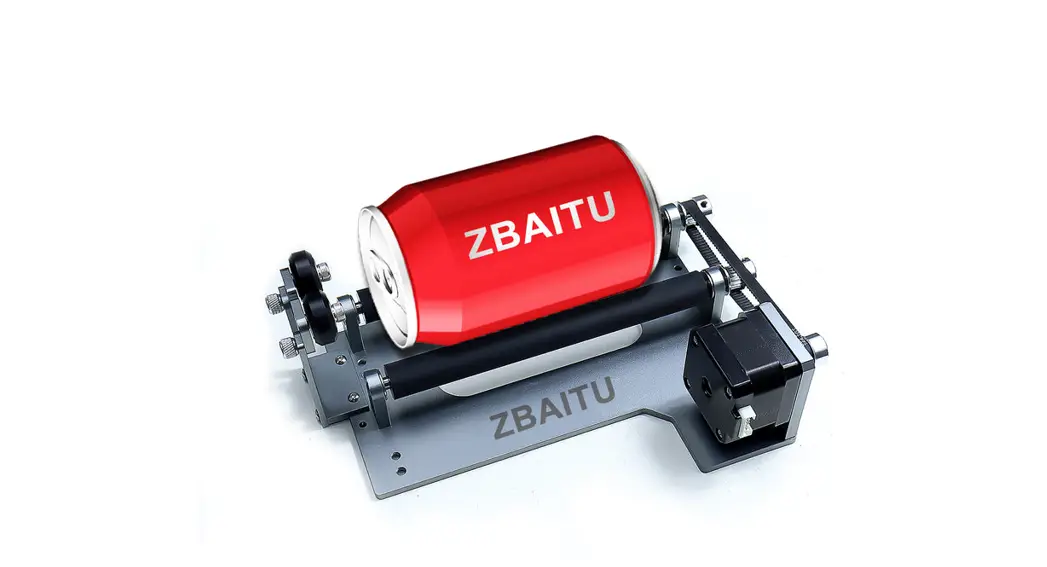
![]() Placing the swivel attachment parallel to the Before you attach it to the Z40, you may need to place the swivel attachment parallel to the working area of the Z40.
Placing the swivel attachment parallel to the Before you attach it to the Z40, you may need to place the swivel attachment parallel to the working area of the Z40.
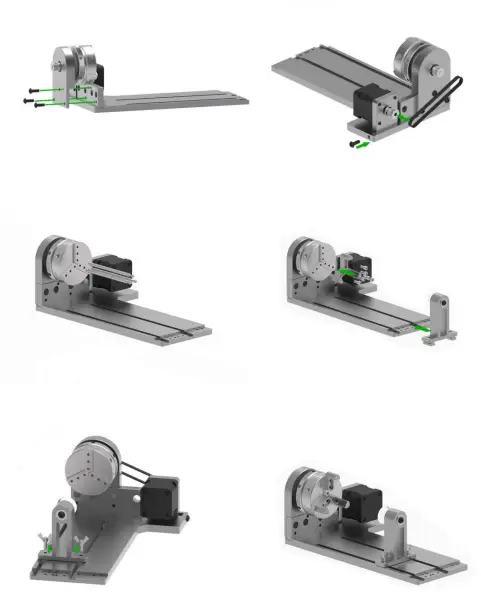
Unplug the Y-axis motor cable and connect to the rotary attachment power cable.
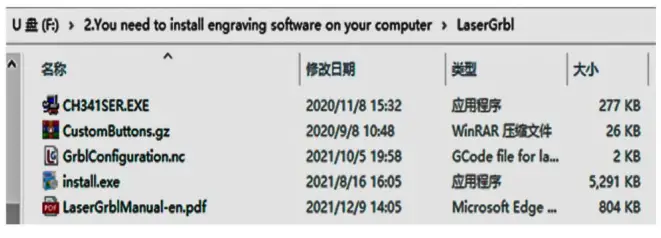
Software Installation
Laser GRBL
a) The Software is in the SD card, path: 12.You need to install engraving software on your computer1LaserGrb11 install.exe.
- 0r Download the latest version Laser Garble from https://lasergrbl.com/

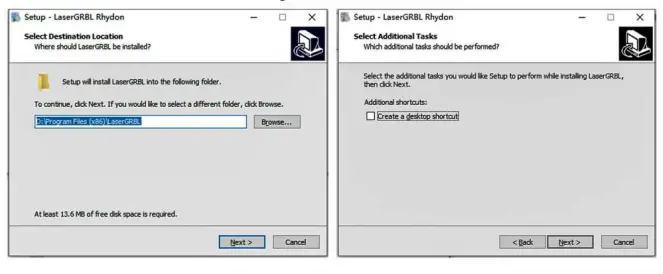
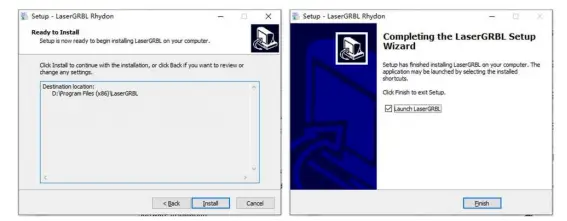
b)Software Installation
- Double click install.exe to start installing

- Choose the location you want to install and
- Click “Create a desktop shortcut” and then click “Next” click “Next”
- Click “Install”
- Wait for the installation to complete

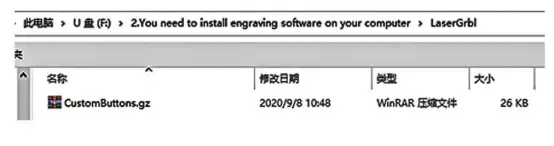
c)Import Custom Buttons
- Open LaserGrbl
- Right click the add Custom button in the red box area

- Select Custom button path: ‘2.You need to install engraving software on your computer\LaserGrbl\ CustomButtons.gz


d) USB Driver Installation
- Click Install Ch340 Driver
- Click Install, wait for the installation to complete


Operation Instructions
a) You can refer to the usage in the https://lasergrbl.com/. Select corn (This corn will be automatically recognized by the computer.) and click the connect button to connect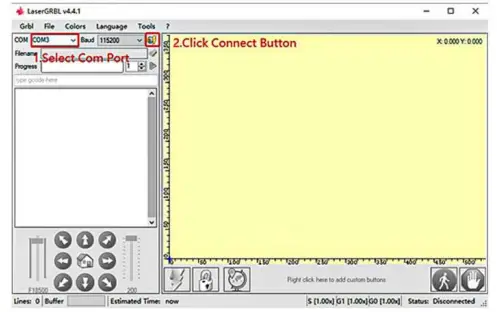
- Turn on the machine power
- Connect one end of the data cable provided by us to the USB port of the machine and the other end to the USB port of the computer
- Open the computer operating software and click the connect button to connect
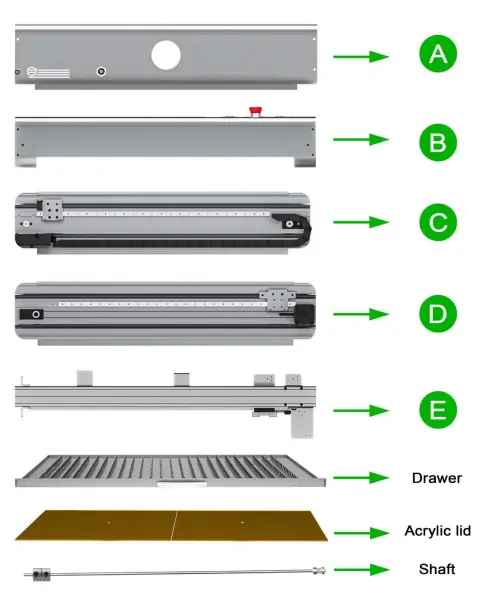
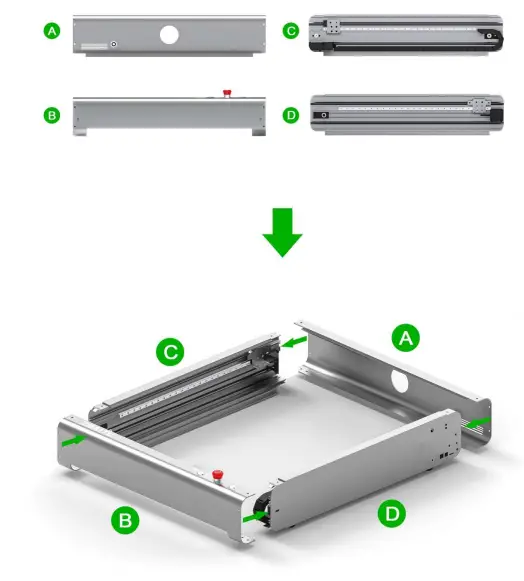
![]()


