![]()
HUO1
Installation Guide
Installation Guide
| Additional Parts Optional Bolt Faceplate 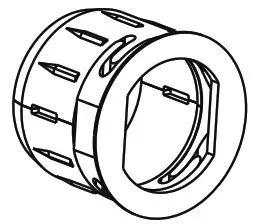 | Tools Needed Door prep 1. 2-1/8” (54mm) hole saw 2.1” (26mm) boring bit 3. 7/64” (2.5mm) drill bit 4. 3/8” (10mm) drill bit 5. Chisel&Hammer | Lock Installation #2 Philips screwdriver Important Notice: Make sure your door is prepared prior to installation. Only drill a upper hole if you wish the lock to have added stability. Please refer to the provided templatefor drilling if needed. |
hugolog reserves all rights for the final interpretation to this instruction![]() All design and specifications are subject to change without notice
All design and specifications are subject to change without notice
Preparing for Installation
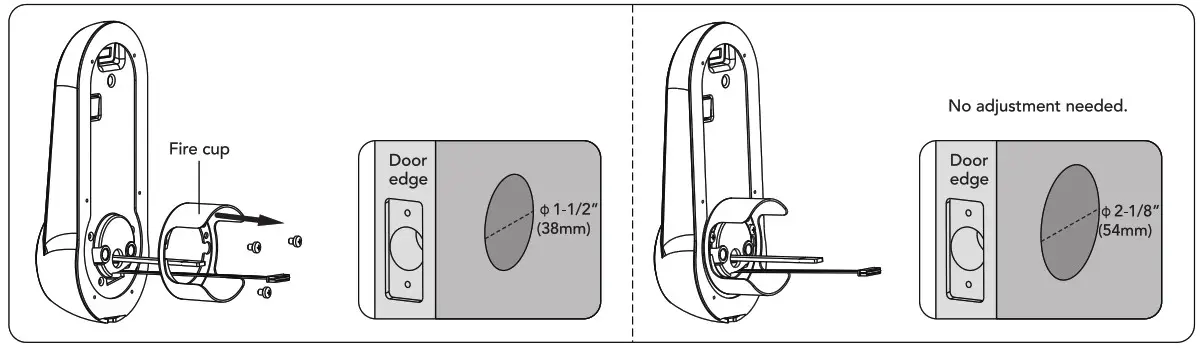
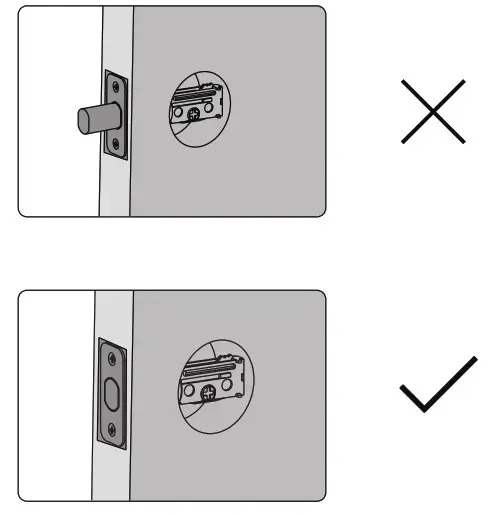
A. Measure the dimension of the hole shown.If the measurement is 1-1/2”(38mm), remove the fire cup.
B. Change faceplate,if necessary.
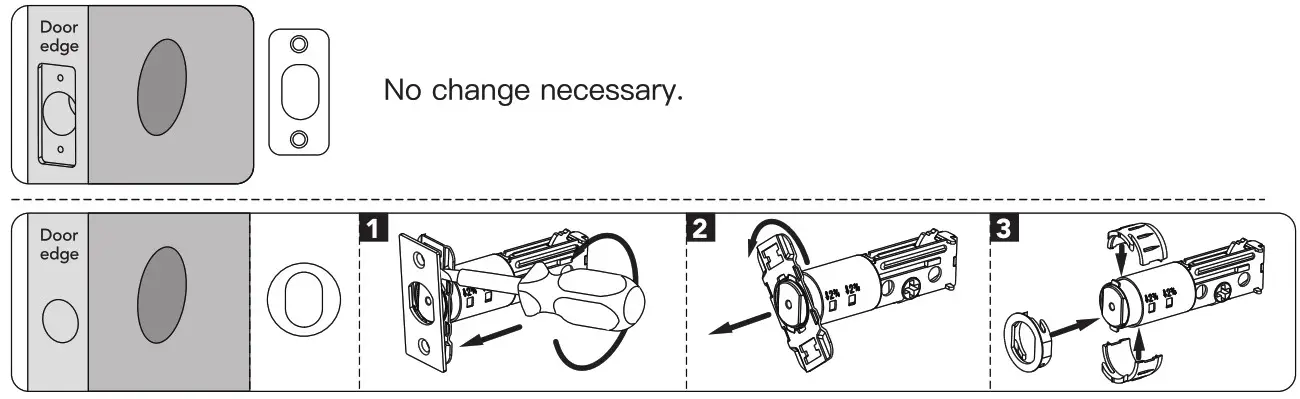
C. Adjust the deadbolt.
NOTE: Bolt snips with backset: in 2-3/8 160m! position. If acquired, turn the bolt case ana null to extend to 2-3/4″ 170 mm backset past on. see picture below!![]() The bolt must be in retracted (unlocked) position when you are changing backset.
The bolt must be in retracted (unlocked) position when you are changing backset.

D. Adjust the tailpiece according to your door’s thickness.
Carefully break off cylinder tailpiece at required mark for your door thickness.

![]() Caution: Use two pliers as shown or tailpiece will be darnaged,
Caution: Use two pliers as shown or tailpiece will be darnaged,
Installation
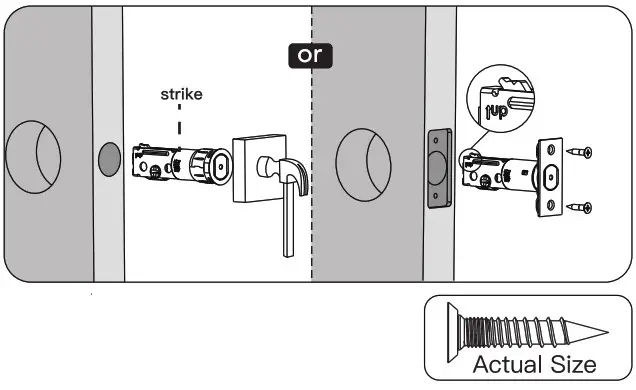
- Install strike on the door frame.
 NOTE: Ivisee sure to allow toe the belt to bo ceatoredd in tne ateke
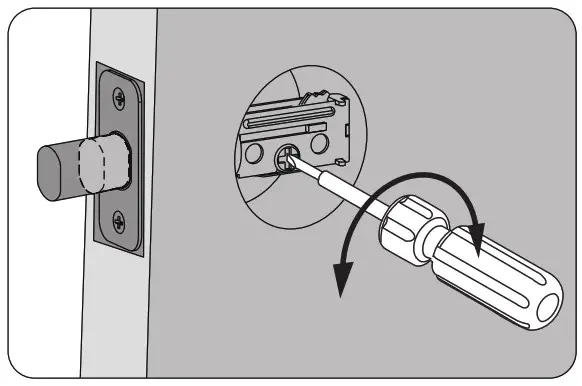
- Use a screwdriver to test if deadbolt works smoothly.

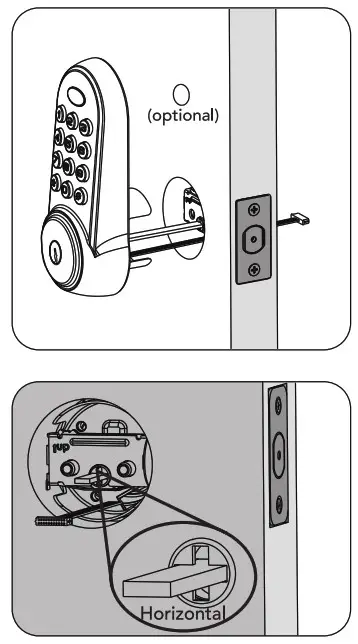
- Make sure the bolt in retracted(unlocked) position. NOTE: The bolt must be in retractea (Unlocked) position before installing the lockset.

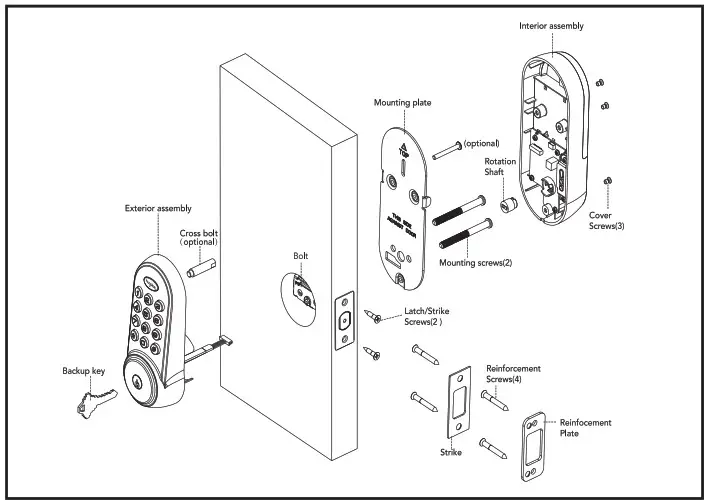
- Hold the exterior assembly flush to the door, pull the key tailpiece and cable through the door hole.
 This hole is for the optional cross-bolt provided for stabilizing your lock. If you drilled a hole, securely tighten the post before mounting on you door. NOTE: Cable must go through door hole under the bolt. NOTE: The tailpiece should be kept in a horizontal position.
 - Positon the inside mounting plate by first routing the cable and connector through the mounting plate’s cable hole.

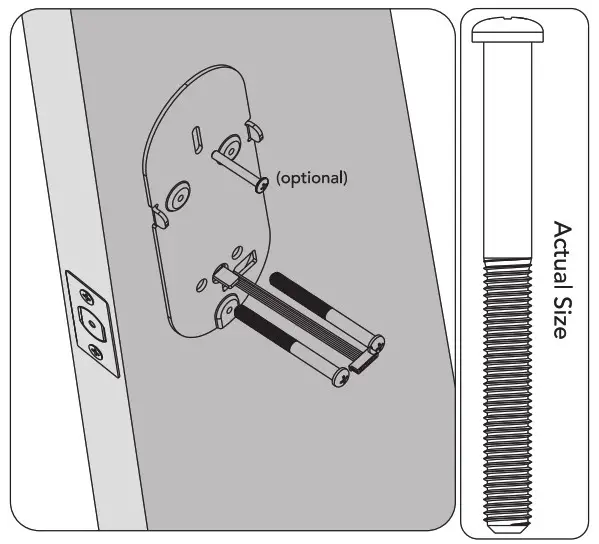
- Secure both assemblies using 8/32×34(optional) and 1/4×65 screws. Make sure that exterior assembly is vertically aligned. Tighten securely
with a #2 Philips screwdriver.
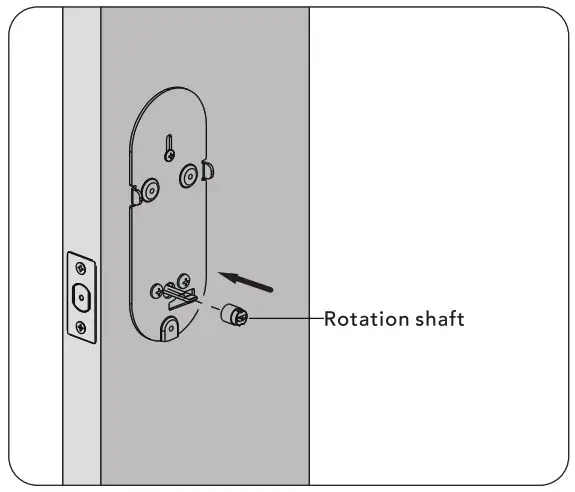
- Place rotation shaft in the hole on the inside assembly.

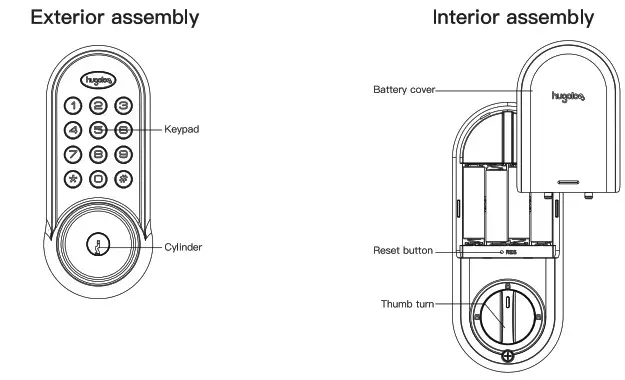
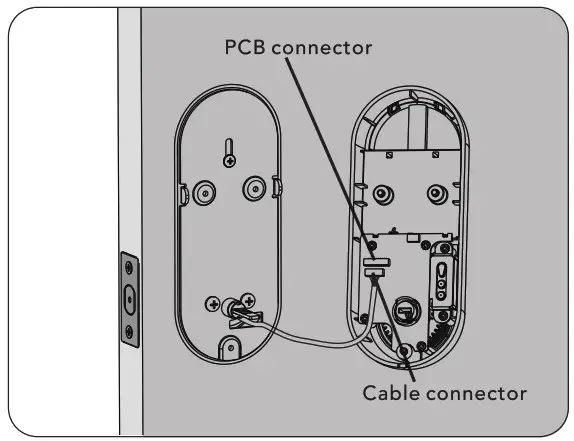
- Attach cable assembly to the interior assembly PCB by lining up notches on top of cable connector to slots on PCB connector. Press connector in
firmly using thumbs untill commpletely connected.
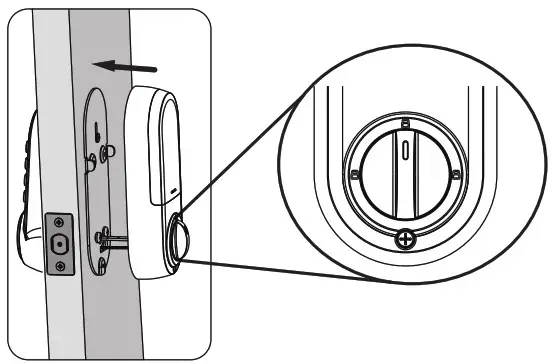
- Install interior assembly on inside mounting plate.
 NOTE: The horizontal orientation of the taipiece as you insert the inside escutcheon (thumb turn should be vertical)
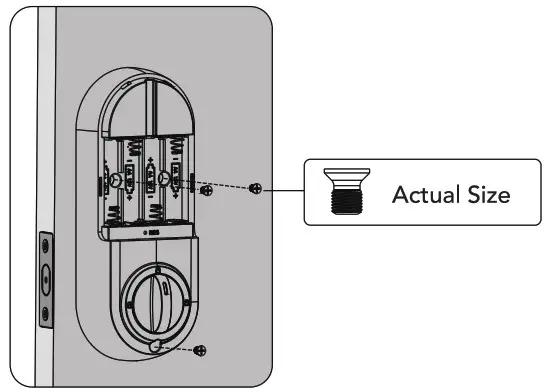
 - Secure using screw through the interior assembly onto the mouting plate.
 NOTE: Testing operation using backup key and thumb turn before installing batteries, see if bolt works smoothly.
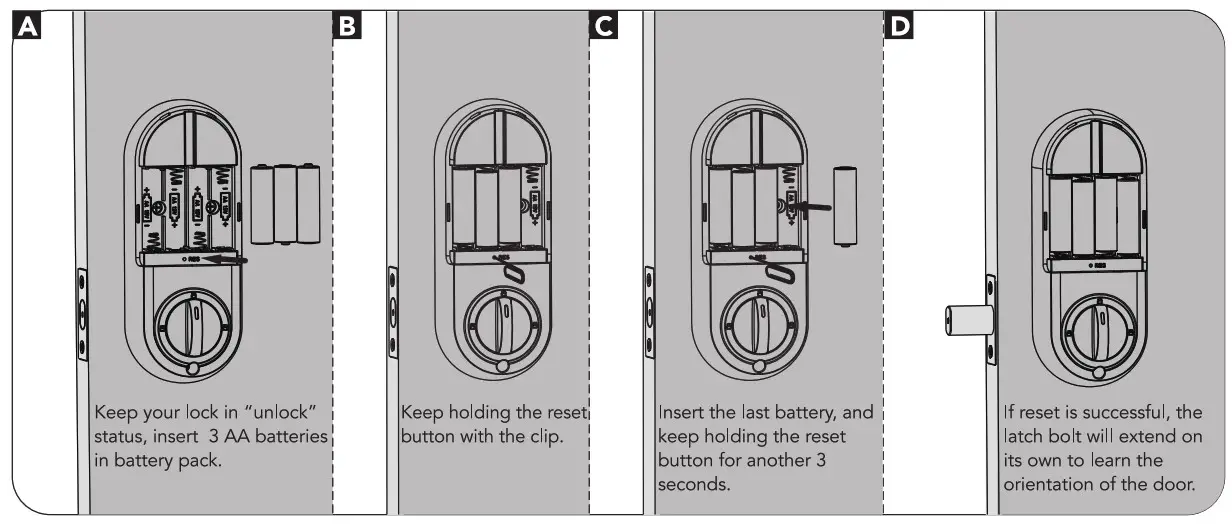
 - Reset the lock to learn the orientation of your door. NOTE: Resetting the lock before use is required and crucial for the lock to operate properly.

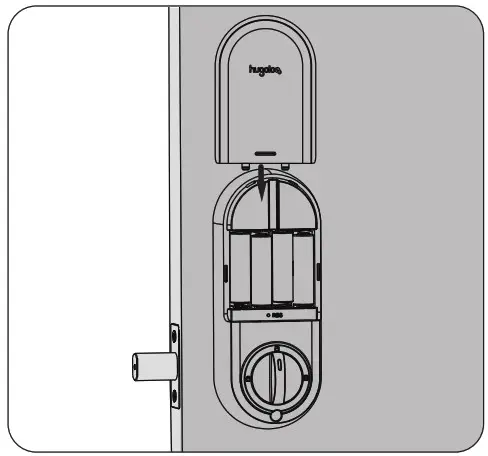
- Install battery cover.

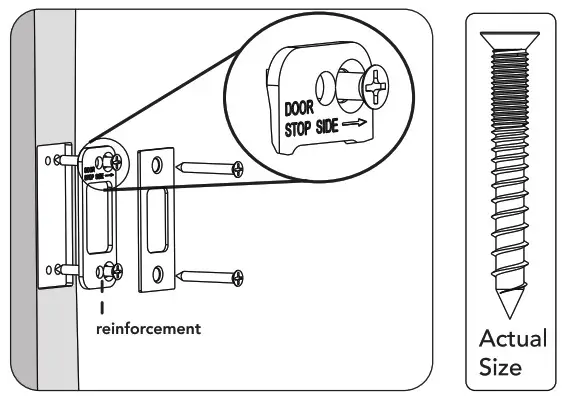
- Install reinforcement plate and strike into door jamb.

 This hole is for the optional cross-bolt provided for stabilizing your lock. If you drilled a hole, securely tighten the post before mounting on you door.
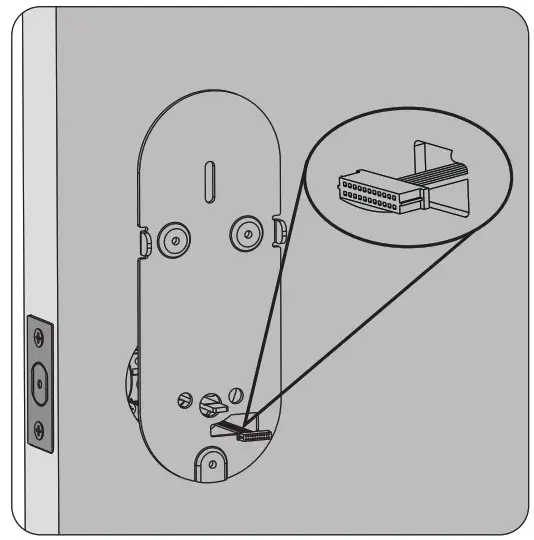
Download APP
Bluetooth network configuration must be restored to factory settings first, and network configuration completed within 5 minutes after factory reset.