JR-TO3S True wireless
TWS Bluetooth Earphone (Light sensor )
manual
Product display
Basic Information
| 1 | Product Name | True Wireless TWS Bluetooth Earphone |
| 2 | Model | JR-103S |
| 3 | Wearing method | Half-in Ear |
| 4 | Bluetooth | Bluetooth 5.0 |
| 5 | Support Agreement | HSP/HFP/A2DP (SBC.AAC)/AVRCP |
| 6 | Transmission range | 510m |
| 7 | Frequency range | 2.400GHz-2.483GHz |
| 8 | Sensitivity | 103±3db |
| 9 | Frequency response range | 20HZ-20KHZ |
| 10 | Microphone sensitivity | -42db±3db |
| 11 | Earphone capacity | 4SmAh |
| 12 | Rechargeable battery capacity | 400mAh |
| 13 | Impedance | 160 |
| 14 | Rated power | 3mW |
| 15 | Drive unit | 013mm |
| 16 | Playing time | about 3.5 hours |
| 17 | Standby time | about 100 hours |
| 18 | Charging current | DC-5V/1A |
| 19 | Earphone charging time | 40 minutes |
| 20 | Wireless charging time | 1.5-2 hours |
| 21 | N.W. | 6.8g (without storage case) |
Device pairing
Matching earphones for 105 devices:
Open the cover of the charging case and the earphone will power on automatically. Click the connection button according to the pop-up display and then long-press the button on the back of the charging case to connect (as shown in the figure).
Android system device pairing earphones:
- Settings > Wireless & Network > I Bluetooth > On Enable > Scan to find the device (The menu may vary from device to device)
- Select “JR-TO3S” If the phone asks for a password, enter four zeros 0000)
- After successful pairing, you will hear the *Di Di*prompt.
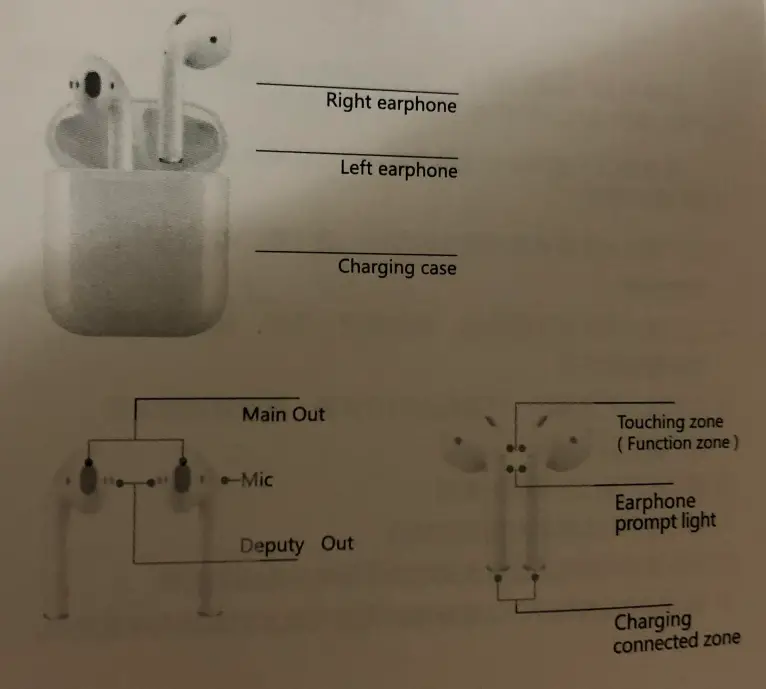
Operating instruction
- Defined function in call mode
The earphone indicated Sound for coming call Some devices come with a ringtonea&indicator sound Answer call One-Touch left/right earphone function Hang up call One-touch left/right ear function during a call Reject call Long touch for one second left/right earphone function to reject the call - Defined function in music mode
Play/Pause Touch the left/right earphone function button In audio mode, remove the earphone to pause/put on the earphone to play Previous song/ Next song Touch left earphone 3 times, Next Previous song: continue to touch right earphone 3 times Volume+/volume- Continue to touch the right earphone twice, and Continue to touch the left earphone twice - Language assistant
IOS system devices Call ‘Ski” :long touch left/right function zone for 2s Android system devices Long touch left/right function zone for 2s (Make sure its an Android system phone supporting language assistant)
Prompt sound description
| Prompt list | Prompt sound description |
| Turn on | Prompt: “Do” |
| Turn off | Prompt: “Di” |
| Device connected | Prompt: “Di Di” (up tone) |
| Device disconnected | Prompt “Di Di” (down tone) |
| TWS left&right earphone pairing | Prompt “Di” |
| Low battery warning | Prompt “Di Di” (up tone) |
Charging indicator
| Serial number | Product mode | Backside with button model | Front side with button model |
| 1 | Charging mode | The orange light is on | red light is on |
| 2 | Completed charging | Greenlight will be one For 1 minute | Blue light is on |
| 3 | Charging for Earphone | Left earphone charging green light flash slowly | Left earphone breathing light flash |
| Right earphone charging white light flash slowly | Right earphone red light breathing earphone | ||
| Right&left earphones charging green&white light flash slowly &simultaneously | Left&right earphones breathing light flash | ||
| 4 | Battery percentage Display after opening It’s cover | Greenlight is on | |
| White light is on | |||
| Orange is on |
Charging case wireless charging prompt light
| Serial number | Function | Backside with button model | Front side with button model |
| 1 | Charging mode | The orange light is on | The red light is on |
| 2 | Fully charging mode | Greenlight will be gone after 1 minute | Blue light is on |
Common instructions
- Single ear use
A JOS system pop-up window pairing
After opening the cover of the charging case, make the earphone close to the phone and the pop-up window will appear to prompt connection. After selecting the connection, long-press the button 3S behind the charging case to connect. After connecting the phone successfully, there is a “didi” prompt, and then take out the left ear/right earphone to use.
B Android system pop-up pairing
Enter the phone settings, open the Bluetooth switch, search for “1R-TO3S”, and click on the connection, the connection is successfully followed by the “Drip” prompt tone, then use the left ear / right ear directly. - Switch to unilateral use in binaural mode
Put the left ear/right ear directly into the charging case, and the earphone will automatically switch. It can be directly put back into the charging case without other operations. - Shutdown instruction
The earphone is put into the charging case, the earphone automatically shuts down and charges itself, the earphone is fully charged, and the earphone is automatically turned off. - 4. Both earphones can be switched
A. Putting either earphone into the charging case during the use of the earphone will automatically switch the other side earphone to the earphone and continue to maintain the music mode before switching.
B. Charging the earphone into the charging box during the use of the ear does not affect the normal operation of the other side earphone;
C.Turn on the left or right earphone separately, it will automatically connect back to the phone
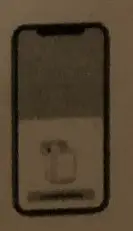
D. After opening the cover, after the connection is successful, the earphone can be used. - Apple pop-up function
Close to the Apple mobile devices, it can trigger the iPhone mobile phone pop-up function to click the pairing connection, it can display the earphone power and its charging case power. - Light sensing function (ear detection)
After the earphone is connected successfully, in single-ear mode: when playing music, remove the earphone, music will automatically pause, put on the earphone, and music will automatically play (this function is not applicable to video).
After the earphone is connected successfully, in binaural mode: when playing music, remove any earphones, and music will automatically pause, put on any earphones, and music will automatically play (this function is not applicable to video).
Precautions
- Please store and use this product in a normal temperature environment;
- Do not expose this product to rain or moisture environment;
- Do not throw it away to avoid product damage caused by falling;
- Do not disassemble, repair or modify this product;
- Do not wipe the product with a chemical solvent;
- Do not discard it at will, or put it at a high temperature (temperature above 60 degrees) and fire to avoid danger;
Warning
Please follow the safety cautions and use the product in the correct way to avoid casualties and damage.
Please follow the following notes to prevent accidents like fire, overheating, chemical leakage, and explosion.
- To reduce the risks of fire and damage to the battery, please do not expose the product to the rain or moisture environment.
- To reduce the risks of fire, please do not cover the product with inflammable like carpet and quilts.
- To prevent the product from further damage, it is prohibited to dismantle the broken device without a permit. In this case, please consult the Aftersales Department for the repair.
- Please do not use it when the device is overheating.
- Please do not apply any batteries, powers, or accessories other than those specified in the Instruction.
- Please do not use self-made or modified batteries.
- Do not use the wireless charging transmitter that has not passed the 01 certification standard to charge the charging box.
Warranty Card
User’s name ———————————————————
User’s telephone —————————————————
User’s Add ———————————————————-
Date of purchase ————————————————–
Invoice ————————————————————–
Dealer’s name ——————————————————
Dealer’s Add ——————————————————-
Dealer’s telephone ————————————————
Warranty
This product is covered under warranty for a period of one year from the date of purchase limited to normal use and maintenance of the machine pares, materials, and functions. Problems and failures verified upon further identification, will be provided with free repair and replacement parts.
Limited to the following:
A. Headset is beyond the warranty period.
B. User does not follow the instructions. so that the headphone wire and earplug broke.
C. Without the authorization to dismount, repair, alteration structures:
D. Can’t provide proof of purchase.
E. Man-made damage.
F. Due to natural disasters and other force majeure (such as earthquakes, and fires) product failure of damage causes;


