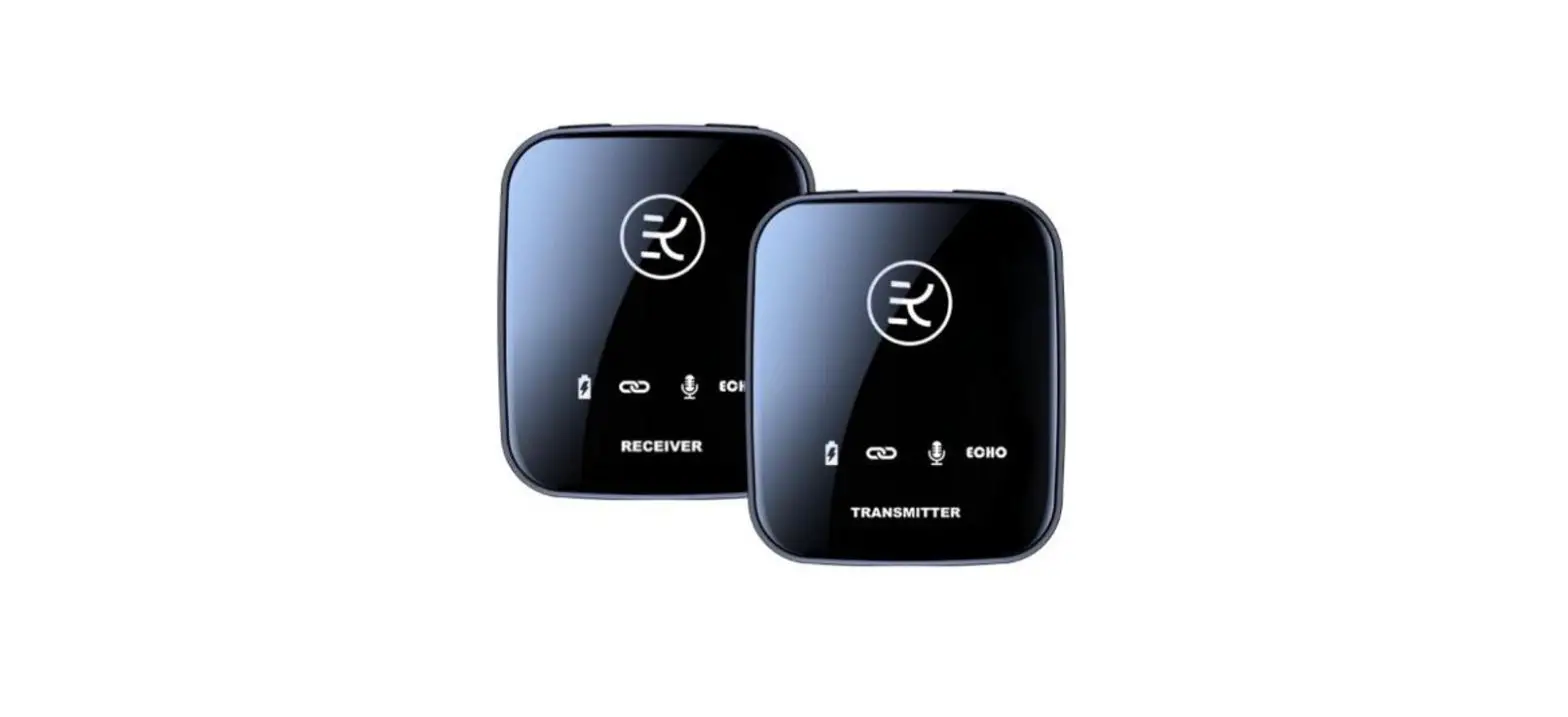
KingLucky M18 Wireless Microphone System
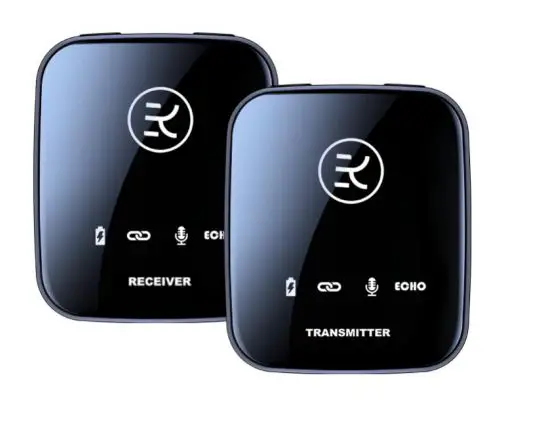
Transmitter
Input device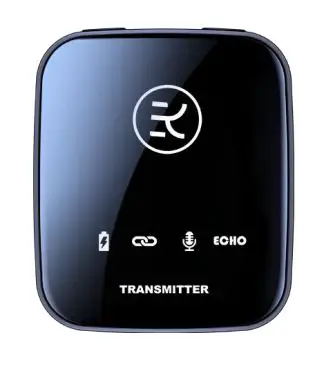
Receiver
Output device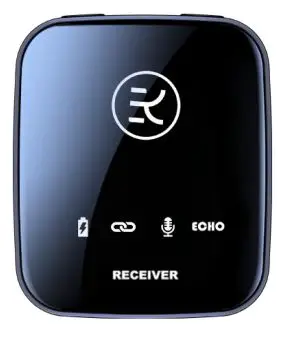
Parameters
Transmitter
| TYPE-C Charging | DC 5V/1A |
| Connection Distance | 15-30M |
| Standby Power | ≤42uA |
| Working E-current | ≤33mA |
| S/N Ratio | ≥ 75dB |
| Sensitivity | 90dB |
| Battery | 3.7V/400mA Polymer battery |
| Working Time | 10H-12H |
Receiver
| TYPE-C Charging | DC 5V/1A |
| Connection Distance | 15-30M |
| Standby Power | ≤ 42uA |
| Working E-current | ≤33mA |
| S/N Ratio | ≥ 75dB |
| Sensitivity | 90dB |
| Frequency Stability | ±10ppm |
| Audio Output | 350mv(MAX) |
| Battery | 3.7V/400mA Polymer battery |
| Working Time | 10H-12H |
Transmitter Instruction

| 1.Mic | Build-in Mic can’t be damping |
| 2.Monitor
Earphone | Listen to Mic audio output |
| 3.Type-c Charging | Charging with Adaptor DC/5V, charging port is
Type-c |
| 4.Power Indicator | Green-Working, Red-Charging , Blue-Low power |
| 5.Connection
Indicator | Stay Green light-connection successful
Flash green light-connection failed |
| 6.Mic Indicator | Green light-with noise, Blue light-no noise,
Red light-noiseless |
| 7.Echo | Green light-Echo mode, No light-No echo |
Receiver Instruction
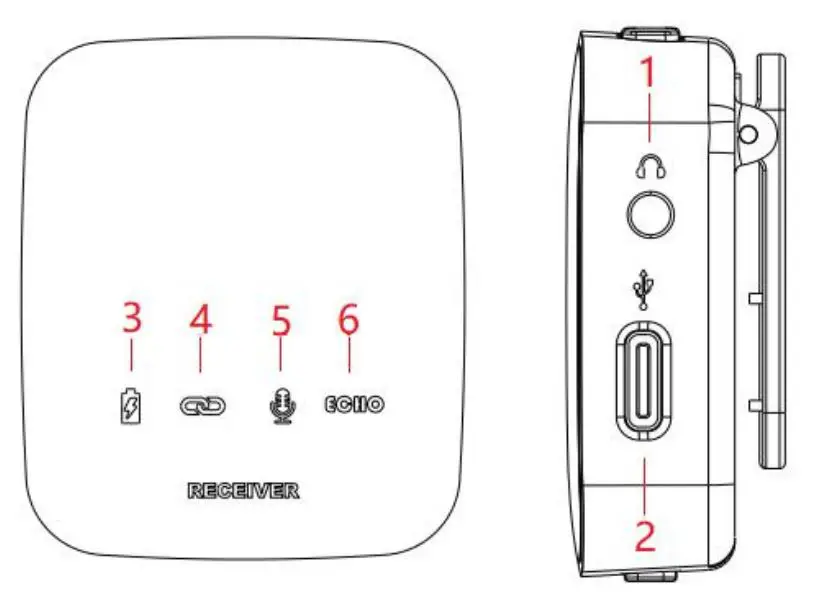
| 1.Monitor
Earphone | Listen to the Mic audio output |
| 2.OTG Mic output Type-charging | OTG(Mic/echo signal output) Charging with Adaptor DC/5V, charging port is Type-c |
| 3.Power Indicator | Green-Working, Red-Charging , Blue-Low power |
| 4.Connection
Indicator | Stay Green light-connection successful
Flash green light-connection failed |
| 5.Mic Indicator | Green light-with noise, Blue light-no noise,
Red light-noiseless |
| 6.Echo Indicator | Green light-Echo mode, No light-No echo |
TX Buttons Instruction
RX Buttons Instruction
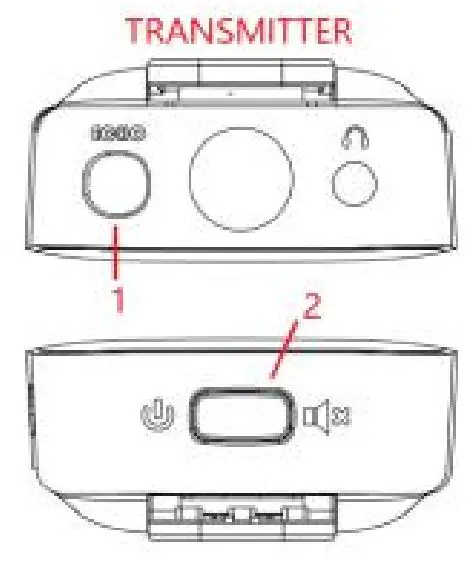
For Transmitter
| 1. ECHO | Long press 2S:OFF/ON
One Click:Noise/No noise |
| 2. POWER
MUTE | Long press 2s:OFF/ON
One click:Mute/Working |
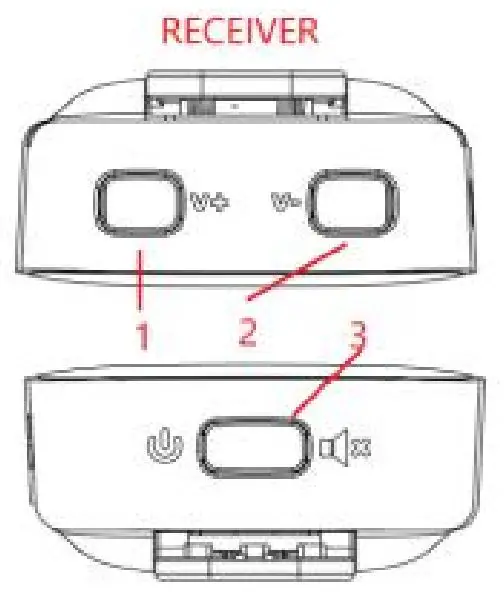
For Receiver
| 1. V+ | Click:Volume up |
| 2. V- | Click:Volume down |
| 3. Power
Mute | Long press 2s:OFF/ON
One click:Mute/Working |
Cables Instruction

Note: Lightning Connected with Type-C OTG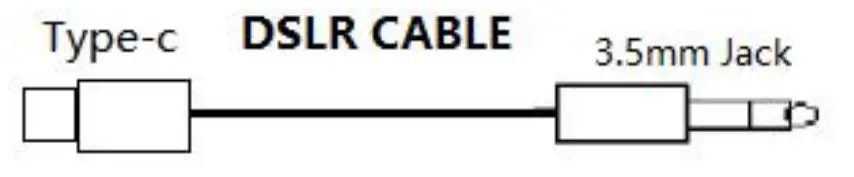
Note: Type-C port for RX, Jack for DSLR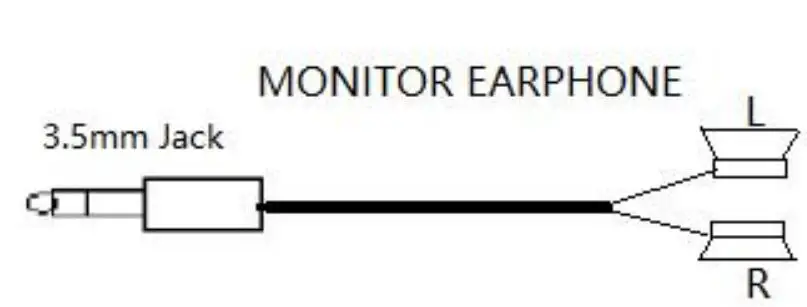
Note: Usually for Receiver
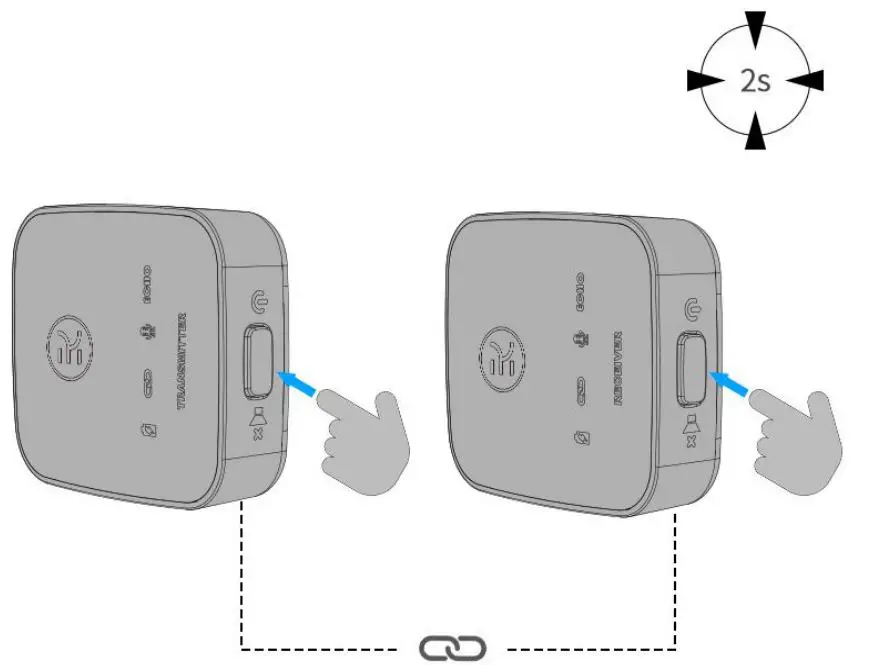
Transmitter&Receiver
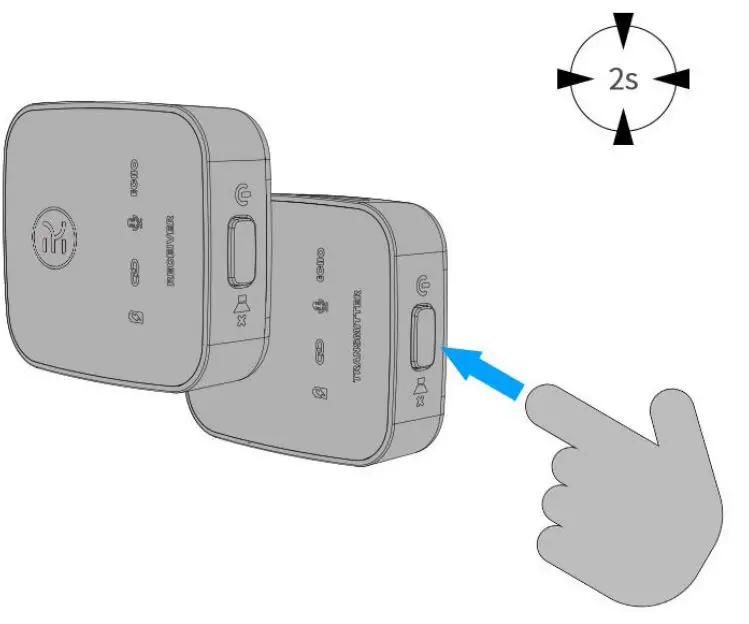
Pairing
Transmitter with Wind Muff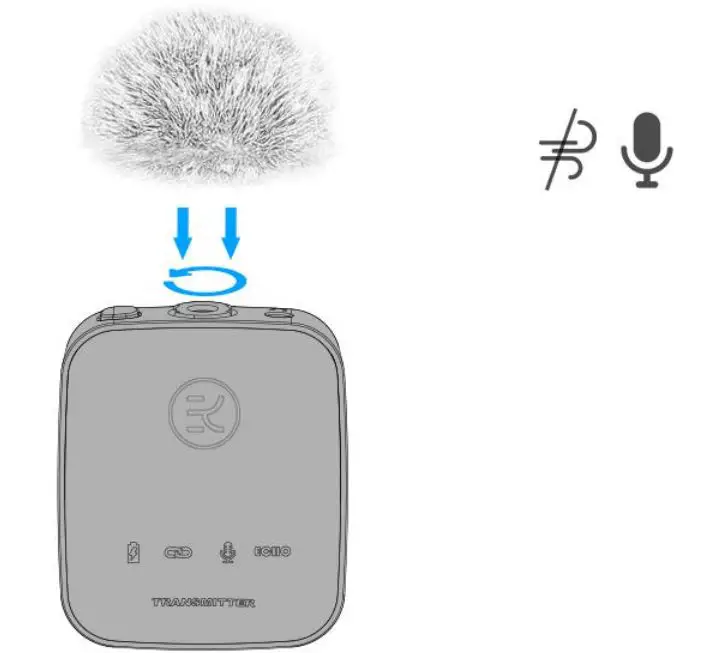
Transmitter Fixed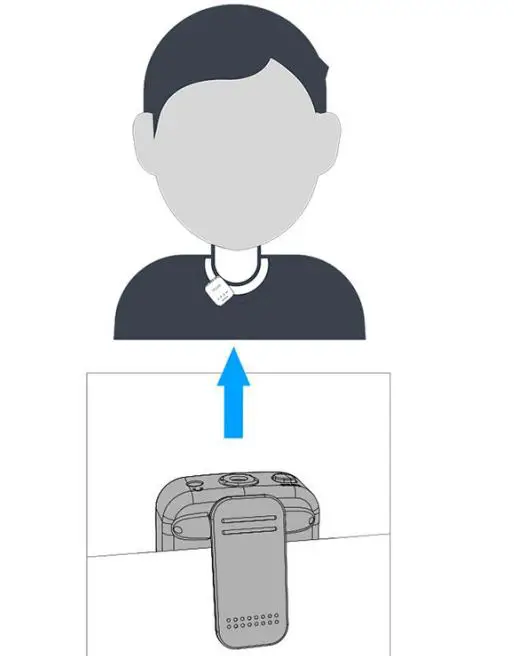
Connected with Apple Device
Connected with DSLR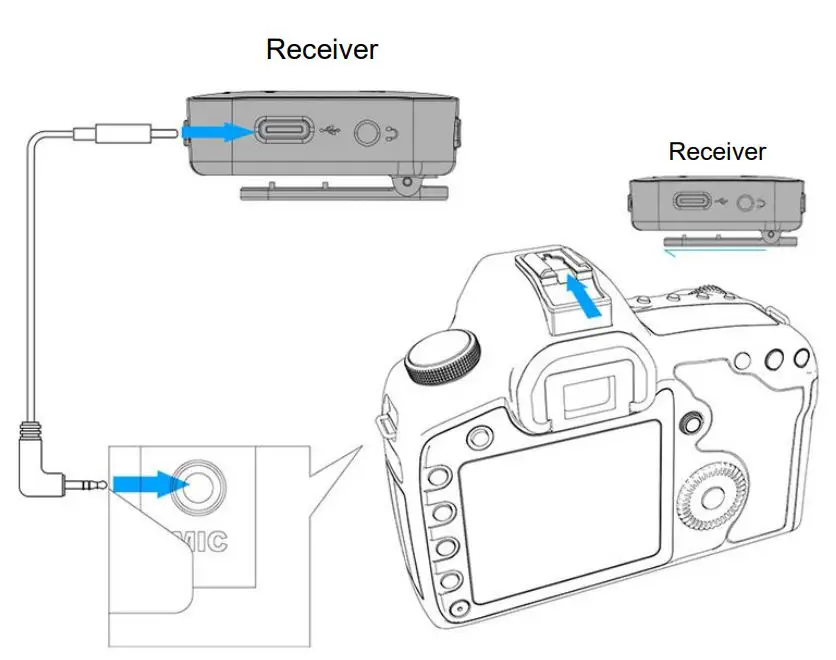
Technical Support
Dear Customer:
Thank you for your great support on us. We sincerely hope that you would be satisfied with our Lav Mic and service.If you have any questions about our product or if your experience with us was less than perfect in any way, please contact us Email: [email protected] immediately so we can make it right for you!
FCC Statement
This equipment has been tested and found to comply with the limits for a Class B digital device, pursuant to part 15 of the FCC Rules. These limits are designed to provide reasonable protection against harmful interference in a residential installation. This equipment generates, uses and can radiate radio frequency energy and, if not installed and used in accordance with the instructions, may cause harmful interference to radio communications. However, there is no guarantee that interference will not occur in a particular installation. If this equipment does cause harmful interference to radio or television reception, which can be determined by turning the equipment off and on, the user is encouraged to try to correct the interference by one or more of the following measures:
- Reorient or relocate the receiving antenna.
- Increase the separation between the equipment and receiver.
- Connect the equipment into an outlet on a circuit different from that to which the receiver is connected.
- Consult the dealer or an experienced radio/TV technician for help.
Caution: Any changes or modifications to this device not explicitly approved by manufacturer could void your authority to operate this equipment. This device complies with part 15 of the FCC Rules. Operation is subject to the following two conditions: (1) This device may not cause harmful interference, and (2) this device must accept any interference received, including interference that may cause undesired operation.
RF Exposure Information
The device has been evaluated to meet general RF exposure requirement. The device can be used in portable exposure condition without restriction.


