![]() INSTALLATION INSTRUCTIONS:
INSTALLATION INSTRUCTIONS:
E353758 / E949536 mPOS PRINTER STAND WITH
EXPANSION MODULE FOR ANDROID
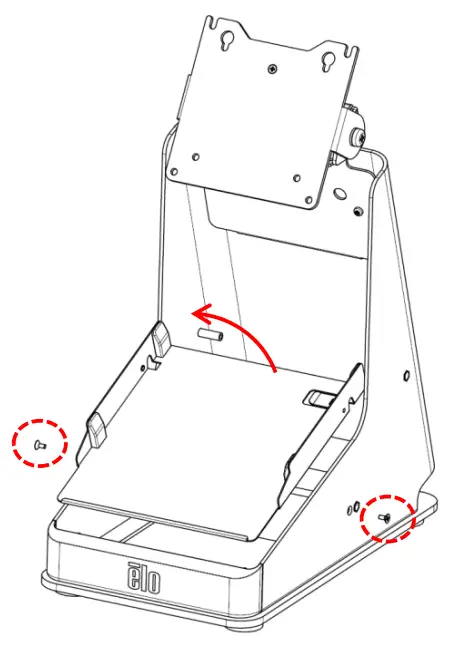
E353758 mPOS Flip Stand
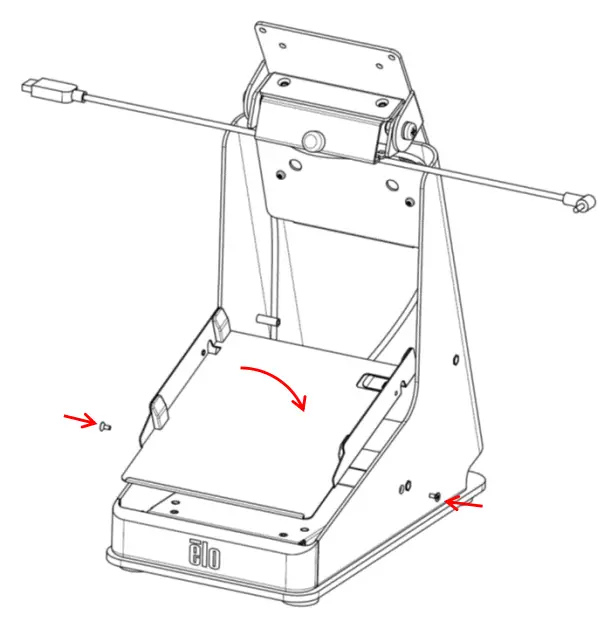
- Remove (2) screws (L & R side) and pull-out printer tray. Keep screws for reassembly.

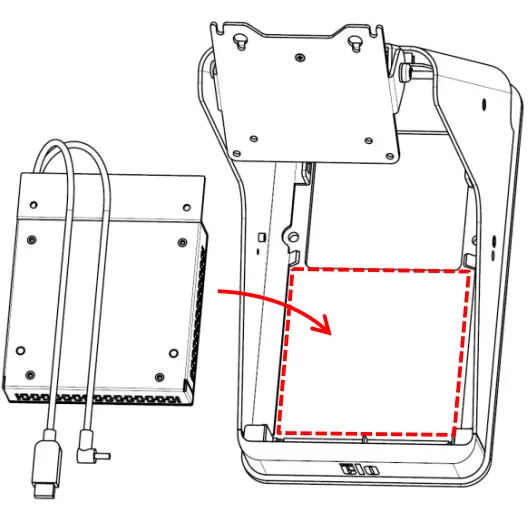
- Place Expansion Module into base.

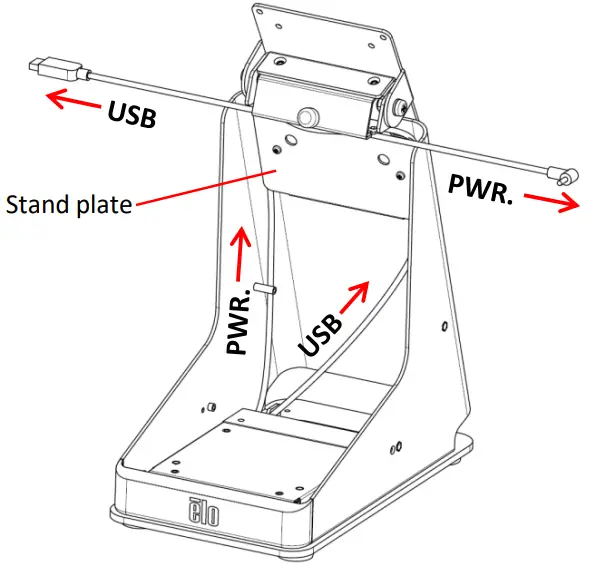
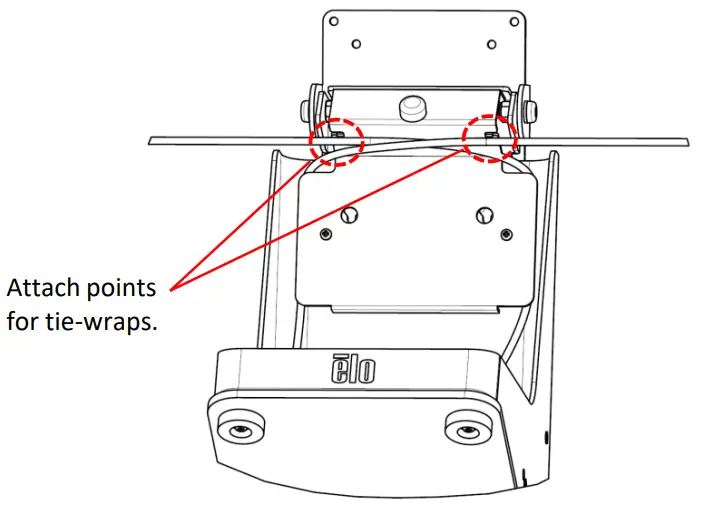
- Route cables behind L & R sides of stand plate. Secure cables to stand with tie-wraps; white band on cables indicates correct location to secure cables.


- Re-assemble printer tray using (2) screws, L & R side.

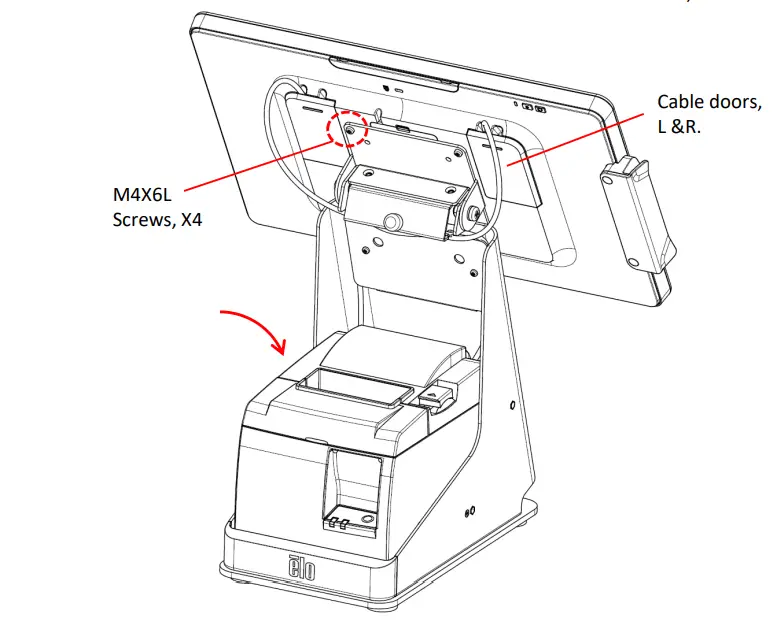
- Attach 15i/10i using (4) M4X6L screws. Plug in USB and PWR. cables, attach cable doors.

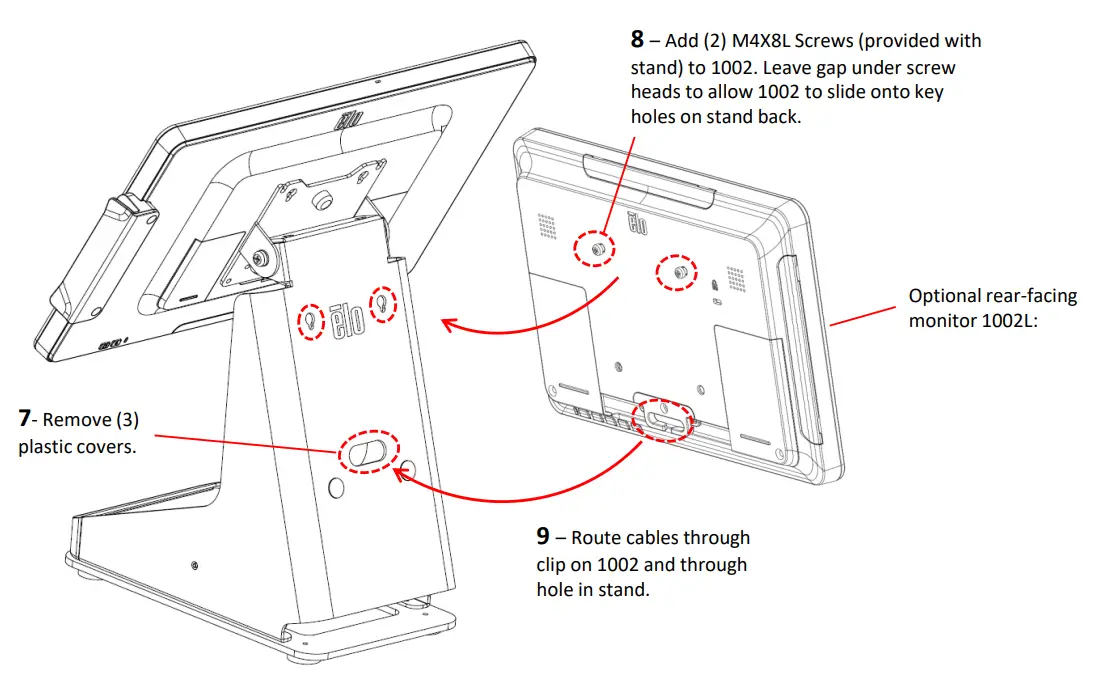
- Insert compatible printer. (If adding optional rear-facing touch monitor ET1002L, go to step 7 before installing printer).
VESA Plate Cover Assembly for E949536 (Optional)
NOTE –VESA Plate Cover is optional for the assembly, it will not affect the function and performance.

QIG600035 Rev. D


