![]() Wall Mounted Pegboard with Thread Storage
Wall Mounted Pegboard with Thread Storage
Craft Collection
Model 5423412
Instruction Manual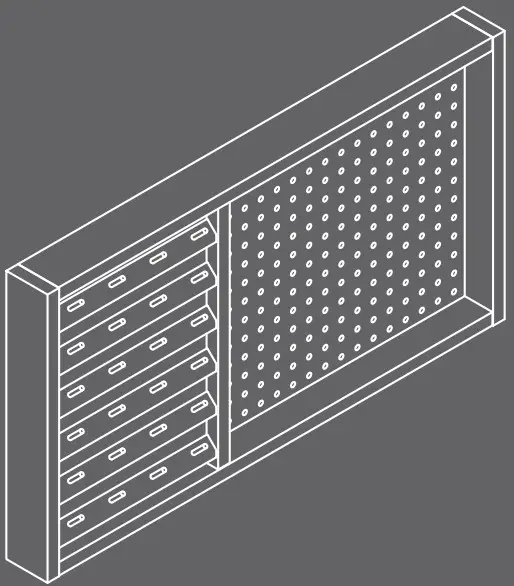
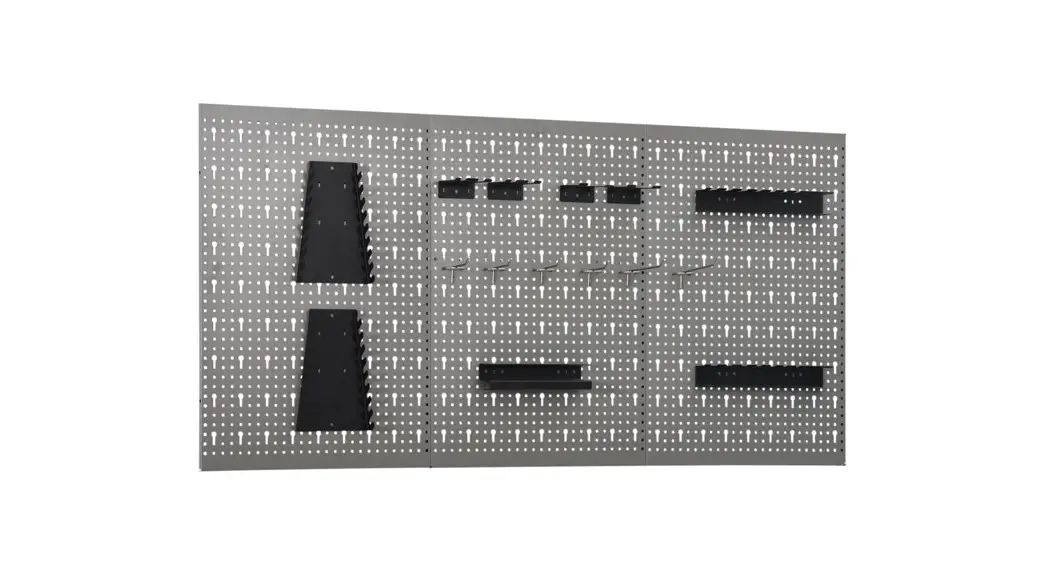
5423412 Wall-Mounted Pegboard
www.teknikoffice.co.uk
NOTE: THIS INSTRUCTION BOOKLET CONTAINS IMPORTANT SAFETY INFORMATION.
PLEASE READ AND KEEP IT FOR FUTURE REFERENCE.
Assembly Tools Required
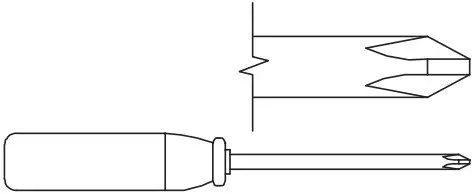 | No. 2 Phillips Screwdriver Tip Shown Actual Size |
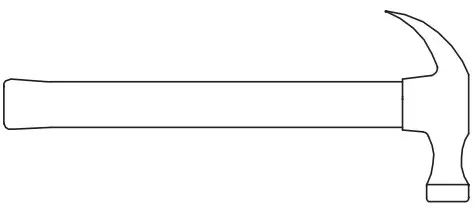 | Hammer Not actual size |
| Pencil | |
 | • Electric drill with 1/4″ bit (ONLY in indicated step) • Tape Measure |
Part Identifi cation
![]() Now you know our ABCs.
Now you know our ABCs.![]() While not all parts are labeled, some of the parts will have a label or an inked letter on the edge to help distinguish similar parts from each other. Use this part identifi cation to help identify similar parts.
While not all parts are labeled, some of the parts will have a label or an inked letter on the edge to help distinguish similar parts from each other. Use this part identifi cation to help identify similar parts.
A UNIT (1)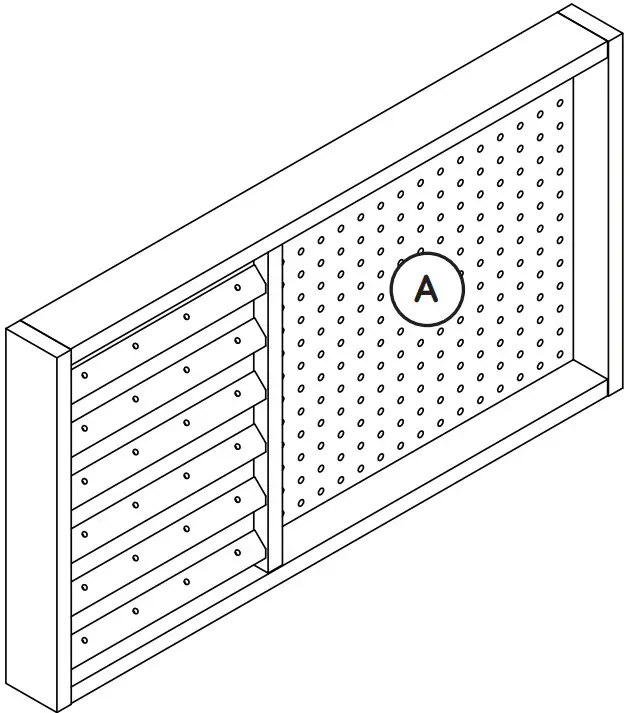
Hardware Identifi cation
![]() Screws are shown in actual size. You may receive extra hardware with your unit.
Screws are shown in actual size. You may receive extra hardware with your unit.
 |
 |
Step 1![]() Assemble your unit on a carpeted floor or on the empty carton to avoid scratching your unit or the floor.
Assemble your unit on a carpeted floor or on the empty carton to avoid scratching your unit or the floor.![]() Turn the UNIT (A) onto its front edges.
Turn the UNIT (A) onto its front edges.![]() Fasten the BRACKETS (3) to the UNIT (A) exactly as shown. Use four SILVER 7/16″ PAN HEAD SCREWS (5).
Fasten the BRACKETS (3) to the UNIT (A) exactly as shown. Use four SILVER 7/16″ PAN HEAD SCREWS (5).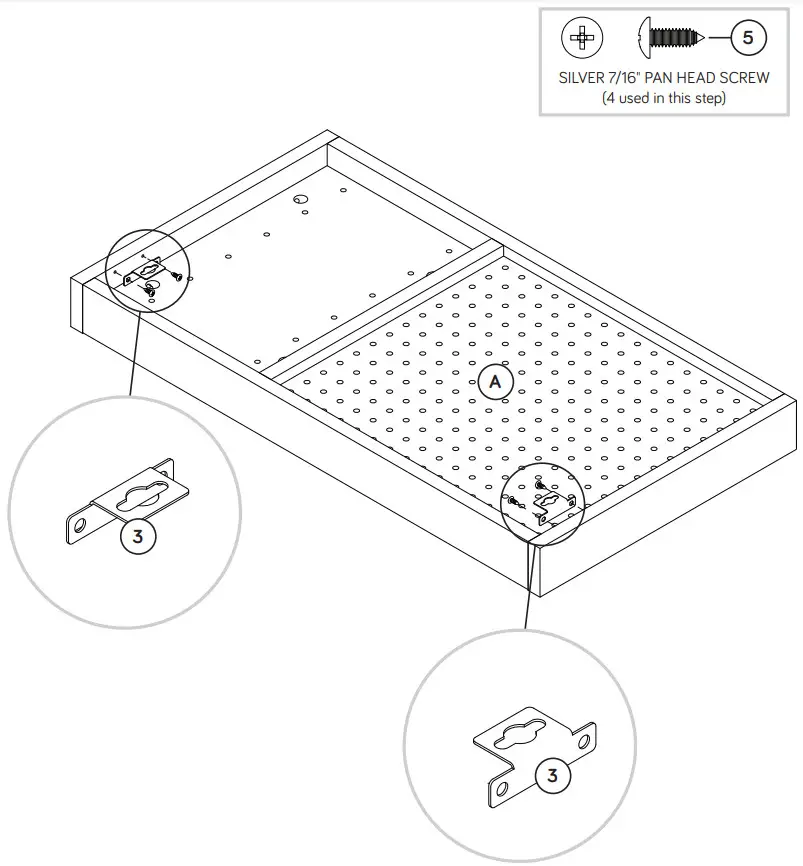 Step 2
![]() Stand your unit upright.
Stand your unit upright.![]() Insert the PEGS (1) into the UNIT (A).
Insert the PEGS (1) into the UNIT (A).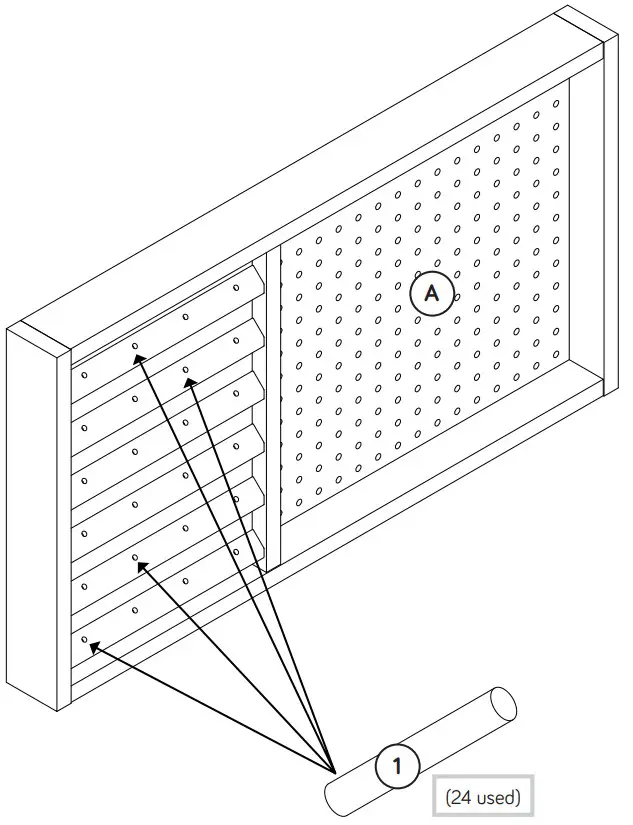 Step 3
![]() The centers of the BRACKETS used to hang your unit are spaced 25-5/8″ apart. With your tape measure, measure the distance on your wall. Then, mark the locations on your wall with a pencil. The marks should be 2-5/16″ down from the top of your unit.
The centers of the BRACKETS used to hang your unit are spaced 25-5/8″ apart. With your tape measure, measure the distance on your wall. Then, mark the locations on your wall with a pencil. The marks should be 2-5/16″ down from the top of your unit.![]() Next, drill the holes that are marked on the wall using a 1/4″ drill bit.
Next, drill the holes that are marked on the wall using a 1/4″ drill bit.![]() NOTE: If attaching the Thread Storage to a wall made of concrete, plaster, or other material, go to your local hardware store for proper hardware.
NOTE: If attaching the Thread Storage to a wall made of concrete, plaster, or other material, go to your local hardware store for proper hardware.![]() Using your hammer, gently tap the WALL ANCHORS (2) into the holes in your wall. Then, turn two SILVER 1-1/2″ PAN HEAD SCREWS (4) into the WALL ANCHORS (2).
Using your hammer, gently tap the WALL ANCHORS (2) into the holes in your wall. Then, turn two SILVER 1-1/2″ PAN HEAD SCREWS (4) into the WALL ANCHORS (2).![]() NOTE: Do not use a power screwdriver to tighten the SCREWS.
NOTE: Do not use a power screwdriver to tighten the SCREWS.![]() NOTE: Do not completely tighten the SCREWS. There should be approximately a 3/16″ gap between the SCREW and WALL ANCHOR.
NOTE: Do not completely tighten the SCREWS. There should be approximately a 3/16″ gap between the SCREW and WALL ANCHOR.![]() Carefully insert the SCREWS in your wall into the large holes in the brackets on the back of your unit. Then set the unit down into place.
Carefully insert the SCREWS in your wall into the large holes in the brackets on the back of your unit. Then set the unit down into place.![]() NOTE: Please read the back pages of the instruction booklet for important safety information.
NOTE: Please read the back pages of the instruction booklet for important safety information.![]() This completes the assembly. Clean with your favorite furniture polish or a damp cloth. Wipe dry.
This completes the assembly. Clean with your favorite furniture polish or a damp cloth. Wipe dry.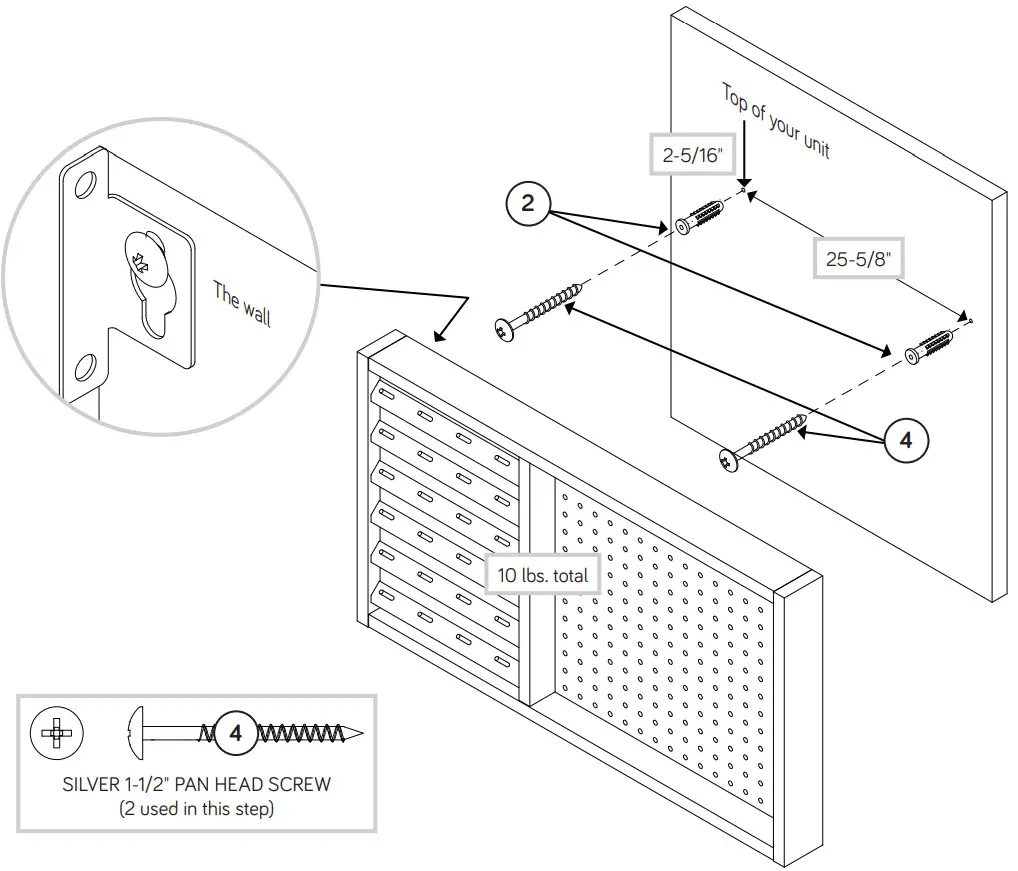
![]() WARNING
WARNING
Please use your furniture correctly and safely. Improper use can cause safety hazards or damage to your furniture or household items. Carefully read the following chart.
| Look out for: | What can happen: | How to avoid the problem: |
| • Properly mounting the shelf to the wall. | • If not properly mounted, the shelf can fall from the wall and cause injury and damage | • Carefully review and follow the mounting instructions contained in this manual. |
| • Overloaded shelves. | • Risk of injury or property damage• Overloaded furniture can break. | • Never exceed the weight limits shown in the instructions. |
| • Improper use of furniture to support TVs. • Placing TVs on furniture items not intended to support them is hazardous. | • Risk of injury or death. TV’s can be very heavy. Plus the weight and location of the picture screen can make furniture tip forward. | • This product is not designed to support a television. |
![]()


