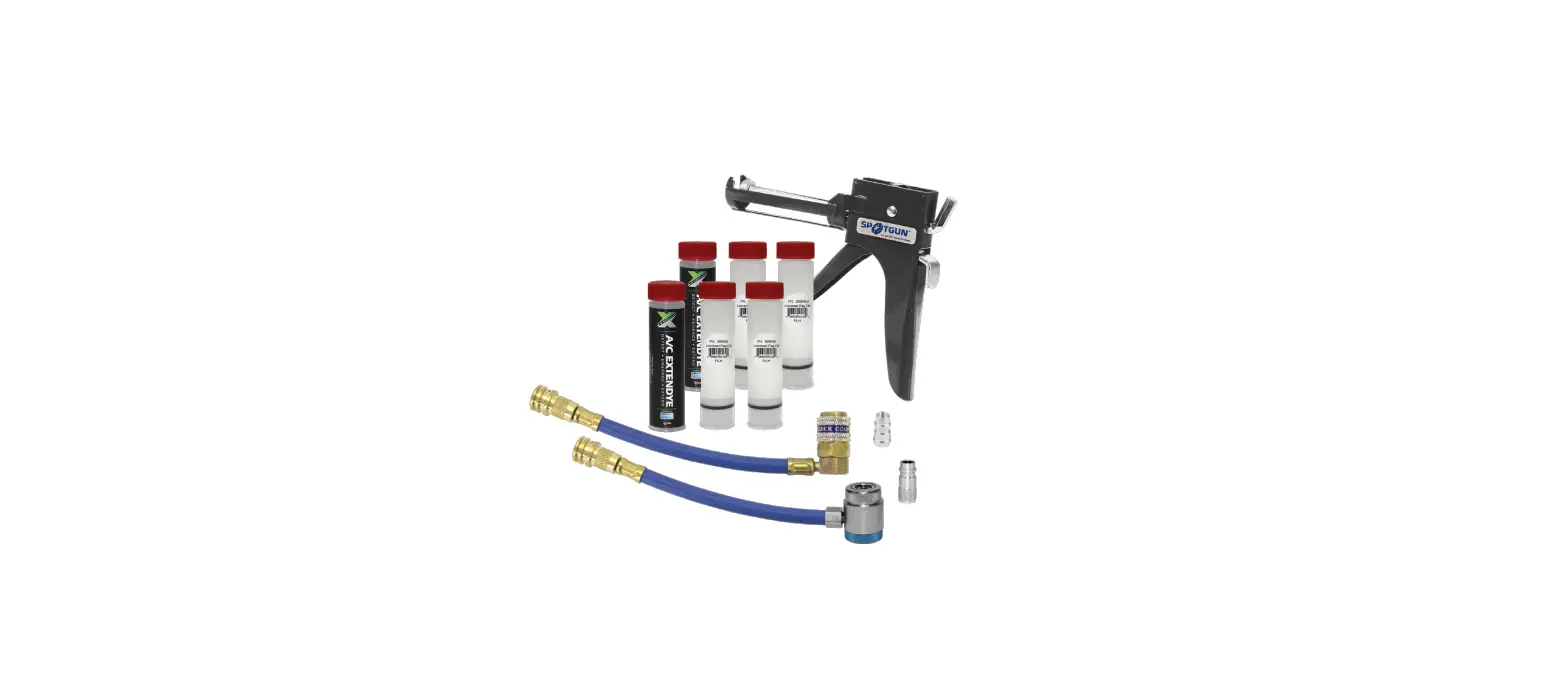
MATCO TOOLS AC381550 SPOTGUN Oil Injection Master Kit
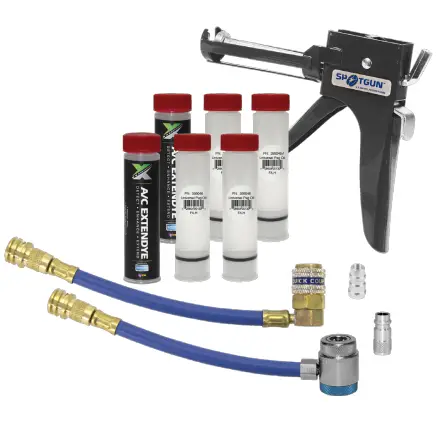
SPOTGUNTM JR. INJECTION SYSTEM
The SPOTGUNTM JR. Injection System is the world’s most popular injection method for injecting dye into an A/C system without the need to evacuate any refrigerant. It is used to detect leaks in the A/C system.
product SET UP INJECTION GUN SYSTEM
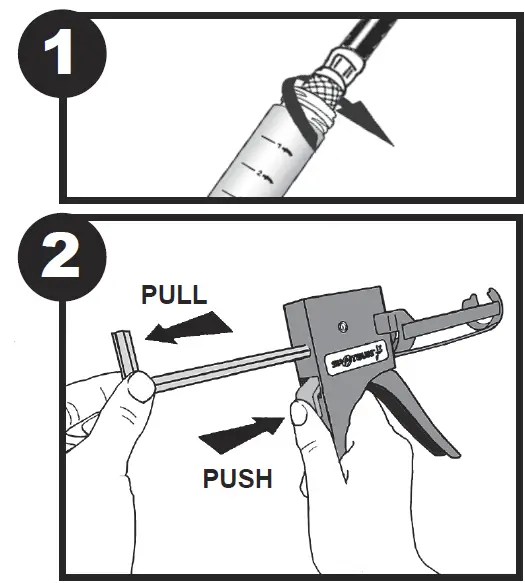
- Hold the disposable cartridge in an upright position then remove cap and seal from the cartridge.
- Attach the hose (R-134a) to the top of the disposable cartridge then remove drip cap from the adapter. (Fig. 1)
- Push the release lever on the injection gun with your thumb, and pull the rod all the way back. (Fig. 2)
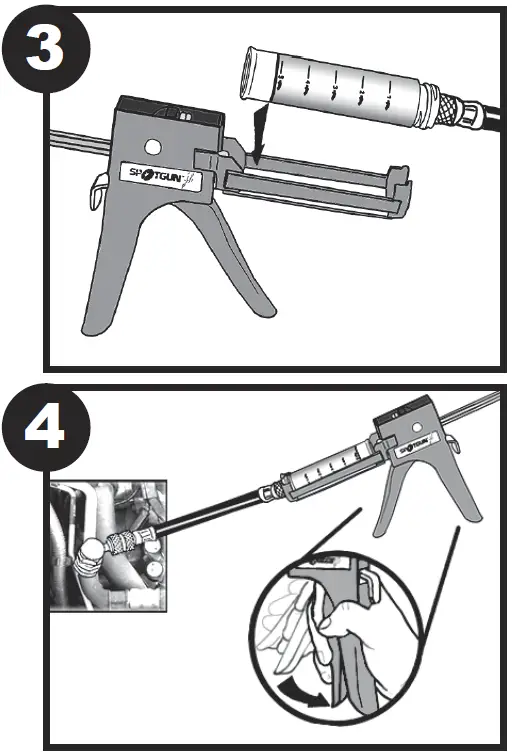
- Install the cartridge into the gun assembly. (Fig. 3)
- Squeeze the trigger until the piston seats in a disposable cartridge. Now the Injection gun system is ready to be used.
Product OPERATION (R-134a)
- Connect the injection gun system to the low side port of the A/C system.
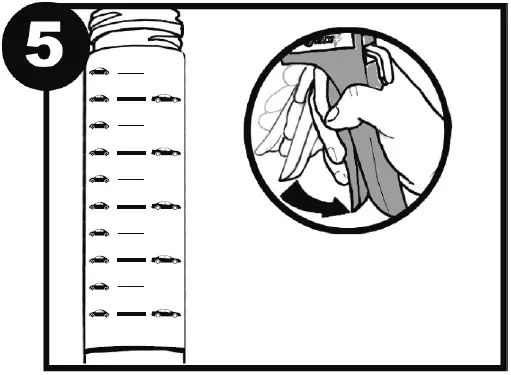
- Inject dye into the A/C system by squeezing the trigger (Fig.
- See Dye Dose Chart below.
- Disconnect injection gun system from the A/C port.
- Attach drip cap to the adapter.
- Install Dye Service Sticker in a visible location under the hood.
- Start the engine and turn on the A/C to the maximum for a few minutes. This is to circulate the fluorescent dye in the system.
- Turn the engine OFF. Check for leaks using an ultraviolet lamp. Possible leak areas will glow a bright yellow/green when exposed to UV light.
- Note: Smaller leaks may require longer circulation time. Let the A/C system run for a few days then reinspect.
product R-12 SET-UP
- Complete all steps in SET-UP procedure.
- Remove R-12 adapter drip cap and attach to low side port of the A/C system.
- Attach injection gun system to the R-12 adapter valve.
- Repeat steps from 2-7 in the OPERATION procedure above (as applicable).
SET-UP INJECTION GUN SYSTEM
- Hold the disposable cartridge in an upright position then remove cap and seal from a cartridge.
- Attach hose (R-134a) to the top of the disposable cartridge then remove drip cap from adapter. (Fig. 1)
- Push the release lever on the injection gun with your thumb, and pull the rod all the way back. (Fig. 2)

- Install cartridge into gun assembly. (Fig. 3)
- Squeeze trigger until piston seats in disposable cartridge. Now the Injection gun system is ready to be used.
OPERATION (R-134a)
The Injection gun injects the dye into the A/C system without the need to evacuate any refrigerant. To use, proceed with the following steps:
- Connect injection gun system to the low side port of the A/C system.
- Inject dye into the A/C system by squeezing the trigger (Fig. 4). See “Dye Dose Chart” below.
- Disconnect injection gun system from the A/C port.
- Attach drip cap to the adapter.
- Install “Dye Service Sticker” in a visible location under the hood.
- Start the engine and turn on the A/C to maximum for a few minutes. This is to circulate the fluorescent dye in the system.
- Turn the engine “OFF”. Check for leaks using an ultraviolet lamp. Possible leak areas will glow a bright yellow/green when exposed to UV light.

Note: Smaller leaks may require longer circulation time. Let the A/C system run for a few days then reinspect.
R-12 SET-UP
- Complete all steps in SET-UP procedure.
- Remove R-12 adapter drip cap and attach to low side port of the A/C system.
- Attach injection gun system to the R-12 adapter valve.
- Repeat steps from 2-7 in OPERATION procedure above. (As applicable).