Contents hide

YOSE POWER Electric Bike Kits
Safety Regulation Notice of user manual
 Important information
 Notice of user manual
 Important information
E-Bike assembling & repair guide

Tools and Packing Components
| Installation tool | Material | |
| Adiustable wrench | Hub motor with wheel | |
| Cross screwdriver | Waterproof connection cable (5 in 1) | |
| Hex wrench | Controller | LCD display |
| Puller | PAS Sensor | Controller bag/box |
| Thumb throttle | Brake lever | |
| Front Led Light | ||
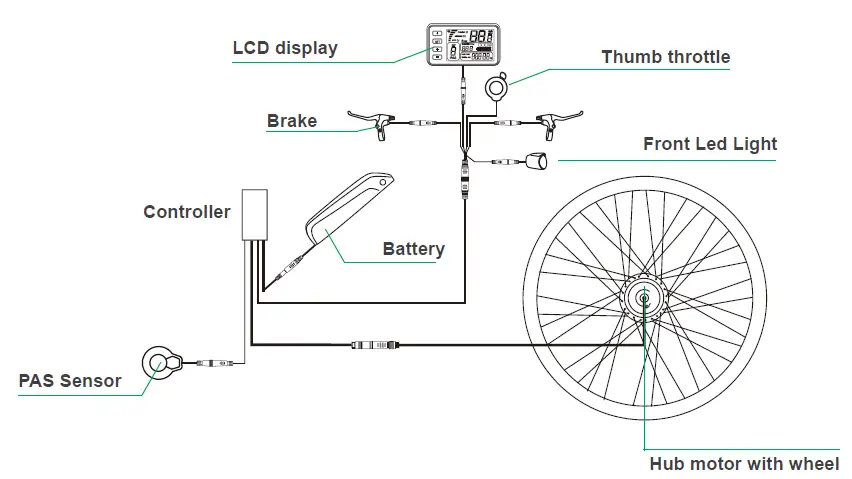
Kits connection diagram
Remove original front wheel
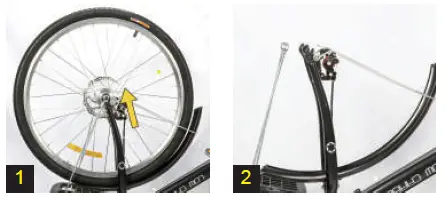
Photo1、2: Take out the original front wheel.
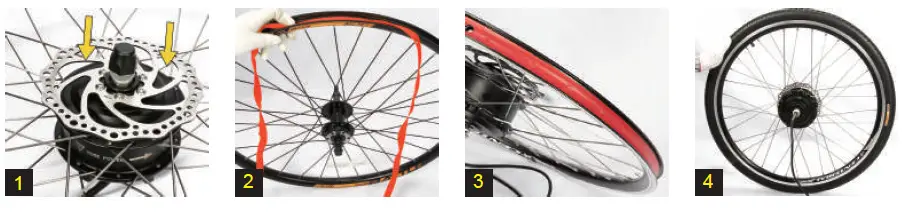
Brake disk/Tire installation
- Photo1: Unscrew the original brake disc and then install it on the motor with the hex wrench (Attention:Please use the screws from the motor to fasten the disc).
- Photo2、3: Remove the original tire and guard ring, install them on the motor wheel(The guard ring can protect the tire).
- Photo4: Install the original tire to the motor hub.

Front wheel installation
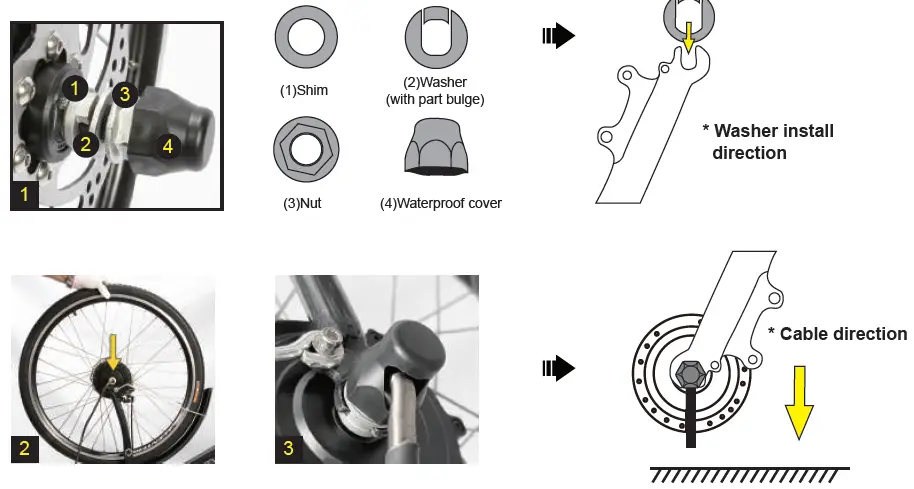
Motor screws install and fasten method
- Photo1: Place the washer (with part bulge), shim,and nut in sequence into both sides of the motor axle.
- Photo2-3: Put the front wheel into the front fork, place the washer between the motor and fork,then use the adjustable wrench to fasten the nut.Please note: the motor cable should face down,cover the waterproof plug, waterproof and dustproof.

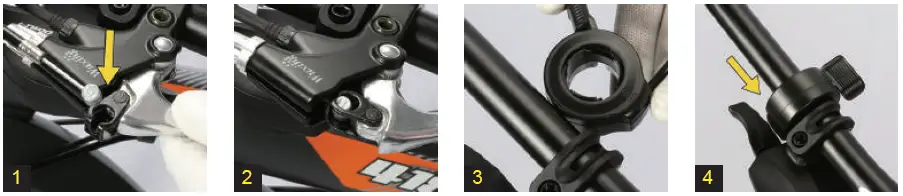
Brake Lever and Throttle installation
- Put the brake lever to the handle bar and adjust it to a comfortable position,then use the hex wrench to fix it.
- Photo1、2: Pull out the original brake line of bike, then connect the line to the new brake lever.
- Photo3、4: Place throttle on the right side of the bar,find a comfortable position and fasten it with hex wrench.

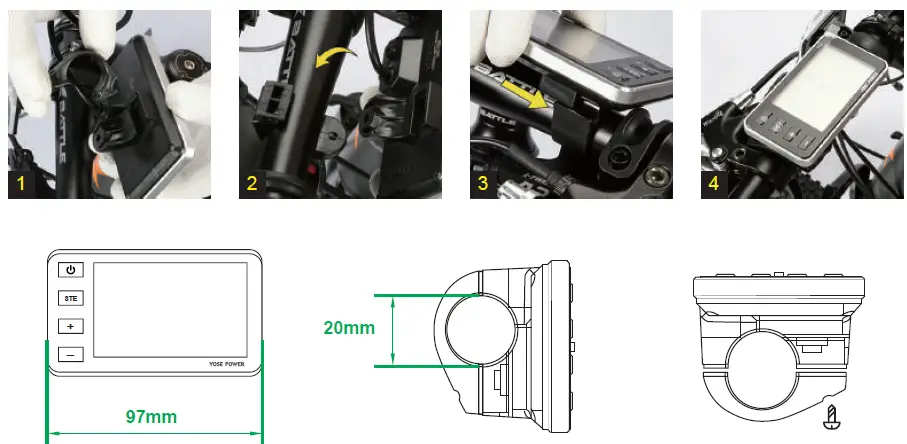
Display installation
- Put the display on the left handle bar and fix it in a comfortable position.
Please re-set the data of wheel diameter otherwise it will affect the speed showing (default value: 26 inch)
Install the PAS in the left pedal side
Use puller and hex wrench to take off the left crank, then install the pass sensor(Attention:the pass sensor spline must be matched well with crank spline ), finally install and fasten the left crank.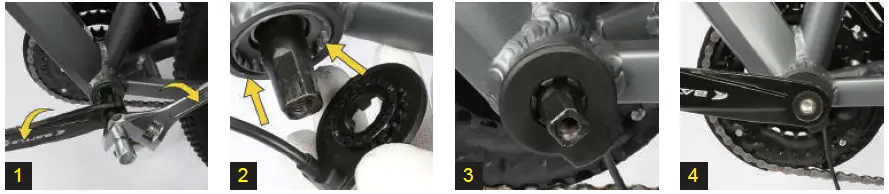
At last, install the battery and controller in the right position, and connect all connectors, then your e-bike has been done.


