
TOYOTA PT948-34220-00 2022 Tundra Tailgate Insert Badge Instruction Manual
Kit Contents
| Item # | Quantity Reqd. | Description |
| 1 | 1 | Badge Letter T |
| 2 | 1 | Badge Letter U |
| 3 | 1 | Badge Letter N |
| 4 | 1 | Badge Letter D |
| 5 | 1 | Badge Letter R |
| 6 | 1 | Badge Letter A |
Hardware Bag Contents
| Item # | Quantity Reqd. | Description |
| 1 | n/a | n/a |
| 2 | ||
| 3 |
Additional Items Required For Installation
| Item # | Quantity Reqd. | Description |
| 1 | n/a | n/a |
| 2 | ||
| 3 |
Conflicts
Recommended Tools
| Personal & Vehicle Protection | Notes |
| Safety Glasses / Gloves | Optional |
| Special Tools | Notes |
| Non Intrusive IR Temperature Probe / Gun | |
| Soft Felt Block | 0.5” thick with double bevel edges i.e. Sutherland Felt 32S1 or 3M 71606 |
| Installation Tools | Notes |
| Heat Source | For temperatures under 70°F |
| Lint-Free Scratch Resistant Cloth | WypAll L40 Disposable Cloth (Recommended) |
| Special Chemicals | Notes |
| Cleaner | VDC Approved Cleaner (PPO) |
| Soap & Water Mixture (DIO) | |
| Clean Water | Bottled Distilled Water |
General Applicability
| MY22 and newer Tundra Models |
Recommended Sequence of Application
| Item # | Accessory |
| 1 | Tailgate Insert |
| 2 | |
| 3 | |
*Mandatory
Vehicle Service Parts
(may be required for reassembly)
| Item # | Quantity Reqd. | Description |
| 1 | n/a | n/a |
| 2 | ||
| 3 | ||
Legend
![]() STOP: Damage to the vehicle may occur. Do not proceed until process has been complied with.
STOP: Damage to the vehicle may occur. Do not proceed until process has been complied with.
![]() OPERATOR SAFETY: Use caution to avoid risk of injury.
OPERATOR SAFETY: Use caution to avoid risk of injury.
![]() CAUTION: A process that must be carefully observed in order to reduce the risk of damage to the accessory/vehicle and to ensure a quality installation. TOOLS &
CAUTION: A process that must be carefully observed in order to reduce the risk of damage to the accessory/vehicle and to ensure a quality installation. TOOLS &
![]() EQUIPMENT: Used in Figures calls out the specific tools and equipment recommended for this process.
EQUIPMENT: Used in Figures calls out the specific tools and equipment recommended for this process.
![]() REVISION MARK: This mark highlights a change in installation with respect to previous issue.
REVISION MARK: This mark highlights a change in installation with respect to previous issue.
![]() SAFETY TORQUE: This mark indicates that torque is related to safety.
SAFETY TORQUE: This mark indicates that torque is related to safety.
![]() REGULATORY MARK: This mark indicates the component is related to regulatory compliance
REGULATORY MARK: This mark indicates the component is related to regulatory compliance

Care must be taken when installing this accessory to ensure damage does not occur to the vehicle. The installation of this accessory should follow approved guidelines to ensure a quality installation.
These guidelines can be found in the “Accessory Installation Practices” document.
This document covers such items as:-
- Vehicle Protection (use of covers and blankets, cleaning chemicals, etc.).
- Safety (eye protection, rechecking torque procedure, etc.).
- Vehicle Disassembly/Reassembly (panel removal, part storage, etc.).
- Electrical Component Disassembly/Reassembly (battery disconnection, connector removal, etc.).
Please see your Toyota dealer for a copy of this document.
Installation Precautions

 Thoroughly clean all installation surfaces.
When cleaning with VPC approved cleaner (PPO), follow with a clean water solution.- Always use a clean WypAll lint-free scratch resistant cloth.
- Shake VPC cleaner (PPO) or soap & water mixture (DIO) well.
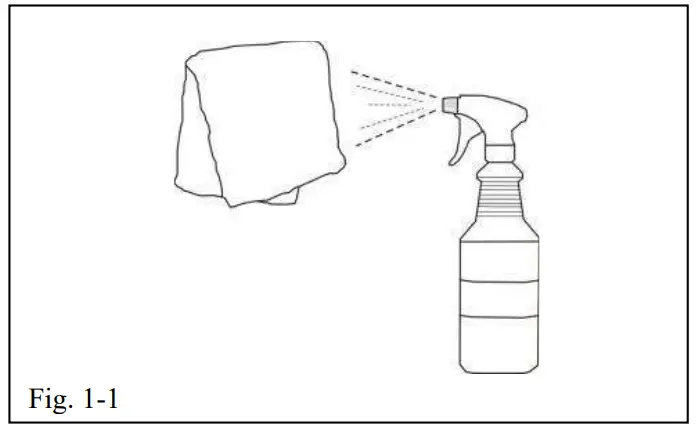
- Apply VPC cleaner or soap & water mix directly to cloth. Do not spray cleaning solutions directly to vehicle. (Fig.1-1)

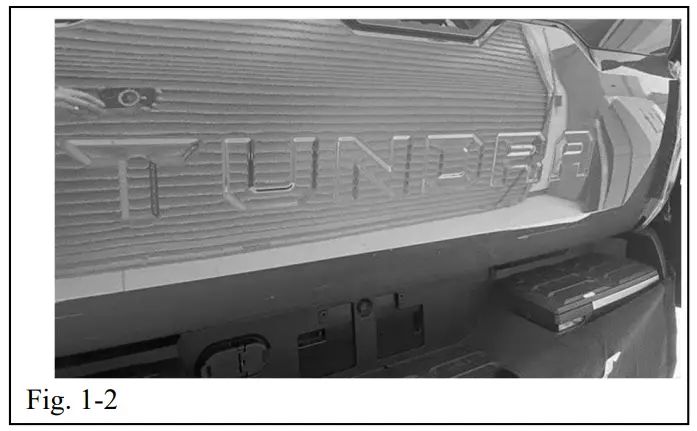
- Clean surface thoroughly and wipe dry immediately with a new clean cloth. Do not allow cleaner to air dry. (Fig. 1-2)
- Apply water to a clean cloth. Clean surface soap & water mixture is completely removed. Wipe dry with a new clean cloth.
- Tailgate badge and vehicle installation surface must be between 70°F and 110°F (21°C and 43°C) at time of installation.
- A heat source may be used to reach minimum temperature if necessary.
Check Kit Content
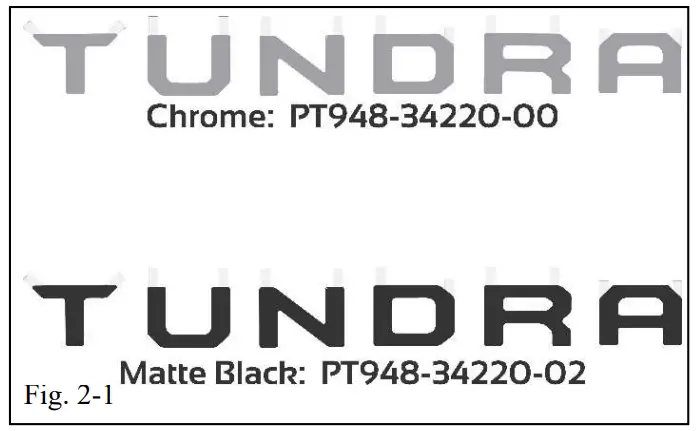
- Inspect kit for content and damage. (Fig. 2-1)
Install Letter T
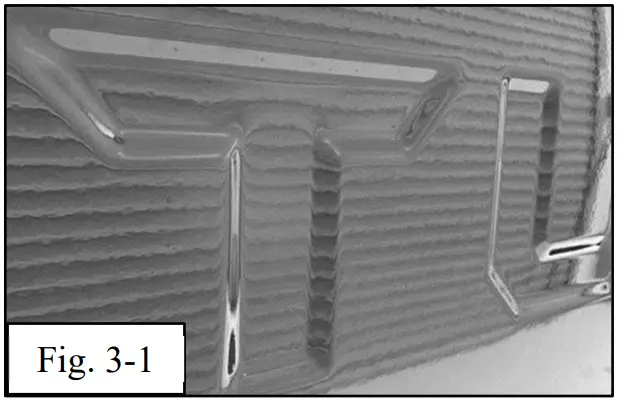
- Center the letter T inside of the corresponding cavity in the rear tailgate to confirm fit. (Fig. 3-1)

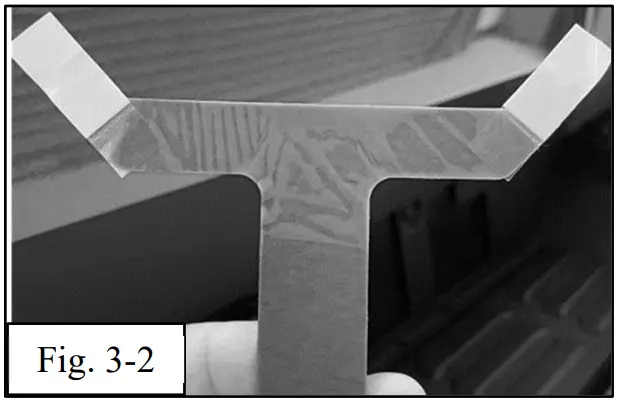
- Pull down the pull tab on the top left and top right edges of the letter exposing the adhesive backer. (Fig 3-2).
- Do not touch adhesive during installation.
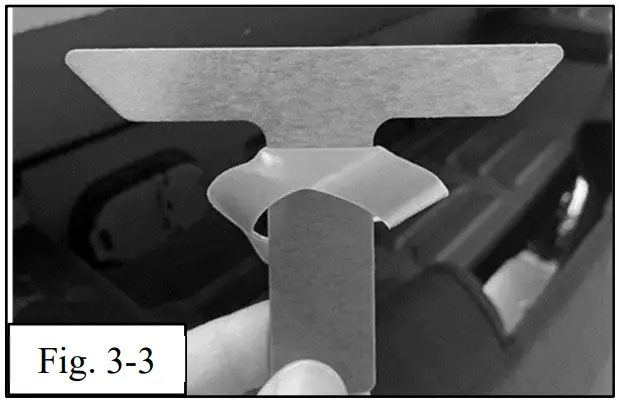
- Pull the liner down until the liner reaches halfway down the letter (Fig 3-3).
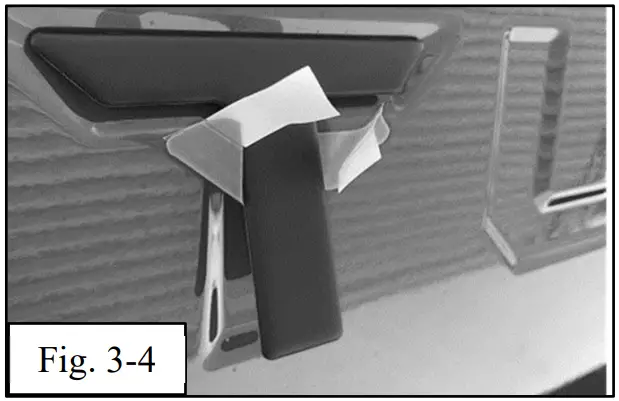
- Align the top left corner of the insert and slightly attach the letter (do not fully adhere to vehicle) (Fig 3-4).
- Do not touch adhesive during installation.
- Check the top left and top right of the letter are aligned and make any alignment adjustments before removing the rest of the liner.
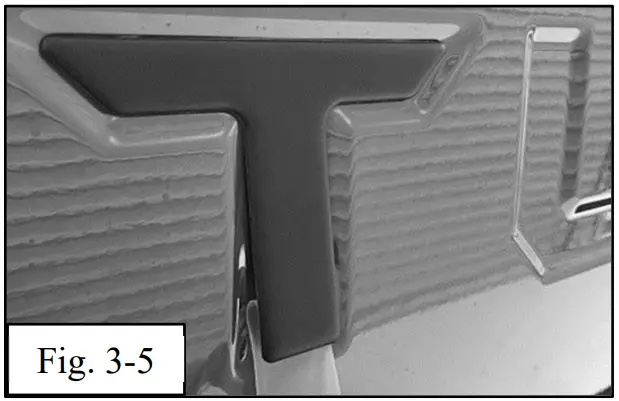
- Remove the remaining liner and press lightly to adhere (Fig 3-5).
- Do not touch adhesive during installation.
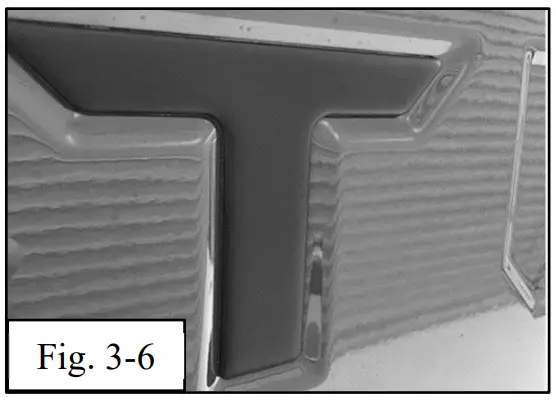
- Using a soft felt block, press firmly on the letter T from the top edge working downward to the bottom of the letter, to ensure maximum adhesion contact. (Fig. 3-6)

Install Letter U
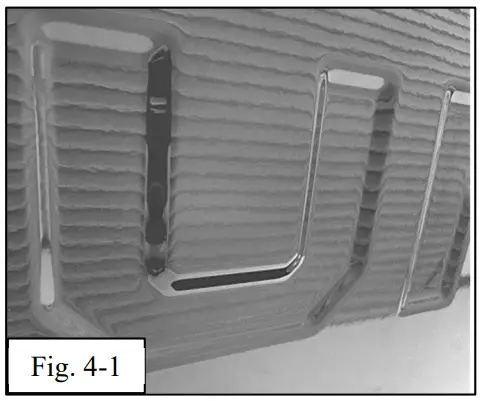
- Center the letter U inside of the corresponding cavity in the rear tailgate to confirm fit. (Fig. 4-1)

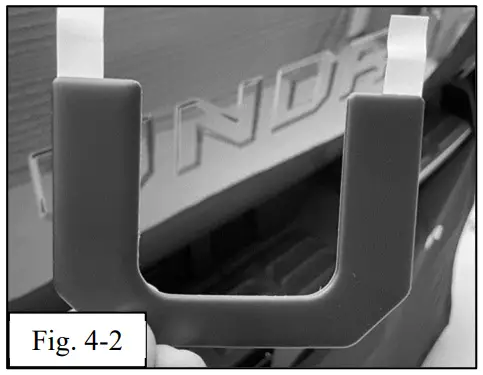
- Pull down the pull tab on the top left and top right edges of the letter exposing the adhesive backer (Fig 4-2).

- Do not touch adhesive during installation.
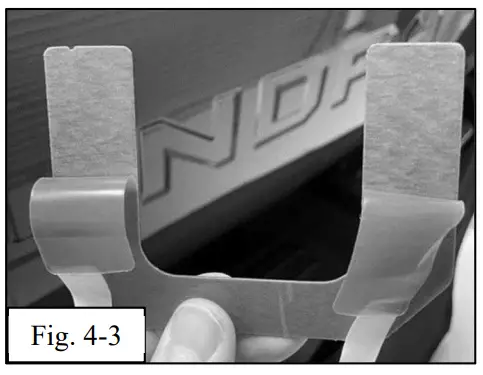
- Pull down the liner until the liner reaches halfway down the letter (Fig 4-3).
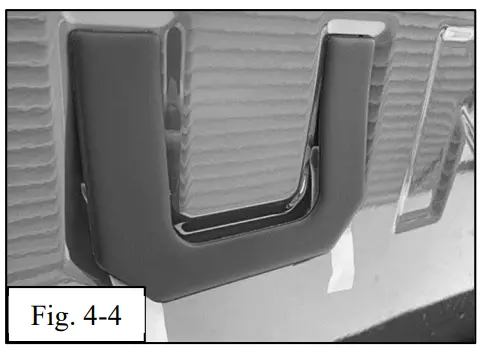
- Align the top left corner of the insert and slightly attach the letter (do not fully adhere to vehicle) (Fig 4-4).

- Do not touch adhesive during installation.
- Check the top left and top right of the letter are aligned and make any alignment adjustments before removing the rest of the liner.
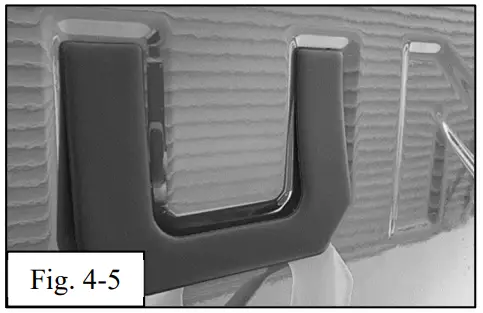
- Remove the remaining liner and press lightly to adhere (Fig 4-5).

- Do not touch adhesive during installation.
- Using a soft felt block, press firmly on the letter U from the top edge working downward to the bottom of the letter, to ensure maximum adhesion contact.
Install Letter N
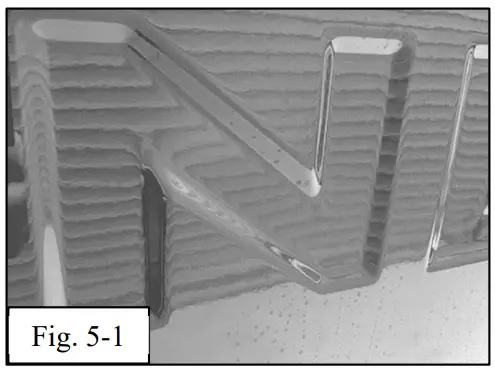
- Center the letter N inside of the corresponding cavity in the rear tailgate to confirm fit. (Fig. 5-1)

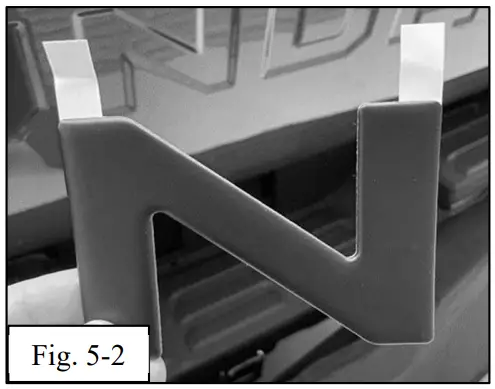
- Pull down the pull tab on the top left and top right edges of the letter exposing the adhesive backer (Fig 5-2).

- Do not touch adhesive during installation.
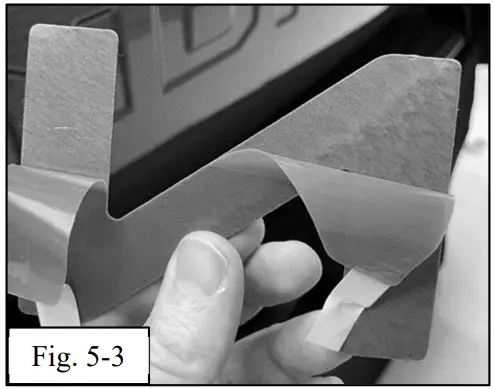
- Pull the liner down until the liner reaches halfway down the letter (Fig 5-3).
- Align the top left corner of the insert and slightly attach the letter (do not fully adhere to vehicle)
- Do not touch adhesive during installation.
- Check the top left and top right of the letter are aligned and make any alignment adjustments before removing the rest of the liner.
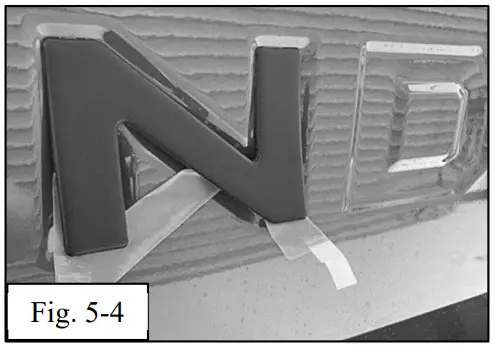
- Remove the remaining liner and press lightly to adhere (Fig 5-4).

- Do not touch adhesive during installation.
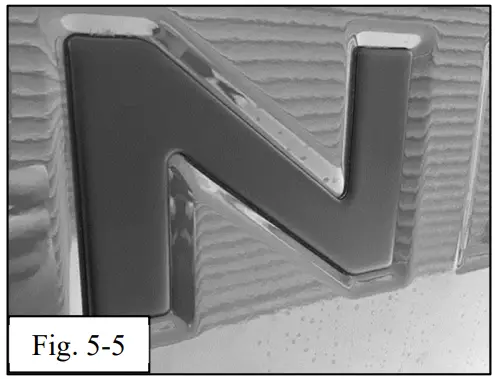
- Using a soft felt block, press firmly on the letter N from the top edge working downward to the bottom of the letter, to ensure maximum adhesion contact. (Fig. 5-5)

Install Letter D
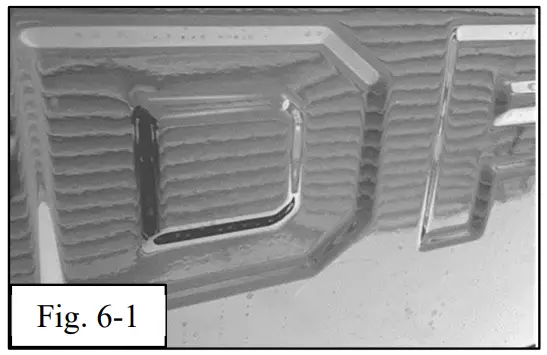
- Center the letter D inside of the corresponding cavity in the rear tailgate to confirm fit. (Fig. 6-1)

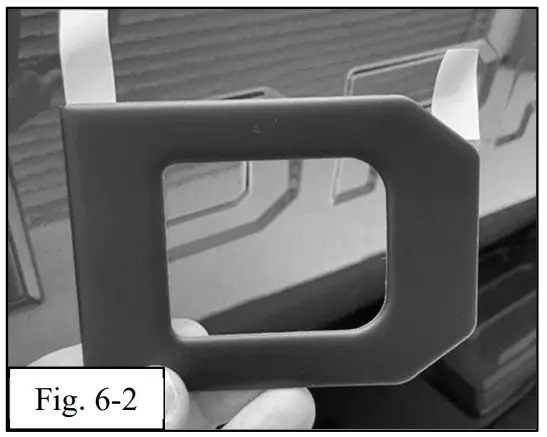
- Pull down the pull tab on the top left and top right edges of the letter exposing the adhesive backer (Fig 6-2).

- Do not touch adhesive during installation.
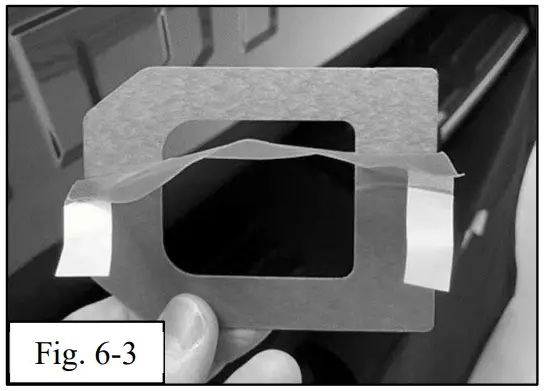
- Pull the liner down until the liner reaches halfway down the letter (Fig 6-3).

- Align the top left corner of the insert and slightly attach the letter (do not fully adhere to vehicle)
- Do not touch adhesive during installation.
- Check the top left and top right of the letter are aligned and make any alignment adjustments before removing the rest of the liner.
- Remove the remaining liner and press lightly to adhere (Fig 6-4).

- Do not touch adhesive during installation.
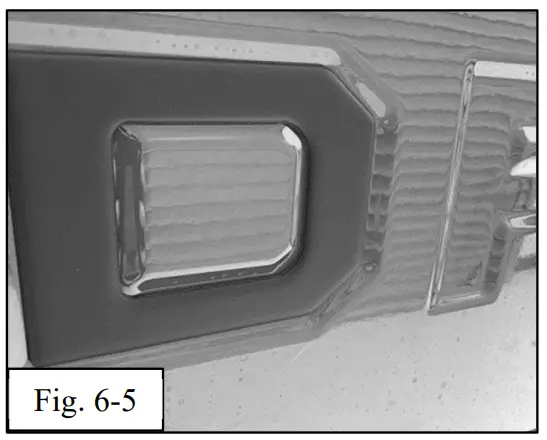
- Using a soft felt block, press firmly on the letter D from the top edge working downward to the bottom of the letter, to ensure maximum adhesion contact. (Fig. 6-5)


Install Letter R
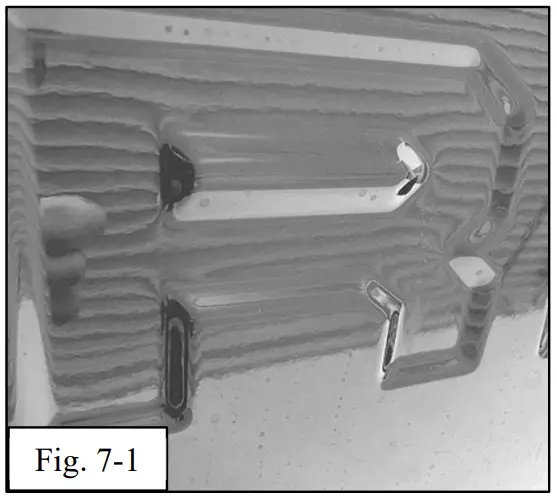
- Center the letter R inside of the corresponding cavity in the rear tailgate to confirm fit. (Fig. 7-1)

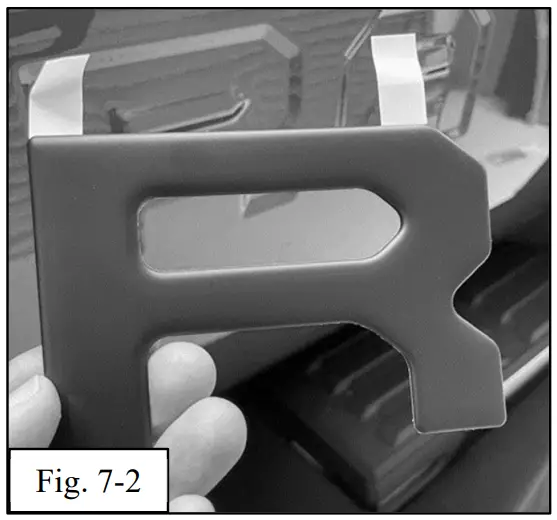
- Pull down the pull tab on the top left and top right edges of the letter exposing the adhesive backer (Fig 7-2).

- Do not touch adhesive during installation.
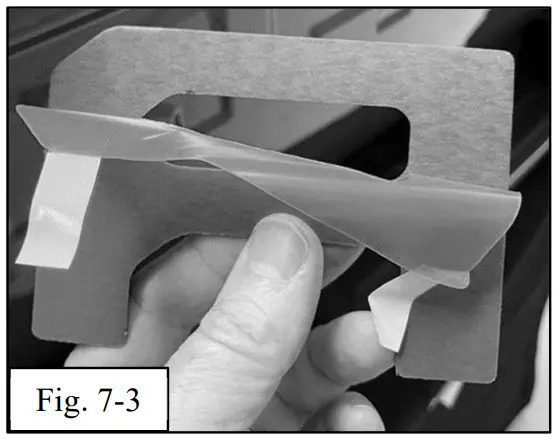
- Pull the liner down until the liner reaches halfway down the letter (Fig 7-3).

- Align the top left corner of the insert and slightly attach the letter (do not fully adhere to vehicle).
- Do not touch adhesive during installation.
- Check the top left and top right of the letter are aligned and make any alignment adjustments before removing the rest of the liner.
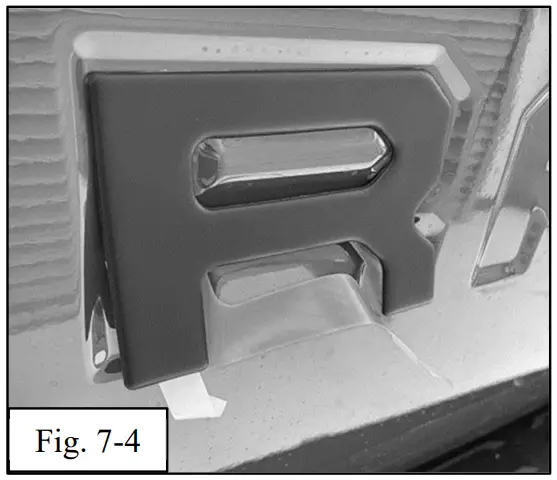
- Remove the remaining liner and press lightly to adhere (Fig 7-4).

- Do not touch adhesive during installation.
- Using a soft felt block, press firmly on the letter R from the top edge working downward to the bottom of the letter, to ensure maximum adhesion contact.
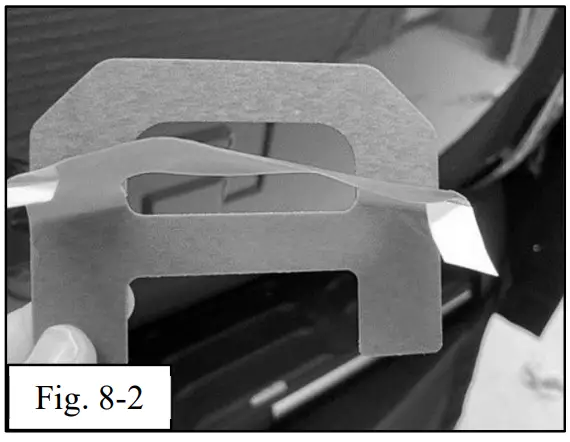
Install Letter A
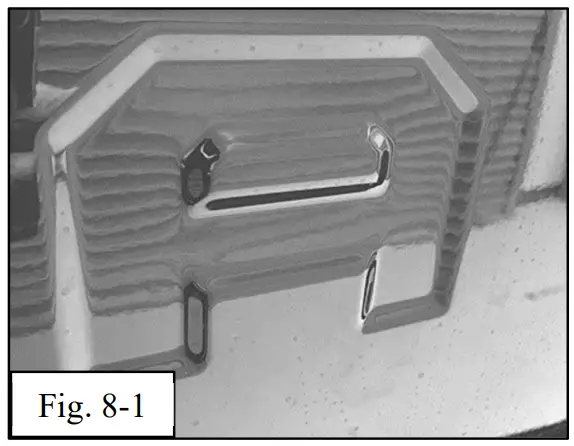
- Center the letter A inside of the corresponding cavity in the rear tailgate to confirm fit. (Fig. 8-1)

- Pull down the pull tab on the top left and top right edges of the letter exposing the adhesive backer.
- Do not touch adhesive during installation.
- Pull the liner down until the liner reaches halfway down the letter (Fig 8-2).

- Align the top left corner of the insert and slightly attach the letter (do not fully adhere to vehicle).
- Do not touch adhesive during installation. (e) Check the top left and top right of the letter are aligned and make any alignment adjustments before removing the rest of the liner.
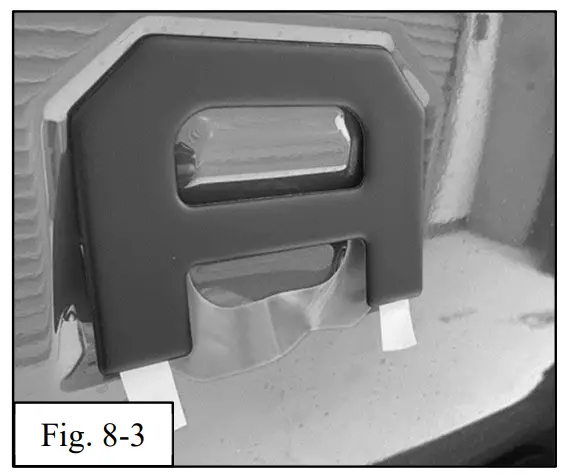
- Remove the remaining liner and press lightly to adhere (Fig 8-3).

- Do not touch adhesive during installation.
- Using a soft felt block, press firmly on the letter A from the top edge working downward to the bottom of the letter, to ensure maximum adhesion contact.
Check
Accessory Function Checks
![]() Tailgate badge adhesive
Tailgate badge adhesive![]() Tailgate badge alignment
Tailgate badge alignment
Vehicle Function Checks
![]() n/a
n/a![]()
![]()
Vehicle Appearance Check
![]() After accessory installation, perform a visual inspection.
After accessory installation, perform a visual inspection.
![]() Verify that all six letters are installed.
Verify that all six letters are installed.
Look For:
Badge letters should be securely attached to the vehicle; no air pockets or lifting.
Badge letters should be aligned evenly inside of the factory tailgate cavity.
Ensure no damage (including scuffs and scratches) was caused during the installation process.
![]()


