![]() Versa™ Mediabar™- BlueTooth
Versa™ Mediabar™- BlueTooth
User Manual
Introduces Versa Mediabar
![]() ClearOne® Contacts
ClearOne® Contacts
Headquarters
5225 Wiley Post Way Suite 500
Salt Lake City, UT 84116
Sales
Tel: +1.801.975.7200
[email protected]
Headquarters
Tel: +1.801.975-7200
Technical Support
Tel: +1.801.974.3760
[email protected]
Notices
© 2022 ClearOne, Inc. All rights reserved.
Information in this document is subject to change without notice.
Document: DOC-0481-001v1.0, September 2022
About The Product
1.1 Feature
- Designed with built-in all-in-one camera, microphone, and speaker;
- With Speaker Tracking Function and Auto Framing Tracking Function;
- 110° ultra-wide FOV with no distortion, full coverage of the whole meeting room;
- 4K Ultra HD video @30fps, brings super clear video experience;
- EPTZ realizes automatic viewfinder and intelligently selects all participants;
- Effective and accurate speaker detection and tracking function, fast and accurate close-up of speakers;
- Built-in high-sensitive omnidirectional microphone, up to 5 meters of sound pickup distance, supports ANS, AEC, AGC;
- USB 3.0, MJPEG/H.264/H.265/YUV;
- Supports UVC/UAC protocol;
- Configure mute and mute prompt functions;
- Supports Bluetooth and USB connection (can not work together)
- Exquisite remote control settings, easy to hold and control.
1.2 Application Scenarios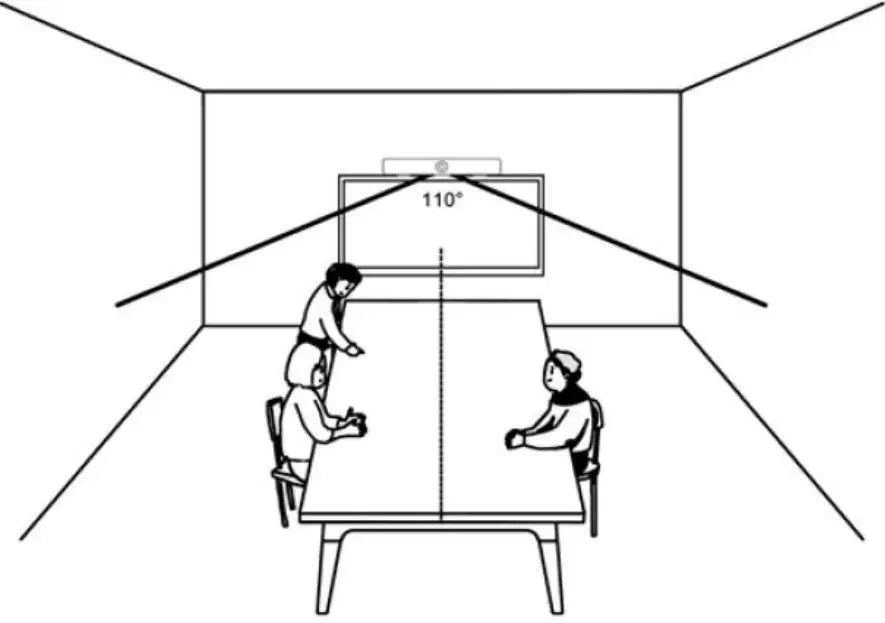
Components
2.1 Accesories
When you open the box, check all accessories according to the packing list.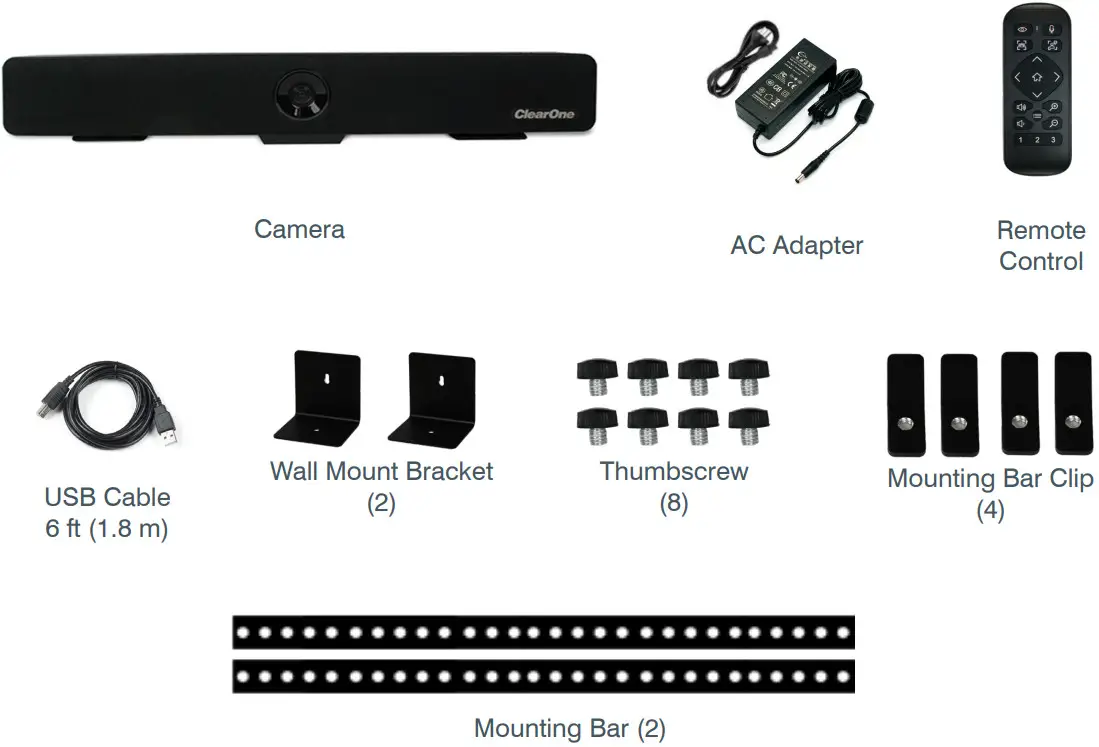 2.2 Main Parts & Interfaces
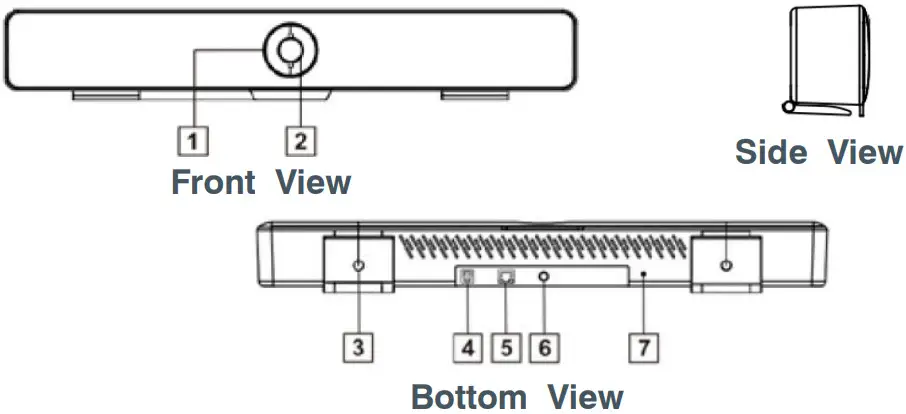
| No | Interface |
| 1 | LED Light |
| 2 | Camera Lens |
| 3 | Bracket |
| 4 | USB Type B |
| 5 | EXT(connect with external microphone) |
| 6 | Power(DC12V) |
| 7 | Service |
2.3 Remote & Control(Standard)
| No | Name | Function |
| 1 | Privacy | Reserved |
| 2 | Auto Framing | Turn on / Turn off Auto framing |
| 3 | Pan | •In menu mode, set menu options •In non-menu mode, pan right / left |
| 4 | Volume | Increase / decrease volume |
| 5 | Menu | Open/close the OSD menu |
| 6 | Mute | Turn on/off the microphone sound |
| 7 | Speaker Tracking | Turn on/off the speaker tracking |
| 8 | Tilt | In menu mode, set menu options In non-menu mode, tilt up / down |
| 9 | HOME | •In menu mode, confirm to Enter •In non-menu mode, press to move camera to Home position •Long press Home button to switch between USB and Bluetooth audio |
| 10 | Zoom | Zoom in/out |
| 11 | Number | •Short press to CALL saved preset •Long press(2 seconds) to set preset |
2.4 Common Function
2.4.1 EPTZ
The camera supports EPTZ control, and 4x digital zoom. The EPTZ can be controlled via direction keys to adjust the image position. And the current image size can be adjusted via zoom button.![]() Note: the Pan / Tile button can not work under the max FOV.
Note: the Pan / Tile button can not work under the max FOV.
2.4.2 Auto Framing
This product has auto framing function. Press the corresponding key and the camera screen can be intelligently scaled according to the number of people in the meeting scene, and centralize all participants. Press again to turn off the automatic box.![]() Note: the auto framing state will be ended by press PTZ buttons or Auto Framing button.
Note: the auto framing state will be ended by press PTZ buttons or Auto Framing button.
2.4.3 Speaker Tracking
The all-in-one supports Speaker Tracking function. Press the Speaker Tracking button to turn on / off the Speaker Tracking function. The all-in-one will give the person who is speaking a close-up view under the Speaker Tracking ON state.
2.4.4 Set/Call The Preset
Long press (2 seconds) the number buttons to set preset; Short press the number buttons to CALL saved preset, and the camera will quickly go to saved preset position.
2.4.5 Menu Function
After entering the menu, select the menu options via direction keys. Press the HOME key to enter the options, adjust the options by using the pan button. Press the Menu key to return to previous menu until the exit menu.
2.4.6 USB And Bluetooth Switching Instructions
After the camera is connected to the USB cable and powered on, the default is USB mode. Long press the HOME key for 2 seconds, the sound source of the horn is switched to Bluetooth, and the word “BT” is displayed on the screen for 5 seconds. Bluetooth is visible and automatically connected to the device (pairing connection is required for the first time). In Bluetooth mode, long press the HOME key for 2 seconds, the Bluetooth is disconnected, the screen displays the word “USB” for 5 seconds, the sound source of the speaker is switched to USB, and the Bluetooth is invisible and cannot be connected.
2.4.7 Indicator
| Action | Indicator Status |
| None | Blue |
| Mic Mute | Red |
| Adjust The Volume | Green, the range of light on varies with the volume |
Installation
3.1.Dimension Figure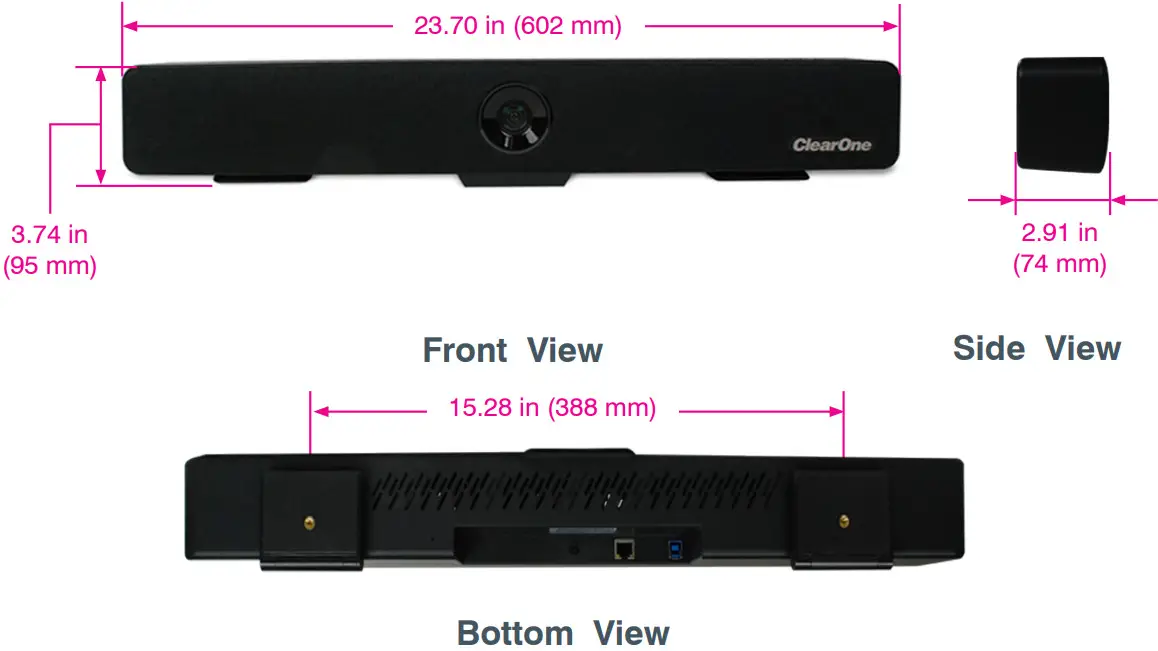 3.2 Installation
3.2.1. Bracket(Standard)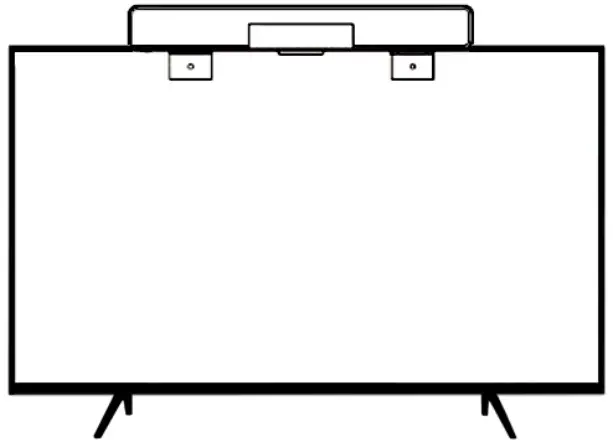 » If your TV doesn’t have mounting bracket, please fix the mount bars with screw holes on the back of your TV.
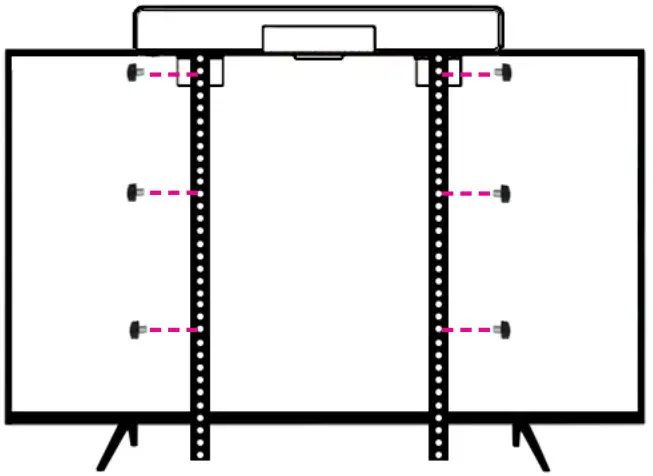 » If your TV doesn’t have mounting bracket, please fix the mount bars with screw holes on the mounting bracket.
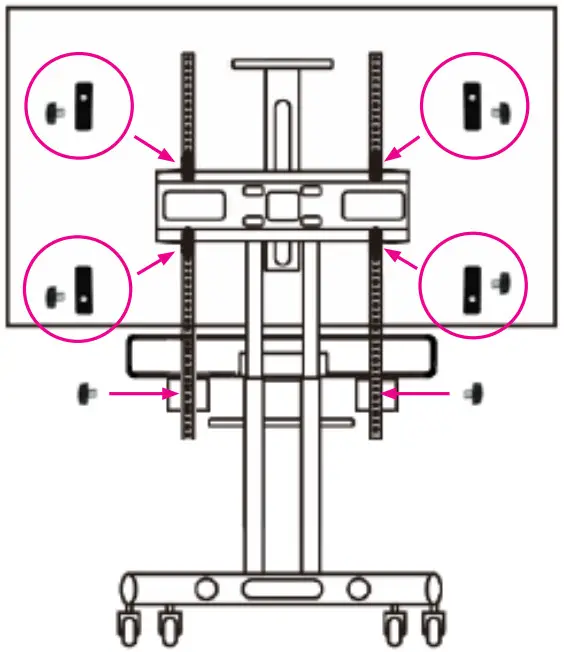 3.2.2. Wall-mount
» Referring to the aperture and position of the mounting hole, drill the corresponding hole at the mounting place and fix the bracket in the mounting place with screws.
» Insert the camera base into the groove of the bracket. To ensure the safety of the camera, make sure the camera is firmly attached to the bracket before you let it go.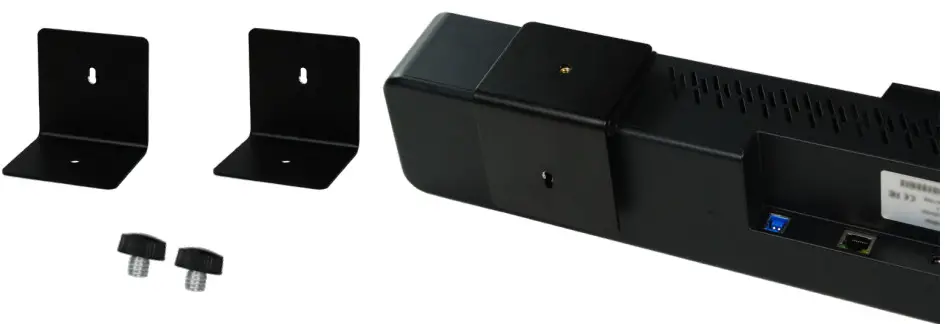 3.3 Connection
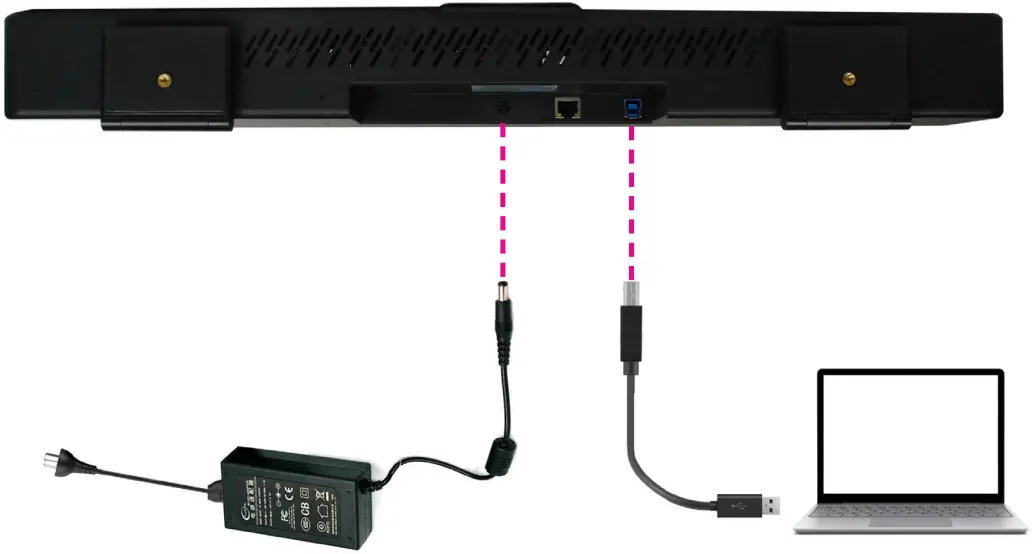 Bluetooth Connection:
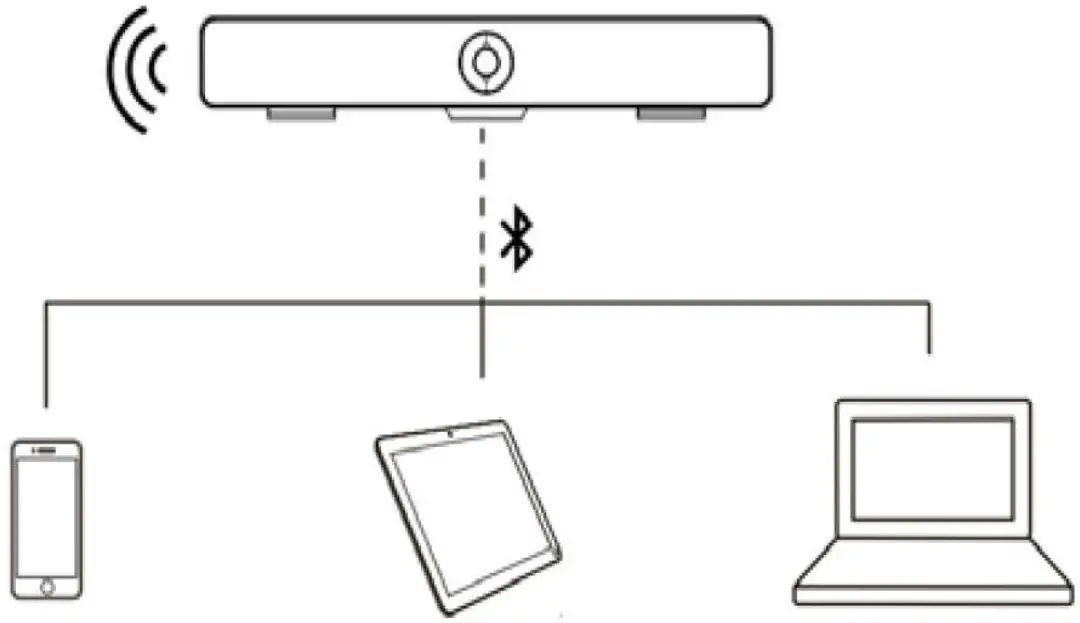 3.4 Bluetooth connectivity
Open camera application in the laptop and select media bar camera to see OSD menu of the media bar.
Step 1
Press menu in the given media bar remote and navigate to system menu for options.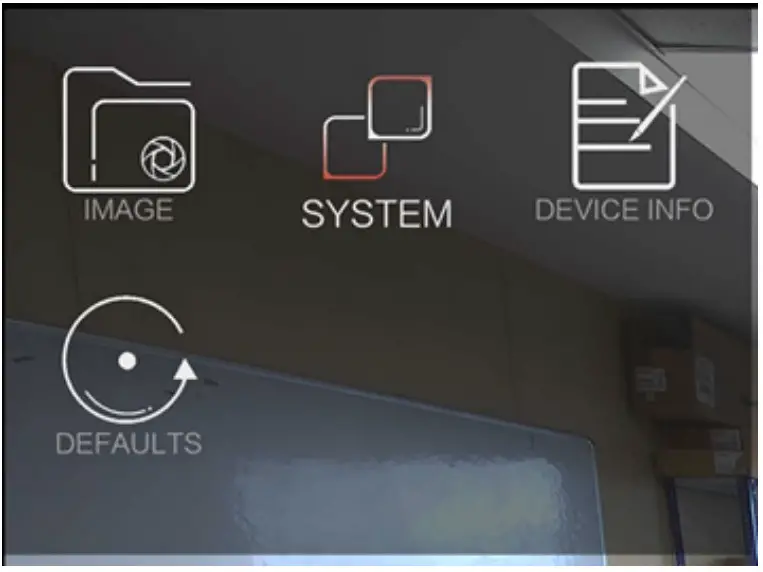 Step 2
In the system menu options, please change the ACTIVE AUDIO from USB to BT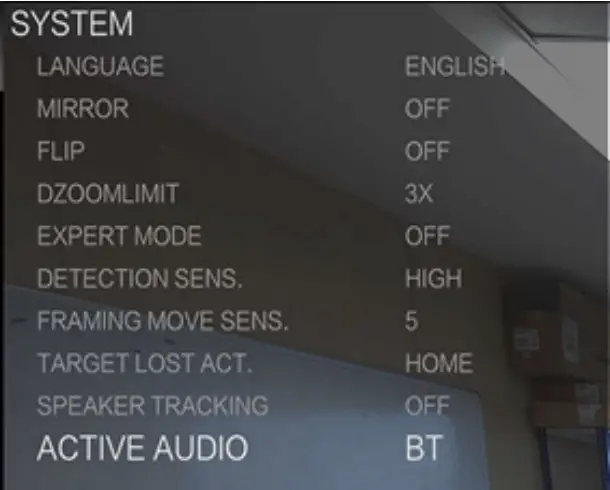
Step 3
Add Bluetooth or other device to pair versa media bar with laptop for first time, once paired you connect with versa media bar by clicking “connect”
Disconnect USB cable from versa media bar to laptop and enable Bluetooth in the laptop and select versa media bar BT from search results.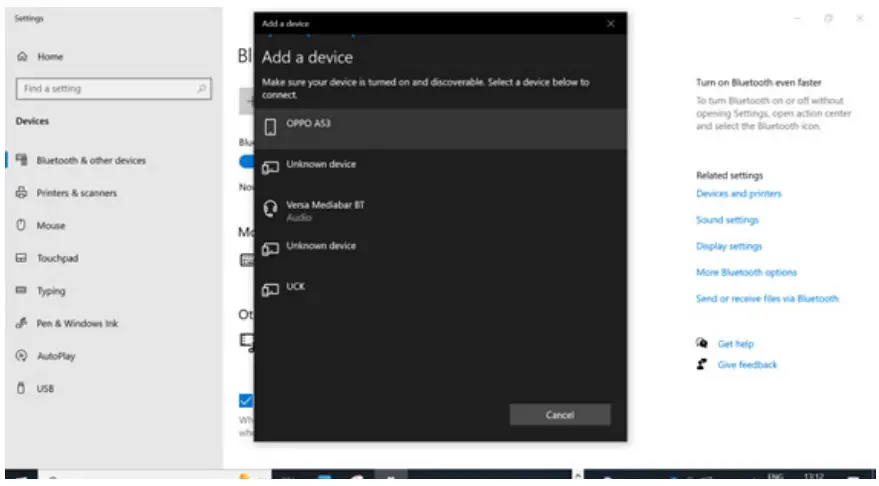 Step 4
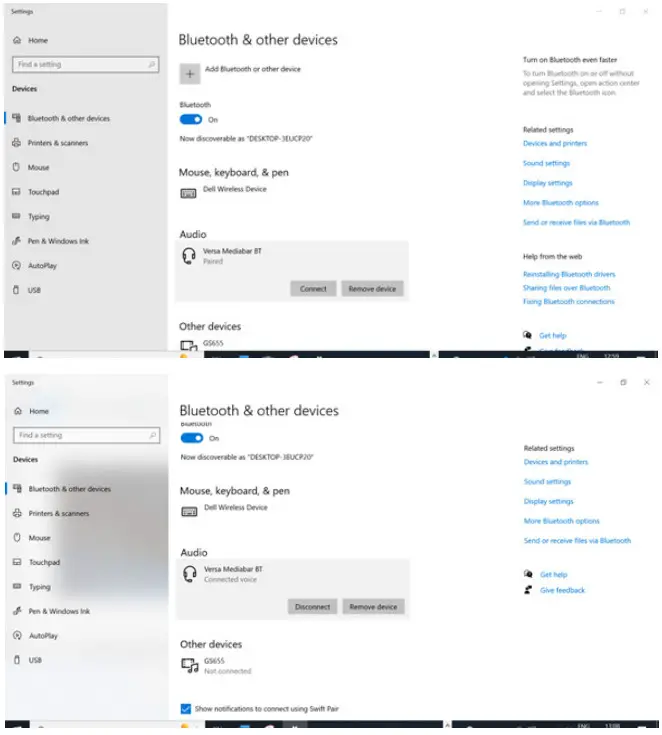 Now the laptop audio is connected to media bar speaker and microphone system.
4.1. Menu Structure
Press the [MENU] button to display the main menu. Use the arrow buttons to select the item to be set.
Press the [HOME] button to enter a sub-menu.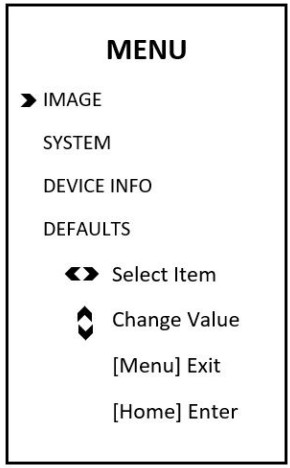 Select Image from the main menu and press the [HOME] button. The IMAGE menu appears.
The table on the following page provides information about Image settings.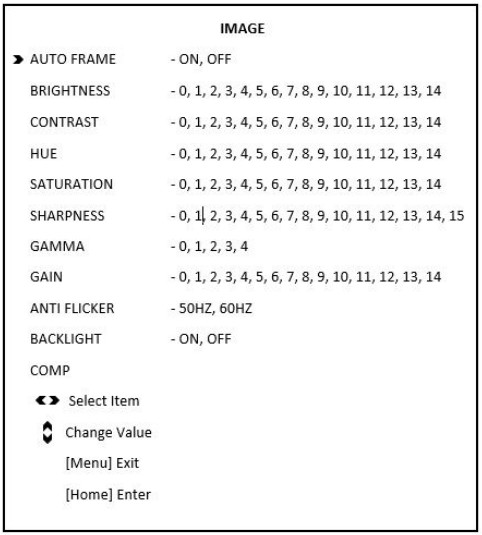 Select System from the main menu and press the [HOME] button. The SYSTEM menu appears.
The table on the following page provides information about System settings.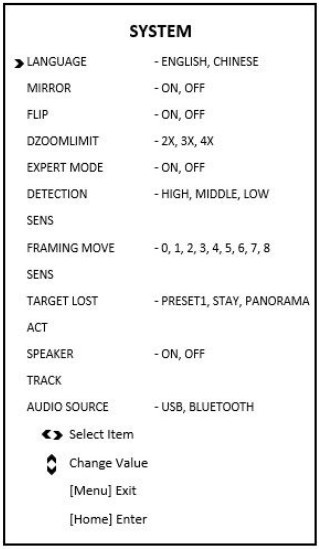 Select Device Info from the main menu and press the [HOME] button. The DEVICE INFO menu appears.
The table on the following page provides information about Device Info settings.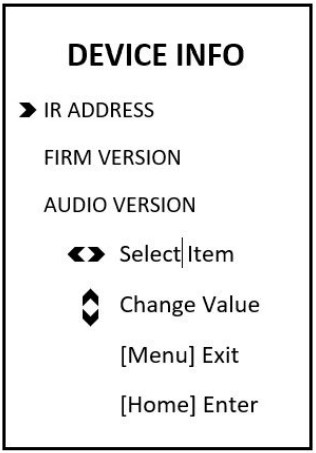 Select Defaults from the main menu and press the [HOME] button. The DEFAULTS menu appears.
The table on the following page provides information about Defaults settings.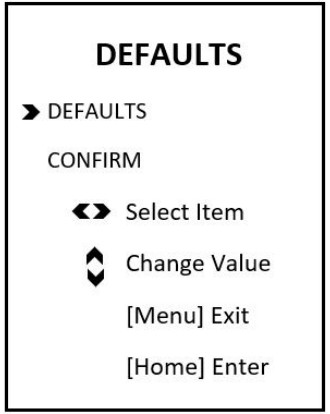
Technical Data
Camera
| Image Sensor | 1/2.8” 4K CMOS, 8.46MP |
| IRIS | F2.2 |
| Focal Lens | f=2.1mm |
| Digital Zoom | 4X |
| Field of View | Horizontal: 110°, Vertical: 74° |
| EPTZ | Support |
| Min Focus Distance | 50cm |
| Min Illumination | 50Lux |
| Max Frame Rate | 4K@30fps |
| Exposure | Auto, Manual, Shutter priority |
| White Balance | Auto, Manual |
| Digital Noise Reduction | 2D, 3D |
| Image Flip | Flip, Mirror |
Audio
| Built-in Mic | 4MIC array |
| Pick-up Distance | 5meter |
| Audio Process | AEC, ANC, AGC |
| Speaker | Support |
Interface
| USB | 1 channel USB3.0, Type B; 1. support UVC 1.0 2. support MJPEG/H.264/H.265/YUV 1) MJPEG: 4K@30/25fps, 1920×1080@30/25fps, 1280×720@30/25fps, 640×360@30/25fps 2) H.264: 4K@20fps, 1920×1080@30/25fps, 1280×720@30/25fps, 640×360@30/25fps 3) H.265: 4K@20fps, 1920×1080@30/25fps, 1280×720@30/25fps, 640×360@30/25fps 4) YUV: 1920×1080@5fps,1280×720@10fps, 640×360@30/25fps 3. support UAC |
| Network | 1 channel RJ-45, 10/100/1000M |
| Mic-Extension | Support |
| Bluetooth | Support |
| Remote-Control | Support |
| Power | DC 12V |
General
| Consumption | < 8W |
| Working Temperature | 0°C ~ + 40°C |
| Storage Temperature | -20°C ~ +60°C |
| Working Humidity | 10%RH ~ 90%RH |
| Storage Humidity | 10%RH ~ 95%RH |
| Dimension (L×W×H) | 602mm×74mm×95mm |
| Net Weight | 1.66kg |
| Color | Black |
DOC-0494-001v1.0
Back to Table of Contents![]()


