ClearOne CLRO-910-2200-001 Versa Mediaba
SYMBOLS INSTRUCTION
| Symbol | Instructions |
| To represent the supplement and explanation of the text. |
| To indicate that the user is alerted to some important operation or to prevent the potential danger of injury and property damage. |
| To indicate a potential risk that, if not avoided, may result in injury accidents, equipment damage or business interruption. |
| To indicate a high potential risk that, if not avoided, may result in significant risk of death or injury. |
| The symbol indicates polarity of d.c. power connector | |
| Direct Current. |
SAFETY NOTES
The following important notes must be followed carefully to run the camera and respective accessories in total safety. The camera and relative accessories are called video system in this section.
- Before installing the camera, please read this manual carefully. Please follow installation instructions indicated in this manual during installation. Please keep this manual for future use.
- Please put the power cable, video cable and control cable in safe place.
- Do not operate the camera beyond the specified temperature and humidity. Working temperature range of the camera is between 0 ~ +25. The ambient humidity range is 10%RH ~ 90%RH.
- During transporting, avoid violent shake or force to the camera.
- This device complies with Part 15 of the FCC Rules. Operation is subject to the following two conditions:
(1) this device may not cause harmful interference
(2) this device must accept any interference received, including interference that may cause undesired operation. - The users manual or instruction for an intentional or unintentional radiator shall caution the user that changes or modifications not expressly approved by the party responsible for compliance could void the user’s authority to operate the equipment. In cases where the manual is provided only in a form other than paper, such as on a computer disk or over the Internet, the information required by this section may be included in the manual in that alternative form, provided the user can reasonably be expected to have the capability to access information in that form.
- This equipment must be installed and operated in accordance with provided instructions and the antenna(s) used for this transmitter must be installed to provide a separation distance of at least 20 cm from all persons and must not be co-located or operating in conjunction with any other antenna or transmitter. End-users and installers must be provide with antenna installation instructions and transmitter operating conditions for satisfying RF exposure compliance.
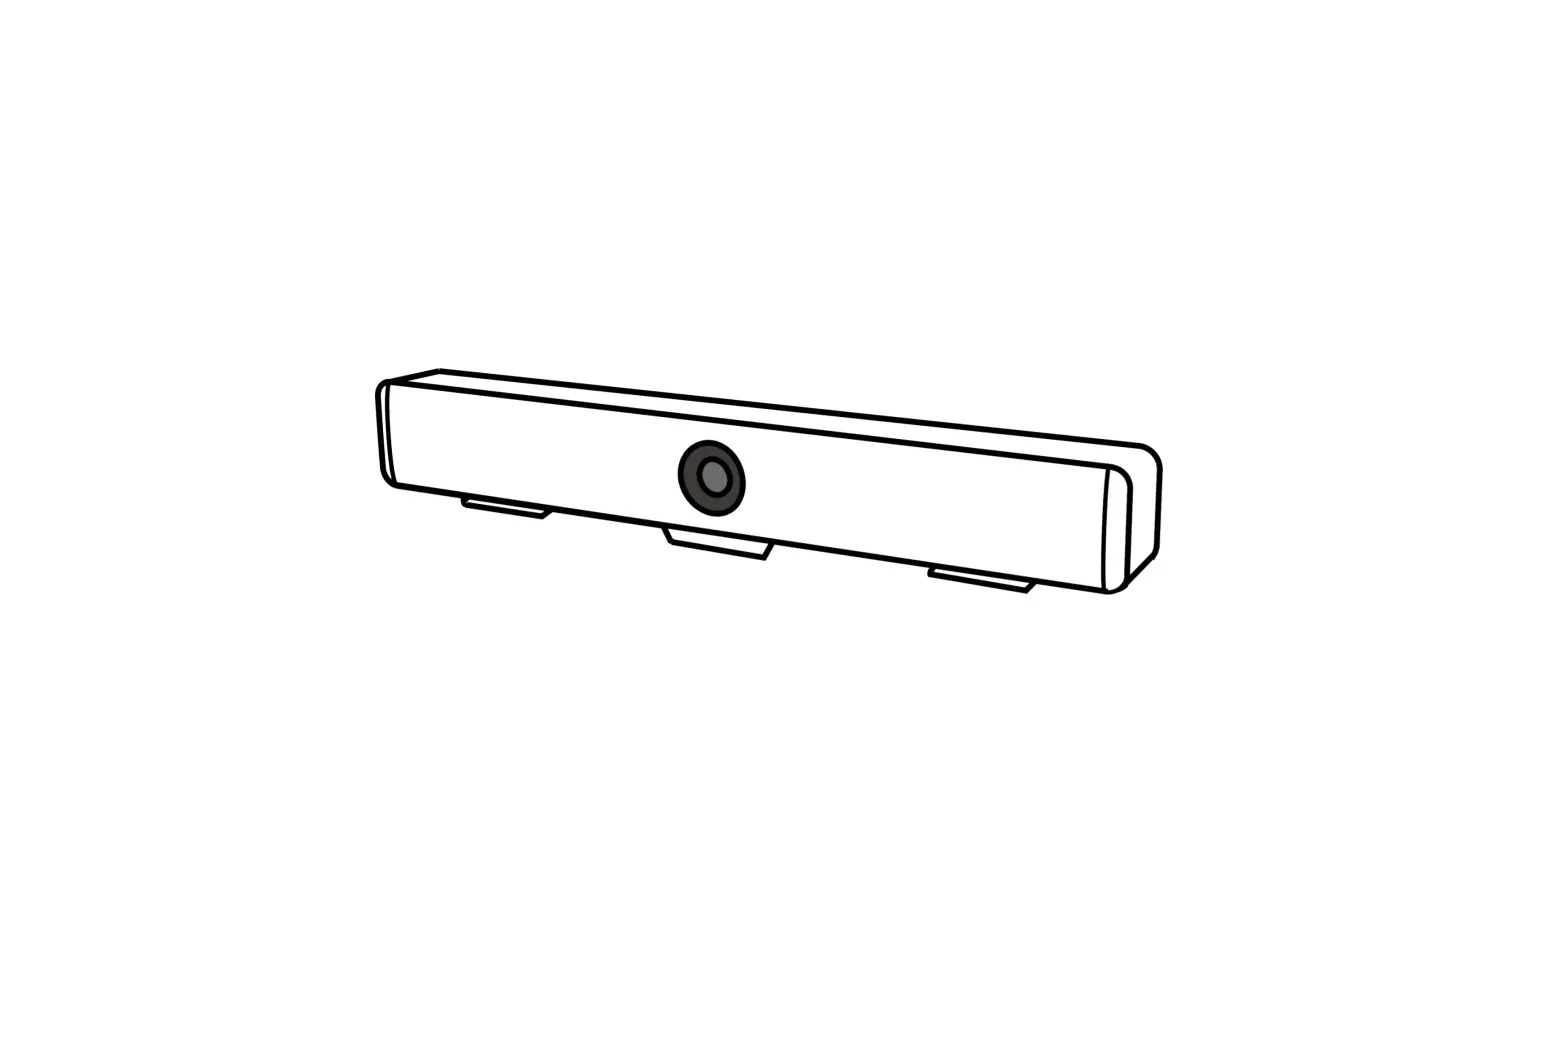
ABOUT THE PRODUCT
Characteristics & Functions
- Designed with built-in all-in-one camera, microphone, and speaker;
- With Speaker Tracking Function and Auto Framing Tracking Function;
- 110° ultra-wide FOV with no distortion, full coverage of the whole meeting room;
- 4K Ultra HD video @30FPS, brings super clear video experience;
- Built-in high-sensitive omnidirectional microphone, up to 5 meters of sound pickup distance, supports ANS, AEC, AGC;
- USB 3.0, MJPEG/H.264/H.265/YUV;
- Supports UVC/UAC protocol;
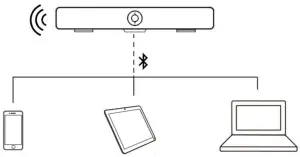
- Supports Bluetooth and USB connection (can not work together
Application Scenarios
COMPONENTS
Accessories
When you open the box, check all accessories according to the packing list.
|
|
|
|
|
|
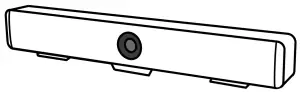
 Camera X1
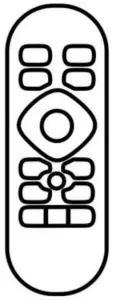 Remote Control X1
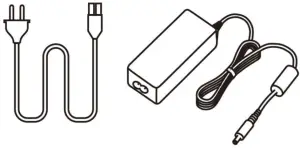 AC Adapter X1
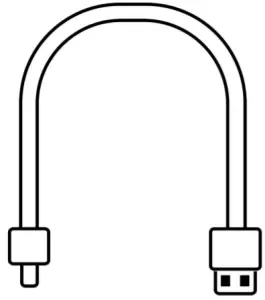 USB Cable X 1
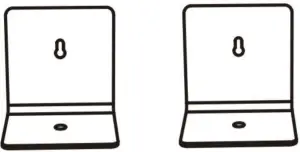 Cable X 1 Bracket X 2
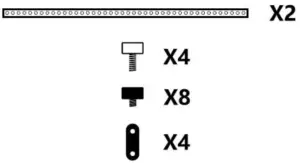 TV Mount Bar with Screws X1
Main Parts Interfaces
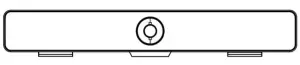
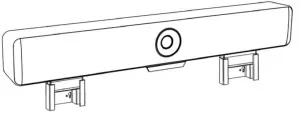
Front View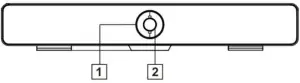
Side View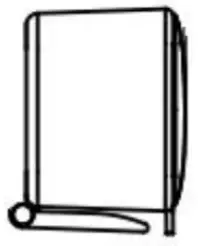
| No | Interface |
| 1 | LED Light |
| 2 | Camera Lens |
| 3 | Bracket |
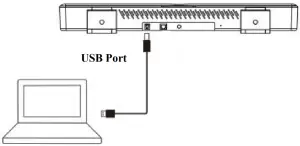
| 4 | USB-Type B ( Data transmission) |
| 5 | EXT(No function) |
| 6 | DC12V |
| 7 | Service |
Remote & Control (Standard)

| No | Name | Function |
| 1 | Privacy | Reserved |
| 2 | Auto Framing | Turn on / Turn off Auto framing |
| 3 | Pan |
|
| 4 | Volume | Increase / decrease volume |
| 5 | Menu | Open/close the OSD menu |
| 6 | Mute | Turn on/off the microphone sound |
| 7 | Speaker tracking | Turn on/off the speaker tracking |
| 8 | Tilt |
|
| 9 | HOME |
|
| 10 | Zoom | Zoom in/out |
| 11 | Number |
|
Common Function
EPTZ
The camera supports EPTZ control, and 4x digital zoom. The EPTZ can be controlled via direction keys to adjust the image position. And the current image size can be adjusted via zoom button.
| Note: The Pan/ Tile button can not work under the max FOV |
Auto Framing
This product has auto framing function. Press the corresponding key and the camera screen can be intelligently scaled according to the number of people in the meeting scene, and centralize all participants. Press again to turn off the automatic box.
 | Note: The auto framing state will be ended by press PTZ buttons or Auto Framing buttom. |
Speaker tracking
The all-in-one supports Speaker Tracking function. Press The Speaker Tracking button to turn on/ off the Speaker Tracking function. The all-in-one will give the person who is speaking a close-up view under the Speaker Tracking ON state.
Set/Call the preset
Long press (2 seconds) the number buttons to set preset; Short press the number buttons to CALL saved preset, and the camera will quickly go to saved preset position.
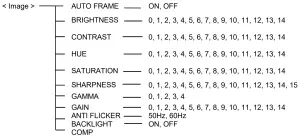
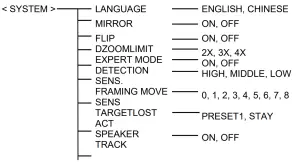
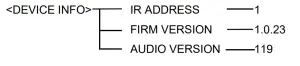
Menu Function
After entering the menu, select the menu options via direction keys. Press the HOME key to enter the options, adjust the options by using the pan button. Press the menu key to return to previous menu until the exit menu.
Indicator
| Action | Indicator Status |
| None | Blue |
| Mic Mute | Red |
| Adjust The Volume | Green, the range of light on varies with the volume |
INSTALLATION
Dimension Figure
Front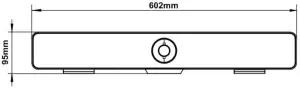
Bottom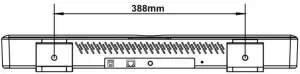
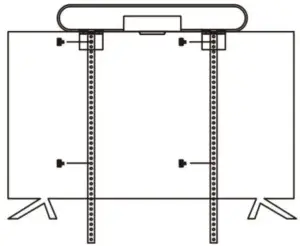
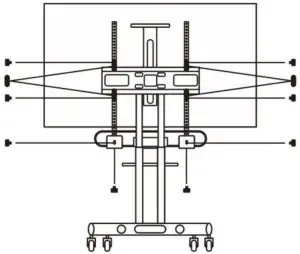
Installation
Bracket (Standard)
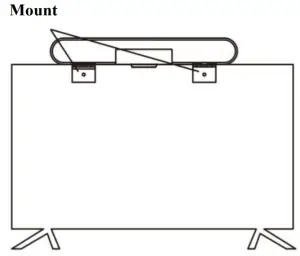
- If your TV doesn’t have mounting bracket, please fix the mount bars with screw holes on the back of your TV.

- If your TV has a mounting bracket, please fix the mount bars with screw holes on the mounting bracket.

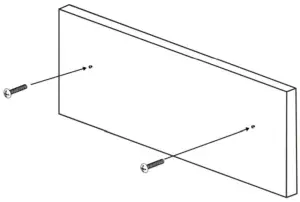
Wall-mount
- Referring to the aperture and position of the mounting hole, drill the corresponding hole at the mounting place and fix the bracket in the mounting place with screws.

- Insert the camera base into the groove of the bracket. To ensure the safety of the camera, make sure the camera is firmly attached to the bracket before you let it go.
- The installation height does not exceed 2m.

Connection
Bluetooth connection:

TECHNICAL DATA
| Camera | |
| Image Sensor | 1/2.8” 4K CMOS, 8.46MP |
| IRIS | F2.2 |
| Focal Lens | f=2.1mm |
| Digital Zoom | 4X |
| Field of View | Horizontal: 110°, Vertical: 74° |
| EPTZ | Support |
| Min Focus Distance | 50cm |
| Min Illumination | 50Lux |
| Max Frame Rate | 4K@30fps |
| Exposure | Auto, Manual |
| White Balance | Auto, Manual |
| Digital Noise Reduction | 2D, 3D |
| Image Flip | Flip, Mirror |
| Audio | |
| Built-in Mic | 4MIC array |
| Pick-up Distance | 5meter |
| Audio Process | AEC, ANC, AGC |
| Bluetooth | Support |
| Speaker | Support |
| USB Interface | |
| USB | 1 channel USB3.0, Type B; support UVC 1.0, MJPEG/H.264/H.265/YUV, UAC |
| MJPEG | 4K@30/25, 1920×1080@30/25, 1280×720@30/25, 640×360@30/25 |
| H.264 | 4K@20, 1920×1080@30/25, 1280×720@30/25, 640×360@30/25 |
| H.265 | 4K@20, 1920×1080@30/25, 1280×720@30/25, 640×360@30/25 |
| YUV | 1920×1080@5, 1280×720@10, 640×360@30/25 |
| Other | |
| Intelligent Function | Auto Framing , Speaker Tracking, Bluetooth |
| Mic-Extension | Support |
| Remote-Control | Support |
| General | |
| Power(AC Adaptor) | Brand: APD Model: DA-30E12 Input: 100-240V~, 50/60Hz 1.0A Output: 12V⎓ 2.5A |
| Consumption | < 8W |
| Working Temperature | 0°C ~ + 40°C |
| Storage Temperature | -20°C ~ +60°C |
| Working Humidity | 10%RH ~ 90%RH |
| Storage Humidity | 10%RH ~ 95%RH |
| Dimension (L×W×H) | 602mm×74mm×95mm |
| Net Weight | 1.66kg |
| Color | Black |
| This user manual is only for reference, it is subject to change; please ask for the latest version from your supplier. |


