MT-PowerAUDIO Multi-Rom Music Solution Wireless Speakers User Manual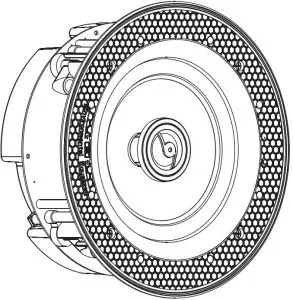
Specification
Wi-Fi feature:
- Built-in Wi-Fi
- Wireless standard: 802.11b/g/n
- Support online audio streaming media
- Support audio format: MP3/WMA/AAC/ACC/ACC+/ALAC/APE/WAV
Amplifier feature:
- Type: Class D(digital)
- Power input: DC24V/2.5A
Speaker:
WPS button PSW-60 R v2
- Frequency response: 70Hz-20KHz
- Power (RMS/max.): 60/120W @8ohm
- Impedance: 8 ohms
- Sensitivity(1w/1m): 90dB
RFW-60 R v2
- Frequency response: 65Hz-20KHz
- Power (RMS/max.): 60/120W @8ohm
- Impedance: 8 ohms
- Sensitivity(1w/1m): 90dB
SEW-6 R v2
- Frequency response: 45Hz-20KHz
- Power (RMS/max.): 60/120W @8ohm
- Impedance: 8 ohms
- Sensitivity(1w/1m): 90dB\
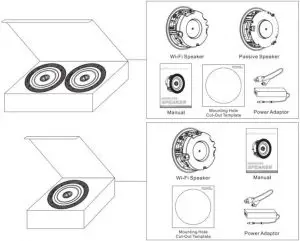
Package Contents
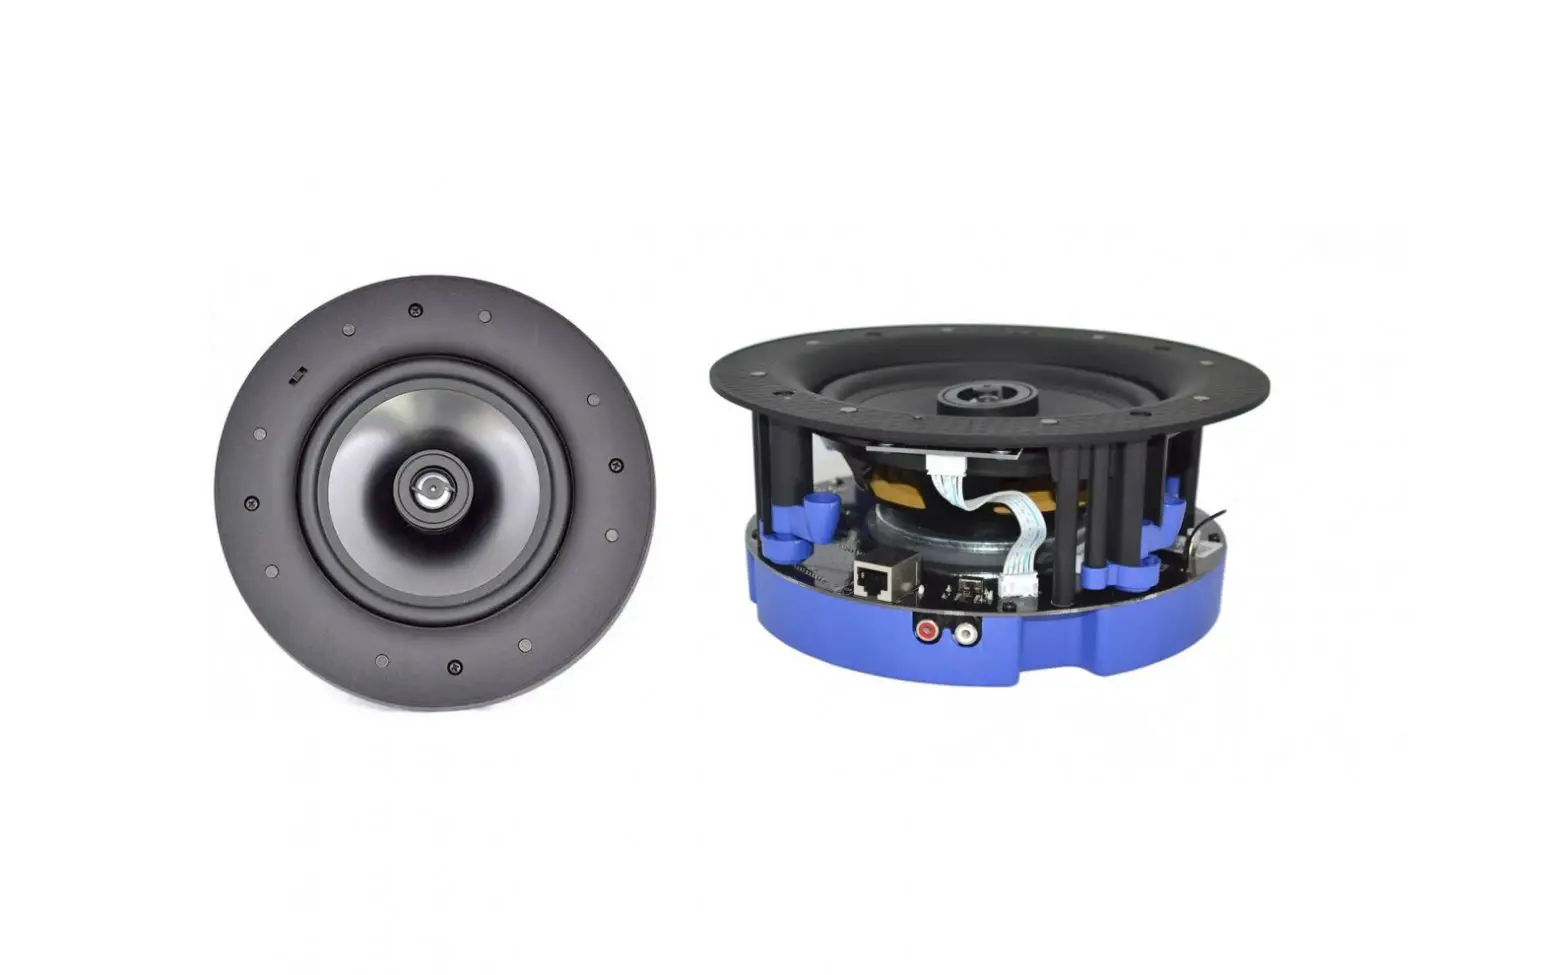
Specification Parts Of The Wi-Fi Speaker
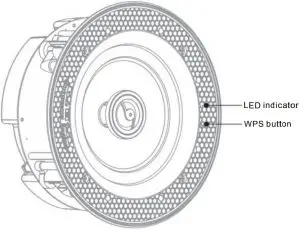
- LED indicator: indicate the power, wifi and music working status.
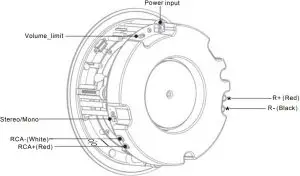
- R+(Red) R-(Black): to link passive speakerto stream stereo sound.
- RCA: to connect with your home TV set.
- Power input: connect with DC adaptor to offer power supply for the speaker.
- WPS: the trigger to configure multi-room music network or restore the device to original default settings.
- Volume_limit: slide to choose 50%/100% volume output.
- Stereo/Mono: slide to choose stereo/mono mode.
Controller App Installation
Controller APP Installation


Please search “Smartsonix” to download controller app from Google Play (Android) or Apple App Store (I0S).
Wi-Fi Speaker testing
Before your Wi-Fi speaker is installed into ceilings, please arrange testing to make sure the device properly works.
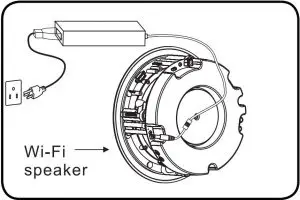
- Step 1 Connect the Wi-Fi speaker to power supply.

- Step 2 Switch the Wi-Fi function and connect your phone to the Wi-Fi.

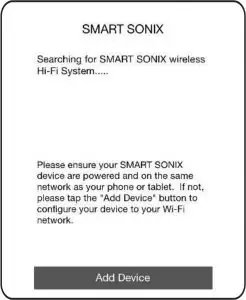
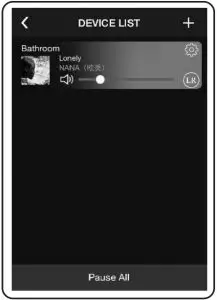
- Step 3 Start the controller APP smartsonix and click ADD DEVICE
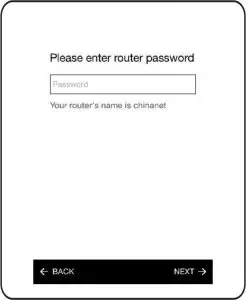
- Step 4 Enter the password of the router and click NEXT. Please make sure the router is available in your space.
- Step 5 Press the WPS button on the back of the speaker to configure network and click NEXT.

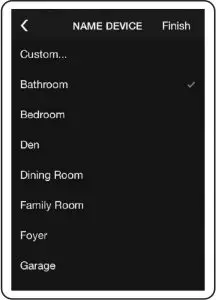
- Step 7 Name the device according to the room you will install and click FINISH.
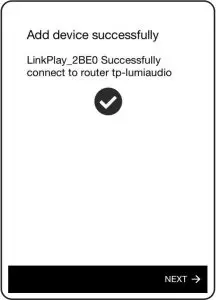
- Step 6 Later a progress diagram comes, wait for a few seconds, the device will be connected to your router automatically. If fails, click RETRY and repeat the operation of step 4 and step 5.
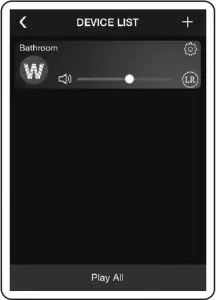
- Step 8 After setting, the Wi-Fi speaker will be in the device list. If you have more than 1 Wi-Fi speakers, add devices and name them accordingly. After these steps, your multi-room music network is successfully established.
- Step 9 Choose a device and play a song in your phone to test whether the device works. If ok. testing finishes and you can forward the speaker installation.


Wi-Fi Speaker Installation
Equipment you will need: Besides template that is included in the box, you must have a ladder and the equipment shown below to guarantee installation go smoothly.

- Step 1 Use enclosed template to mark out the cut out, then simply cut along the line. This is the only cut you will need to make.

Installation dimension: Φ 210
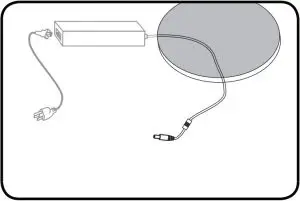
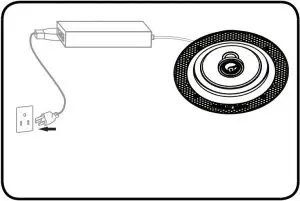
mm Installation depth: >102mm - Step 2 Place the DC adaptor in a suitable place in your wall or ceiling, leave the plug end and jack end. During speaker installation, please make sure the adaptor is cut out from power supply.
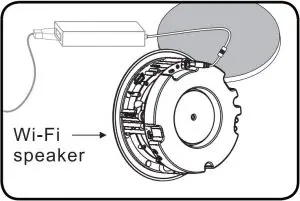
- Step 3 Connect the jack of DC adaptor to the Wi-Fi speaker and install the speaker into ceiling. The installed place should be in accordance with the room you have set in the controller APP.
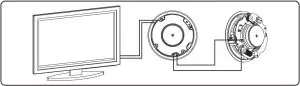
- Step 4 To enjoy stereo sound and achieve better sound quality, you can install another passive speaker to be paired with the Wi-Fi speaker. Lying loudspeaker cable from passive to the R+ and R-connectors of the Wi-Fi speaker.
Lying diagram between Wi-Fi speaker and passive speaker or home TV set. Cables should be lain before Wi-Fi speaker installed.
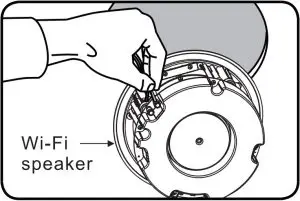
- Step 5 Cover the grill for the installed speaker and connect the plug of DC adaptor to the power supply.

Device Resetting
If the multi-room network fails during operation, you can press the WPS button to restore the speaker to its original factory default settings. Uninstall the Wi-Fi speaker from ceiling and press the WPS button for around 5 seconds, during this operation, make sure the speaker is power supplied.
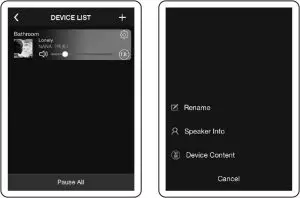
Device Personal setting
- Rename: If you found Wi-Fi speaker wrongly named after installation, you can rename the device to a correct one.
- Speaker info: Each Wi-Fi speaker will launch wireless signal, to protect the Wi-Fi from embezzling by others, you can set password for your device.
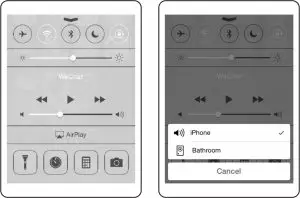
Airplay Function
For iPhone, iPad and iMac smart device with ios operating system, you can use the Wi-Fi speaker with Airplay function. Connect your device to the speaker Wi-Fi. In the pull-up menu, click Airplay and choose the Wi-Fi speaker, then the sound can be steamed from your smart device.