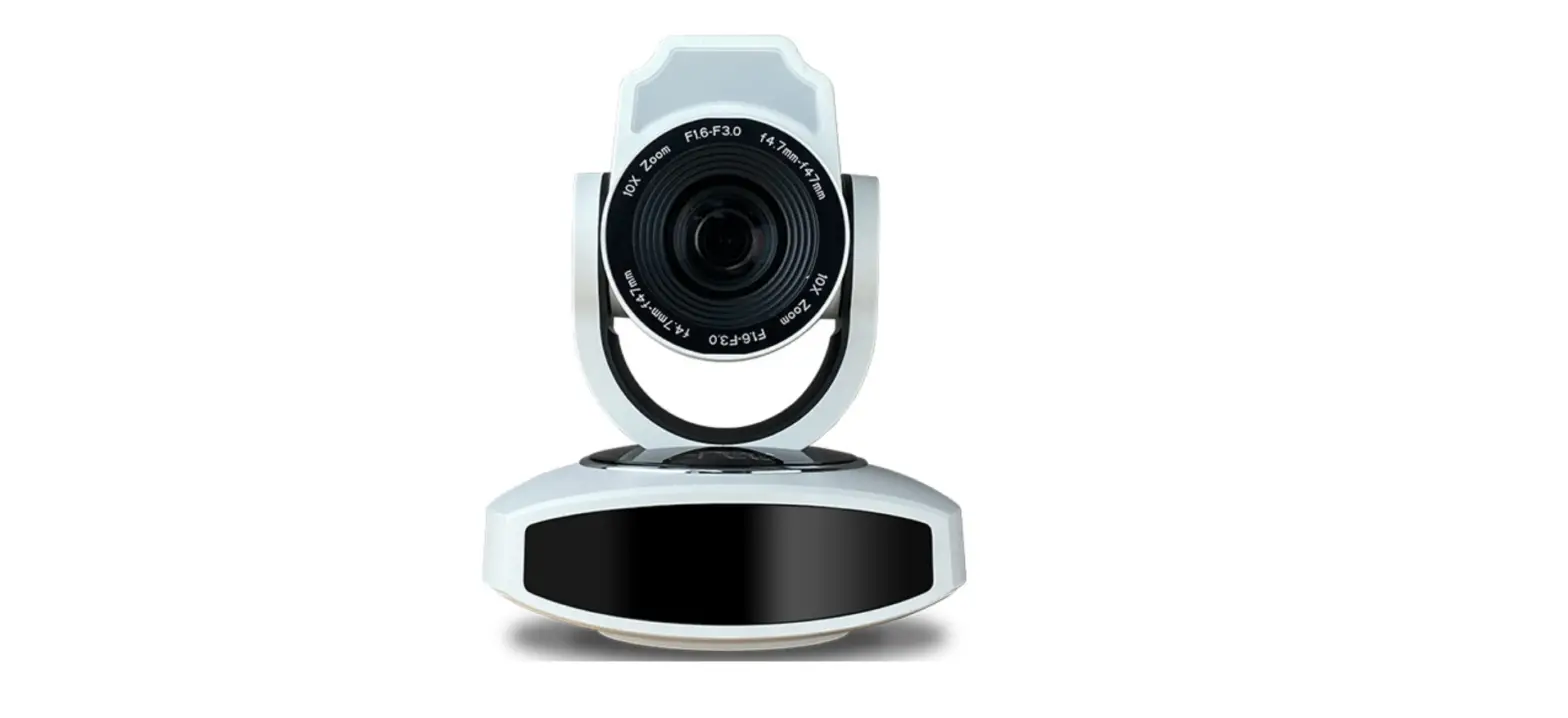
Arec CI-21H Full HD PTZ Conference Camera 10X
Preface
This manual introduces the function installation and operation of the Camera. Prior to installation and usage, please read the manual thoroughly.
Warning
- This product can be only used in specified range in order to avoid any damage or danger;
- Don’t expose the camera to rain or moisture place
- Don’t remove the cover to reduce the risk of electric shock. Refer servicing to qualified personnel.
- Never operate the camera under unqualified temperature , humidity and power supply;
- Please use the soft cloth to clean the camera. Use neuter cleanser if bad smeared .Don’t use the strong or cleanser avoiding scuffing.
Electric Safety
Installation and operation must accord with electric safety standard.
Caution to transport
Avoid stress,vibration and soakage in transport,storage and installation.
Polarity of power supply
This product uses DC 12V power supply.
Careful of installation
- This series item must be put on the smooth desk or platform, and it can not be installed slantways.
- Don’t apply in corrosive liquid, gas, or solid environment to avoid the cover which is made up of organic material.
- This product has a heating device inside, please keep ventilated.
- Never power on before installation is completed.
- Don’t disassemble discretionarily
- We are not responsible for any unauthorized modification or dismantling.
- Attention
An electromagnetic filed under a certain rate may affect the camera image!
Product Overview
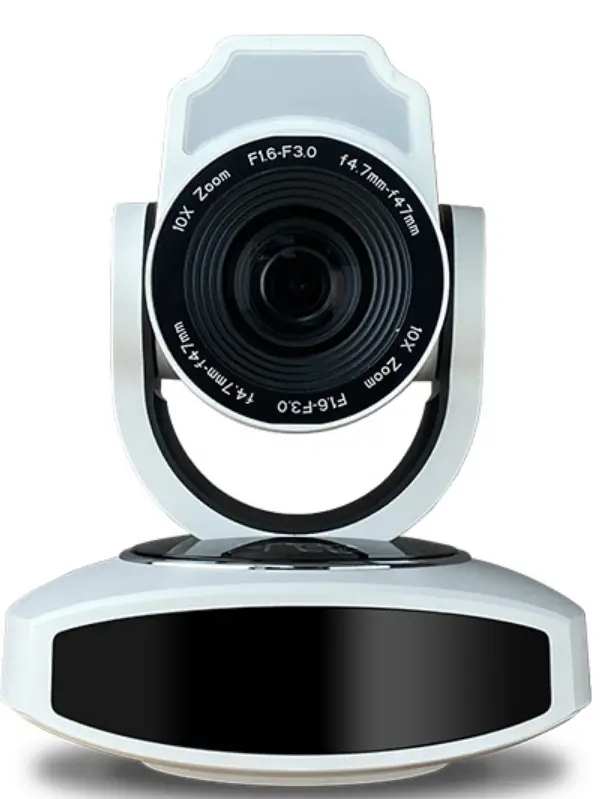
CI-21H/CI-21S PTZ Camera is a professional-grade high-quality PTZ camera, CI-21H/CI-21S is ideal for mid to large-size conference, huddle rooms, or lecture capture, bridging the feature and price gap between current webcam and professional PTZ cameras in the market.
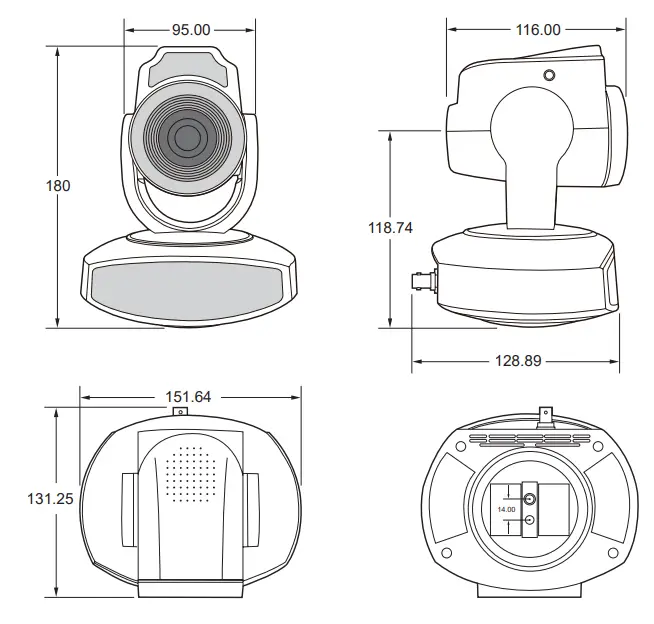
Dimension
Accessory
| No. | HDMI Model | SDI Model |
| 1 | Power Adaptor | Power Adaptor |
| 2 | RS-232 Cable | RS-232 Cable |
| 3 | USB3.0 Cable | – |
| 4 | Remote Controller | Remote Controller |
| 5 | X type 2-in-1 Cable (RS-232 & Power) | X type 2-in-1 Cable (RS-232 & Power) |
| 6 | Quick Installation Guide | Quick Installation Guide |
Camera performance
The camera offers perfect functions, superior performance and versatile interfaces. The features include advanced ISP processing algorithms to provide vivid images with a strong sense of depth, high resolution and fantastic color rendition. It supports H.264/H.265 encoding which makes motion video fluent and clear even with less than ideal bandwidth conditions. By adopting high accuracy step driving motor mechanism, it works extremely quiet and moves smoothly and very quickly to designated position. Product works stable and reliable, and it is easy to use, installation and maintenance.
Technical specification
| Camera Parameter | |
| Optical Zoom | 10X, f=4.7~47mm |
| Sensor | 1/2.8 inch high quality HD CMOS sensor |
| Effective Pixels | 16: 9 2.07 megapixel |
|
Video Format | HDMI/SDI video format 1080P60/50/30/25/59.94/29.97;1080I60/50/59.94; 720P60/50/30/25/59.94/29.97 U3 video format (1) U3:1920X1080P60/50/30/25;1280X720P60/50/30/25;960X540P30;640X360P30; 640X480P30;352X288P30;960X540P30; (2) U3 compatible with U2: 960X540P30; 640X360P30; 1280X720P10/15; 720X576P50; 720X480P60; 640X480P30; 352X288P30. |
| View Angle | 6.43°(tele)–60.9°(wide) |
| Iris | F1.6–F3.0 |
| Digital Zoom | 5X |
| Minimum Illumination | 0.5Lux (F1.8,AGC ON) |
| DNR | 2D & 3D DNR |
| White Balance | Auto / Manual / One Push / 3000K / 3500K / 4000K / 4500K / 5000K / 5500K / 6000K / 6500K / 7000K |
| Exposure | Auto / Manual / Shutter Automatic Exposure / Aperture Automatic Exposure / Brightness priority |
| Focus | Auto / Manual / One Push |
| Aperture | Auto / Manual |
| Electronic Shutter | Auto / Manual |
| BLC | ON / OFF |
| WDR | OFF / Dynamic level adjustment |
| Video Adjustment | Brightness, Color, Saturation, Contrast, Sharpness, B/W mode, Gamma curve |
| SNR | >55dB |
| Input/Output Interface | |
| Video Interfaces | HDMI Model:RS232(INPUT), LAN, HDMI, USB3.0 SDI Model:RS232(INPUT), LAN, SDI, A-IN |
| Image Code Stream | Dual stream output |
| Image Output Multiple Code Source | Dual Code Source output(SDI/HDMI/USB3.0 LAN ) |
| Video Compression Format | H.264, H.265 |
| Audio Input Interface | Double track 3.5mm linear input; |
| Audio Output | SDI/HDMI/LAN output together with video |
| Audio Compression Format | AAC/MP3/G.711A |
| HD IP Interface | 100M IP port(100BASE-TX) |
| Network Protocol | RTSP/RTMP, ONVIF, GBT28181; Support IP Visca control protocol; Distance update, Distance restart, Distance reset |
| Control Interface | RS232 |
| Control Protocol | VISCA/Pelco-D/Pelco-P; Baud Rate: 115200/9600/4800/2400 bps |
| Power Interface | HEC3800 outlet (DC12V) |
| Supply Adapter | AC110V-AC220V to DC12V/2A |
| Input Voltage | DC12V±10% |
| Input Current | 2A (Max) |
| Consumption | 24W (Max) |
| PTZ Parameter | |
| Pan Rotation | ±135° |
| Tilt Rotation | -30°~+30° |
| Pan Control Speed | 0.1-60°/sec |
| Tilt Control Speed | 0.1-30°/sec |
| Preset Speed | Pan: 60°/sec, Tilt: 30°/sec |
| Preset Number | 255 presets (10 presets by remote controller) |
| Other Parameter | |
| Store Temperature | -10°C ~ +60°C |
| Store Humidity | 20% – 95% |
| Working Temperature | -10°C ~ +50°C |
| Working Humidity | 20% – 80% |
| Dimension (L x W x H) | 131 x 151 x 180 mm |
| Weight | 890g |
| Using Environment | Indoor |
Quick Installation Instructions
The camera interface and indicators description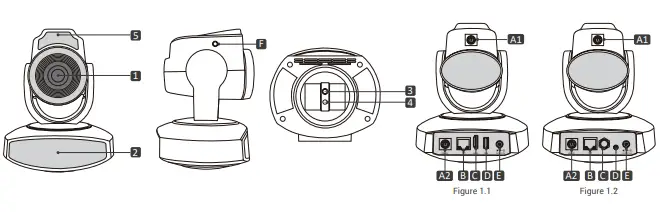
| No. | CI-21H | CI-21S |
| 1 | Camera Lens | Camera Lens |
| 2 | Remote Controller Receiver | Remote Controller Receiver |
| 3 | Tripod Screw Hole (¼ UNC 20, Depth 6.5mm) | Tripod Screw Hole (¼ UNC 20, Depth 6.5mm) |
| 4 | Locating Hole (Ø5.5, Depth 6.5mm) | Locating Hole (Ø5.5, Depth 6.5mm) |
| 5 | Tally Light | Tally Light |
| A | RS232 Control Interface (Input) | RS232 Control Interface (Input) |
| B | LAN Interface | LAN Interface |
| C | HDMI Interface | SDI Interface |
| D | USB3.0 Interface | Audio-IN Interface |
| E | DC12V Input Power Supply Socket | DC12V Input Power Supply Socket |
| No. | LED Color | Glow Rule | Operation |
|
2 | Red/Green dual-color light | Red light blinking | Power Adaptor plug to Socket |
| Green light turns on | Power on | ||
| Green light blinking | Receive remote control signal | ||
| 5 | Red light | Red light turns on | Recording |
- Power on initial configuration
- Power on: Connect DC12V power supply adapter with power supply socket.
- Initial configuration: Power on with power indicator light on and remote control receiver light blinking, camera head moves from bottom left to the bottom, and then goes to the HOME position (intermediate position of both horizontal and vertical ),while the camera module stretches. When remote control receiver light stops blinking, the self-checking is finished.
Note:
- The default address of the remote controller is the 1# address.
- If you set preset 0, when Power on self-test is completed, the camera automatically moves to the preset 0 position.
Video output
Video Output from LAN
- a. Network Cable Connection Port: Connect this product and your computer through network cable, the device LAN interface refer to No B in Figure 1.1.
- b. Webpage Login: Open your browser and enter 192.168.11.202 in the address bar (factory default); press Enter to enter into the login page; click on the “player is not installed, please download and install!” and follow the installation steps for installation. Then enter the user name admin and password admin (factory default); press Enter to enter into the preview page, users can carry out PTZ control, video recording, playback, configuration and other operations.
( Note: If you forget your user name, password, IP address, you can manually restore the default by the remote controller key combination * # )
HDMI Video Output
- a. HDMI Video Cable Connection: HDMI Model refer to No.C in Figure 1.1.
- b. Connect the camera and the monitor via HDMI video cable; video output is available after camera self-test.
SDI Video Output
- a. SDI video cable connection: SDI Model refer to No.C in Figure 1.2.
- b. Connect the camera and the monitor via SDI video cable; video output is available after camera self-test.
USB3.0 video output
- a. USB3.0 video cable connection: HDMI Model refer to No.D in Figure 1.1.
- b. Connect the camera and the monitor via USB3.0 video cable, open video display software, select image device, and then video output will be available.
USB3.0 compatible with USB2.0 output
- a. USB3.0 video cable connection: HDMI Model refer to No.D in Figure 1.1.
- b. Connect the camera and the monitor via USB3.0 video cable, open video display software, select image device, and then video output will be available.
Connection
Step 1 Connection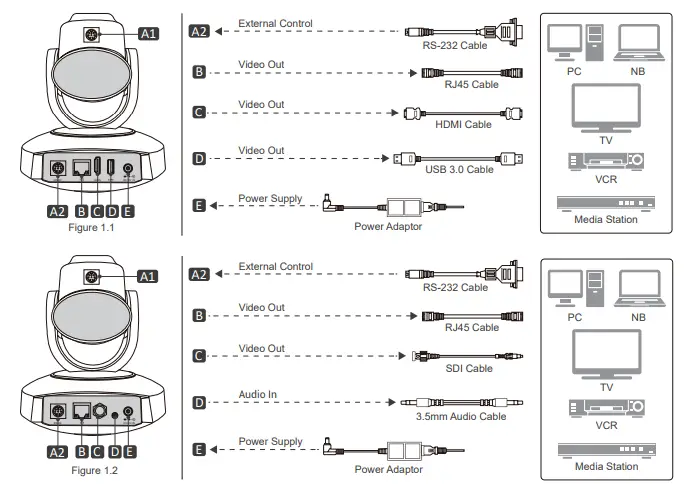
Step 2 Setup X type 2 in-1 tracking cable
Use the X type 2 in 1 tracking cable connected to Tally Light, refer to Camera Interface Instruction
- a. Connect A1, A2, E in sequence
- b. Finally, connect the camera power adapter to F
- AREC Inc.© All Rights Reserved 2021. l www.arec.com All information contained in this document is Proprietary
- Made in Taiwan
Date : 2021.7.1 Version : 2.5.1 2021-6-7 - AREC has the right to change or improve product specifications, without obligation to notify any user. Go to www.arec.com get the latest information related to the product or additional information.
- AREC Inc.© All Rights Reserved 2021. l www.arec.com All information contained in this document is Proprietary


