Contents hide
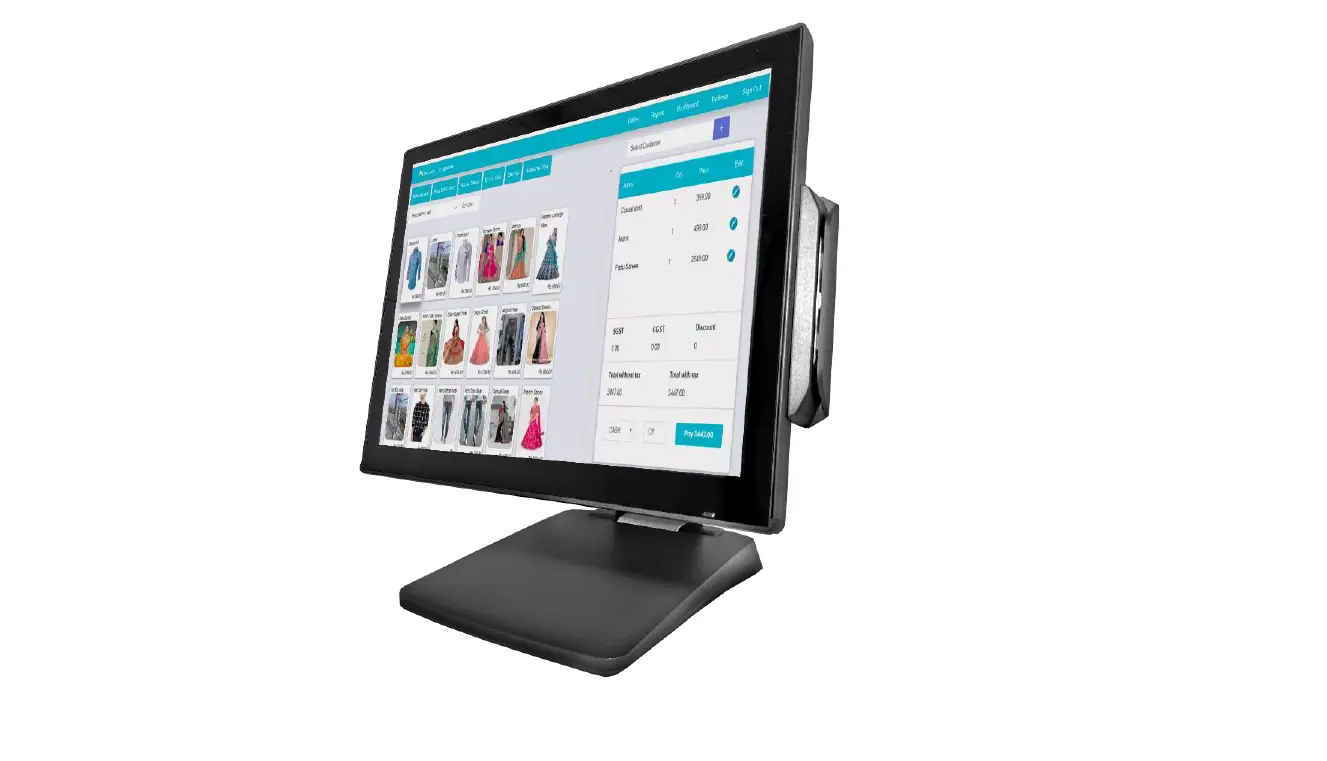
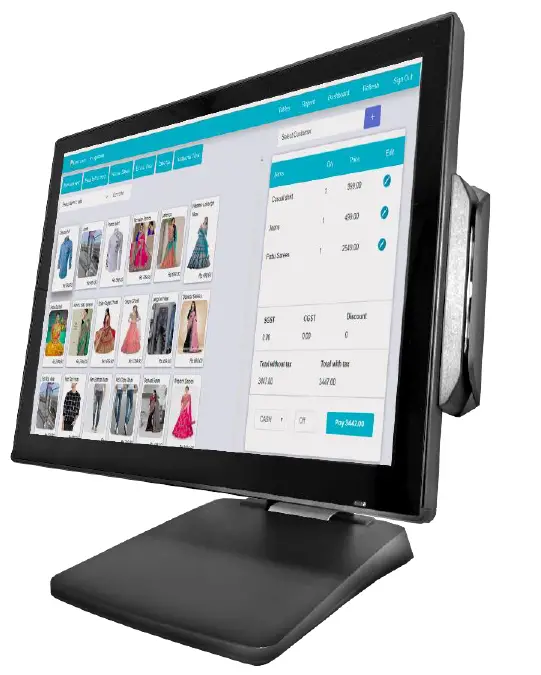
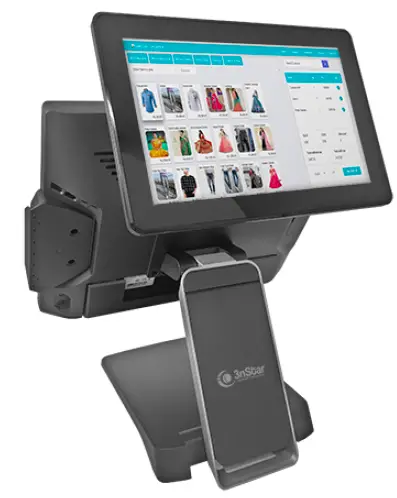
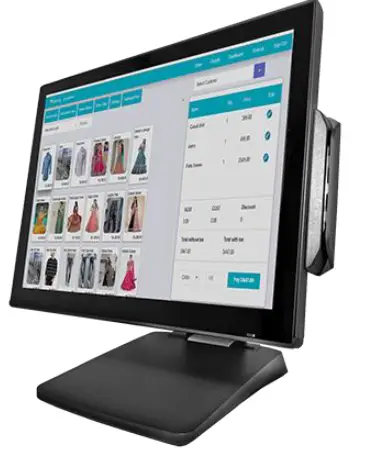
3nstar PTE0905 15 All-In-One POS System
 Safety and Warranty
 Safety and Warranty
- Read these safety instructions carefully.
- Disconnect from power outlet before cleaning, disassembly or transport. Do not use liquid or spray detergents for cleaning. Use a damp cloth only and avoid any prolonged contact with moisture.
- Keep the unit away from humidity.
- Place the unit on a sturdy surface before servicing or operation to prevent accidental drops.
- The openings on the enclosure are for ventilation. Do NOT cover the openings.
- Make sure the voltage and load ratings of the power source are correct before connecting the equipment to the power outlet.
- Position the power cord to prevent accidental tripping. Do not twist, pinch or clip the power cord.
- All cautions and warnings printed on the equipment should be followed.
- If the equipment is not used for a long time, disconnect it from the power source.
- Never pour any liquid into openings. This could cause fire or electrical shock.
- For safety reasons, only qualified service personnel should open and service the equipment.
- If any of the following situations arises, get the equipment checked by service personnel:
- The power cord, plug, or adapter is visibly damaged.
- Liquid has entered into the equipment.
- The equipment has been exposed to moisture.
- The equipment has been dropped and damaged.
- The equipment has obvious signs of breakage.
- DO NOT LEAVE THIS EQUIPMENT IN AN UNCONTROLLED ENVIRONMENT WHERE THE STORAGE TEMPERATURE IS BELOW -20° C (-4°F) OR ABOVE 60° C (140° F).
Introduction
Main Features
- Platform: INTEL Coffee Lake platform support INTEL gen 9 processor
- Panel PC with Dual hinge stand: Adjustable angle and height
Improve the viewing angle, enhance the user experience, can also be Desktop, Pole or Wall-mounted. - Shared Peripherals: Share the same peripherals with XPOS
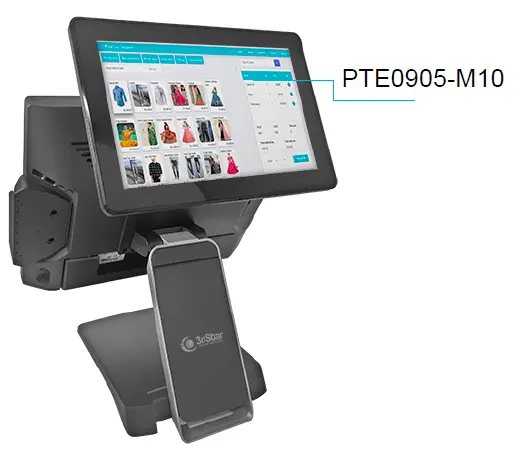
15” PTE0905
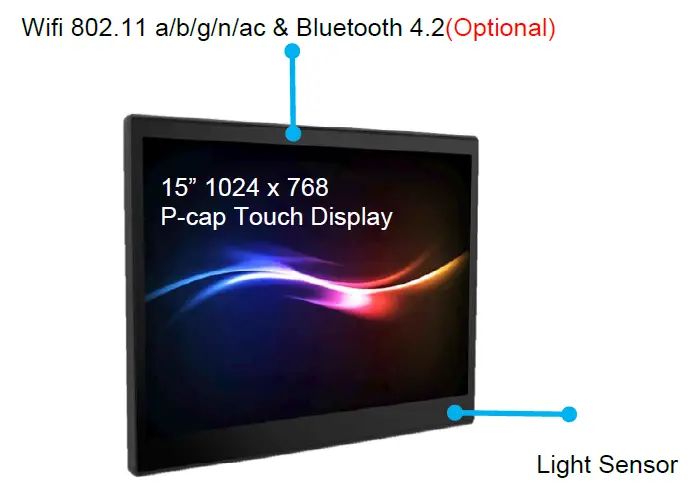

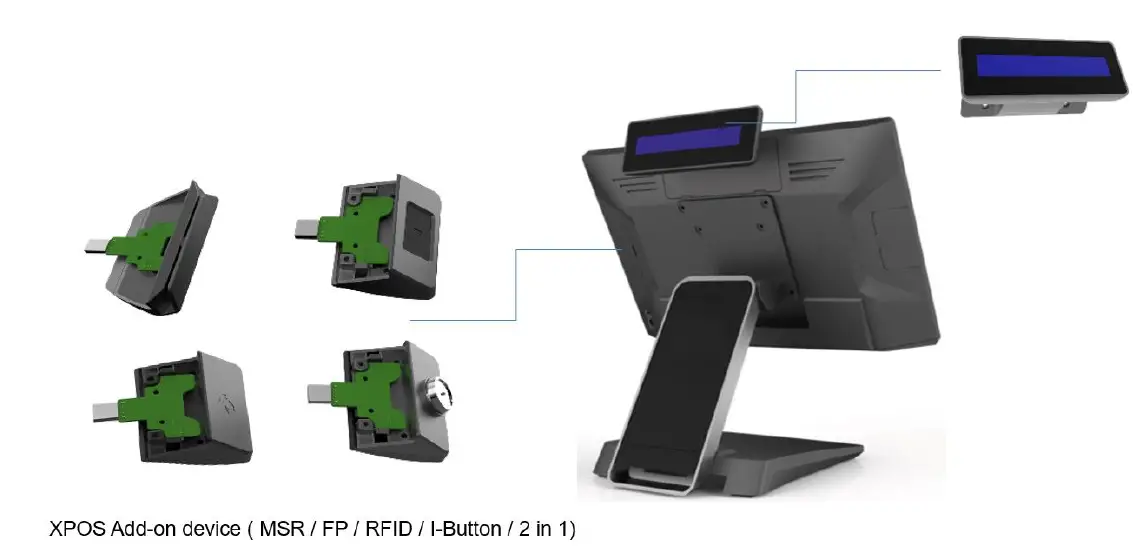
Optional Peripheral PTE0905


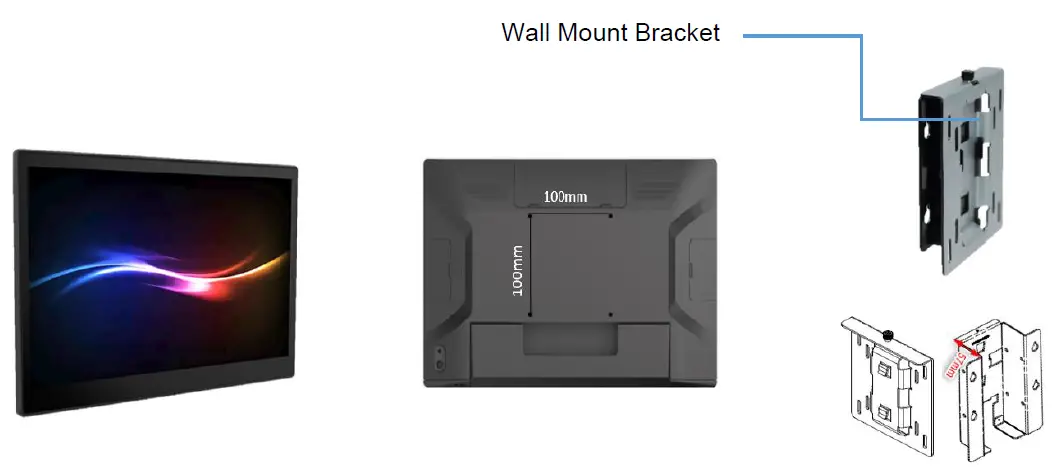
- The thickness of wall mount bracket (no space for power adapter)= 21mm
- The thickness of Wall Mount bracket (space for power adapter= 57mm
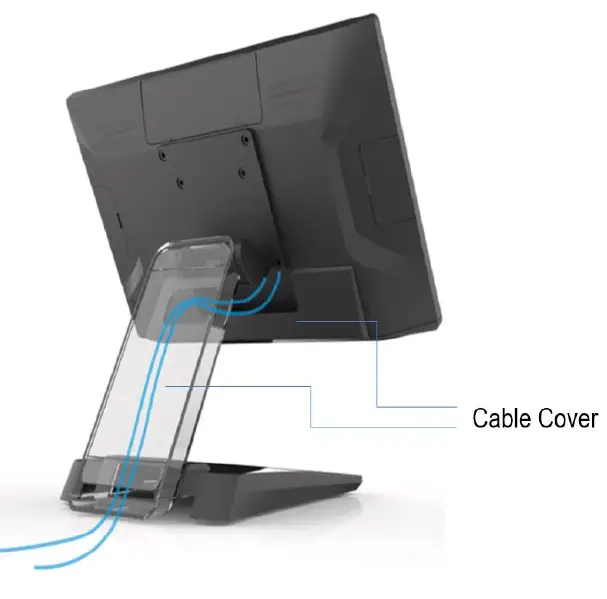
Cable Management (PTEO905)
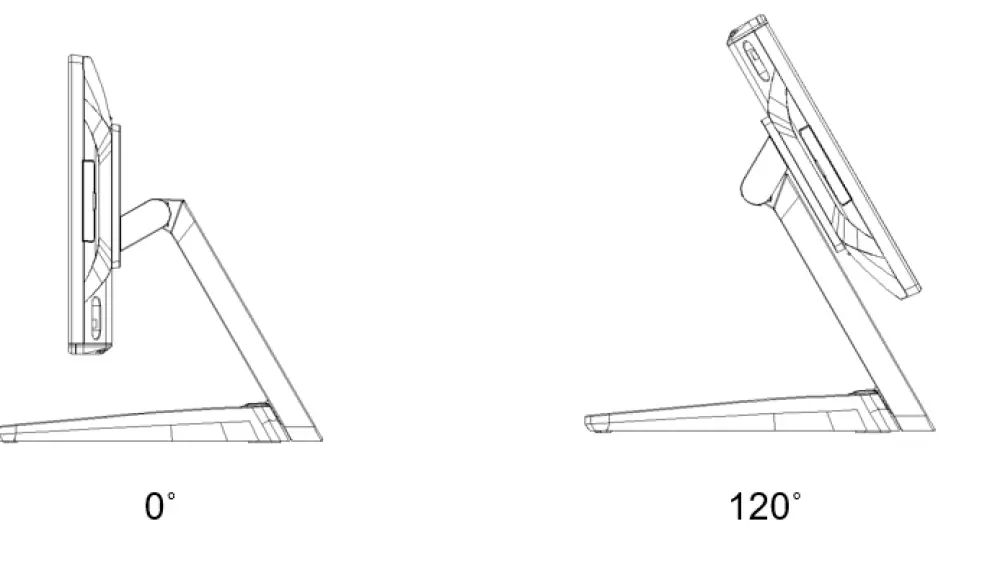
Adjustable Angle (PTE0905) 
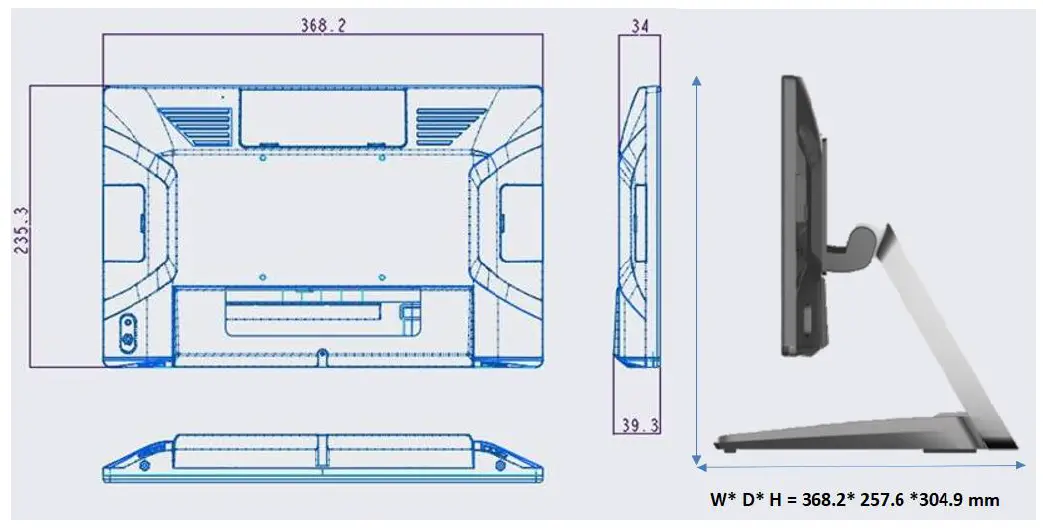
Dimension (PTEO905) 
Rear /O Panel Connectivity (PTE0905)
IO Default 
| I/O Port | Connector Type | Application |
| Video Ports | HDMI x1 | For 2nd HDMI Monitor |
| PUSB 24V | 24V Power USB | |
| Smart I/O | Including 5V/12V/24V (BIOS select) and USB 2.0 x 2 and Com port x 1 | I/O cables |
| 20V in | 20V DC in (130W) | |
| Cash drawer | 12V / 24V adjust by bios | |
| USB DP or Smart DD | USB TC x1 (USB DP, SMART DD by BIOS select) | For 2nd USB DP Monitor |
| Serial port | RJ45 Com port x 3 | |
| USB | USB 2.0 x 2, USB 3.0 x 2 | |
| Ethernet | Giga Lan |
Packing List (PTEO905)
| Standard | Optional & Peripherals | ||
| 1 | 15” | ||
| 2 | 20V 130W Power Adaptor | ||
| 3 | AC Cord Cable | ||
| 4 | RJ-45 to D-sub9 Convert Cable x1 | ||
Hardware Installation & Setting
Optional Device Installation
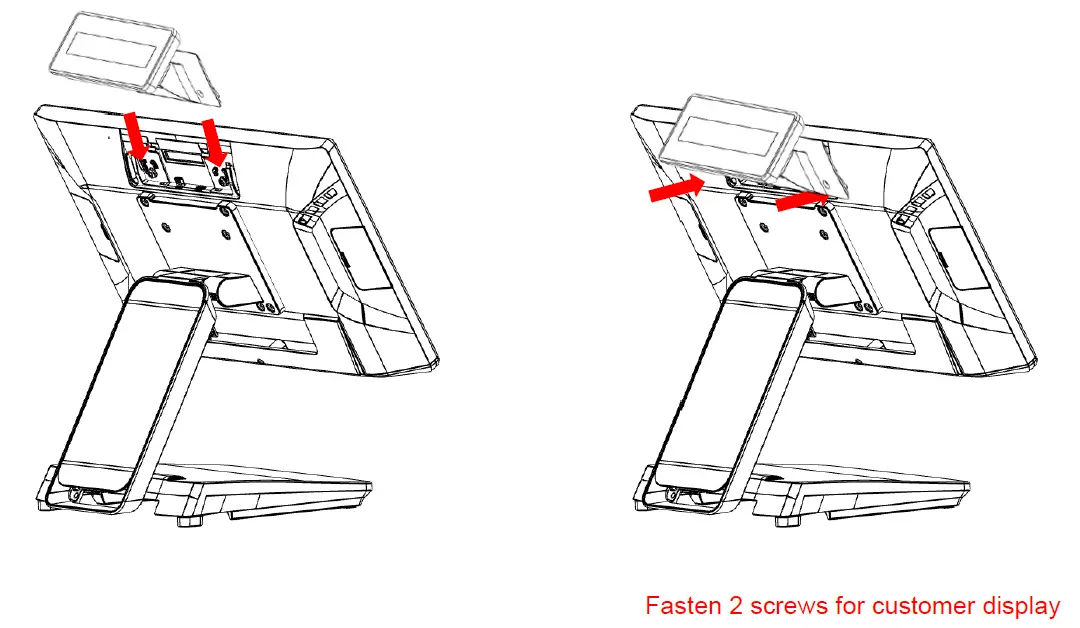
- Customer Display Installation,
Install Pull up the connector
- Install 2nd display (integrated type) PTE0905-M10 on Smart DP
 Remover Plastic Cover
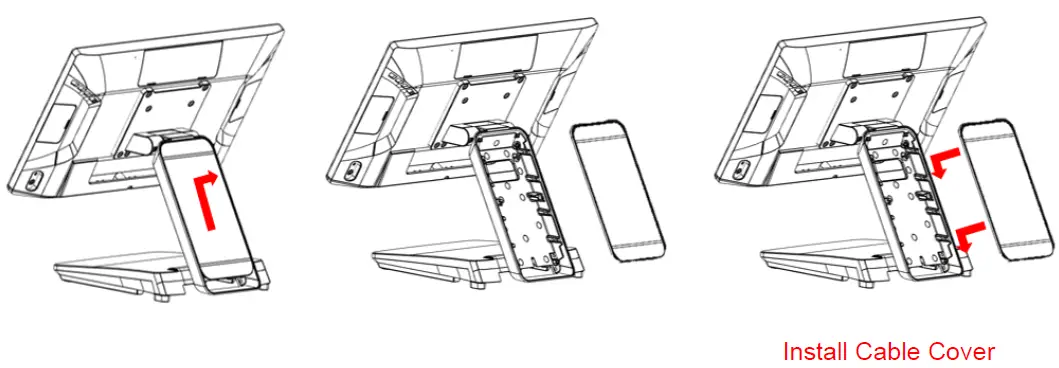
- Remove & Install Cable Cover
Remove Cable Cover
 Remover Plastic Cover
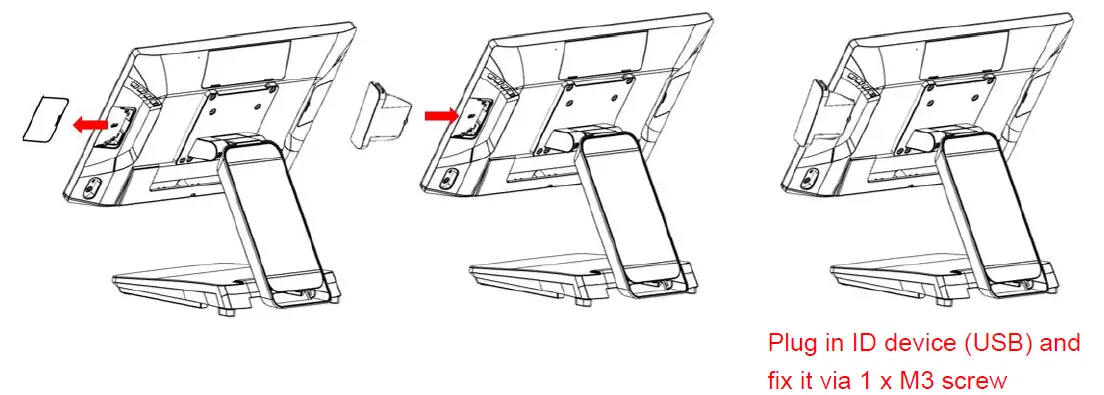
Device status setting
Driver& Utility Installation and Setup
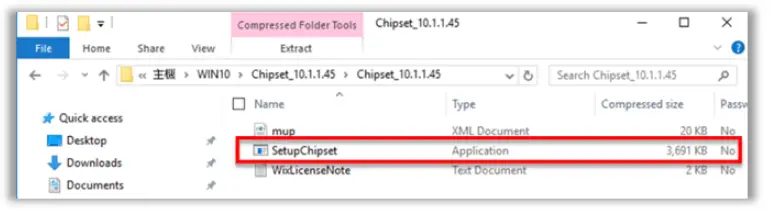
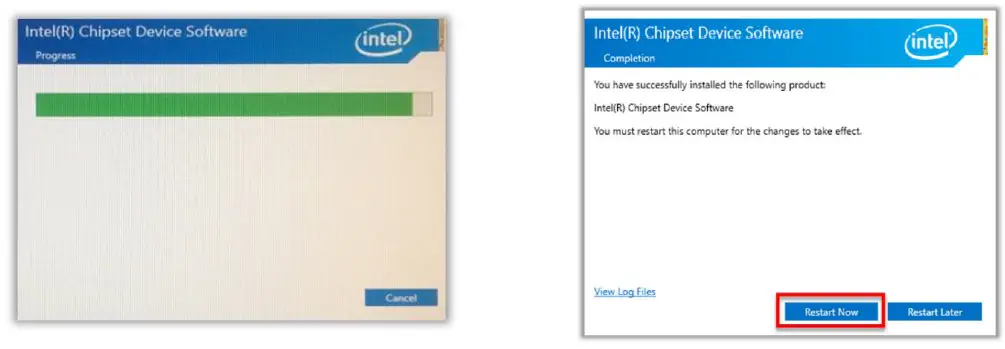
- Chipset
- Locate chipset folder and double click on [ SetupChipset]

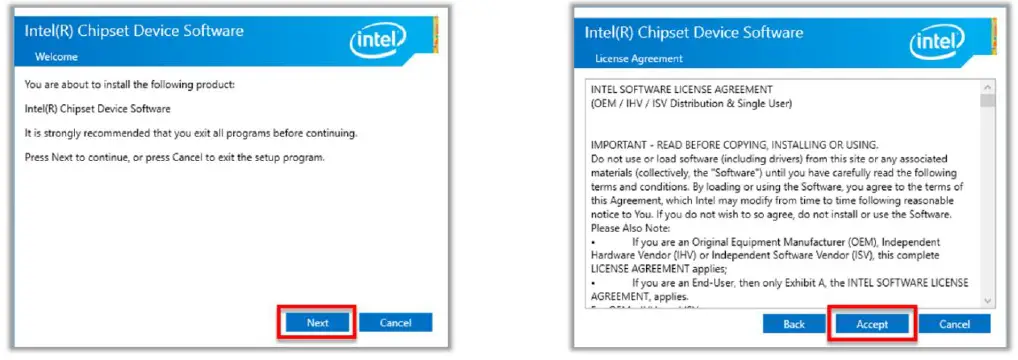
- Click [ Next ]
- Click [ Accept ]

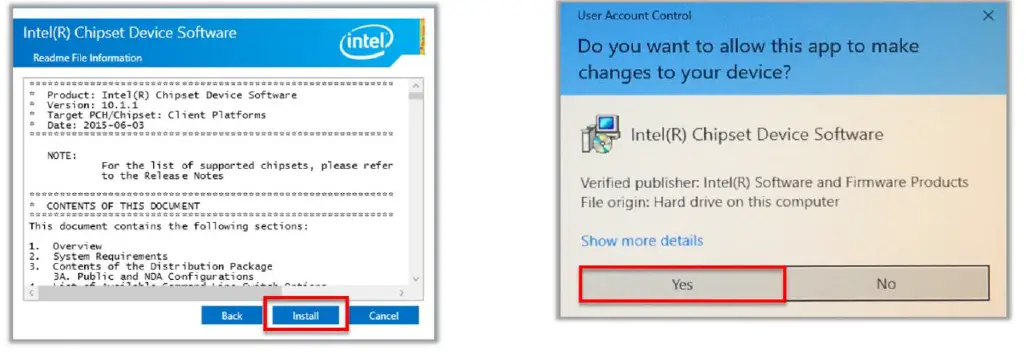
- Click [ Install ]
- Click [ Yes ]

- Click [ Restart Now ]

- Locate chipset folder and double click on [ SetupChipset]
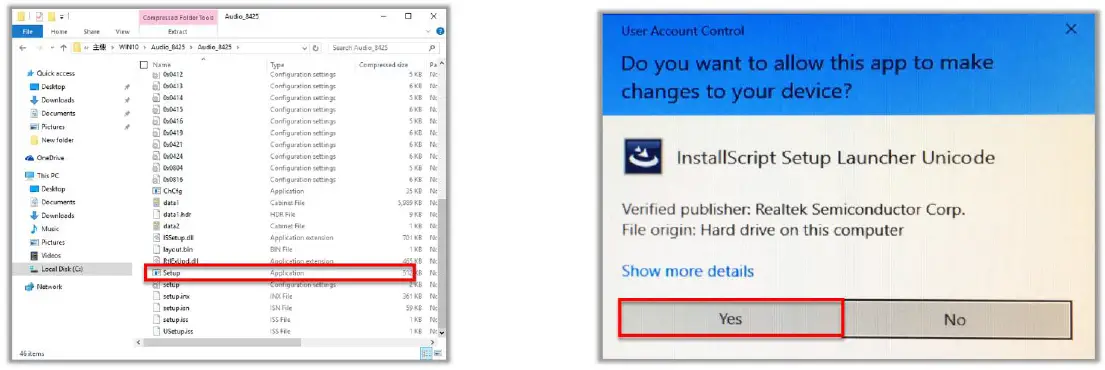
- Audio
- Double click[ Setup ]
- Click [ Yes ]

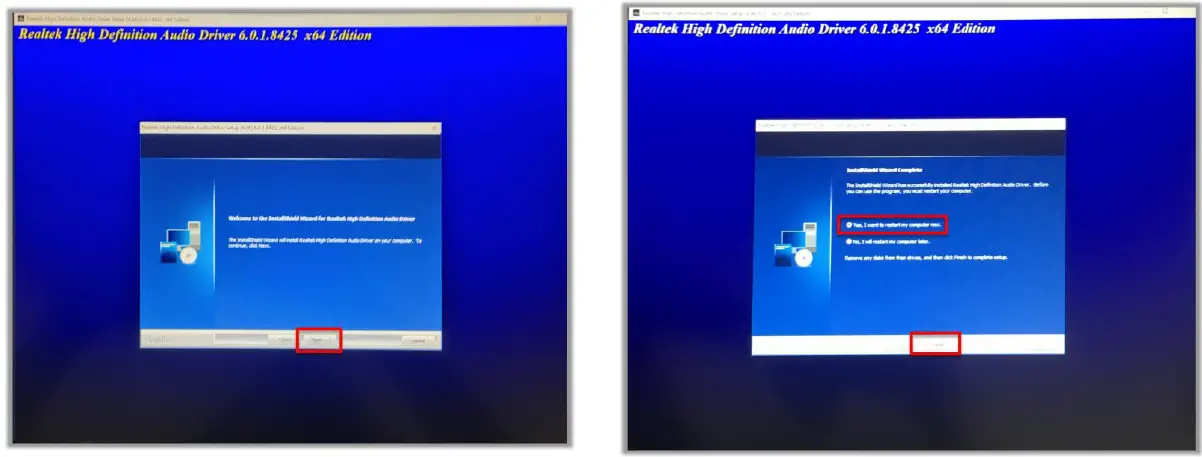
- Click [ Next ]
- Click [ Yes, I want to restart my computer now ], [ Finish ]

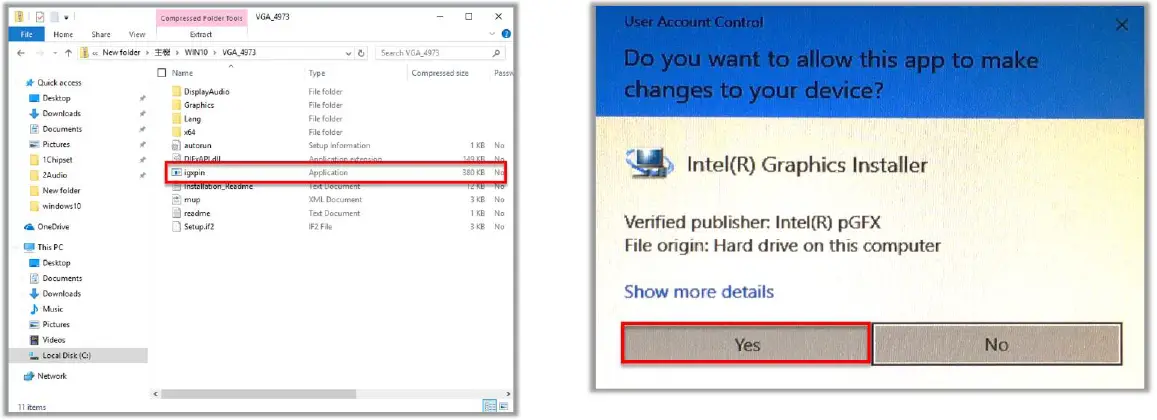
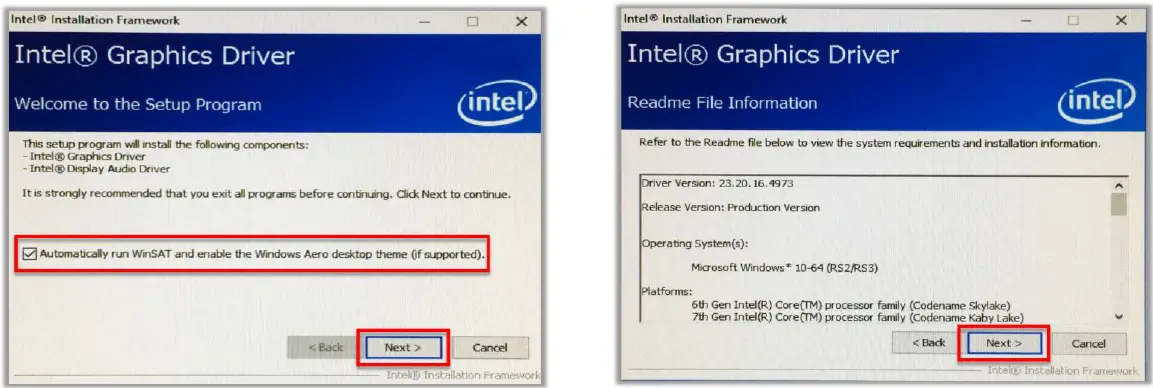
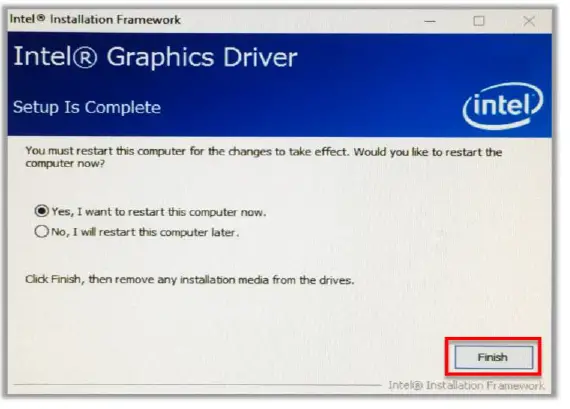
- Graphics
- Double Click [ igxpin ]
- Click [ Yes ]

- Click [ Next ]
- Click [ Next ]

- Click [ Finish ]

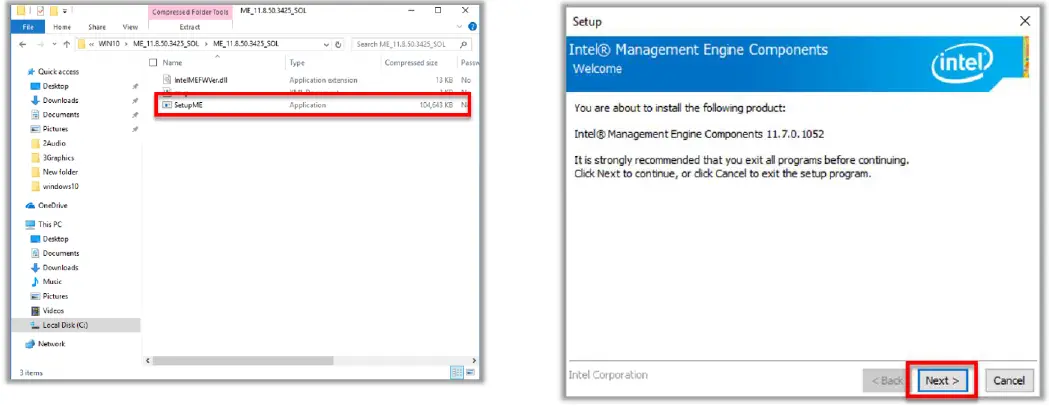
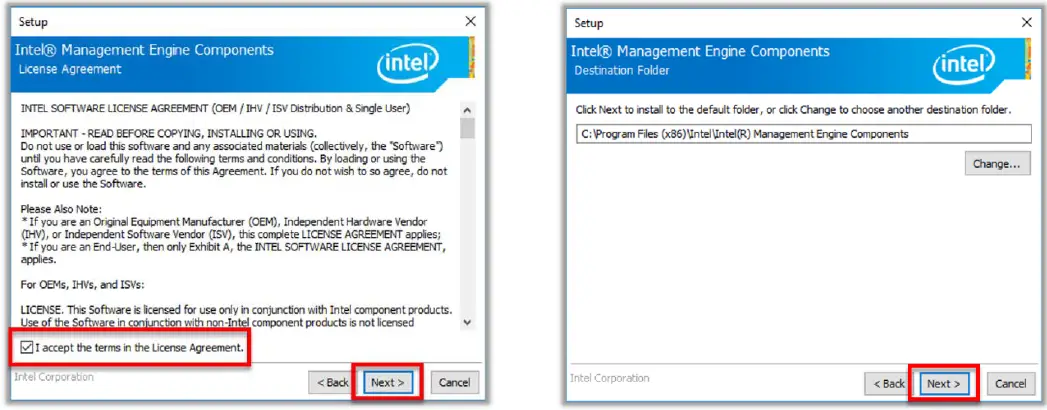
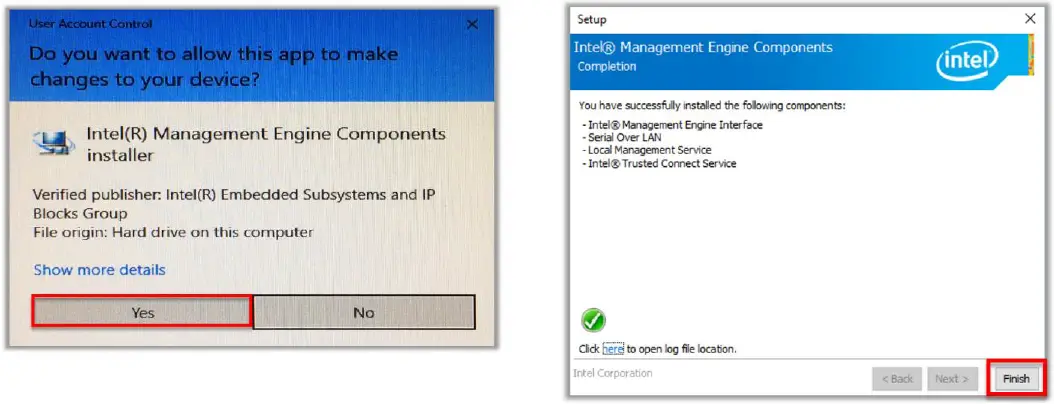
- Intel® ME
- Double Click [ SetupME ]
- Click [ Next ]

- Accept Terms then click [ Next ]
- Click [ Next ]

- Click [ Yes ]
- Click [ Finish ]

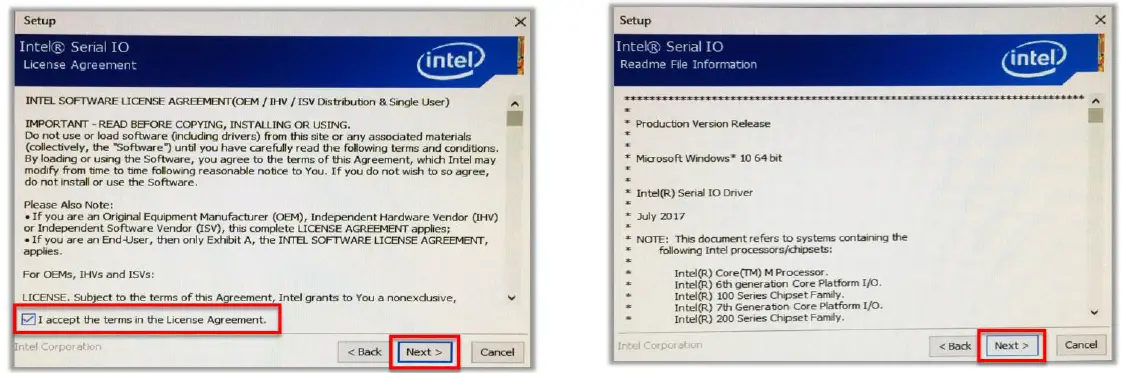
- Serial IO
- Double Click [ SetupSerialIO ]
- Click [ Next ]

- Accept terms then click [ Next ]
- Click [ Next ]

- Click [ Next ]
- Select Yes, I want to restart this computer now the click [ Finish ]

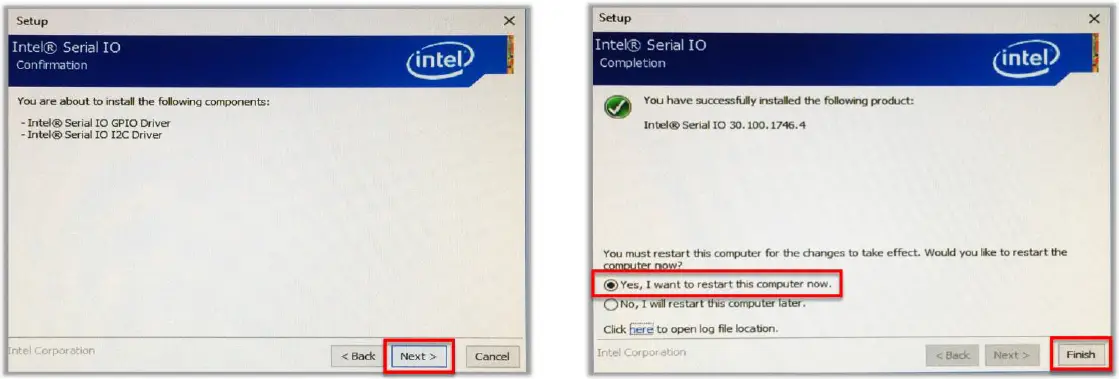
- Sensor
- Double Click [ install ]
- Click [ Yes ]

- OPOS
Please contact customer service to request “ OPOS Driver for 3nStar CashDrawer & VFD/LCM”

Specification
| 15” | |
| Model | PTE0905 |
| CPU | I5-9500TE (Embedded)(9 Gen) |
| Resolution | 1024 * 768 400nits |
| Touch | Projected Capacitive (Multi-touch) |
| DRAM | DDR4 SO-Dimm Slot x 2 (Support 2666 MHz & max 64G) |
| M.2 storage | M.2 2280 slot x 1 (Interface SATA 3 & Support PCIE), optional for 2nd M.2 |
| Default I/O | Video Ports : HDMI x1 PUSB 24V : 24V Power USB SMART I/O : Including 5V/12V/24V (BIOS select) and USB 2.0 x 2 and Com port x 1 20V in: 20V DC in ( 130W ) Cash drawer: 12V / 24V adjust by bios USB DP or SMART DD : USB TC x1 (USB DP, SMART DD by BIOS select ) Serial port :RJ45 Com port x 3 USB: USB 2.0 x 2 , USB 3.0 x 2 Ethernet :Giga Lan |
| Optional: SMART I/O Cables | ||||||||
| Cable Type | Application | Side A | Side B | P/N | ||||
| 1 | 12V Y cable | 2nd Monitor | TC connector | 12V DC jack & USB B | RA9000XC4441 | |||
| 2 | 24V Printer Y cable | Printer | TC connector | 3 pin hoshiden & USB B | RA9000XC4390 | |||
| 3 | COM cable | Com port device | TC connector | DB 9 | RA9000XC4391 | |||
| 4 | USB cable | Payment device power | TC connector | 12V DC jack | RA9000XC4442 | |||
| Speakers | 2 x 2W | |||||||
| OS | Windows 10 LTSC | |||||||
| Power | 20V 130W | |||||||


