Bambu Lab P1P 3D Printer
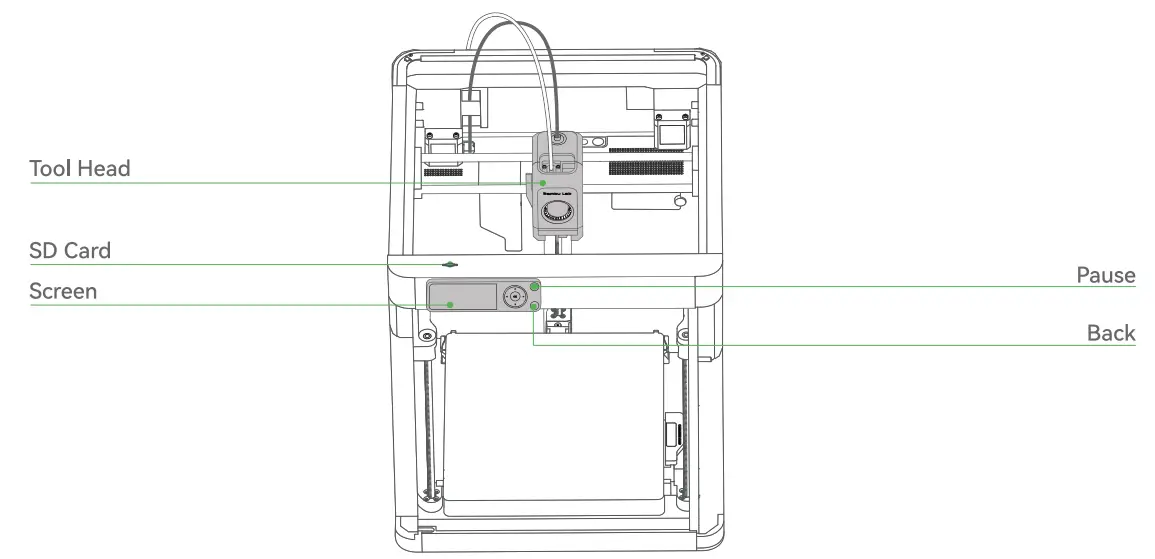
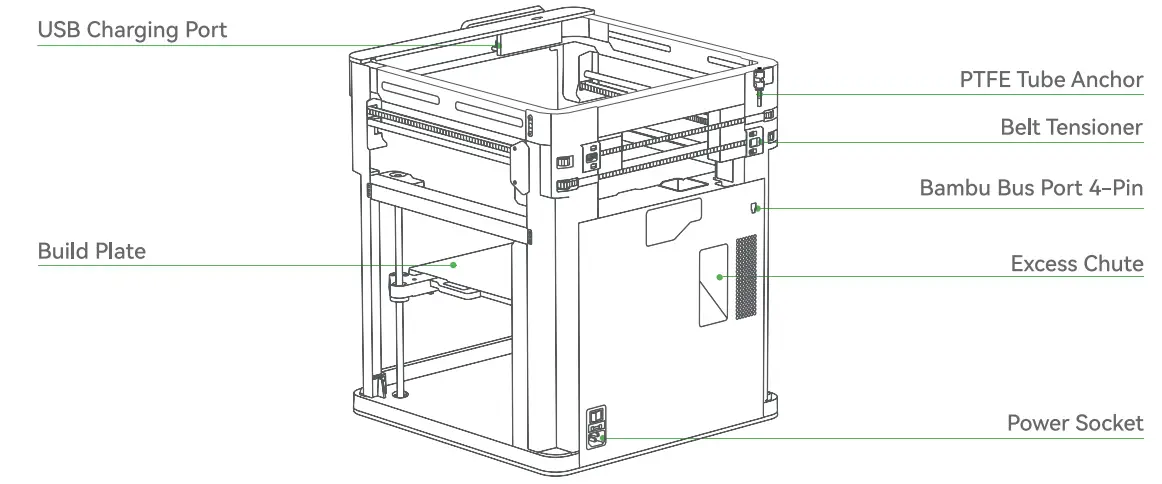
Component Introduction
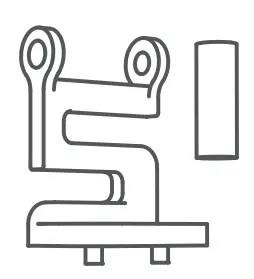
Accessory Specification
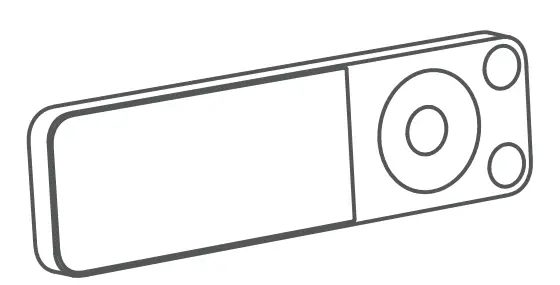
- Screen

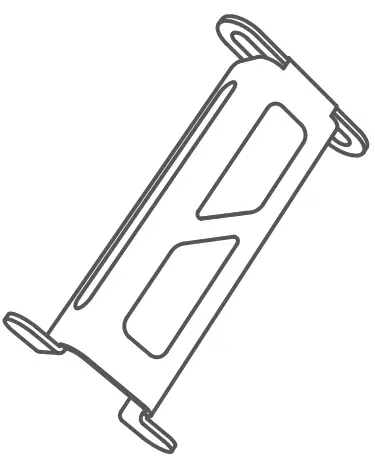
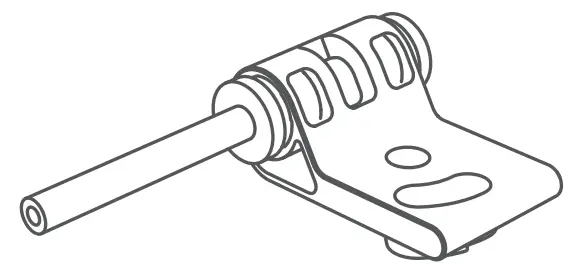
- Spool Holder

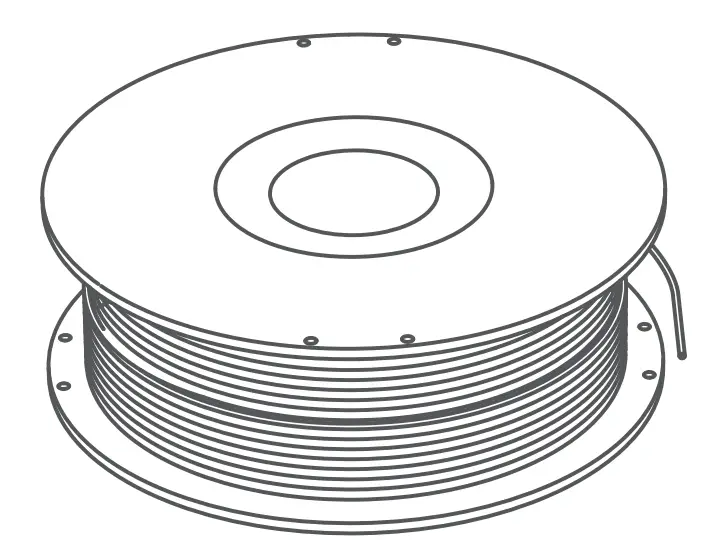
- Filament

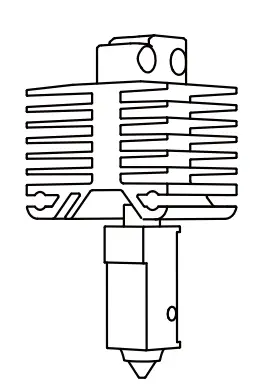
- Spare Hot End

- Nozzle Wiping Pad (x2)

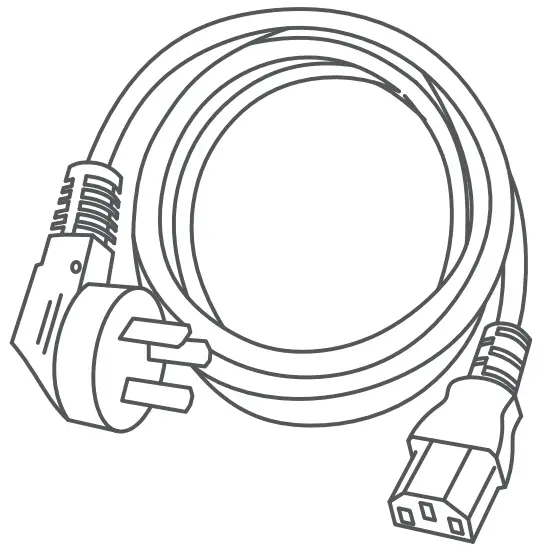
- Power Cord

- Unclogging Pin Tool

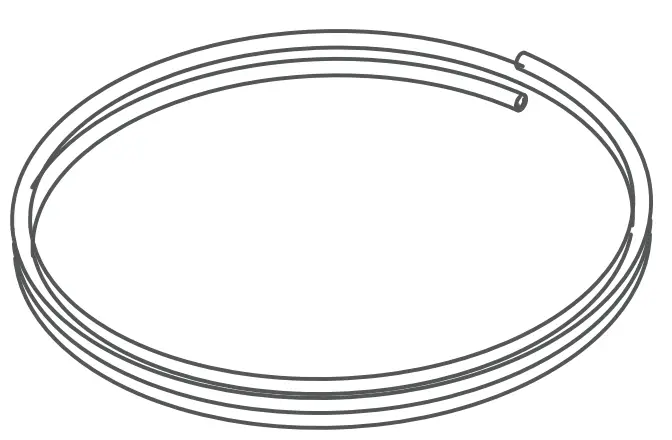
- PTFE Tube

- Bambu Scraper

- Allen Key H1 .5 Allen Key H2

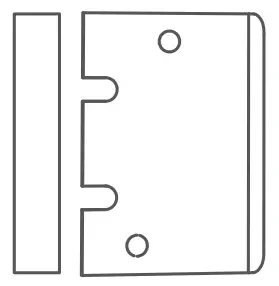
- PTFE Tube Anchor

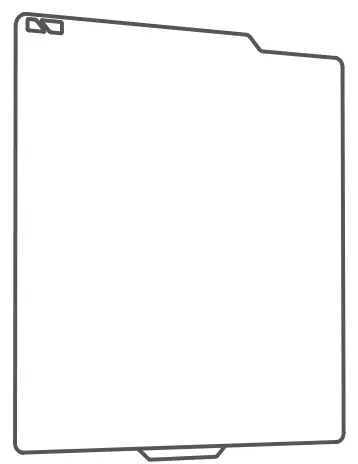
- Build Plate


Tool Head Unlock
Cut the zip tie securing the toolhead.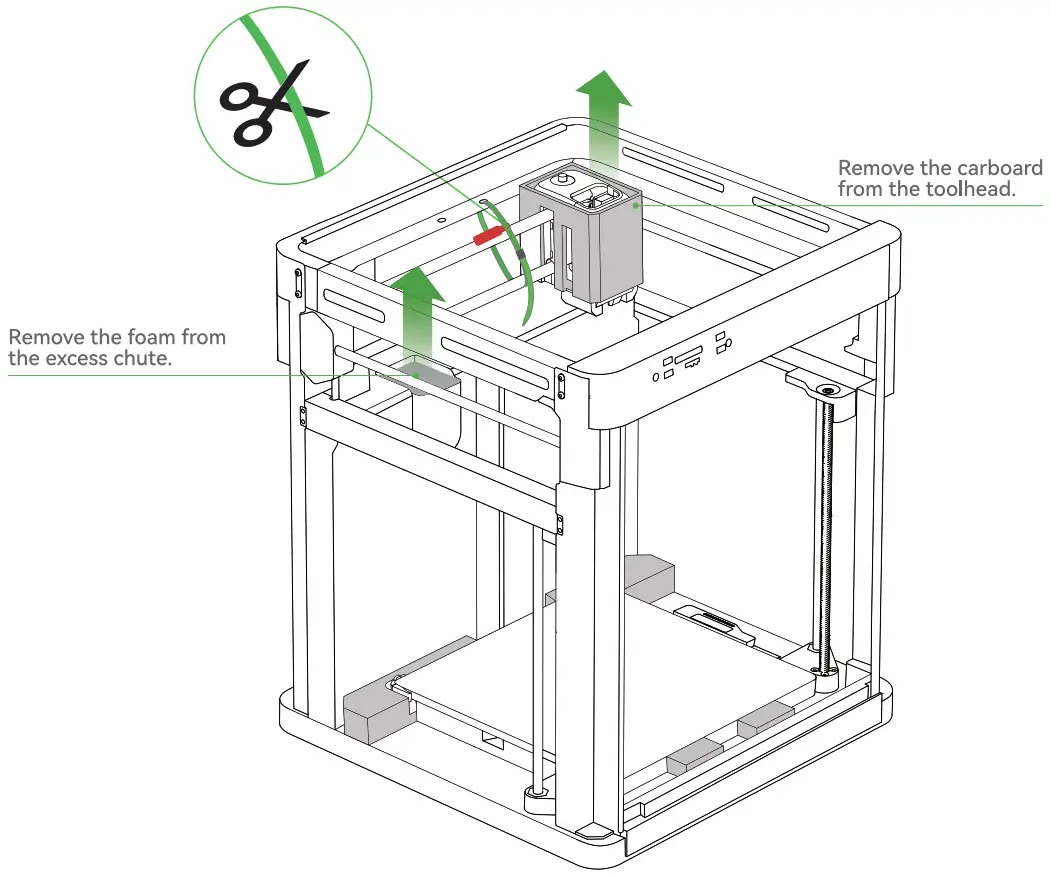
Spool Holder & PTFE Tube Anchor Assembly
*We recommend using the short end of the Allen Key to unlock the screws more easily.
Remove the screws as pictured with an Allen Key H2.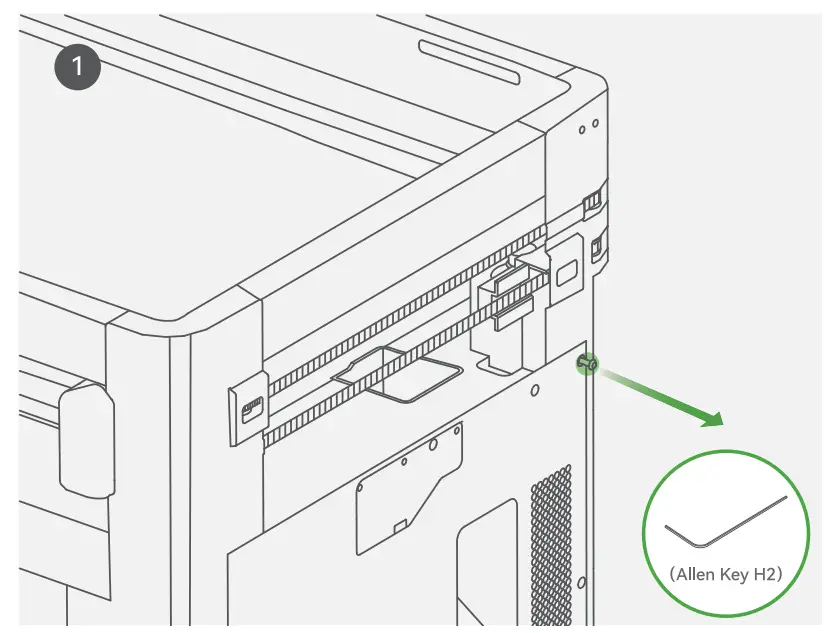
Secure the spool holder with two screws from the accessory box.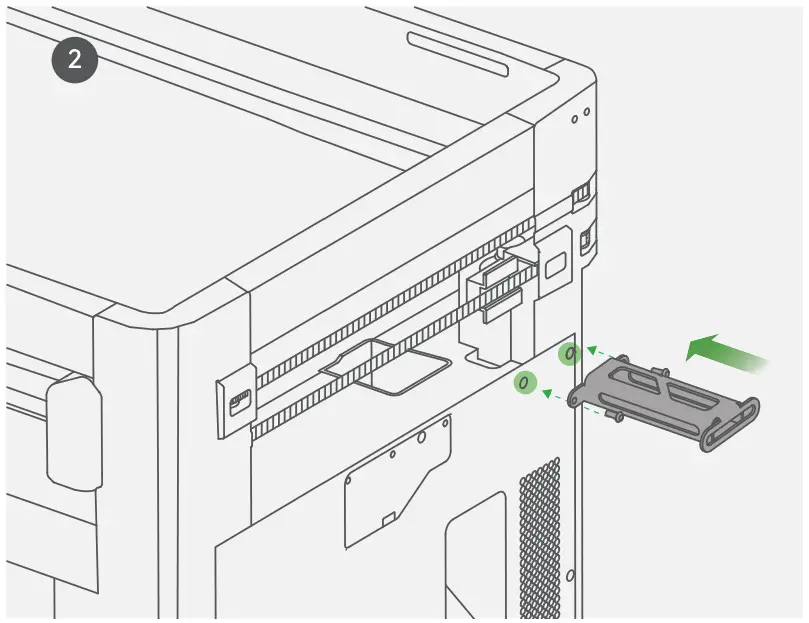
Secure the PTFE tube anchor with two screws from the accessory box.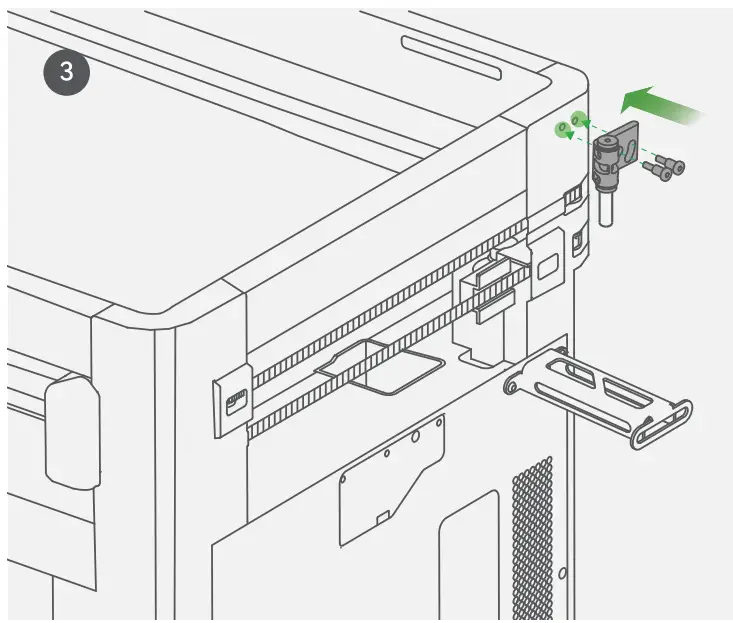
Place the PTFE tube as pictured. Make sure both ends of the PTFE tube are inserted tightly.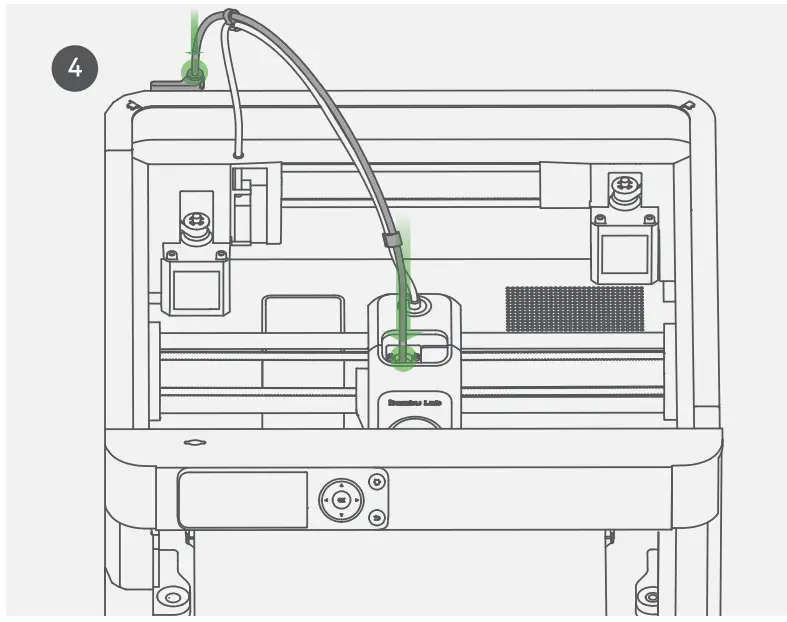
Hot Bed Unlock & Screen Installation
Remove the three screws with an Allen Key H2 to unlock the hot bed.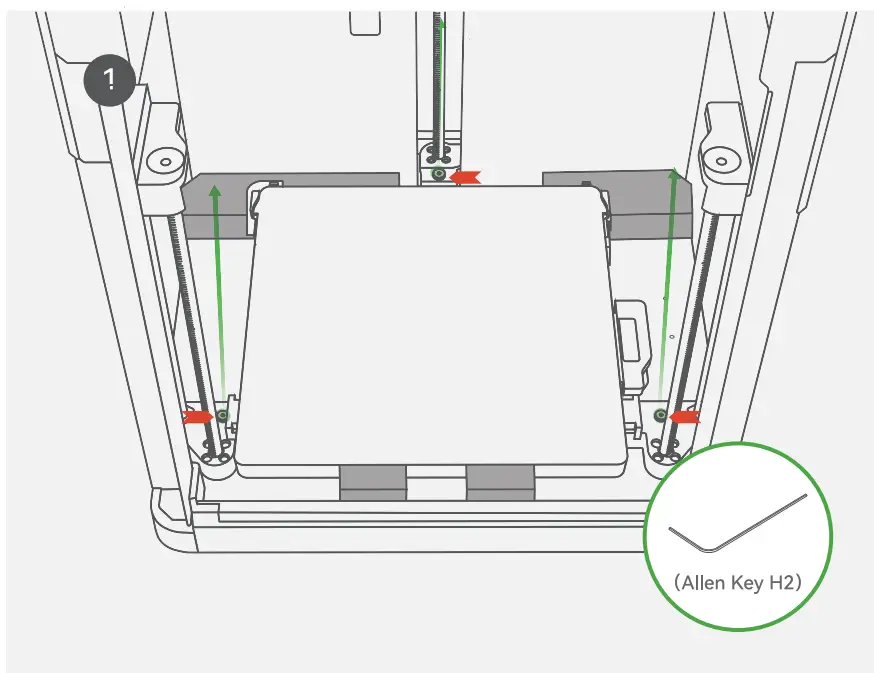
Insert the LCD cable into the port by plugging it into the terminal as pictured.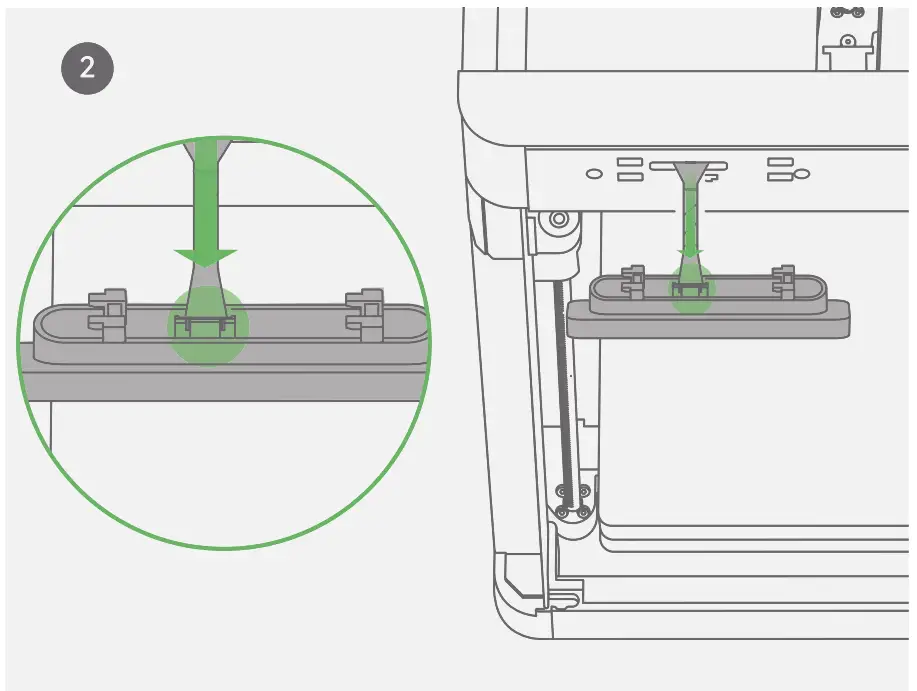
Attention: Bend the LCD cable towards the opening on the back of the screen as pictured.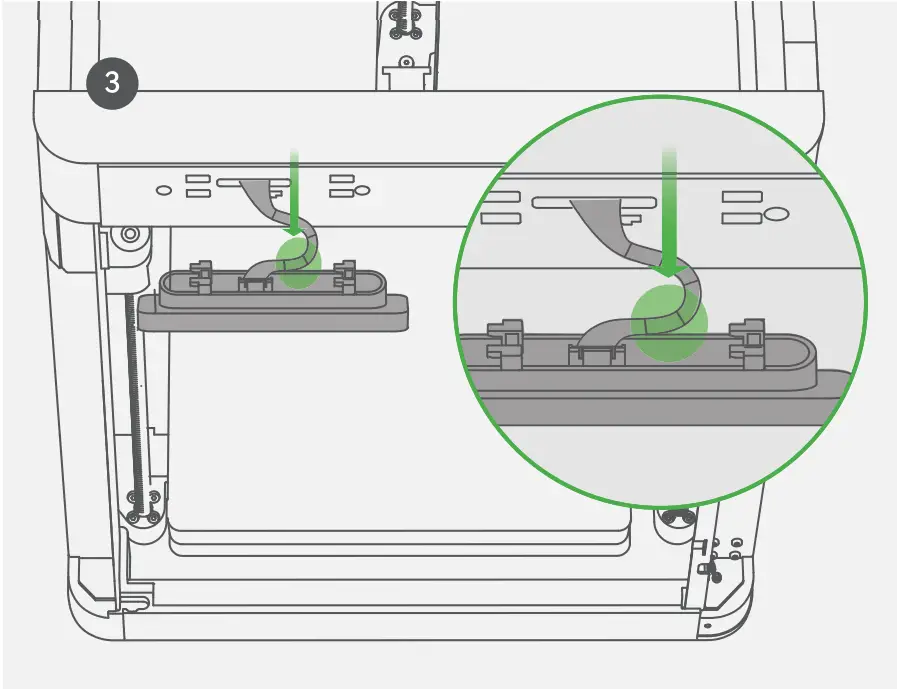
Inset the screen back to the slot on the printer, then lock it by pushing it to the left.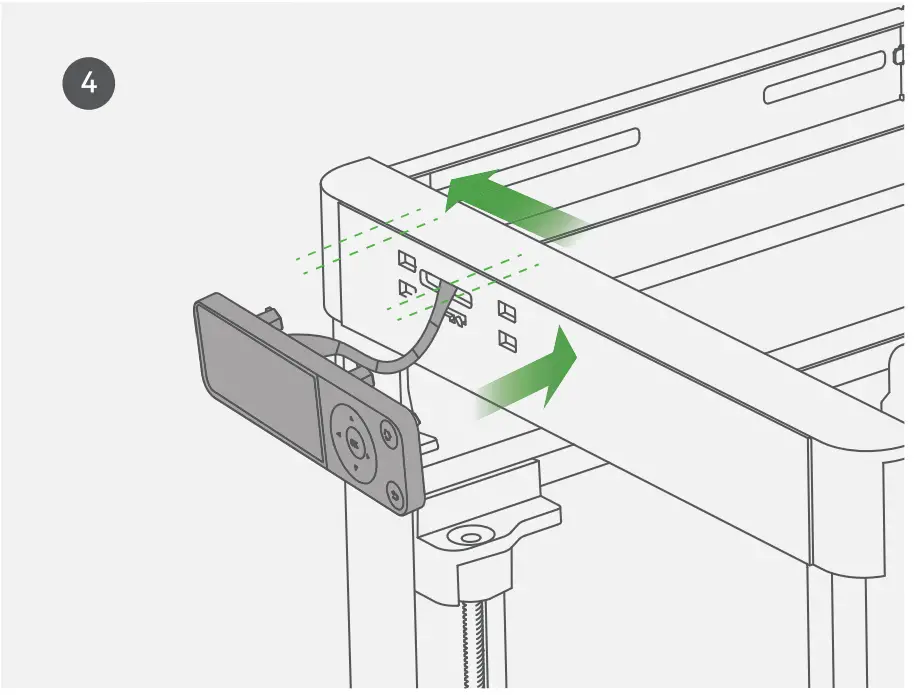
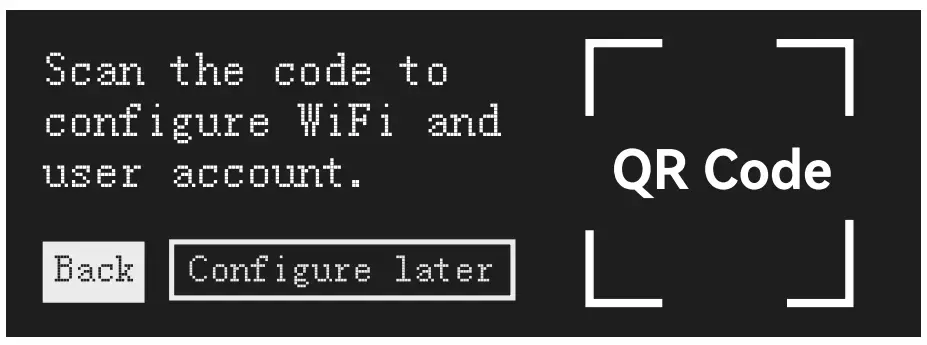
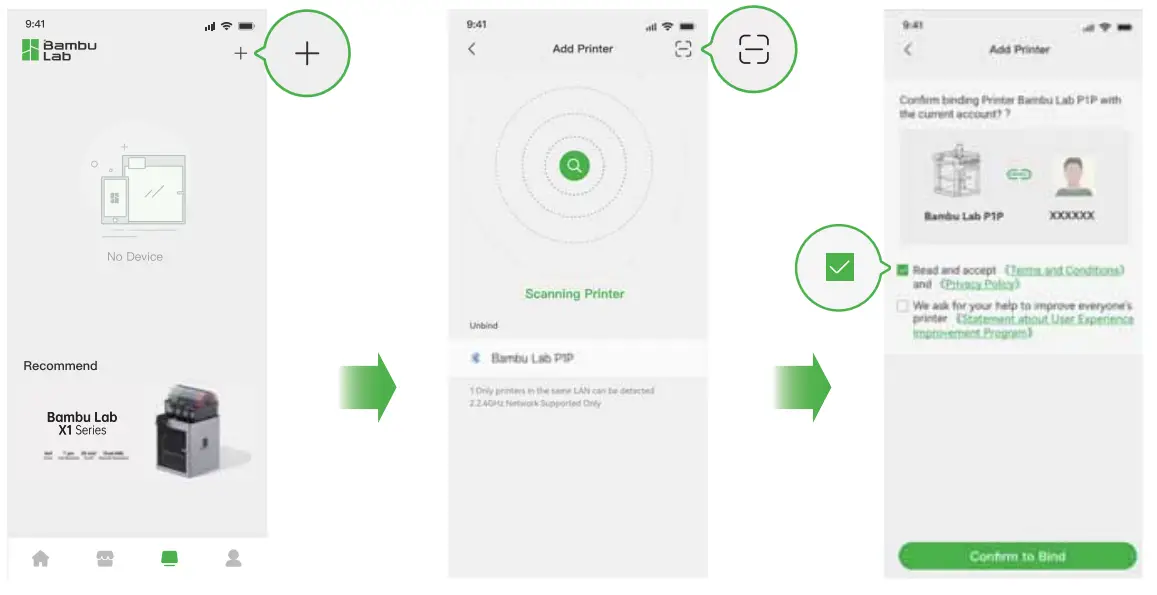
Printer Binding
- Download the Bambu Handy App. Register and log in to your Bambu Lab account.

- Connect the printer to power. Follow the instructions on the screen until getting to the page shown on the right side.

- Use Bambu Handy to scan the QR code on the screen, and bind your printer with your Bambu Lab account.

- Follow the instructions on the screen to complete the initial calibration. It is normal to have vibration and noise during the calibration process.
DO NOT remove the protective foam from beneath the hot bed until after the initial calibration is complete.

First Print
Insert filament into the PTFE Tube. Keep pushing the filament until it can not move forward.
*We recommend using the supplied Bambu PLA Basic for your first test print.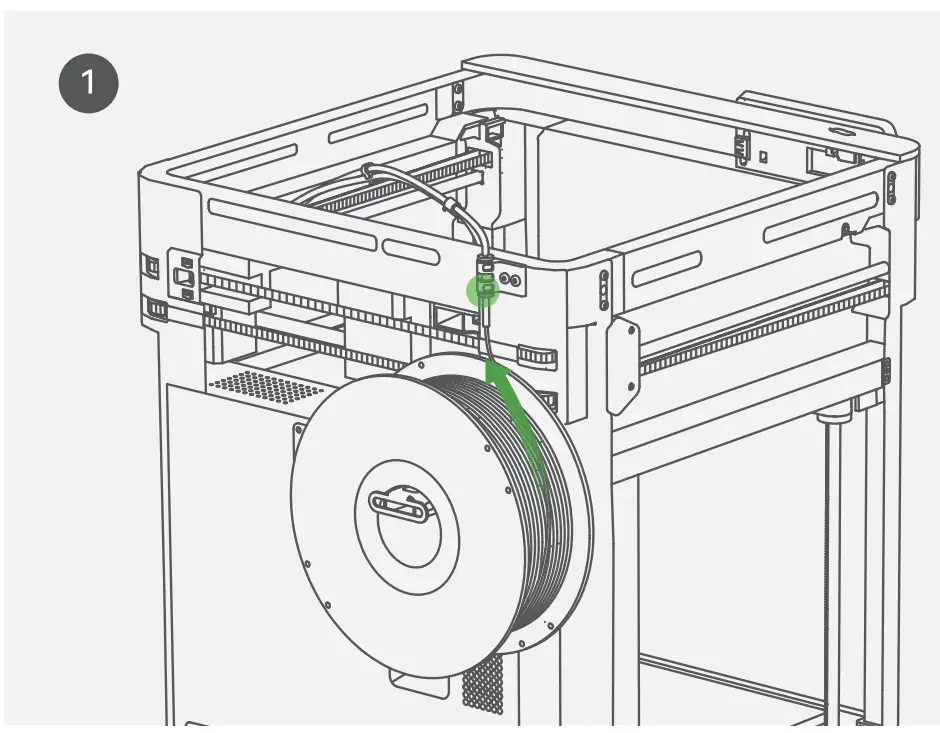
Select “![]() ” “
” “![]() ” and heat the nozzle to the recommended temperature for the filament.
” and heat the nozzle to the recommended temperature for the filament.
Select “![]() ” ” E” “
” ” E” “![]() “several times until the filament comes out from the nozzle and cannot be pulled out from the PTFE tube anchor manually.
“several times until the filament comes out from the nozzle and cannot be pulled out from the PTFE tube anchor manually.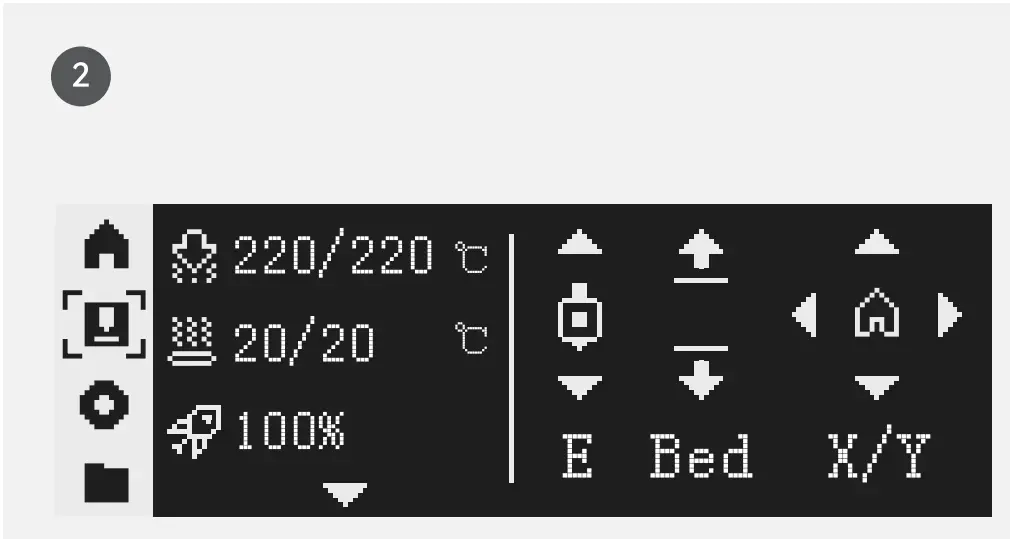
Select ![]() and select a file to start the first print.
and select a file to start the first print.
* We recommend using one of the pre-loaded files as a first test print.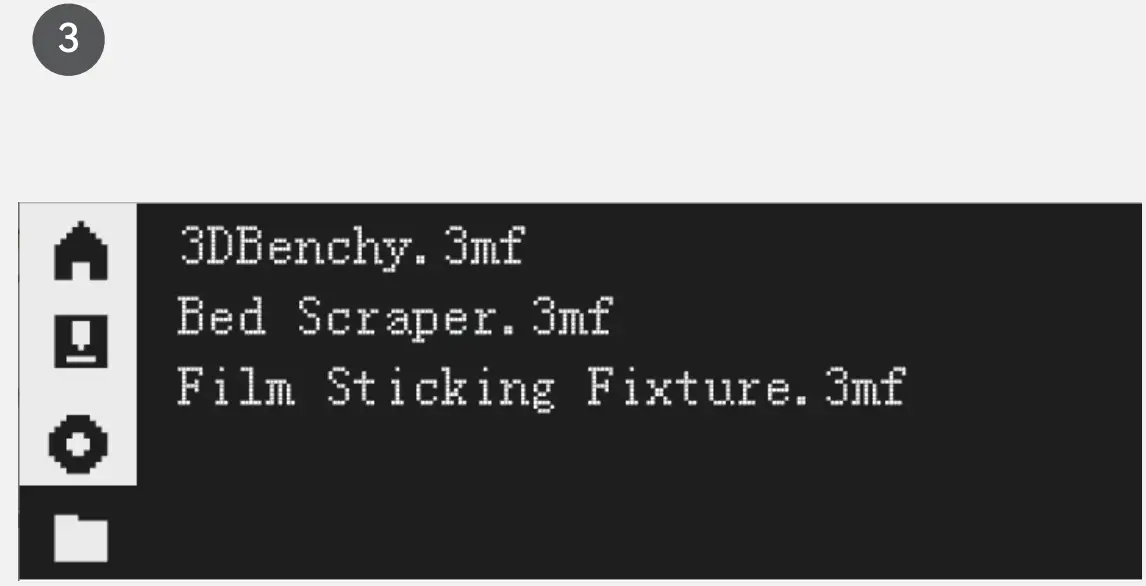
Bambu Studio
Download Bambu Studio: http://bambulab.com/download
Log in to Bambu Studio with your Bambu Lab account, which is the same for the Bambu Online store. Create or open a project.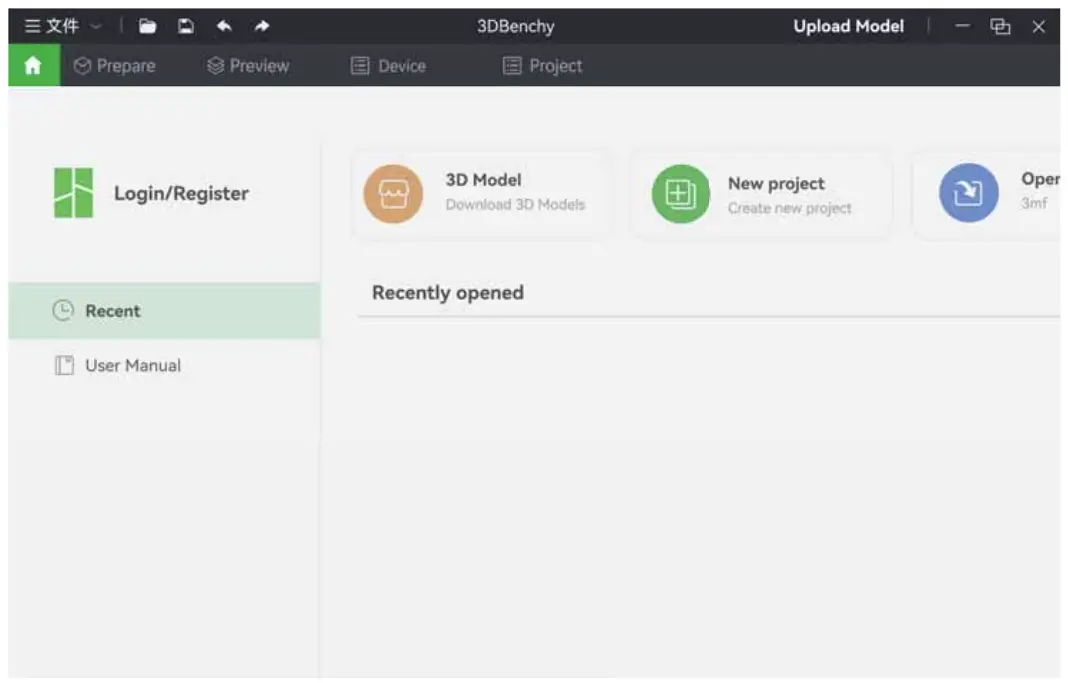
Slice the model, select your printer and send the model to print.
* We recommend doing bed leveling everytime you start a print.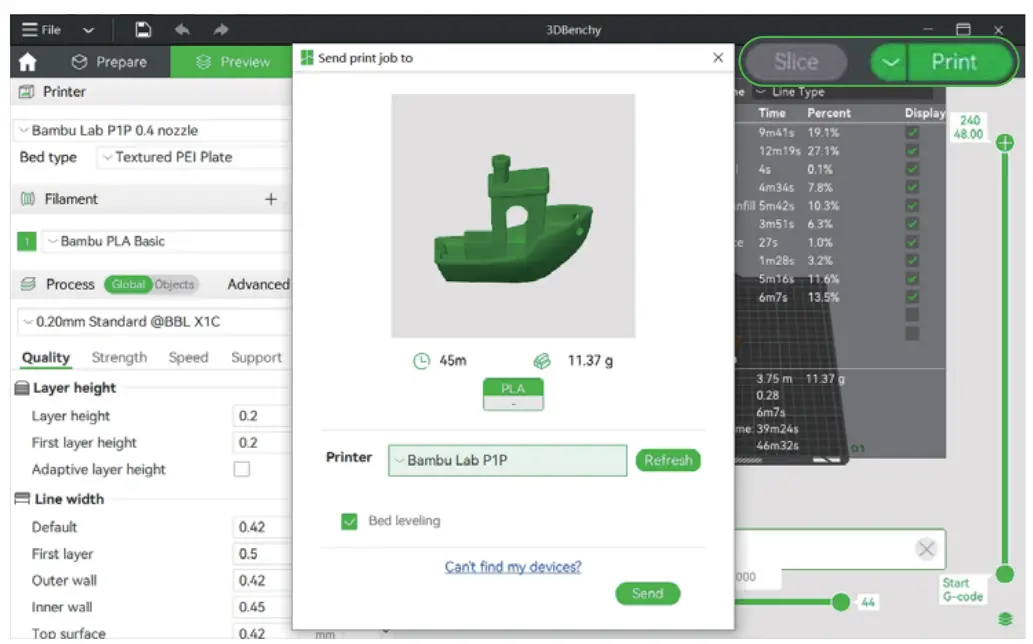
During printing, you can remotely monitor your print, or pause/stop printing on the “Device” interface.
* The live view can be seen only if a camera is mounted.
Specification
Item | Specification | |
Printing Technology | Fused Deposition Modeling | |
| Body | Build Volume(WxDxH) | 256*256*256 mm |
| Chassis | Steel | |
| Shell | Printable | |
| Tool Head | Hot End | All-Metal |
| Extruder Gears | Steel | |
| Nozzle | Stainless Steel | |
| Max Hot End Temperature | 300 °C | |
| Nozzle Diameter (Included) | 0.4mm | |
| Nozzle Diameter (Optional) | 0.2 mm, 0.6 mm, 0.8 mm | |
| Filament Cutter | Yes | |
| Filament Diameter | 1.75 mm | |
| Hot bed | Compatible Build Plate | Bambu Dual-Sided Textured PEI Plate Bambu Cool Plate Bambu Engineering Plate Bambu High Temperature Plate |
| Max Build Plate Temperature | 100°C | |
| Speed | Max Speed of Tool Head | 500 mm/s |
| Max Acceleration of Tool Head | 20 m/s2 | |
| Max Hot End Flow | 32 mm3/s @ABS(Model: 150 * 150 mm single wall; Material: Bambu ABS; Temperature: 280°C) | |
| Cooling | Part Cooling Fan | Closed Loop Control |
| Hot End Fan | Closed Loop Control | |
| Control Board Fan | Closed Loop Control | |
| Auxiliary Part Cooling Fan | Upgradeable | |
| Supported Filament | PLA,PETG,TPU,ASA,PVA,PET | Ideal |
| PA, PC, ABS | Capable | |
| Carbon/Glass Fiber Reinforced Polymer | Not Recommended | |
| Sensors | Chamber Monitoring Camera | Upgradeable |
| Filament Run Out Sensor | Yes | |
| Filament Odometry | Optional with AMS | |
| Power Loss Recover | Yes | |
| Physical Dimensions | Dimensions (WxDxH) | 386*389*458 mm |
| Net Weight | 9.65 kg | |
| Electrical Requirements | Input Voltage | 100-240 VAC, 50/60 Hz |
| Max Power | 1000 W@220 V, 350 W@110 V | |
| USB Output Power | 5V/1.5A | |
| Electronics | Display | 2.7-inch 192×64 Screen |
| Connectivity | Wi-Fi, Bluetooth, Bambu-Bus | |
| Storage | Micro SD Card | |
| Control Interface | Button, APP, PC Application | |
| Motion Controller | Dual-Core Cortex M4 | |
| Software | Slicer | Bambu Studio Support third party slicers which export standard G-code such as Super slicer, Prusa slicer and Cura, but certain advanced features may not be supported. |
| Slicer Supported OS | MacOS, Windows | |
| Wifi | Frequency Range | 2412 MHz-2472 MHz(CE) 2412 MHz-2462 MHz(FCC) 2400 MHz-2483.5 MHz(SRRC) |
| Transmitter Power (EIRP) | :521.5 dBm(FCC) :520 dBm(CE/SRRC) | |
| Protocol | IEEE802.11 b/g/n | |
| Bluetooth | Frequency Band | 2402MHz-2480MHz(CE/FCC) 2400MHz-2483.5M Hz(SRRC) |
| Transmitter Power (EIRP) | :520dBm (FCC/CE/SRRC) | |
| Protocol | BLE5.0 | |
Customer Support
Please visit the Bambu Lab Wiki for more setup and maintenance tutorials.
https://wiki.bambulab.com/en/home

If you need support, please try either of the two approaches:
Approach 1: Create a support ticket on the Official Website
Approach 2: Create a support ticket on the Bambu Handy App
Disclaimer and Warning
Thanks for purchasing a Bambu Lab product. The information in t his document affects your safety and your legal rights and responsibilities. Read this entire document carefully to ensure proper configuration before use. Failure to read and follow instructions and warnings in this document may result in serious injury to yourself or others, damage to your Bambu Lab product, or damage to other objects in the vicinity. This document and other collateral documents are subject to change at the sole discretion of Bambu Lab.
By using this product, you hereby signify that you have read this disclaimer and warning carefully and that you understand and agree you are solely responsible for your own conduct while using this product, and for any consequences thereof. You agree to use this product only for purposes t hat are proper and in accordance with all applicable laws, rules and regulations, and all terms, precautions, practices, policies, and guidelines Bambu Lab has made and may make available. Bambu Lab accepts no liability for damage, or injury or any legal responsibility incurred directly or indirectly from the use of the product. The user shall observe safe and lawful practices including, but net limited to, those set forth in this document.
Bambu Lab is a trademark of Shenzhen Tuozhu Technology Co., Ltd. and its affiliated companies. Names of products, brands, etc., appearing in this manual are trademarks or registered trademarks of their respective owner companies.
Before You Start
The following documents have been produced to help you safely operate and make full use of your
Bambu Lab P1P 3D Printer
Bambu Lab P1 P 3D Printer Disclaimer and Safety Guidelines
Bambu Lab P1P 3D Printer Quick Start Guide
Check that you have all the included parts. Please review the entire Quick Start Guide before operating the printer.
Read the Disclaimer and Warning above to understand yourlegal rights and responsibilities. If you have any questions or problems during the installation, maintenance, or use of t his product, Please contact Bambu Lab or a Bambu Lab authorized dealer.
Safety Guidelines
- The product must be disconnected from the power supply before carrying out any installation or maintenance work
- Installation and maintenance must be carried out by a skilled worker in compliance with the manufacturer’s instructions and local safety regulations
- Do net use multiple plug adapters or extension leads
- Do not touch the product with any wet part of the body and do not operate it while barefoot
- Do not reach inside the appliance while it is in operation
- The product is not allowed to be used by children. Please place the product out of the reach of children.
- This product is designed solely for indoor use. It should be kept in a dry environment
- The recommended operating temperature for the appliance is between 10-C to 30″C(50″F-86″F)
- The recommended humidity level is under 85%.
- The product should be positioned on a clean, stable and flat workbench
- The product should be kept in a well-ventilated location
Compliance Information
FCC Compliance Notice
Supplier’s Declaration of Conformity
Product name: P1 P
Model Number: PF001-S
Responsibility Party: Shenzhen Tuozhu Technology Co.,Ltd. (Bambulab USA Inc) Responsibility Party Address: 800) Centre Park Drive, STE 330, Austin, TX, 78754
Website: www.bambulab.com
We, Shenzhen Tuozhu Technology Co., Ltd, (Bambulab USA Inc) , being the responsible party, declares that the above mentioned model was tested to demonstrate compliance with all applicable FCC rules and regulations
This device complies with Part 15 of the FCC Rules, Operation is subject to the following two conditions.
(1) This device may not cause harmful interference, and (2) This device must accept any interference received, including interference that may cause undesired operation, Warning: Changes or modifications not expressly approved by the party responsible for compliance could void the user’s authority to operate the equipment.
NOTE: This equipment has been tested and found to comply with the limits for a Class B digital device, pursuant to Part 15 of the FCC Rules, These limits are designed to provide reasonable protection against harmful interference in a residential installation, This equipment generates uses and can radiate radio frequency energy and, if not installed and used in accordance with the instructions, may cause harmful interference to radio communications, However, there is no guarantee that interference will not occur in a particular installation If this equipment does cause harmful interference to radio or television reception, which can be determined by turning the equipment off and on, the user is encouraged to try to correct the interference by one or more of the following measures:
– Reorient or relocate the receiving antenna,
– Increase the separation between the equipment and receiver,
– Connect the equipment into an outlet on a circuit different from that to which the receiver is connected
– Consult the dealer or an experienced radio/TV technician for help
FCC Radiation Exposure Statement:
This equipment complies with FCC radiation exposure limits set forth for an uncontrolled environment. This equipment should be installed and operated with minimum distance 20cm between the radiator & your body,
ISED Compliance Notice
This device contains license-exempt transmitter{s)/receiver(s) that comply with Innovation, Science and Economic Development Canada’s license-exempt RSS(s), Operation is subject to the following two conditions.
(1) This device may not cause interference,
(2) This device must accept any interference, including interference that may cause undesired operation of the device,
EU Compliance Statement
Hereby, Shenzhen Tuozhu Technology Co,, Ltd. declares that the radio equipment type P1 Pis in compliance with Directive 2014/53/EU, The full text of the EU declaration of conformity is available at
the following internet address: www.bambulab.com/euro-compliance
 DANGER ELECTRIC SHOCK
 KEEP HANDS CLEAR OF MOVING PARTS
 DO NOT TOUCH NOZZLE ORBED WHILE HOT
![]() www.bambulab.com
www.bambulab.com
Copyright© 2022 Barn bu Lab All Rights Reserved
![]()


