Contents hide
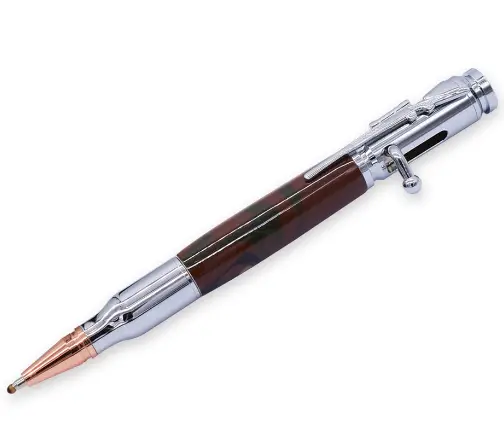
carbatec PEN-6 Chrome Rifle Bolt Action Pen Kits Instruction Manual
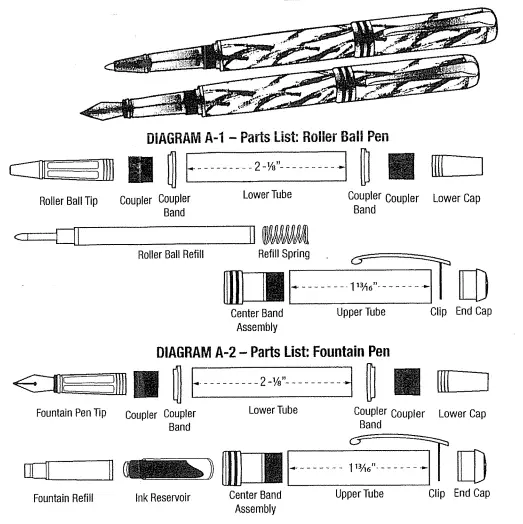
TYCOON Roller Ball and Fountain Pen Kits
KIT FEATURES
- Heavy plating with epoxy coating.
- A streamlined modern pen style, with elegant trim pieces.
- Premium pen refill-#PKlO-RPR
- Closed dimensions; 5-1/4″, with cap posted; 6-1/4″
- Refillable Ink Reservoir
REQUIRED ACCESSORIES
- 7mm pen mandrel
- #PKTYBU-3-piece Bushing set
- #PK2564-25/64″ Drill Bit
- #PK1532-15/32″ Drill Bit
- #PKTYBTS-2-piece Barrel Trimmer Sleeve Set
- #PKTRIMKIT-Universal Barrel Trimmer
- 2-part epoxy glue or insta-cure glue (cyano-acrylate).
PREPARING THE BLANKS:
- Prepare a master blank of at least ~ 5/8″ square. Cut two blanks to the length of each tube. (Add 1/16″ for trimming) Mark the center of each blank.
- Upper Blank ( shorter tube )-drill a 15/32″ hole through the blank
- Lower Blank (longer tube)-drill a 25/64″ hole through. NOTE: Sand the tubes using 220-grit abrasive for better adhesion.
- Glue each tube in the proper blank. Spread the glue over each tube. Insert the tube into the blank with a twisting motion to spread the glue evenly inside. Center each tube lengthwise inside the blank.
- When glue dries; square the ends of each blank. Using a barrel trimmer with adapter sleeves #PKTYBU. Mount the proper sleeve (large diameter for the short tube, smaller diameter for the longer tube) over the 7mm shank. Trim the blank down flush with the brass tube.
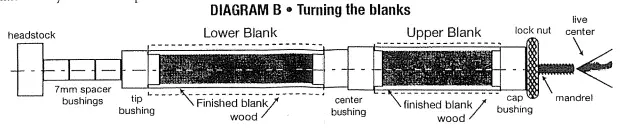
TURNING THE BLANKS:
- Mount spacer bushings on the mandrel. Place the tip bushing on the mandrel. Slide the lower blank on and follow with the center bushing, shorter diameter first. Slide the upper blank ( shorter) on next. Finally, slide the cap bushing ( wider diameter) wide end in last. Mount spacer bushings lo fill the space to thy threads on the mandrel. Screw on the lock nut hand tight. Bring the tailstock in snug to the mandrel. Lock in place. Do riot over-tighten the lock nut; it may damage the mandrel.
- Turn the blanks down close to the bushings. Follow with abrasive until the tube diameters are flush with the bushings. Finish with your choice of polish.
DIAGRAM B • Turning the blanks
CARBA-TEC® Woodturning Project
ASSEMBLY:
- NOTE: Line up the components according to DIAGRAM Col (Roller Ball Pen) or DIAGRAM C-2 (Fountain Pen).
To avoid damage to components when assembling pen use vise with covered jaws or PSI #PENPRESS3. - Slide the coupler band, narrow end first over the extension of the coupler. Press this assembly into the lower barrel. Repeat for both ends of the barrel.
- Thread the lower cap on the top coupler.
- Press the center band assembly into the upper (shorter) tube.
- Insert the clip onto the end cap. Press this assembly into the opposite end of the barrel.
DIAGRAM C-1 – Assembly: Roller Ball Pen


