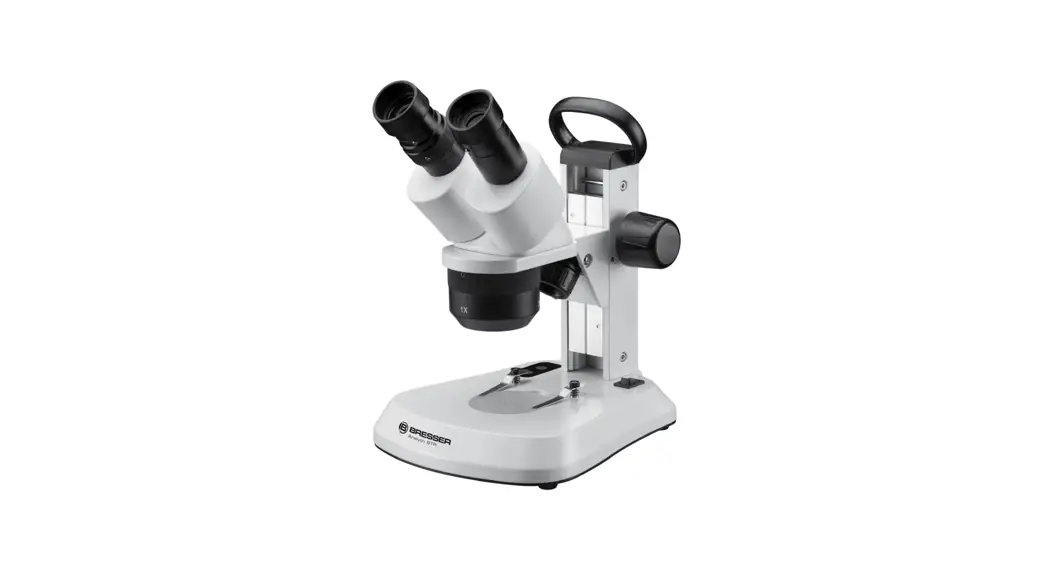
![]() 5803810 Analyth STR Bino Microscope
5803810 Analyth STR Bino Microscope
Instruction Manual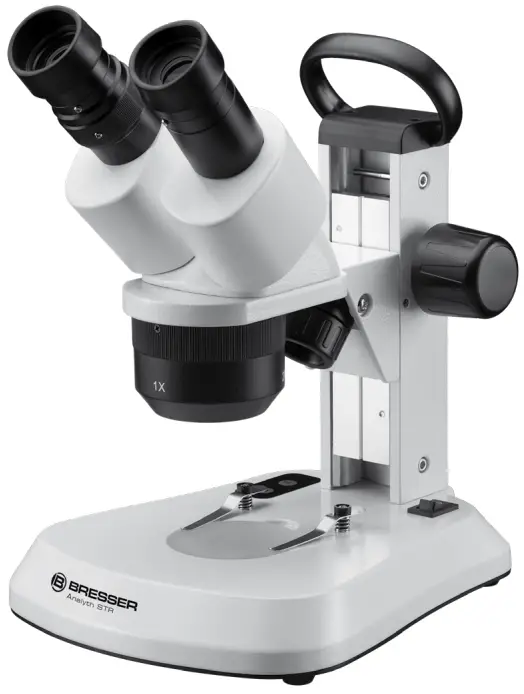
5803810 Analyth STR Bino Microscope
CAUTION!
To work with this microscope, sharp and pointed aids are being used. Please take care that this microscope and its accessories are stored at a place out of reach of children. Let children only work with this microscope under an adult’s supervision! Keep packing material (plastic bags etc.) away from children!
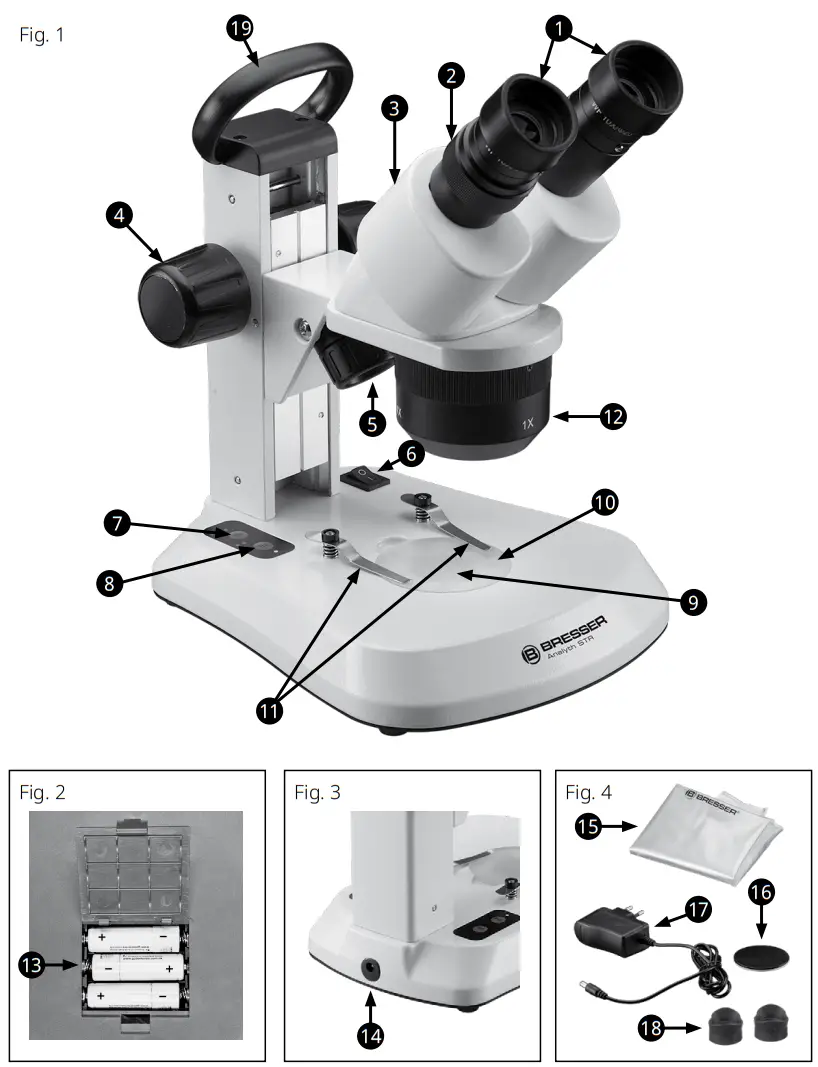
1. Eyepieces 2. Dioptre scale 3. Binocular head 4. Focus wheel 5. Incident light illumination 6. On/Off switch 7. Brightness control (incident light) | 8. Brightness control (transmitted light) 9. Transmitted light illumination 10. Microscope stage with object plate 11. Object clamps 12. Lens holder (rotatable) 13. Battery compartment | 14. Power supply connection 15. Dust cover 16. Object plate (black/white) 17. Power supply 18. Rubber eyecups (2pieces) 19. Carrying handle |
Choosing a place for the microscope
Before starting, choose a sufficient location for microscoping. Please take care that your microscope stands on an even and solid ground.
Position your device so that it can be disconnected from the power supply at any time. The wall socket should always be located near the device and be easily accessible, since the plug on the power cord serves as a disconnecting device for the power supply.
Illumination
With the Analyth STR you have three illumination options: incident light, transmission light and both. First, connect the power supply to a power supply socket and then into the power supply connection of the microscope (14). Now, engage the main switch (6).
The illumination for incident light and transmitted light can be adjusted separately by using the two brightness control buttons (7 and 8). After switching off, the selected setting is retained.
Alternatively, the Analyth STR can also be operated with batteries. To insert the batteries (type AA), open the battery compartment (13) on the underside of the microscope. Make sure that the polarity is correct. The microscope can also be used with the power supply when batteries are inserted. Rechargeable batteries will not be charged.
Observation
Place the desired object in the middle of the stage (10) and secure it with the clamps (11) if necessary. The objective’s magnification (1x, 2x or 4x) can be adjusted by turning the objective holder (12). It is recommended to start observations always with the lowest magnification (1x). Now look through the eyepieces (1) at the binocular head (3). Adjust the sharpness with the focuser (4).
Focusing and dioptre compensation
Set the dioptre scale (2) to to the middle position (shiny ring) and observe an object. Now close your left eye and adjust the focus with the focuser (4) for your right eye. Then, close your right eye and adjust the focus for your left eye with the dioptre scale. Now, the microscope is adjusted for your eyes. Note the setting of the dioptre scale you need to use in future.
Eye distance
The Analyth STR is equipped with an adjustable binocular head. To set your eye distance, move the eyepieces against each other until you found the ideal position.
Replacing the Eyepieces (optional)
To replace the eyepieces you need to loosen the clamp screw on the underside of the eyepiece holder. You can then easily remove and replace the eyepieces.
The clamp screws serve only as protection so that the eyepieces will not fall out.
Note:
The LED illumination has a life span of approx. 20,000 hours. In the case of a technical error please contact the service center.
Adjusting the friction of the focusing drive
It can happen that the Microscope head is no longer held by the focusing drive and shuts down because of his net weight.
By turning the two focusing wheels in opposite directions, the friction can be adjusted more firmly or loosely.
Cleaning and maintenance
Your microscope is a high-quality optical instrument. Please take care that neither dust nor fingerprints take place on the optical surfaces. If necessary, clean the microscope body with a slightly moistened soft cloth. Use a separate clean cloth with some drops of alcohol to clean the optical surfaces. After using, the microscope should be protected with its dust cover.
Note:
Please consider that a sufficient treated microscope keeps its value and optical quality for many years.
Technical data
Binocular head
Eyepieces: 2pcs. 10x
Objectives: 1x, 2x and 4x, Stereo
Total magnification: 10x, 20x, 40x
Illumination: LED
Note:
The total magnification can be calculated by multiplying the objective magnification with the eyepiece magnification.
Declaration of Conformity
10.1. CE Conformity![]() Bresser GmbH has formed a „Conformity Declaration“ in line with the applicable directive. This declaration is available for review under http://www.bresser.de/download/58038X0/CE/5803800-5803850_CE.pdf
Bresser GmbH has formed a „Conformity Declaration“ in line with the applicable directive. This declaration is available for review under http://www.bresser.de/download/58038X0/CE/5803800-5803850_CE.pdf
10.2. UKCA Conformity![]() Bresser UK Ltd. has formed a „Declaration of Conformity“ in line with the applicable directive. This declaration is available for review under http://www.bresser.de/download/58038X0/UKCA/5803800-5803850_UKCA.pdf
Bresser UK Ltd. has formed a „Declaration of Conformity“ in line with the applicable directive. This declaration is available for review under http://www.bresser.de/download/58038X0/UKCA/5803800-5803850_UKCA.pdf
Disposal
![]() Dispose of the packaging materials properly, according to their type, such as paper or cardboard. Contact your local waste-disposal service or environmental authority for information on the proper disposal.
Dispose of the packaging materials properly, according to their type, such as paper or cardboard. Contact your local waste-disposal service or environmental authority for information on the proper disposal.![]() Do not dispose of electric equipment together with household waste material! In observance of European Directive 2012/19/EC on waste electrical and electronic equipment (WEEE) and its implementation in accordance with national law, electric equipment that have reached the end of its life must be collected separately and returned to an environmentally compatible recycling facility.
Do not dispose of electric equipment together with household waste material! In observance of European Directive 2012/19/EC on waste electrical and electronic equipment (WEEE) and its implementation in accordance with national law, electric equipment that have reached the end of its life must be collected separately and returned to an environmentally compatible recycling facility.![]() Discharged batteries and damaged re-chargeable batteries must be disposed of at special battery collection points. Information is available from your local disposal agent or local authority regarding the disposal of devices or batteries.
Discharged batteries and damaged re-chargeable batteries must be disposed of at special battery collection points. Information is available from your local disposal agent or local authority regarding the disposal of devices or batteries.
Warranty & Service
The regular warranty period is 2 years and begins on the day of purchase. To benefit from an extended voluntary warranty period as stated on the gift box, registration on our website is required.
You can consult the full warranty terms as well as information on extending the warranty period and details of our services at www.bresser.de/warranty_terms.
![]() WARRANTY
WARRANTY
 http://www.bresser.de/warranty_terms
Service
Please contact the service centre first for any questions regarding the product or claims, preferably by e-mail.
E-Mail: [email protected]
Telephone*: +44 1342 837 098
BRESSER UK Ltd.
Suite 3G, Eden House
Enterprise Way
Edenbridge, Kent TN8 6HF
United Kingdom
*Number charged at local rates in the UK (the amount you will be charged per phone call will depend on the tariff of your phone provider); calls from abroad will involve higher costs.
![]() Bresser GmbH
Bresser GmbH
Gutenbergstraße 2
46414 Rhede · Germany
www.bresser.de
Bresser UK Ltd.
Suite 3G, Eden House, Enterprise Way
Edenbridge, Kent TN8 6HF · Great Britain
www.bresseruk.com![]() @BresserEurope
@BresserEurope
Errors and technical changes reserved.


