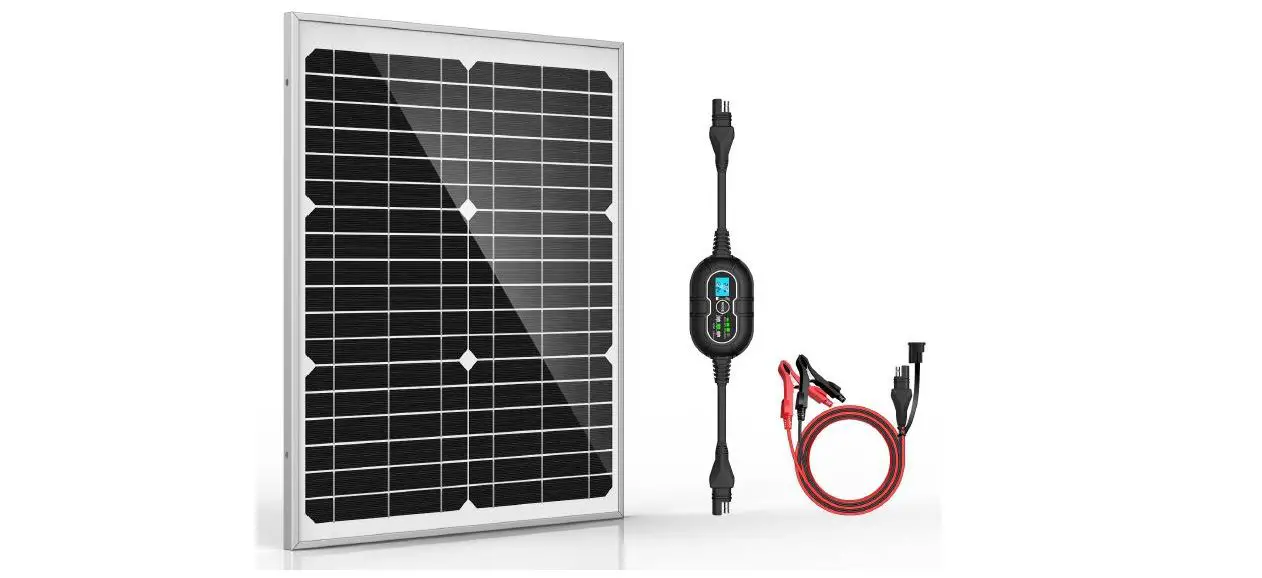
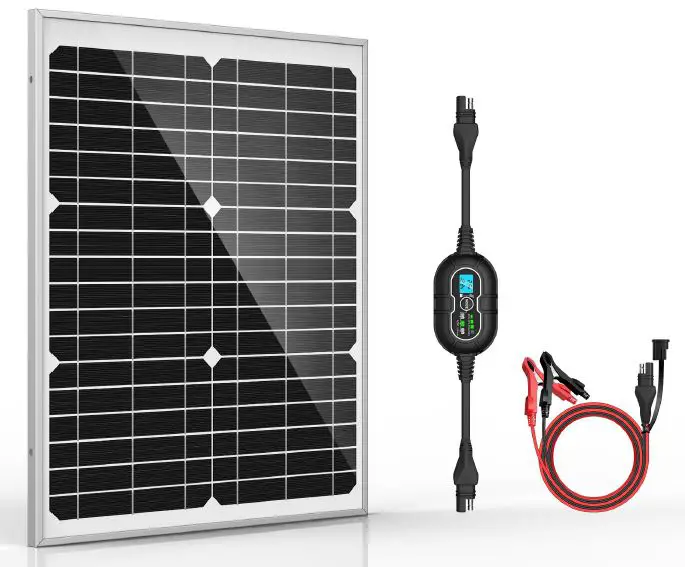
ALTO SOLAR AS-20W-M 20W Mono Solar Panel Kit
Please read all of the installation instructions carefully before installing the product. Improper installation will void the manufacturer’s warranty. The installation instructions are written as guidelines to assist in installing the system. Please contact us with the email if you are not comfortable installing the product. Prior to using and installing the solar battery charger, please read the safety information provided in this user manual. Be sure to use the product as outlined in this user manual. Alteration or modifications carried out without appropriate authorization may invalidate the user’s right to operate the equipment.
Introduction
This manual provides safety and installation instructions for the charge controller. Alto Solar assumes no responsibility for loss, damage or expense resulting from improper installation, handling, or use.
Safety Precautions
Before installing this product, read all safety instructions in this document.
- All installations must be performed in compliance with any applicable local codes.
- The batteries must be the same of type, make and age if you connect several batteries in parallel or series.
- Avoid exposing solar panel to partial sunlight or shadows, partial sunlight can cause a hot spots on the solar panel.
- Ensure input voltage does not exceed 30 VDC to prevent permanent damage.
- The charge controller is powered by sunshine, minimum voltage for the solar panel is 15V.
- Designed for 12V battery, do not use it for 6V or 24V battery. (two 6V batteries also can be used if connected in series; multiple 12V batteries also can be used if connected in parallel).
- Do not attempt to recharge the non-rechargeable battery, converse with your battery dealer for more info before usage.
- Ensure the polarity is correct when connecting the charge controller to battery and solar panel.
Features
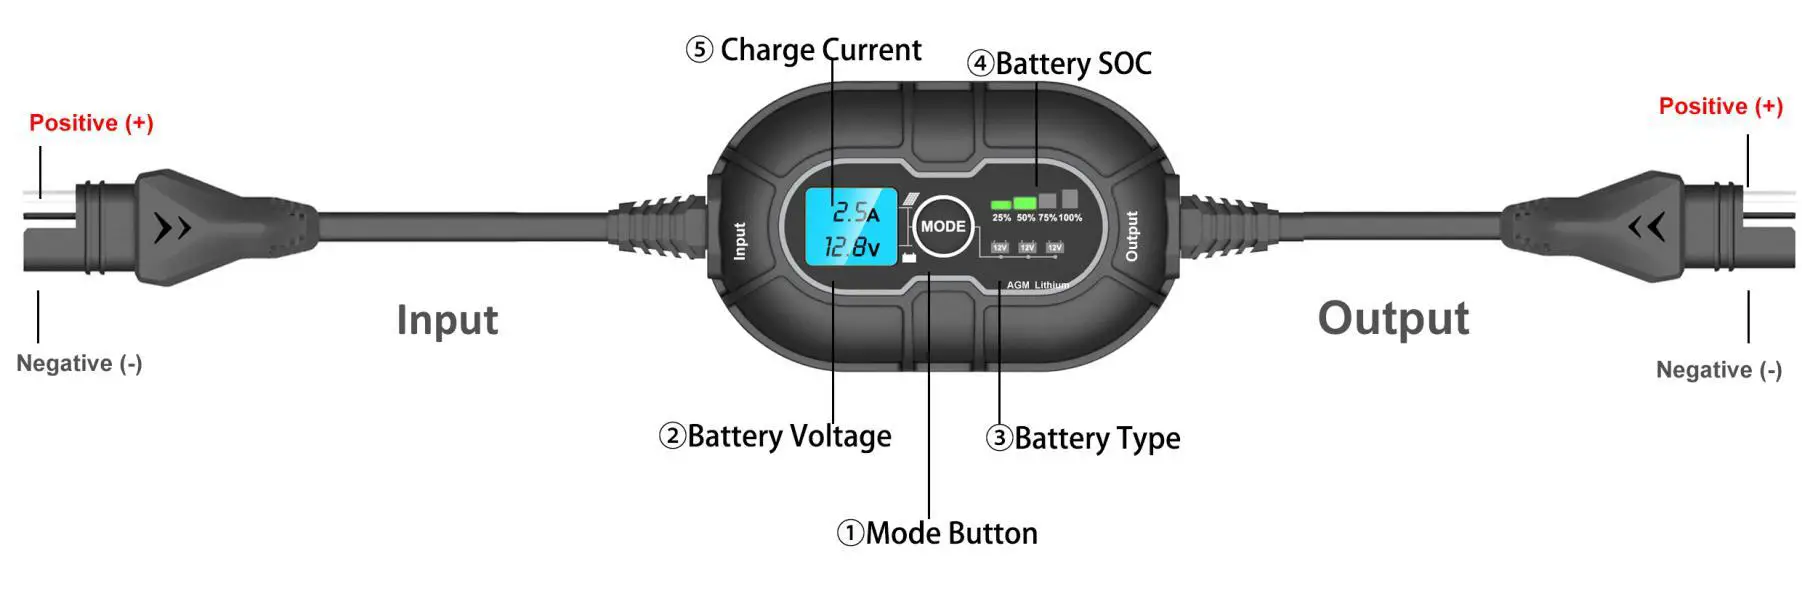
- Mode button: Push to cycle battery types
- Battery Voltage: Indicates battery voltage
- Battery Type: Illuminates solid Green when the battery is selected
- Battery SOC: Indicates the connected battery(s) state-of-charge.
- Charge Current: Indicates solar charge current.
Input & Output: male SAE plug is positive(+) and female SAE plug is negative (-)
How to Install
The charge controller has 3 modes: 12V, 12V AGM, 12V Lithium, It is important to understand the differences and purpose of each charge mode. Always check with battery manufacturer to confirm the right charge mode for your specific battery. Do not operate the charger until you confirm the appropriate charge mode for your battery. Below is a brief description of the charge mode:
| Mode | Explanation |
| 12V | For charging 12-volt Wet Cell, Gel Cell, Enhanced Flooded, Maintenance-Free and Calcium batteries. When selected, the 12V LED will illuminate |
| 12V AGM | For charging 12-volt AGM batteries. When selected, the 12V AGM LED will illuminate. |
| 12V Lithium | For charging 12-volt lithium-ion batteries, including lithium iron phosphate. When selected, the 12V Lithium LED will illuminate. |
Caution Use 12V Lithium mode with extreme care, this mode should only be used with 12 volt lithium batteries that have a built-in battery management system(BMS). Lithium-ion batteries are made and constructed in different ways and some may or may not contain a battery management system(BMS). Consult the lithium battery manufacturer before charging. Some lithium-ion battery may be unstable and unsuitable for charging.
Connecting to Solar Panel and Battery.
Do not connect the charge controller until all other connections are made. Identify the correct polarity of the solar panel and battery terminals. The male SAE connector is positive and female SAE connector is negative, the positive battery terminal is typically marked by these letters or symbol (POS,P,+). The negative battery terminal is typically marked by these letters or symbol (NEG,N,-). Do not make any connections to the carburetor, fuel lines, or thin, sheet metal parts.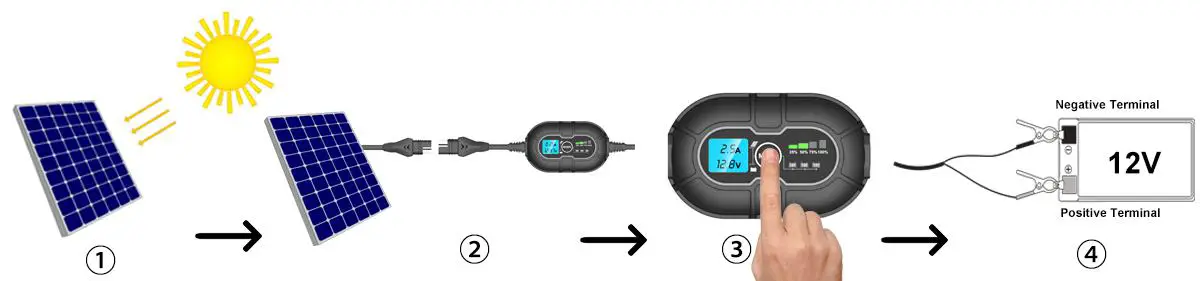
- Expose the solar panel to full sun without shade.
- Connect solar panel to charge controller, the LED screen will illuminate and display PV charge voltage and no current.
- Press the mode button to toggle to the appropriate battery types, the battery LED will illuminate the selected mode
- Connect the charge controller to battery terminals, Wait 5-10s, the charge controller will enter charging mode once it recognizes the battery. The SOC indicator will illuminate and LED screen will display the battery voltage and charge current.
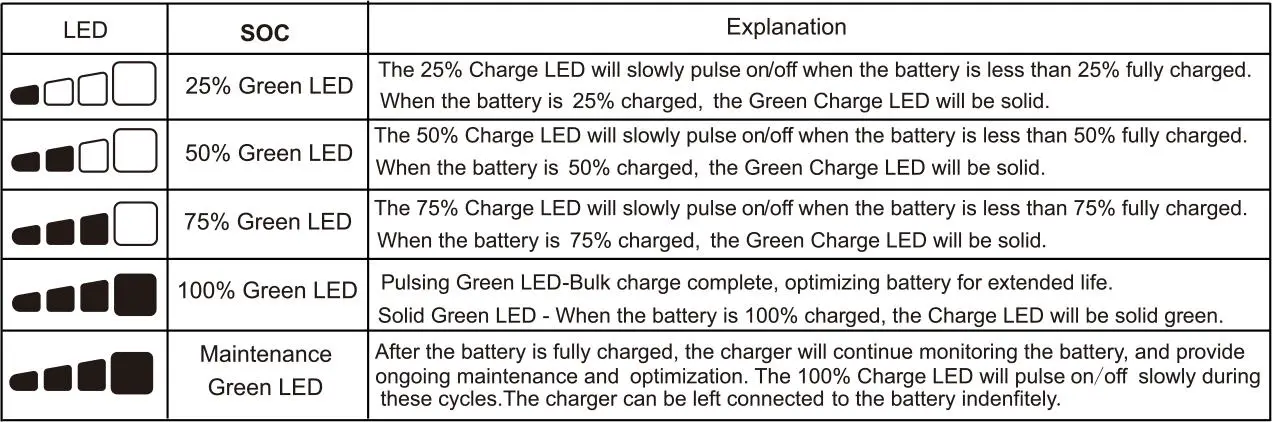
Understanding Charge LEDs.
Technical Parameters
| 10A Charge Controller Parameters | Solar Panel Parameters | ||
| Rated Current | 10A | Power Output | 20W |
| Nominal System Voltage | 12V DC | Power Tolerance | ±5% |
| Max PV Input Voltage | 15-30V | Open Circuit Voltage | 21.6V |
| Max PV Input Power | 120W | Short Circuit Current | 1.17A |
| Electronics Protections | Reverse battery polarity, Reverse PV polarity, PV over-voltage Battery over-voltage, PV over-current, Battery over-current |
Maximum Power Voltage |
18.0V |
| Battery Type | Wet Cell, Gel Cell, Flooded, Maintenance-free, AGM, Lithium | Maximum Power Current | 1.12A |
| Controller Terminals | 1.5mm2/16AWG | Current Temp Coefficient | 0.1 %/°C |
| Power Indicator | 25%-50%-75%-100% | Voltage Temp Coefficient | -0.37 %/°C |
| Standby Current | 0 mA(No discharge from battery) | Power Temp Coefficient | -0.45 %/°C |
| Working Temperature | -40℃~80℃ | Max.Snow/Wind load | 2400 Pa | ||
| Storage Humidity | 10%-90%, no condensation | Max System Voltage | 1000V DC | ||
| Measurements | 87*54*26mm | Measurements | 420*335*18m m | ||
| Weight | 0.35kg | Cable Diameter/Length | 20AWG/3m | ||
|
Battery Type | Wet,Gel Cell/Flooded/ Maintenance- free | AGM | Lithium | Protection Grade | IP65 |
| N.W | 1.45KGS | ||||
| Boost Charge Voltage | 14.2V | 14.6V | 14.6 | Standard Test Condition | 25℃, 1000W/M2 1.5 Air Mass |
| Float Charge Voltage | 13.8V | 13.8V | / | ||
| Boost Charge Recovery | 13.0V | 13.0V | 13.0V | ||
| Boost Duration | 2 Hours | 2 Hours | 2 Hours | ||
Status Troubleshooting
| Description | Explanation | Troubleshooting |
|
LED screen doesn’t illuminate | sunshine is not effective | The charge controller is powered by sunshine, if the sunlight is weak, the charge controller would not light up. Simply expose the solar panel to FULL SUN, see if the LED screen comes on |
| No solar Input | Double check if the polarity is correct when connecting solar panel to charge controller, positive to positive and negative to negative. | |
| LED screen illuminates, no charge current | No battery is recognized | Check if the polarity is correct when connecting charge controller to battery terminals |
| Check if the fuse is blow or not | ||
| Check if the battery connection is loose | ||
| LED screen turn on/off frequently | sunshine is not stable | check if the solar panel is receiving enough sunlight |
Package List
- 1x 20W Solar Panel
- 1 x10A MPPT Charge Controller
- 1 x Battery clamp cable
- 1 x User Manual
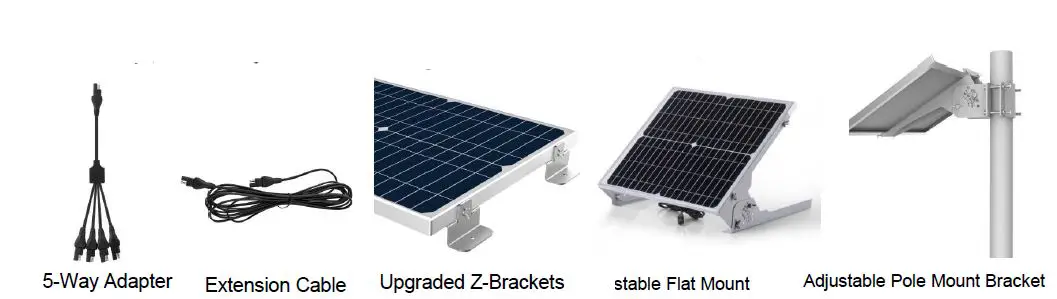
Other Accessories you may need (Not Included)
Warranty
Thank you for purchasing the solar panel, should you experience any defect due to the manufacturer of this product, you are entitled to get a replacement or refund. If You have any questions, feel free to sent us an email [email protected], we will get back to you within 24h.


