![]() QC300K-3D SG Outdoor Router
QC300K-3D SG Outdoor Router
User Guide
Contents hide
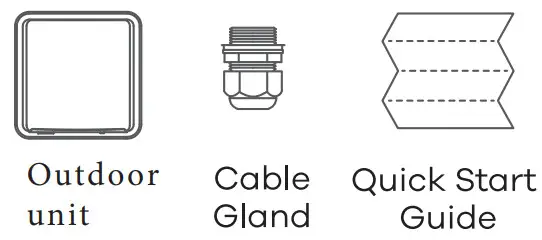
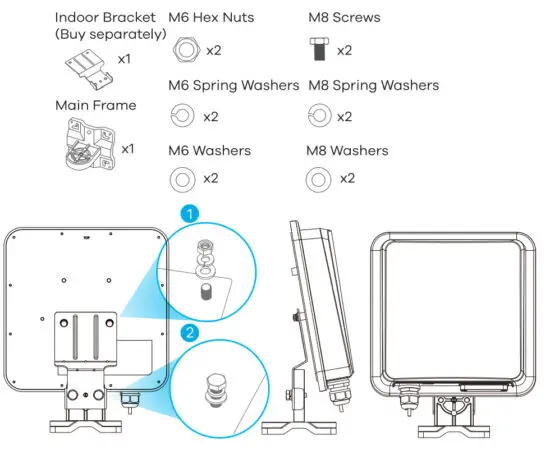
Package Contents
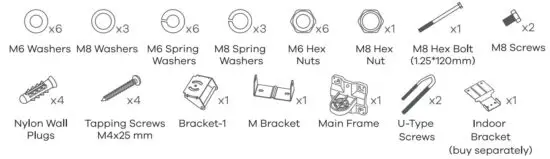
Mounting Kit
Location Examples
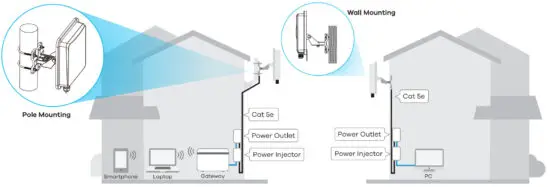
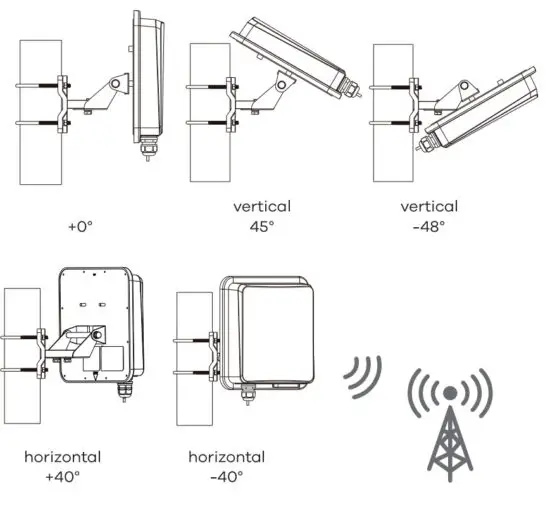
![]() Place in an open area free of obstacles, and adjust the angle to point the front panel towards the base station to have the strongest possible
Place in an open area free of obstacles, and adjust the angle to point the front panel towards the base station to have the strongest possible
LTE signal.
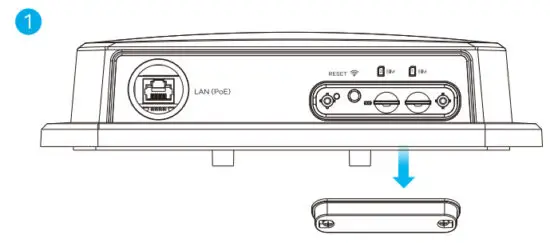
Step 1 SIM Card Installation
- Make sure the NR7101 is turned off. There should be no Ethernet cable connected to provide power using PoE. Unscrew the SIM card slot cover and remove it.
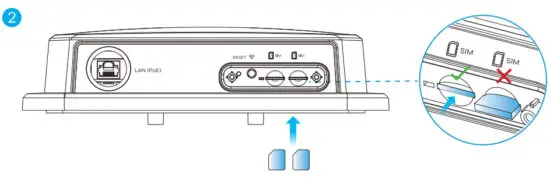
- Insert your SIM card provided by an LTE ISP (Internet Service Provider) into SIM card slot 1 first.
Make sure the SIM card is fully inserted into the card slot.
Step 2 Cable Connections
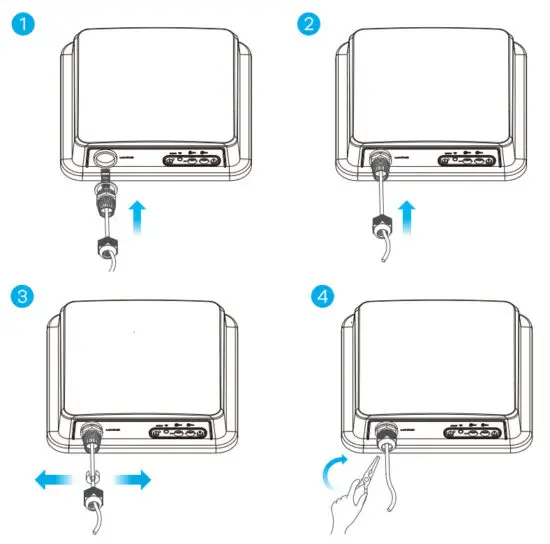
Follow steps 1 to 4 in the drawing to connect an 8-pin Cat Se Ethernet cable to the NR7101’s LAN port.
Step 5 Pole/Wall Mounting: Connect M Bracket and Main Frame
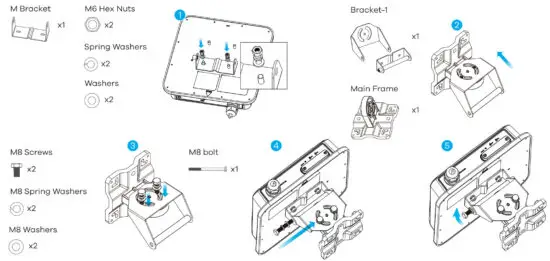
- Use washers, spring washers, and nuts to attach the M-type bracket to the back of the NR7101.
- Follow steps 2-3 in the drawing to attach the rotating bracket to the main mounting frame using M8 screws, washers, spring washers, and hex nuts. Do not tighten the nuts until you adjust the mounting angle in the final step.
- Follow steps 4-5 in the drawing to align the rotating bracket with the M-type bracket, insert the M8 bolt through the holes, and use washers, spring washers, and nuts to secure it.
Wall Mounting (Optional)
Four Nylon Wall Plugs 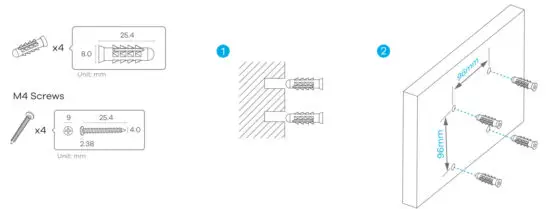
- Use the four corner holes of the mainframe to mark holes on a wall. Drill four holes in a wall.
- Insert the screw anchors and screws into the holes.
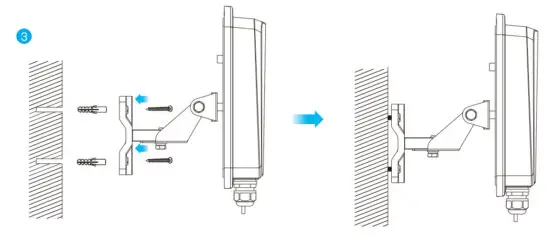
- Insert nylon wall plugs into the wall. Use mounting screws to secure the mainframe to the wall through the nylon plugs.
Pole Mounting (Optional)
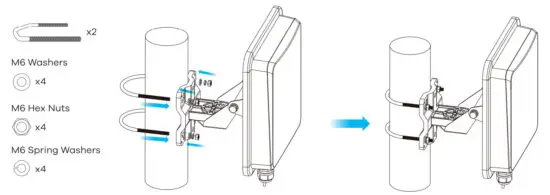
- Place the U-bolt around a pole. Insert the U-bolt into the holes on the mainframe. Use a wrench to secure the mainframe to the pole with the washers, spring washers, and nuts.
Table Stand (Optional)
- Use washers, spring washers, and nuts to attach the indoor bracket to the back of the device.
- Use MB screws, washers, spring washers, and screws to attach the mainframe to the indoor
Pole/Wall Mounting Angle Adjustment