Tosee Warden 1 Smart Door Lock Instruction Manual

Tosee Warden 1 Smart Door Lock Instruction Manual

ToSee-WARDEN-1-Smart-Door-Lock-LOGO

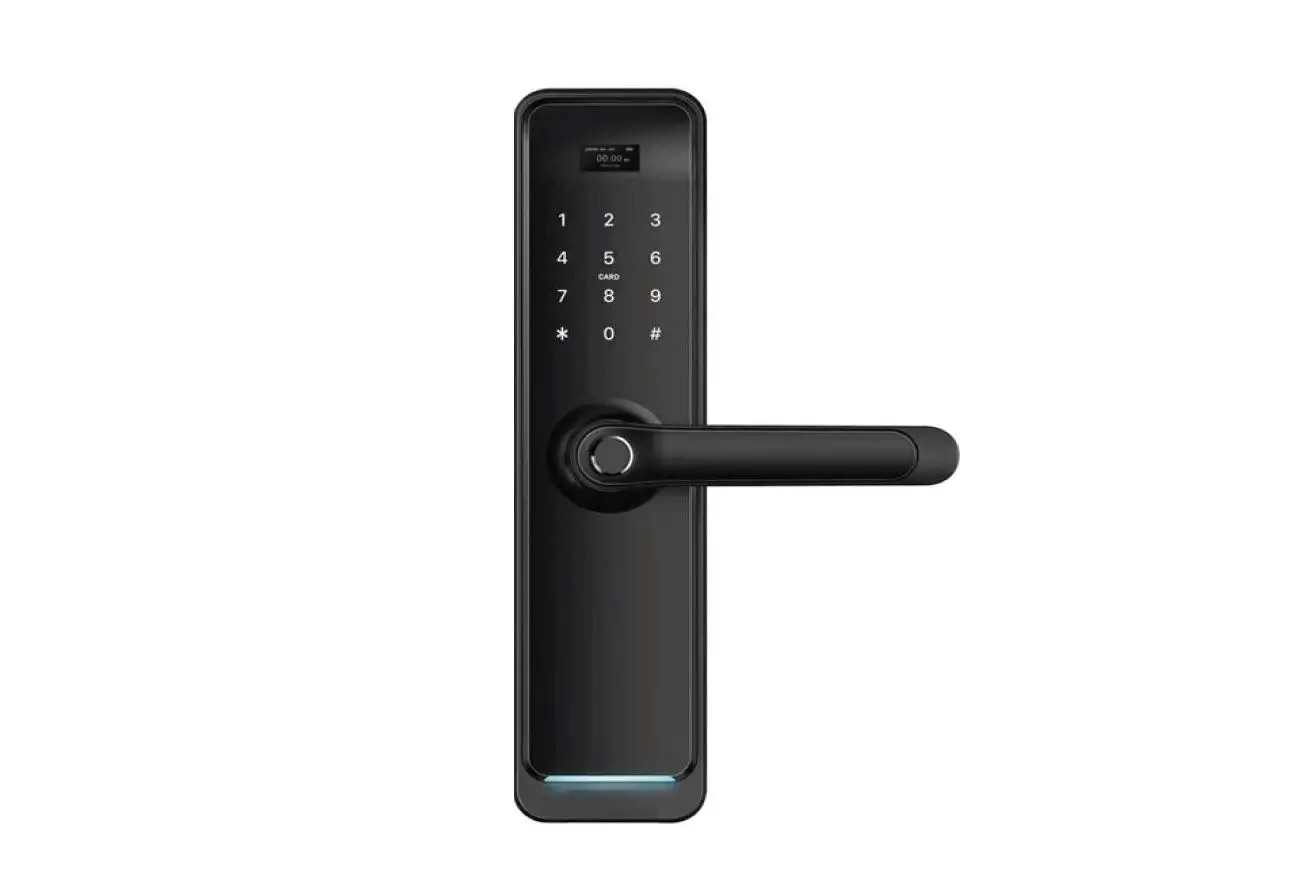
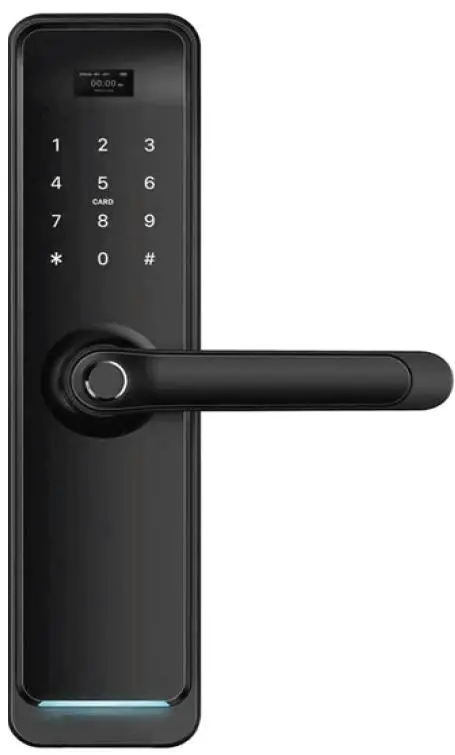
ToSee WARDEN 1 Smart Door LockToSee-WARDEN-1-Smart-Door-Lock-PROD

Installation

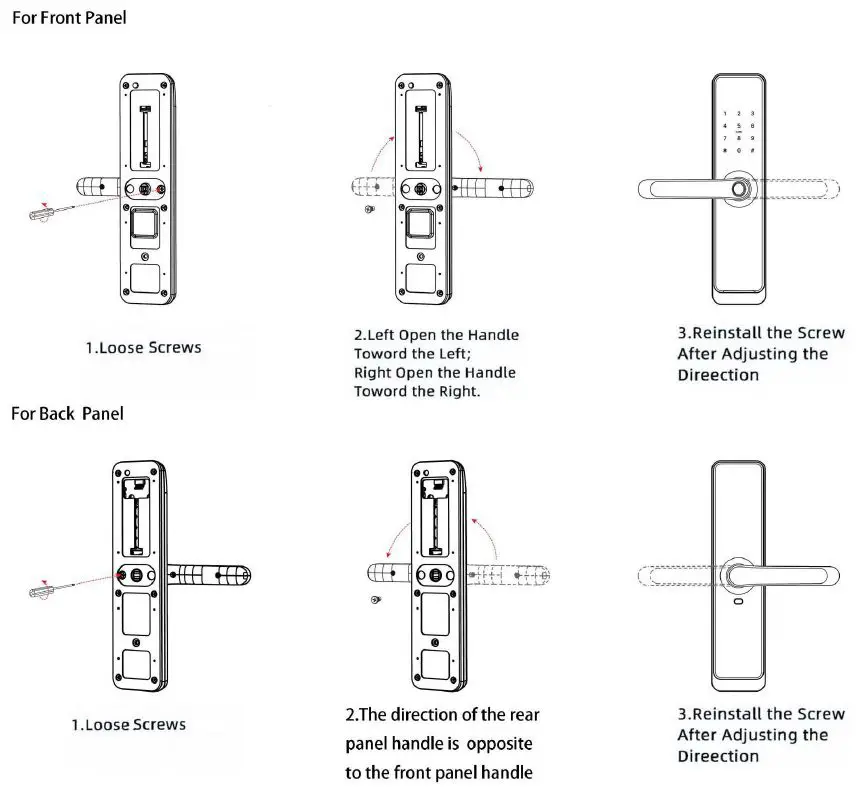
Adjusting the handle direction

Notice: Adjust the handle according to the direction you open the door.
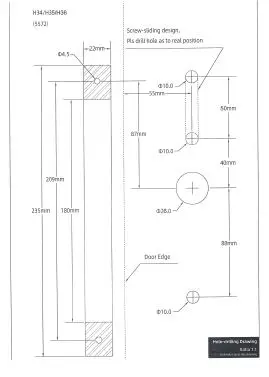
ToSee-WARDEN-1-Smart-Door-Lock-FIG9

Install MortiseToSee-WARDEN-1-Smart-Door-Lock-FIG3

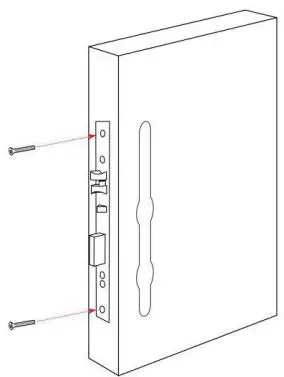
Install Sliding Screw CasingToSee-WARDEN-1-Smart-Door-Lock-FIG4

  1. The screw casing place is adjustable from 55mm to 100mm far from the square shaft. Depending on the location of the hole drilling or the old door hole.
  2. The arrow is always pointing down

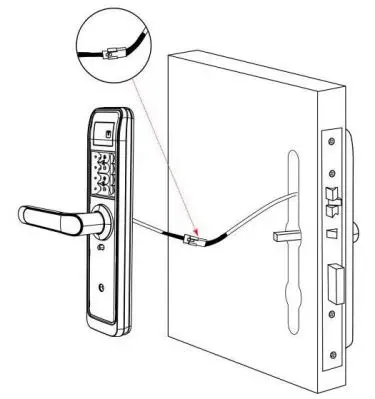
Install Back Panel and link wireToSee-WARDEN-1-Smart-Door-Lock-FIG5

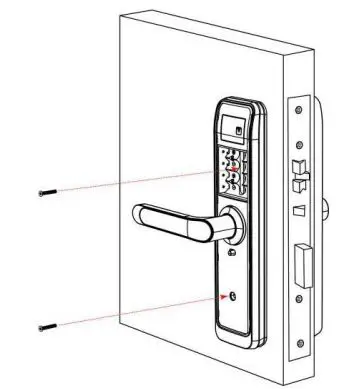
Install fixing screwsToSee-WARDEN-1-Smart-Door-Lock-FIG6

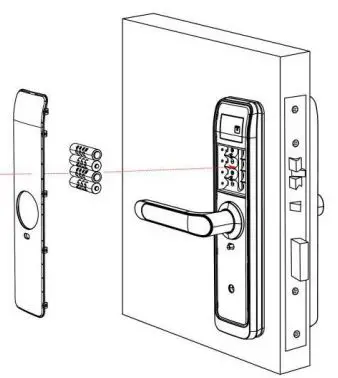
installation completeToSee-WARDEN-1-Smart-Door-Lock-FIG7

An installation template is included with every WARDEN 1ToSee-WARDEN-1-Smart-Door-Lock-FIG8

www.toseesecurity.com.au

References

Documents / Resouces

Download manual
Here you can download full pdf version of manual, it may contain additional safety instructions, warranty information, FCC rules, etc.


Related Manuals