
![]()
Service Manual
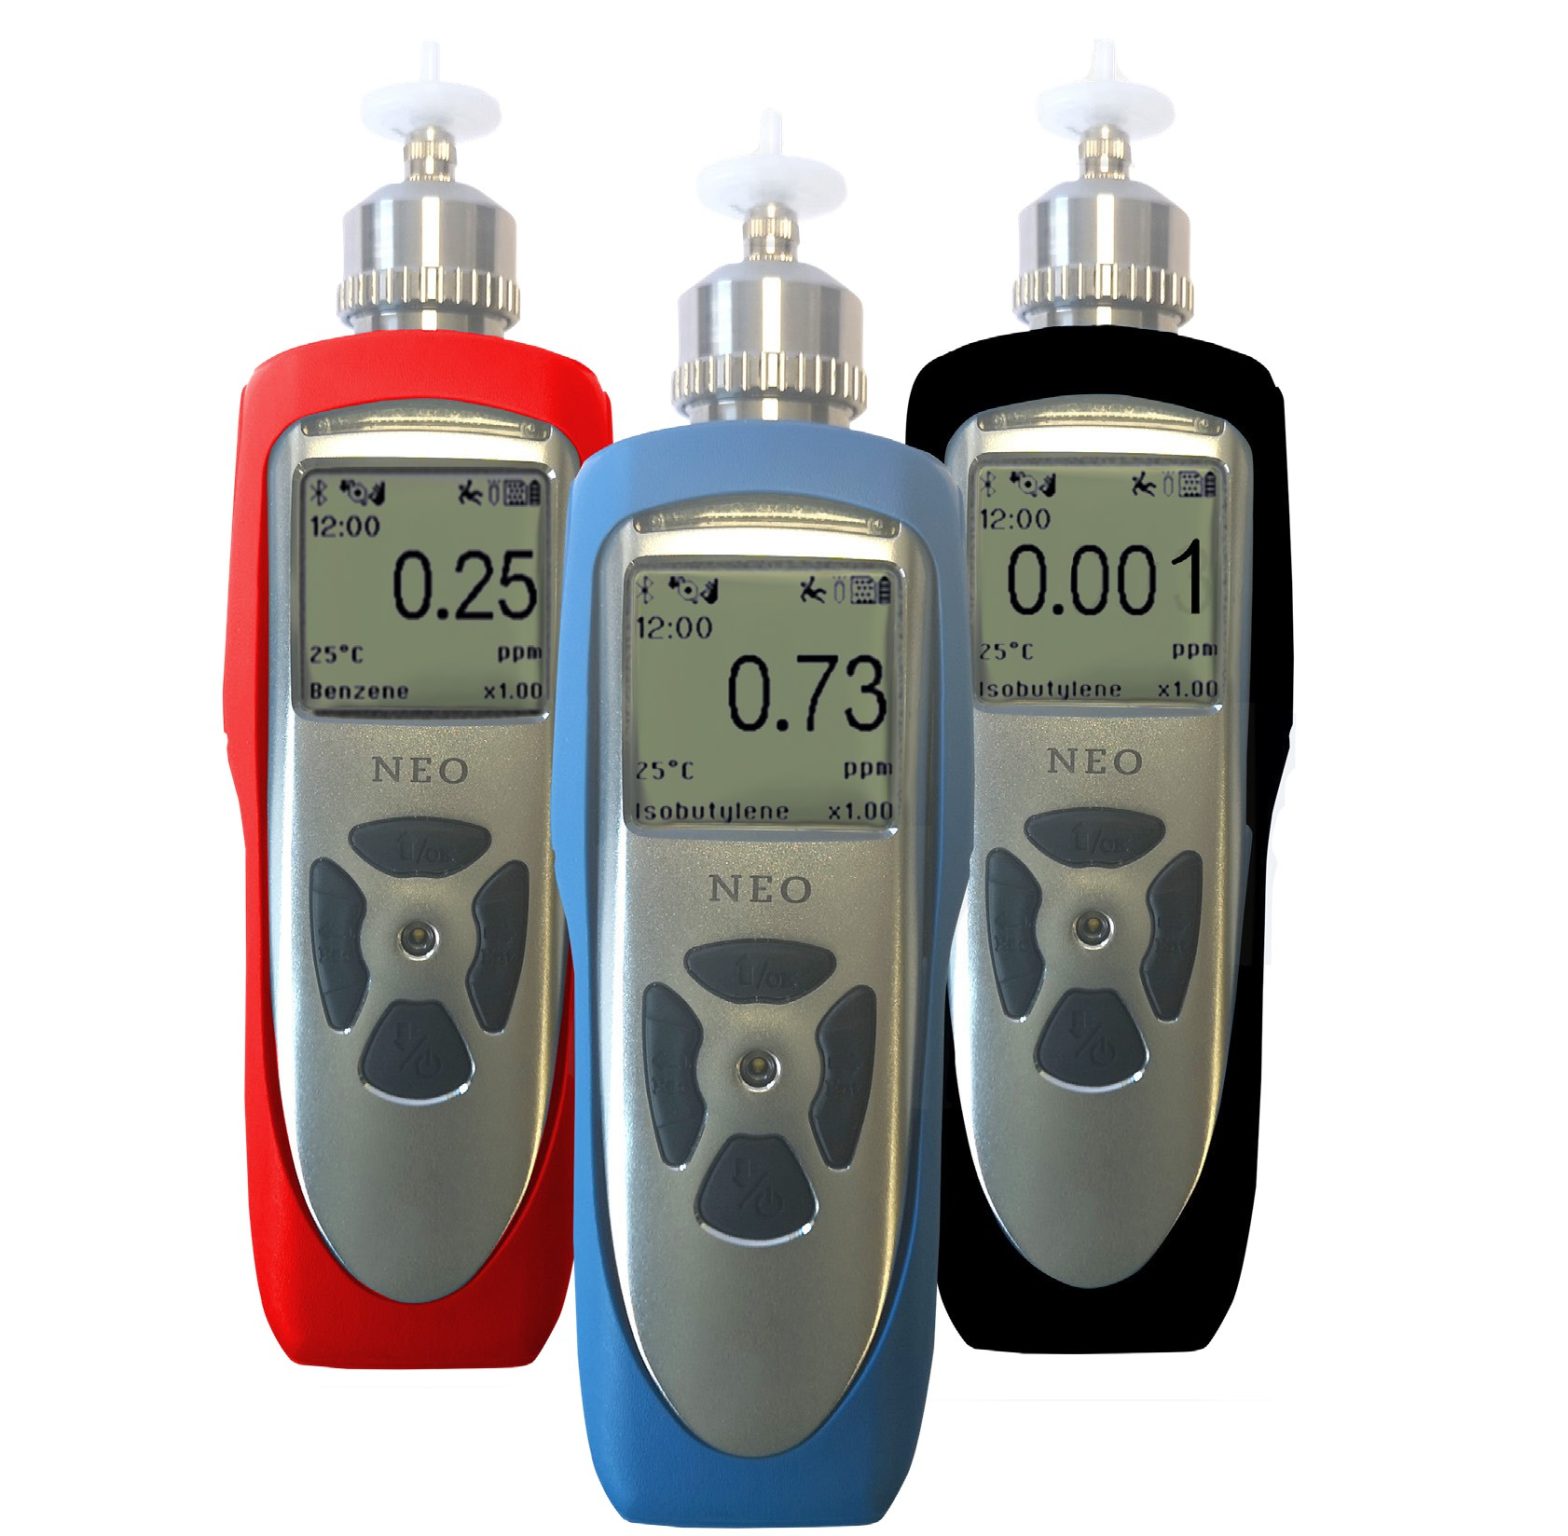
NEO Photoionization Detectors
Read Before Operating
This manual must be carefully read by all individuals who have or will have the responsibility of using, maintaining, or servicing this product.
The product will perform as designed only if it is used, maintained, and serviced in accordance with the manufacturer’s instructions.
The user should understand how to set the correct parameters and interpret the obtained results.![]() CAUTION
CAUTION
To reduce the risk of electric shock, turn the power off before removing the instrument cover. Disconnect the battery before removing the sensor module for service. Never operate the instrument when the cover is removed. Remove instrument cover and sensor module only in an area known to be non-hazardous.
![]() SPECIAL NOTES
SPECIAL NOTES
- When the instrument is taken out of the transport case and turned on for the first time, there may be some residual organic or inorganic vapor trapped inside the detector chamber. The initial PID sensor reading may indicate a few ppm. Enter an area known to be free of any organic vapor and turn on the instrument. After running for several minutes, the residual vapor in the detector chamber will be cleared and the reading should return to zero.
- The battery of the instrument discharges slowly even if it is turned off. If the instrument has not been charged for 5 to 7 days, the battery voltage may below. Therefore, it is a good practice to always charge the instrument before using it. It is also recommended to fully charge the instrument for at least 10 hours before the first use. Refer to this User Guide’s section on battery charging for more information on battery charging and replacement.
- Do not remove the filter when the instrument is on, otherwise, dust entry will reduce the accuracy of measurement, shorten the life of the sensor, and possibly damage the sensor.
![]() WARNING
WARNING
STATIC HAZARD: Clean only with a damp cloth.
For safety reasons, this equipment must be operated and serviced by qualified personnel only. Read and understand the instruction manual completely before operating or servicing.
- Use only WatchGas battery pack M011-3002-000. Substitution of components may impair intrinsic safety. Recharge batteries only in non-hazardous locations.
- Do not mix old and new batteries or batteries from different manufacturers.
- For maximum safety, the accuracy of the instrument should be checked by exposing it to a known concentration calibration gas before each day’s use.
- Do not use USB/PC communication in a hazardous location.
General Information
The NEO is one of the most advanced handheld VOC (Volatile Organic Compound) monitors available for ppb (parts per billion) detection. The NEO offers several models from the most sensitive 1 ppb to a high range up to 15000 ppm for different applications and user selections. Novel designs of the photo-ionization detector (PID) and ultraviolet (UV) lamp provide outstanding sensitivity, stability and reproducibility. Options include real-time data monitoring with a built-in wireless modem using WatchGas Suite application software.
Key Features
- Size: 9.1 x 2.9 x 2.2 in (230 x 74 x 55 mm)
- Weight: 24.95 oz (708 g)
- 1 ppb to 15000 ppm ranges of VOC
- 3-second response time for 90% change (using isobutylene)
- Large and intuitive display
- Integrated correction factors list of more than 200 compounds
- Built-in pump for up to 30 meters sampling distance
- Man-down alarm with real-time remote wireless notification
- ISM wireless connection option
- Easy service and maintenance
- Micro-USB charge port
Maintenance
CLEANING OR CHANGING PID SENSOR / LAMP
2.1.1 Lamp Cleaning and Changing
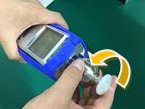
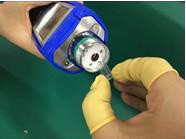
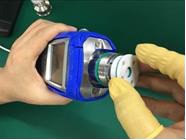
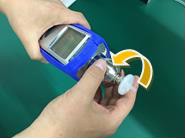
- Unscrew the Sensor Cap and pull the sensor straight out, using a slight rocking motion if necessary.

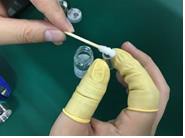
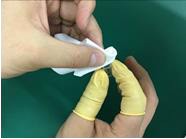
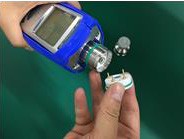
- Put on finger gloves and pull out the lamp. Insert a new lamp, or clean the existing lamp as described below.

- Use a cotton swab wetted with methanol to clean the flat window surface of the lamp. If greasy dirt is hard to remove using methanol, the window can be polished using fine alumina powder polishing paste.

- Use a clean tissue to wipe the lamp window again.
- Re-insert the cleaned lamp, plug in the sensor and screw on the sensor cap.

- Always re-calibrate the PID after cleaning the lamp and/or sensor.
2.1.2 Sensor Cleaning
- Unscrew the sensor cap.
- Pull the sensor straight out, using a slight rocking motion if necessary.

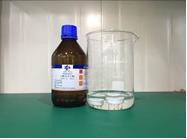
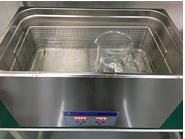
- Put the sensor into a beaker and cover it with pure methanol or ethanol.

Put the beaker into an ultrasonic cleaning bath and sonicate for 5 minutes. Then replace the alcohol with distilled water and sonicated for 2 minutes. Lastly, take out the sensor and dry it. If possible, use a gentle stream of clean air to blow the residual liquid out of the sensor.

- Always re-calibrate the PID after cleaning the sensor.
2.1.3 PID Sensor / Lamp Diagnostics
In general, the strength of a PID sensor is best assessed by observing the noise level of the PID readings. If the response is noisy or weak, the unit should first be checked for a dirty filter or sample train, and then cleaned and calibrated as needed. The PID can still be used as long as the resolution meets the needs of the user’s measurements, even if the diagnostic readings are outside the values given below. PID raw signals can be accessed for aid in troubleshooting lamp/sensor problems. Connect the instrument to WatchGas Suite on a PC or the mobile App, check the “Enable Diagnostic” box in the Configuration screen (“General” section), and send to the instrument. The table below lists typical readings for a new lamp, sensor, and instrument.*
- First check the Raw Zero readings. If these are significantly outside the ranges listed below, there is probably something wrong with the sensor or circuit board.
- Apply calibration gas to the instrument. The readings should decrease by approximately the Delta values listed below, for a new lamp. There is no set limit to the minimum Delta decrease, but commonly if the Delta is only 1/3 of these values, the lamp is getting weak, and if it is 1/10th of these values, it is likely time to replace the lamp.
| 10.6 eV | 10.6 eV | 10.6 eV | 10.6 eV | |
| PID | Test Gas | Raw Zero | Raw Span | Delta |
| NEO PPM MP181 Ch 1 | 10 ppm IBE | 61000±1000 | 50000 | 9000 |
| Ch 2 | 10 ppm IBE | 61400±300 | 61100 | 200 |
| Ch 1 | 100 ppm IBE | 61000±1000 | 500 | 60000 |
| Ch 2 | 100 ppm IBE | 61400±300 | 610000 | 1000 |
| 9.8 eV | 9.8 eV | 9.8 eV | 9.8 eV | |
| Test Gas | Raw Zero | Raw Span | Delta | |
| NEO BENZ MP186 Ch 1 | 10 ppm IBE | 61000±1000 | 11000 | 50000 |
| Ch 2 | 10 ppm IBE | 61400±300 | 610500 | 900 |
| Ch 1 | 100 ppm IBE | 61000±1000 | 100 | >60000 |
| Ch 2 | 100 ppm IBE | 61400±300 | 52000 | 9000 |
*These values are typical for a new instrument and are not to be construed as hard specifications.
SAMPLING PUMP
The flow rate should be roughly 250-350 cc/min at low pump speed and 350-450 cc/min at high pump speed when there is no air leakage. When approaching the end of its useful operating life, the pump will consume more energy and draw significantly lower flow. Also, if excessive dust or particles enter the pump, the flow will be reduced. A strong pump should stall and/or nearly stop when a finger is used to block the inlet. If the pump does not stall but the flow is weak, it is likely that particles are trapped in the pump gasket or diaphragm. When this occurs, it is necessary to replace or rebuild the pump or clean the gasket. Repair of the pump requires removal of the circuit board and should be done by an authorized service center.
2.2.1 Pump Service Procedures
- Check for a dirty or plugged filter by removing the inlet 25-mm filter and re-measuring the flow rate. Replace as needed.
- Place a finger over the probe inlet and listen for a strain on the pump. It should nearly stop, but may not stop completely. If the pump tone barely changes, check the flow path, such as the inlet probe Luer connector and sensor cap.
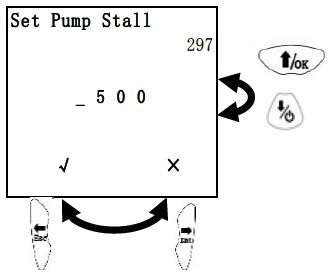
NOTE: The sensor cap should be screwed down only hand-tight to avoid damage to the sensor grid and possibly the lamp. Typically the green O-ring should be partially visible. - Check the Pump stall threshold in Configuration Mode (see NEO User Guide). Briefly block the inlet probe with a finger and observe the rise in pump current value, shown in the upper right. The unblocked pump current is typically about 100-200 when set to high flow and 200-350 when set to low flow and the blocked pump current typically rises to 500 or above.
Set the stall threshold about 50-100 units above the unblocked pump reading, but lower than the blocked pump reading.
NOTE: For NEO Benz MP186, set the stall threshold with an open (used) tube in the holder to avoid a stall alarm when a tube is inserted for benzene measurements.
- If the pump still gives low flow (or little strain when the flow is blocked), clean the pump gasket as described below:
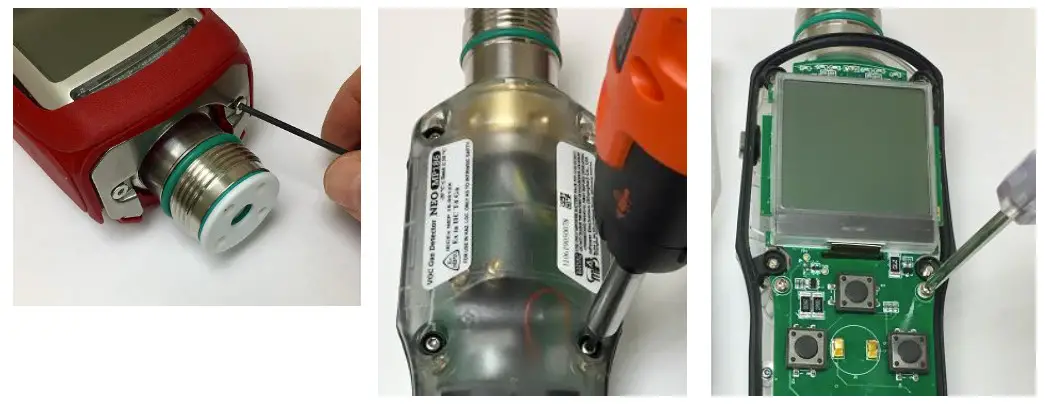
- Remove the sensor cap and boot bracket (2-mm Allen wrench)
- Peel off the rubber boot. Remove 6 housing screws (2-mm Allen wrench)
- Remove the 2 screws holding down the circuit board (Philips’s head)
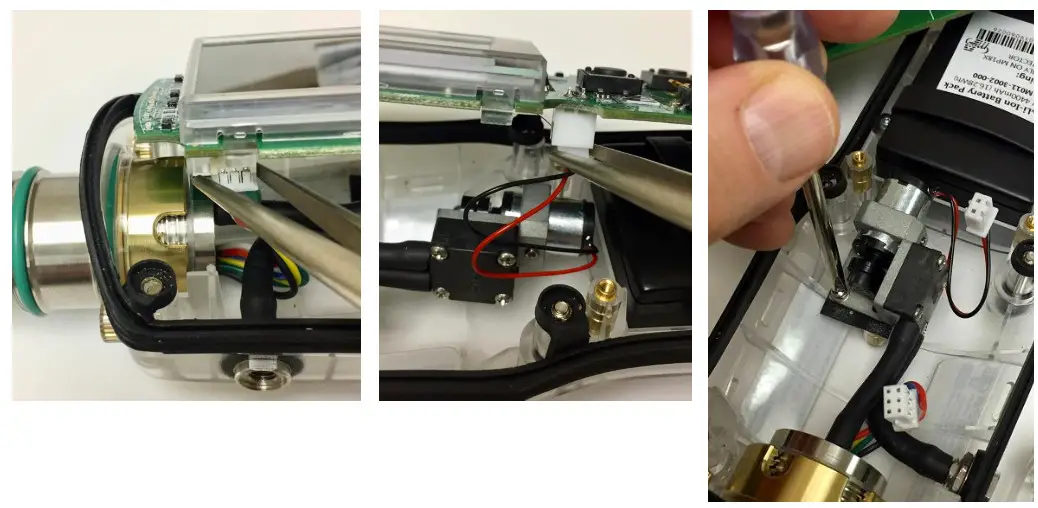
- Unplug the PID sensor connector to the circuit board
- Unplug the pump connector to the circuit board
- Unscrew the single screw holding down the pump
- Remove the sensor cap and boot bracket (2-mm Allen wrench)
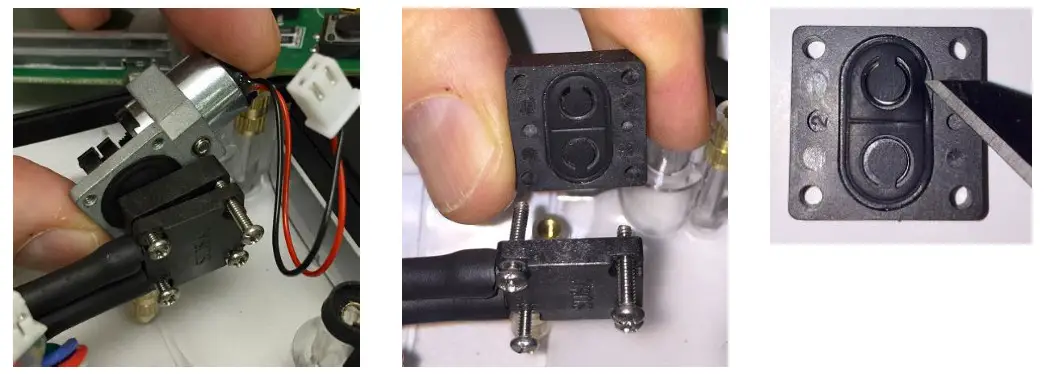
- Remove the pump gasket block.
No need to remove gas connections. - Wipe clean the pump gasket. It may help to remove it (very carefully to avoid damage) and clean both sides. In some cases, it helps to rotate it or flip it to place the top surface down. If damaged or deformed, replace the gasket.
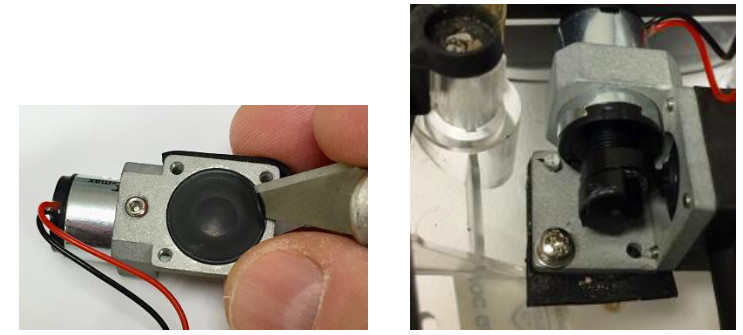
- In extreme cases, it is necessary to replace the pump diaphragm or simply replace the entire pump
- During re-assembly, insert the pump base onto the supporting guide post before screwing down
5. When re-assembling the components, ensure that
a. the pump base is inserted onto the guide/support post
b. the pump and circuit board are screwed down securely.
c. the gasket between the front and back housing fits snugly and forms a good seal, otherwise, the housing could leak and compromise intrinsic safety.
BATTERY REPLACEMENT
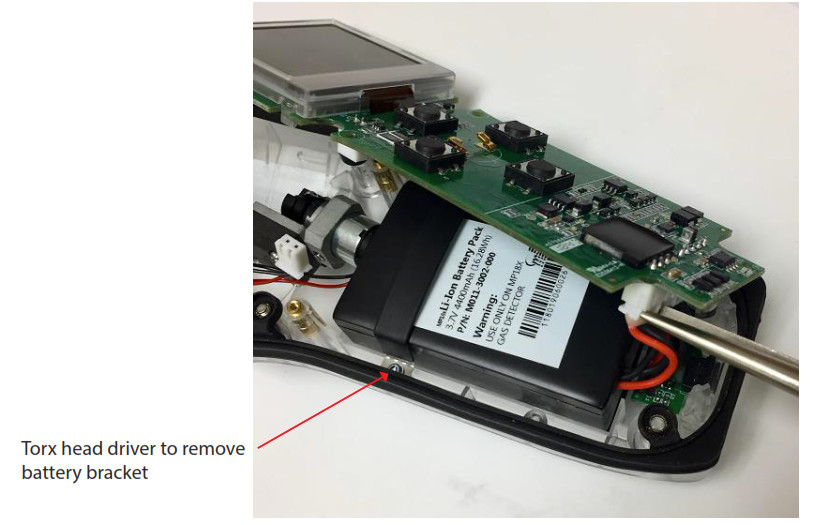
- Open the housing and disconnect the circuit board as described above for pump replacement.
- Disconnect the battery from the circuit board as shown below.
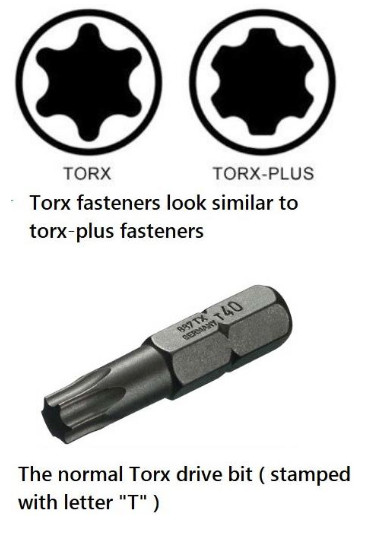
- Use a Size 6 Torx screw bit to remove the bracket holding down the battery.
- Insert a replacement battery and re-assemble.
Troubleshooting
| Problem | Possible Reasons | Solutions |
| Cannot turn on the power after charging the battery | Defective battery | Call authorized service center to replace the battery |
| Reading abnormally High | Dirty Filter | Replace filter |
| Dirty sensor module | Clean or replace sensor module | |
| Excessive moisture or water condensation | Blow-dry the sensor module | |
| Incorrect calibration | Calibrate the unit | |
| Reading abnormally Low | Dirty Filter | Replace Filter |
| Dirty sensor module | Clean or replace sensor module | |
| Weak or dirty lamp | Clean or replace lamp | |
| Incorrect calibration | Calibrate the unit | |
| Buzzer inoperative | Buzzer disabled | Check that buzzer is not turned off |
| Bad buzzer | Call authorized service center | |
| Inlet flow too low | Pump gasket or diaphragm damaged or has debris | Call authorized service center |
| Flow path leaks | Check flow path for leaks; e.g., sensor module 0-ring, tube connectors, Teflon tube compression fitting | |
| “Lamp” alarm on during operation | Lamp drive circuit | Turn unit off and back on |
| Weak or defective PID Lamp | Replace UV Lamp | |
| PC does not recognize the instrument | Wrong cable | Use WatchGas USB cable P/N M-011-3003- 000 |
Replacement Parts
| Description | Part Number | List Price |
| Lamp (10.6 eV, 3/8 inch dia.) | ||
| Lamp (9.8 eV, 3/8 inch dia.) | ||
| PID Sensor for NEO series | ||
| Lamp cleaning and tool kit | ||
| Metal sensor cap with Luer connector | ||
| Tube Holder Probe for MP186 separation tubes | ||
| Luer connector for inlet or outlet port, stainless steel | ||
| Water Trap Filters, female Luer/Luer slip for NEO (10-pk) | ||
| Water Trap Filters, female Luer/Luer slip for NEO (100-pk) | ||
| AC Charging adaptor -1 Port with USB cable | ||
| USB Charging and communications cable | ||
| Rubber boot (Blue) | ||
| Rubber boot (Black) | ||
| Rubber boot (Red) | ||
| Battery pack for NEO Series (must be installed by authorized service center) | ||
| Pump Assembly for NEO MP18X Series | ||
| Pump rebuild kit (3 oval gaskets and 1 piston diaphragm) | ||
| LCD Display for POLI MP400 & NEO MP18X Series (raw LCD, 10 pcs each) | ||
| LCD Assembly for NEO MP18X Series (includes a casing, 1 pc) | ||
| Housing base and cover assembly replacement for NEO |
WatchGas B.V.
Sextantstraat 61
2901 ZZ Capelle aan den IJssel
+31 (0)85 01 87 709
The Netherlands
[email protected] – www.watchgas.eu
V1.0


