![]()
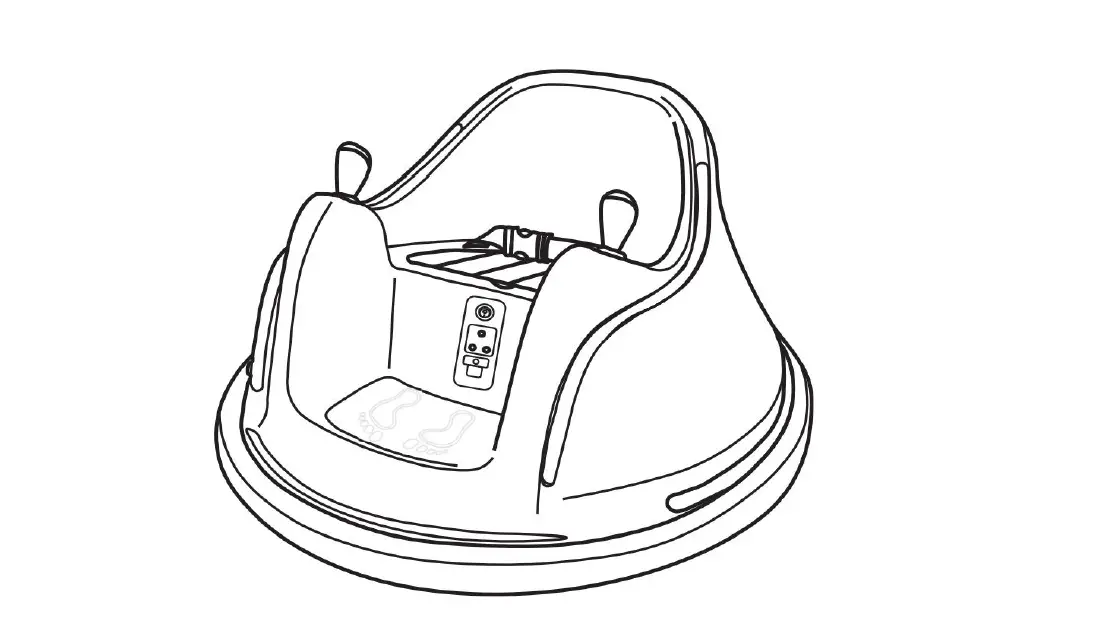
SAKEE Ride On Bumper Car with 2 Batteries 
Safety Instruction
When using electrical products, basic safety precautions should always be followed including the following
Read all instructions before use
- To protect against electrical shock, do not immerse the cord, charger, transformer, battery, or the product in water or other liquid.
- Only use charging devices, transformers, and batteries provided or recommended by the manufacturer.
- For your children’s safety, the product should be assembled by an adult.
- This toy is not intended for children below 1.5 years of age.
- Close supervision is necessary when your children is using the product.
- Unlatch the battery if not used for a long time.
- Do not use this product as a traffic tool.
- Do not use this product on public roads, raceways, by the swimming pool, or at any potential dangerous places.
- Do not use this product on slippery surfaces.
- Always keep hands, hair, and clothing away from moving parts.
- The maximum user’s weight for this product is 66 lb / 30 kg.
- Do not change, modify or add any electrical wiring to this product.
- Avoid using this product in a tight environment to prevent damage to the product or injury to the user.
- Do not use this product in the dark. Only operate this product during daytime or well-lit area.
Product Specification
- Motor: 2 x 25W
- Speed: 1.86 mph (3 km/h)
- Suitable Age: 18 – 72 months
- Maximum User Weight: 66 lb / 30 kg
- Package Dimension: 28.8 x 28.8 x 17.4 inch /73 x 73 x 44 cm Gross weight:24LBS / 11kg
- Battery Charge Time: 8 – 12 hours
- Operation Time: 2-3 hours
- Operation Modes: Remote Control & Joysticks
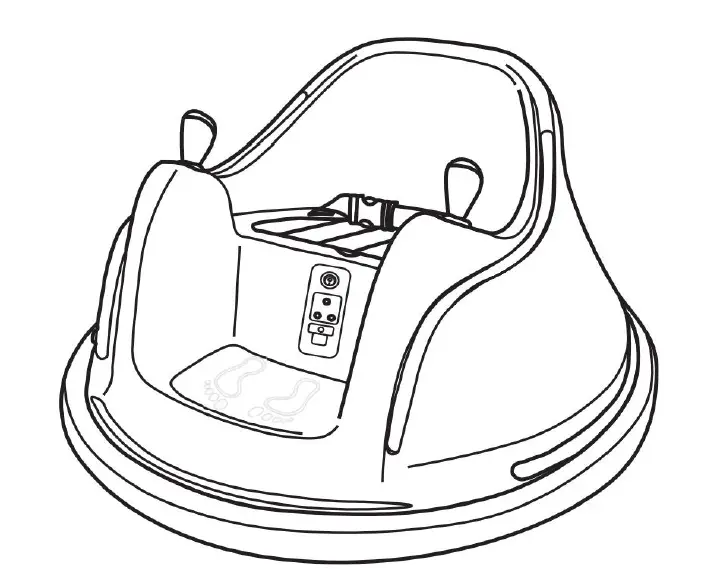
Parts and Feature
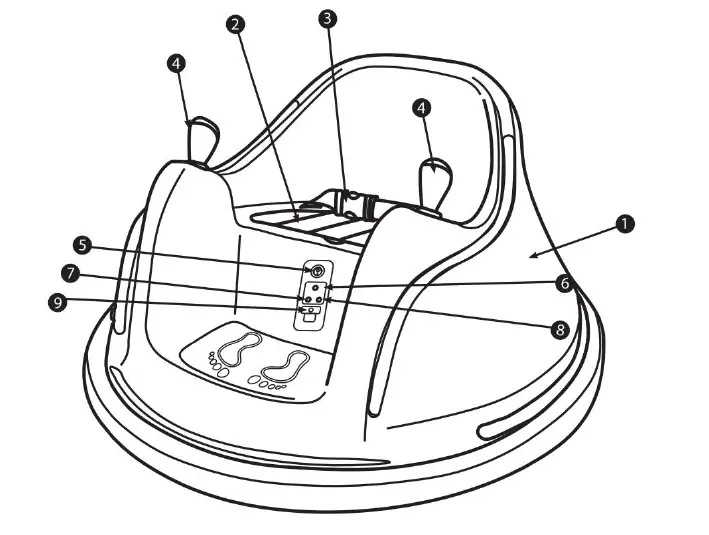
- Vehicle Body
- Seat Cover
- Seat Belt
- Joystick
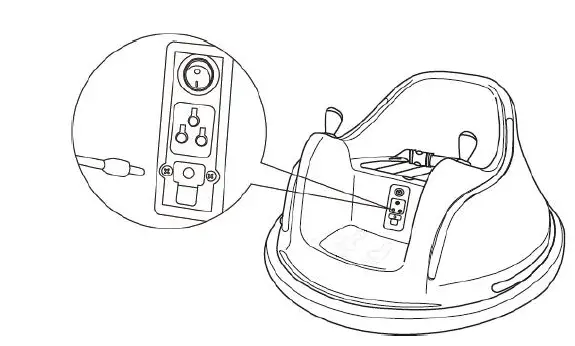
- Power Button
- Light Button
- Horn Button
- Music Button
- Charging Port
Remote Control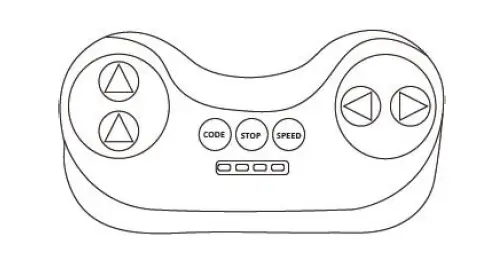
Assembly Instruction
Step 1 Connect the battery wires
For Safe Transportation, the batteries are not pre-connected. So you need to connect the battery wires before use.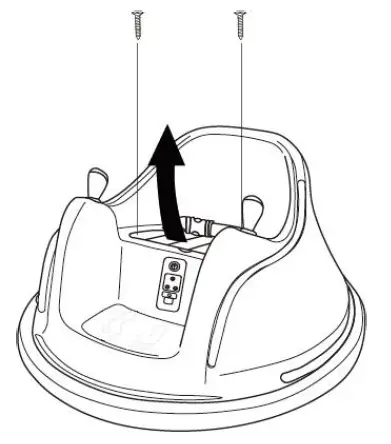
Unscrew the screws and remove the seat cover.
Then connect the battery wires. Red to red, black to black. Then Put back the seat cover and tighten the screws.
You can scan the code to check the video tutorial for this step
Charging the battery
Note: Turn off the bumper car before charging.
- For first charging: Charge the bumper car for 4-6 hrs. But no more than 10 hours.
- For normal charging: Charge the bumper car for 8-12 hrs. But no more than 20 hours.
- Charging indicator: If the batteries are totally empty, the charging indicator is green at the beginning of charging, then turn to red during charging, finally turn to green when fully charged. If the batteries are not empty, the charging indicator is red at the beginning of charging, then turn to green when fully charged.
Pair the remote control
The remote control needs to pair for the first time usage or after replacing the batteries.
- Insert batteries into the remote control. For safe transportation, the batteries for the remote control are not contained in the package. Please prepare them by yourself.
- Press and hold the CODE button, which would turn into solid red light.
- Turn on the bumper car. You will see the red light on the remote control begins to flash.
- Release the button when the car is totally on. Then you can operate the car with remote control.
- If failed to bind, remove and replace the battery from the remote control and repeat the previous steps.
Control the vehicle
- Press the directional buttons to move the vehicle.
- Press the “STOP” button for an emergency stop.

You can scan the code to check the video tutorial for this step
WARNING Close supervision is needed when children is operating the vehicle.
Care and Maintenance
- Check the product regularly and make sure there are no missing or loose parts. Re-tighten any loose parts if necessary.
- Make sure there are no cracked or broken plastic parts.
- When not used, store the product away from the heat source, cover it with a tarp, and away from wet weather.
- Turn off the product and disconnect the battery if the product is not used for a long period of time.
- Clean the vehicle with a cloth. Use non-wax furniture polish to restore shine to plastic parts. Do not use abrasive cleaner.
- Do not wash the product with a hose or immerse any parts in water or other liquid.
- Occasionally use lightweight oil to lubricate moving parts
Warranty
We offer a 1-year warranty on the main body, including the batteries and plastic shell. We offer a lifetime warranty for the remote control, charger, joystick, and bolt driver.
ADDITIONAL CONDITIONS
Colors may vary slightly from the photos because of photography and printing tolerances. Sizes stated in U.S. standard measurements may vary slightly due to products manufactured using the metric system.
Troubleshooting
Customer Service: [email protected]
| Problem | Possible Reason | Solution | |||
|
Vehicle does not move | Low Battery | Fully charge the battery | |||
| Disconnected / Badly connected battery | Reconnect the battery. | ||||
| Failed battery / engine | Contact Customer Service | ||||
| Vehicle does not run very long | Low Battery | Fully charge the battery | |||
| Old Battery | Replace battery Service if necessary | . | Contact | Customer | |
|
Vehicle runs very slow | Low Battery | Fully charge the battery | |||
| Old Battery | Replace battery Service if necessary | . | Contact | Customer | |
| Vehicle is overloaded | Make sure user’s weight is under 66 lb | ||||
| Vehicle is being used in harsh environment | Avoid using the vehicle in harsh environment | ||||
| 1.86 mph cannot meet your needs | 1.86 mph is the certification speed for children’s products | ||||
| Vehicle needs a push to go forward | Poor wire connection | Check if the battery connectors are firmly connected. Contact Customer service if necessary | |||
| Loud grinding sound or clicking sound from the motor or gear box | Damaged motor or gear box | Contact customer service | |||
|
Battery does not charge | Disconnected / Badly connected battery | Reconnect the battery | |||
| Disconnected / Badly connected charger | Make sure the charger is firmly plugged into the power source and connected to the charging port | ||||
| Charger not working | Contact customer service | ||||
|
Joystick is not working |
Poor wire connection | Reconnect the wire. Scan the code to check the video tutorial . | |||
| Broken Joystick | Contact Customer Service. | ||||
| Problem | Possible Reason | Solution |
|
Control is not working | No battery installed | Insert two batteries |
| Pairing failed | Follow the step 3 to repair | |
| Out of remote control range | The remote control shall not exceed 25m. Contact Customer service if necessary | |
| Broken control | Contact Customer Service | |
| Charger feels warm with charging | Normal |
Please contact us at [email protected] if you have any problems. We’ll try our best to help!
Warning:
This device complies with Part 15 of the FCC Rules. Operation is subject to the following two conditions:
- this device may not cause harmful interference, and
- this device must accept any interference received, including interference that may cause undesired operation. changes or modifications not expressly approved by the party responsible for compliance could void the user’s authority to operate the equipment.
NOTE: This equipment has been tested and found to comply with the limits for a Class B digital device, pursuant to Part 15 of the FCC Rules. These limits are designed to provide reasonable protection against harmful interference in a residential installation. This equipment generates, uses, and can radiate radio frequency energy and, if not installed and used in accordance with the instructions, may cause harmful interference to radio communications. However, there is no guarantee that interference will not occur in a particular installation. If this equipment does cause harmful interference to radio or television reception, which can be determined by turning the equipment off and on, the user is encouraged to try to correct the interference by one or more of the following measures:
- Reorient or relocate the receiving antenna.
- Increase the separation between the equipment and receiver.
- Connect the equipment into an outlet on a circuit different from that to which the receiver is connected.
- Consult the dealer or an experienced radio/TV technician for help.

 (12v) Instruction Manual")


