BLAUPUNKT P3PM2T2 EV Portable Charger User Manual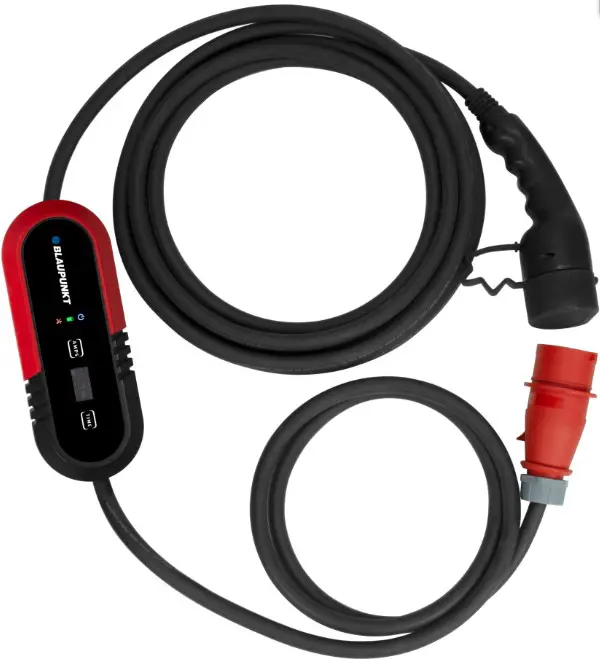
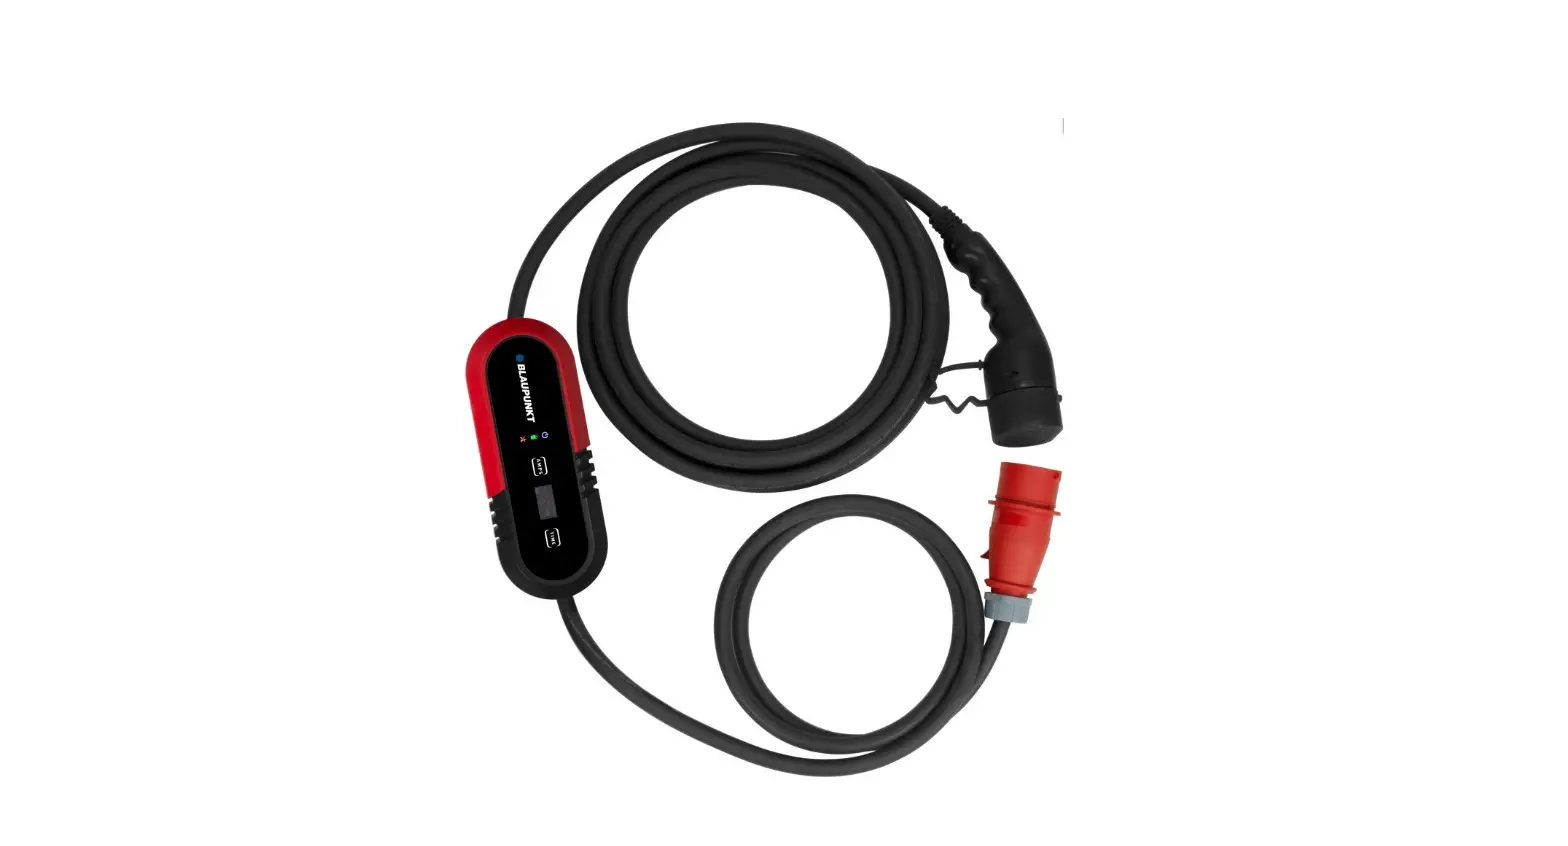
Introduction to the Portable EV Charger ( Mode 2 )
CAUTION
- Use the power source with external upstream Circuit Breaker.
- Make sure the charger is used in a safe, secure place and well out of the reach of young children or pets.
- Please use the charger in a dry, well ventilated and secure place. Keep weel out of reach of young children or pets. Avoid water pouring directly onto the power plug.
- Do not open the enclosure while charging or with the power on.
- Do not maliciously damage the product.
Introduction to the Portable EV Charger ( Mode 2 )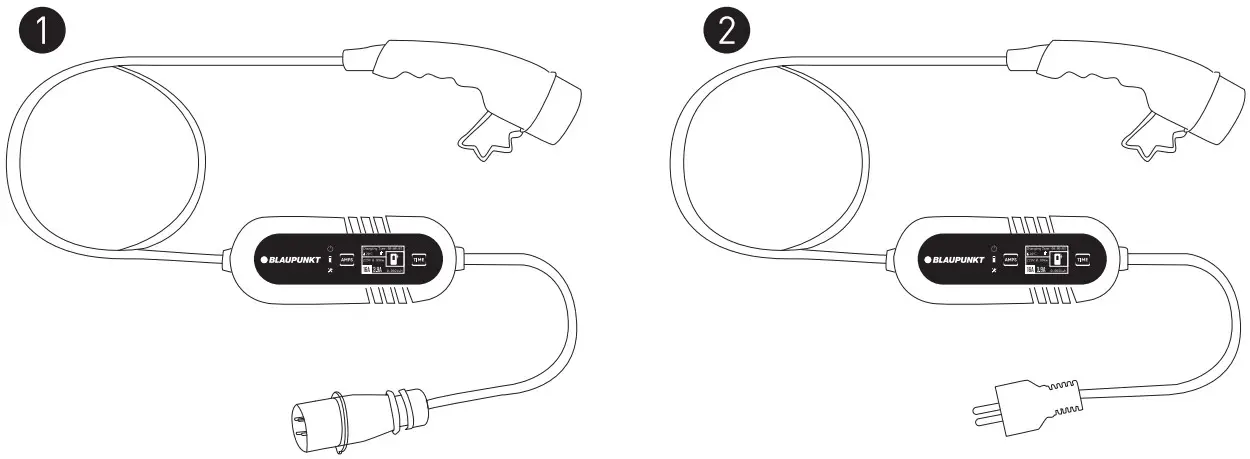
Specifications
| Model | Type | Length | Voltage | Current | Type |
| P1PM2T2 | Single-phase | 8m | 200-250V | 8/10/13/16A | T2 |
| P1PM2T1 | Single-phase | 8m | 200-250V | 8/10/13/16A | T1 |
| P1PM2T2C | Single-phase | 8m | 200-250V | 8/10/13/16A | T2 |
| P3PM2T2 | Three-phase | 8m | 380-450V | 8/10/13/16A | T2 |
| P1PM2T2BS | Single-phase | 8m | 200~250V | 8/10/13A | T2 |
| P1PM2T1BS | Single-phase | 8m | 200~250V | 8/10/13A | T1 |
Explanation of the operating display and technical parameters
Model: P3PM2T2
Explanation of the operating display
 | Power light |
| Charge lamp | |
 | Trouble lamp |
 | Current switch button |
| Charging time | |
| Temperature | |
| PE Detection (Earthing Detection) | |
| 405V | Voltage |
| Power | |
 | Rated current |
 | Constant current |
| Electricity consumption | |
 | Time function button |
 | The upstream PE has not been detected and the charging cannot be started. |
Control box:
Technical Parameters
| Dimensions (L ×W × H) | 260 × 100 × 72.5 mm |
| Weight | 3Phase: 3.35 kg |
| Protection Degree ( Control box ) | IP65 |
| Operating Temperature | -30°C to +50°C |
Explanation of the ” ![]() ” and ”
” and ” ![]() ” symbol
” symbol
Users must check the PE detection mark ” ![]() ” on the display before each use. (PE meaning protective conductor)
” on the display before each use. (PE meaning protective conductor)
- If the Mark ”
 ” is displayed on the screen, it indicates that the charger shall verify the presence of the upstream PE, and the charging process will only begin when the upstream PE is present.
ATTENTION: if the mark ” ” appears, it means that the upstream PE has not been detected and the charging cannot be started. - If the Mark ” ” is NOT displayed on the screen, it indicates that the charger has no function to verify the presence of the upstream PE, and can be charged whether or not the PE can be detected
ATTENTION: It is strongly recommended that users charge under condition 1. Condition 2 has certain security risks due to the absence of PE. So Condition 2 should only be used under the premise that users can ensure safety and in special circumstances where PE does not exist in the power system.
Deactivate PE Detection : Press “Amps + Time” for 4s together.
Reactivate PE Detection: Press “Amps + Time” for 4s together.
Use of the charger – start charging
Start Charging
| Step | Illustration | Operation |
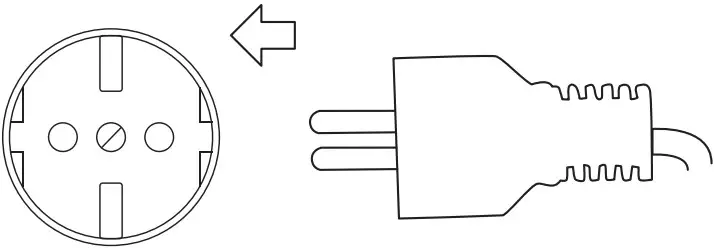
| 1. | 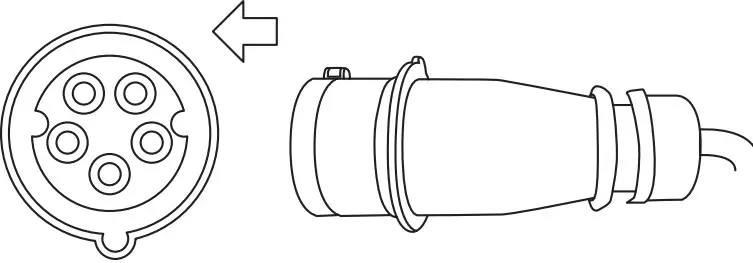 | Insert the plug into the correct power supply socket. |
 | ||
| 2. | 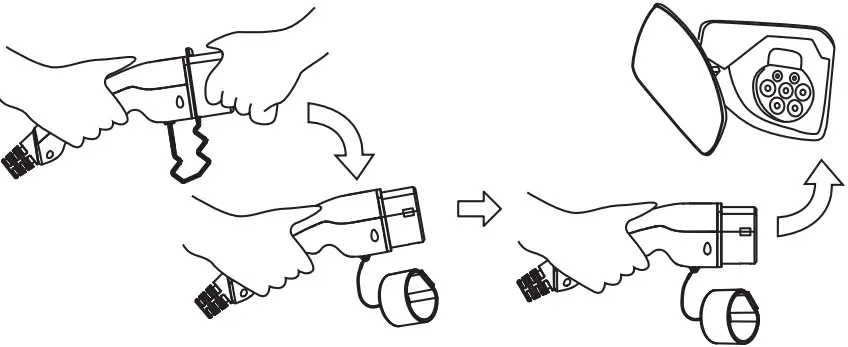 | Remove the protective cap and fully insert the charging connec t or int o the E V charging port. |
| 3. | 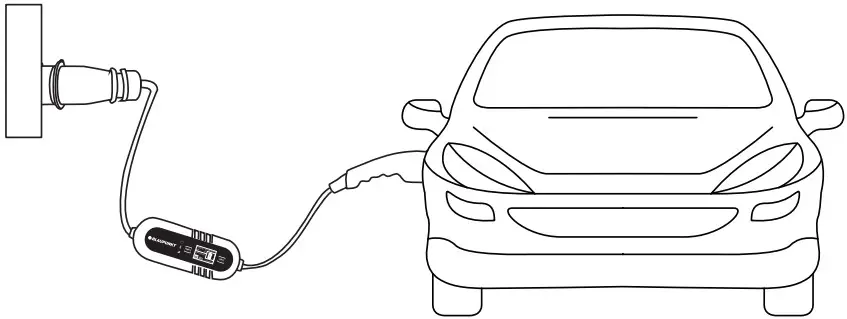 | Start charging |
![]() DANGER
DANGER
Do not use product if it appears to be damaged or the cable is broken. Do not disassemble or assemble the connector and change the internal parts Do not clean the products using chemicals or cleaning the EV car while charging
Stop Charging
| Step | Illustration | Operation |
| 1 | 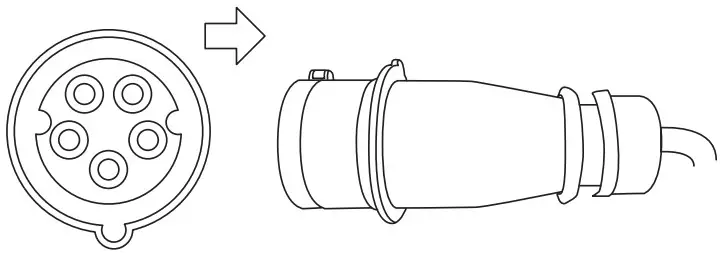  | Disconnect the plug from the power supply socket. |
| 2 | 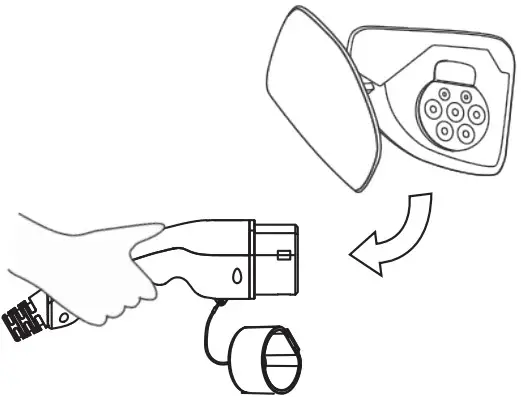 | Disconnect the charging connector from the EV car. |
| 3 | 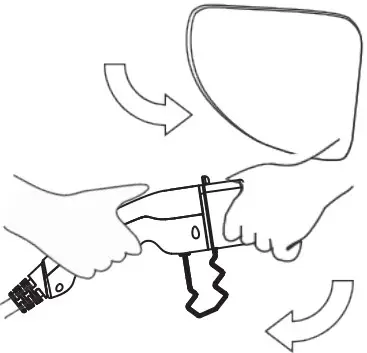 | Close the protective shell of EV charging port,then cover the protective cap of the charging connector. |
| 4 | 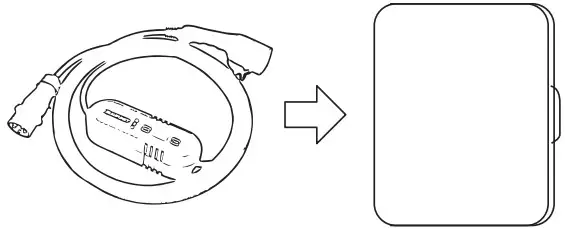 | Put the portable charger into the bag. |
Display Light Status
Display Light Status
| Indicator Light | Status | Indicator Light | Status | Indicator Light | Status |
| Off |  | Blink | On | ||
| Off |  | Blink | On | ||
| Off |  | Blink | | On |
Operation:
| 1 | Power Off | | ||
| 2 | Check | | | |
| 3 | Standby | | ||
| 4 | Connected | | | |
| 5 | Charging | | | |
| 6 | Charge Complete | | | |
Troubleshooting:
| 1 | CP Error | | | |
| 2 | Relay Error | | | |
| 3 | Over/Under Voltage | | | |
| 4 | Over current protection | | ||
| 5 | Electric leakage protection | | | |
| 6 | No ground connection | | | |
| 7 | Temperature warning | | ||
| 8 | Persistent high temperature | |
Function: Switch Current
Switch Current:
![]() CAUTION
CAUTION
In order to switch charging current, Please make sure the power plug is firmly inserted into the socket and plug for the EV vehicle is disconnected.
Step | Illustration | Statu |
| 1.Insert the plug into the correct power supply socket. |  | Ready |
 | ||
| 2.Press the “Amps” switch button for 2 seconds | 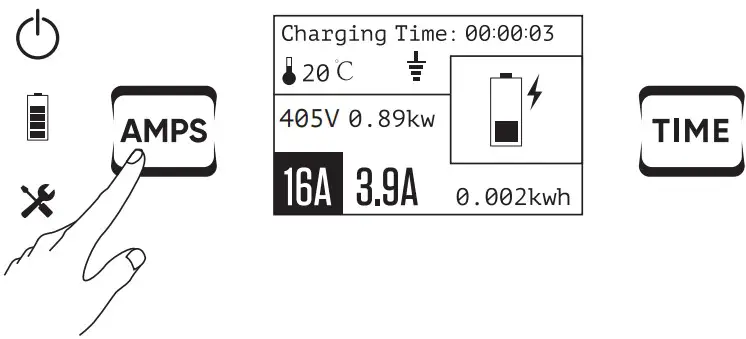 | Enter setting the switch current mode |
| 3.Continue to press the button briefly.The current |  | Setting the current of |
| will be changed. ( switch between 8-10-13-16A ) | | User’s request |
| 4.Press the button for 2s again. |  | Setting successfully |
Function: Timer function
Timer function:
![]() CAUTION
CAUTION
In order to switch charging current, Please make sure the power plug is firmly inserted into the socket and the plug for EV vehicle is disconnected.
| Step | Illustration | Statu |
| 1.Insert the plug into the correct power supply socket. |  | Ready |
 | ||
| 2.Press the “Time” switch button for 2 seconds. | 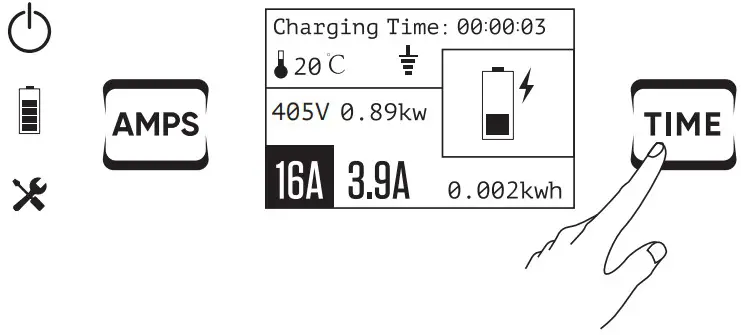 | Enter setting the delay time mode |
| 3.Continue to press the button briefly. The time will be changed.( Switch between 1/2/4/6/8/10H ) | 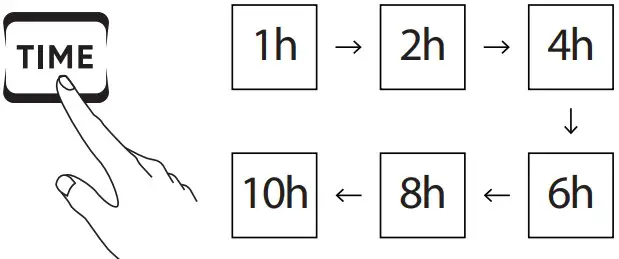 | Setting the delay time of User ’ s request |
| 4.Press the button for 2s again |  | Setting successfully |
Please complete setting within 4 seconds at each step, otherwise the feature setting will fail.
Notice:
In case you want to cancel the timer setting – you can use one of the two options below:
- Directly to disconnect the plug from the outlet socket.
- Press the Time button for 5s.
EVSE
[email protected]
BLP EV Systems ApS
Ediths Allé 8
5250 Odense SV
Denmark
![]()


