mycusini 2.0 3D Chocolate Printer User Manual
Safety instructions
![]() The mycusini has moving parts. Keep your hands out of the printing area during operation. Always grip the cartridge holder at the bottom. Otherwise there is a risk of crushing.
The mycusini has moving parts. Keep your hands out of the printing area during operation. Always grip the cartridge holder at the bottom. Otherwise there is a risk of crushing.
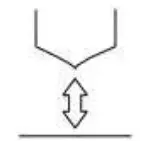
![]() There is a potential risk of burns. The cartridge holder can get hot up to 40 °C (104 °F). Always allow the stainless steel cartridge to cool down completely before removing it.
There is a potential risk of burns. The cartridge holder can get hot up to 40 °C (104 °F). Always allow the stainless steel cartridge to cool down completely before removing it.
![]() If you open the cartridge holder during operation, the heater switches off automatically for safety reasons and shows “Temperature Error!” on the display. Close the cartridge holder. Switch the machine off and then on again.
If you open the cartridge holder during operation, the heater switches off automatically for safety reasons and shows “Temperature Error!” on the display. Close the cartridge holder. Switch the machine off and then on again.
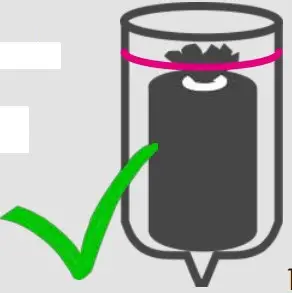
![]() For best results, please always produce at a room temperature of 20 22 °C.
For best results, please always produce at a room temperature of 20 22 °C.
![]() Protect your mycusini® from draughts during printing.
Protect your mycusini® from draughts during printing.
![]() Only clean the cartridge holder with a damp kitchen towel, not under running water or in the dishwashe
Only clean the cartridge holder with a damp kitchen towel, not under running water or in the dishwashe
Accessories
Device
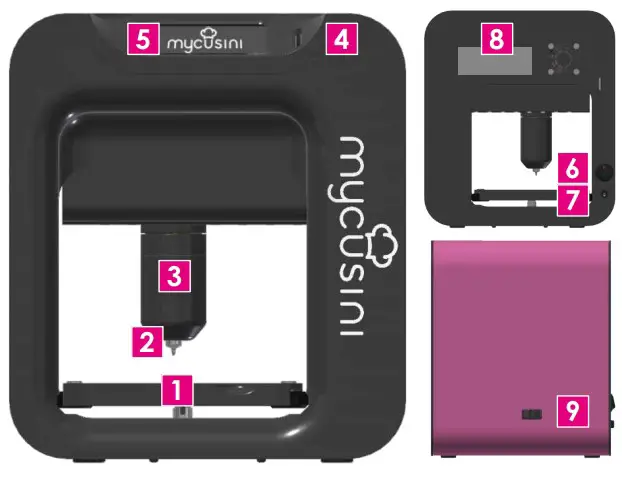
- Printing table
- Cartridge nozzle
- Cartridge holder
- SD card slot
- Display
- On and off switch
- Power connection
- Type plate
- Setting wheel
Start screen & functions
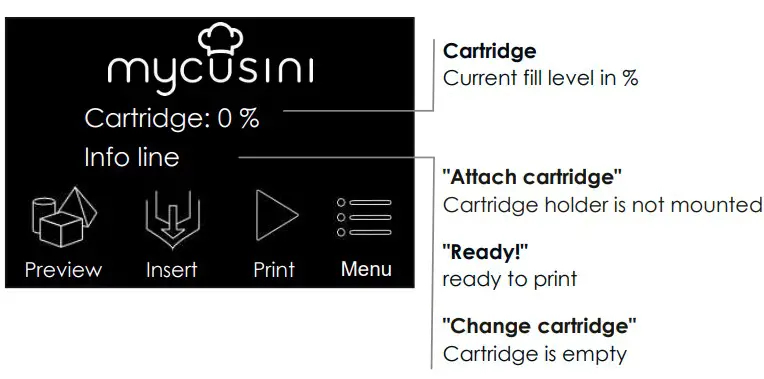
Further functions
![]() Preview shows all objects stored on the SD card
Preview shows all objects stored on the SD card![]() Insert to fill the cartridge with Choco
Insert to fill the cartridge with Choco![]() Print to start a print after inserting the cartridge
Print to start a print after inserting the cartridge![]() Menu leads to the main menu
Menu leads to the main menu![]() Clean the piston
Clean the piston![]() Light ON/OFF
Light ON/OFF![]() Remove the cartridge
Remove the cartridge![]() On Object to readjust start height, e.g. for printing on mycusini chocolate bars
On Object to readjust start height, e.g. for printing on mycusini chocolate bars![]() More leads to further setting options
More leads to further setting options![]() Piston out to completely remove piston for thorough cleaning
Piston out to completely remove piston for thorough cleaning![]() Piston in automatically retracts the piston after thorough cleaning
Piston in automatically retracts the piston after thorough cleaning![]() Calibration to adjust distance of cartridge nozzle to silicone mat
Calibration to adjust distance of cartridge nozzle to silicone mat![]() Language selection
Language selection![]() Info about your mycusini, e.g. shows the current software version
Info about your mycusini, e.g. shows the current software version![]() Reset to factory settings
Reset to factory settings![]() Pre dosing conveys Choco from the printing nozzle
Pre dosing conveys Choco from the printing nozzle
Print 3D Choco
Preparation
Place the mycusini on a horizontal surface.
Insert the SD card.
Insert the printing table and place the silicone mat on the printing table.|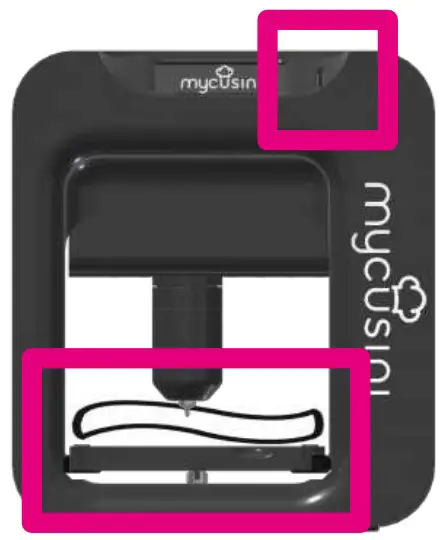
Connect the power supply unit to a socket. Connect the other end of the power supply unit to the mycusini via the power connector (page 13, item 2, no. 7)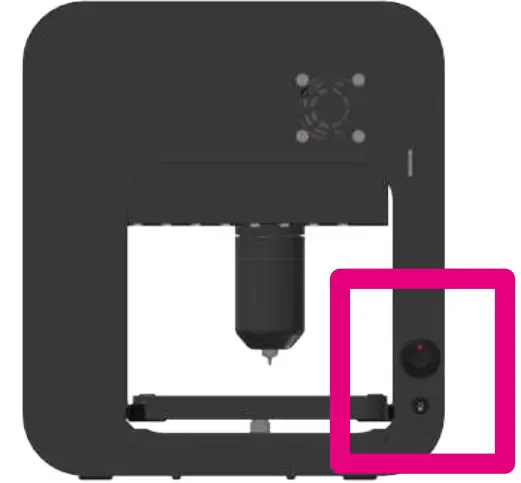
Insert Choco
 Select the function “Insert” on the start screen to insert Choco. Follow the instructions on the display and observe the following notes.
Take a refill and cut the foil slightly around the refill at the marking. The mycusini Refill Cutter is particularly suitable for this.
Now simply break the refill in half and insert one half into the stainless steel cartridge.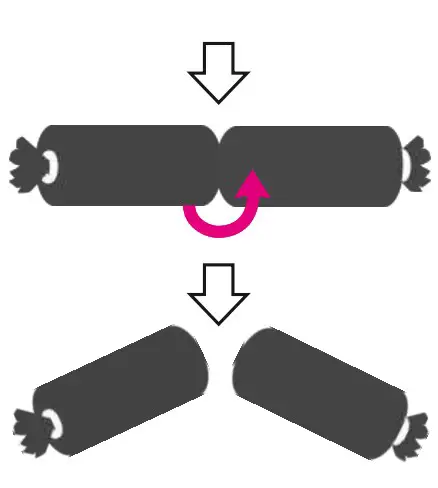
NOTE
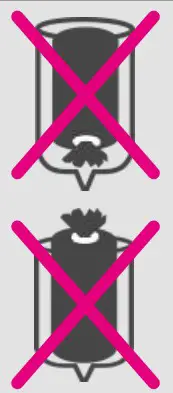
- Insert the refill including the foil with the open side down.
- The refill must not protrude beyond the marking on the outside.
- Gently close the cartridge holder until it stops.
Printing
![]() In the main display, select the function “Print”, to start a print: The mycusini preheats automatically.
In the main display, select the function “Print”, to start a print: The mycusini preheats automatically.
![]() After the preheating phase, you can select the desired object.
After the preheating phase, you can select the desired object.
To do this, press the corresponding object and follow the instructions on the screen.
IMPORTANT: Observe the following instructions for predosing.
NOTE
![]() Predose until the choco flows continuously from the nozzle.
Predose until the choco flows continuously from the nozzle.
If the first print after inserting a new refill starts unevenly, dose again before the next print.
TIP: Predosing is only necessary before the first print after a cartridge change. After the first object has been printed successfully, you can proceed directly to the next print without dosing.
Removing the 3D Choco Object
 Let the object cool down until it is completely solid.
Remove the silicone mat from the printing table and bend the mat slightly to remove the object.
Clean the silicone mat for the next production.
Stop print
![]() Press “Stop” to cancel the current print. Select this menu item to return to the object selection.
Press “Stop” to cancel the current print. Select this menu item to return to the object selection.
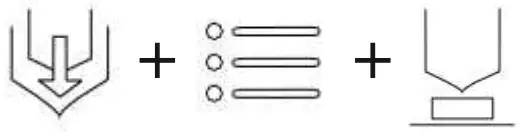
Remove cartridge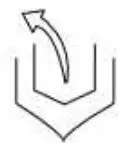 If you want to remove the cartridge from the printer without cleaning it, select “Insert” in the start screen and insert a new cartridge. Alternatively, select “Remove” under “Menu
![]() Switch off
Switch off
Press the on/off switch on the back of the unit. A separate “shutdown” is not necessary.
Printing on chocolate bars & objects
 On object offers you the possibility to set a new start height, e.g. to print directly on mycusini chocolate bars.
Proceed as on page 15 in item 4.2 and set Choco at the beginning.
Select “On object” under Menu and follow the instructions on the display.
NOTE
 Do not place the object (e.g. chocolate bar) until the display prompts you to do so.
- Place the object centrally under the print nozzle.
- Move the print nozzle down until it touches the surface of the object without damaging it!
After printing on object
If the print is finished or has been stopped, you can set the height again.
If the next print is to be made on the silicone mat again, follow the instructions in the next section “Returning to normal printing”.
Remove the printed object from the print table before continuing!
Return to normal printing
If you want to return to normal printing, go to the main screen via the back
button and select “Print”.
mycusini Club Create 3D objects
- Open the browser Google Chrome and type www.mycusini.club into the search bar.
- Register in the mycusini Club with your email address and the serial number of your mycusini. Under the “Login button” you will find the link to register “Register here”.
- You will find the serial number on the back of your mycusini on the type plate (e.g. GM22203220000).
NOTE
- To create an object with the mycusini Club, you need a computer with an Internet connection.
- Always use the browser Google Chrome to log into the mycusini Club,
otherwise errors may occur. The Google Chrome browser can be installed free of charge.
 Once you have successfully registered in the mycusini Club, select your desired
application or a 3D object from the template library.
After you have created your personal 3D object, you can download the file for
printing and save it on the SD card of the mycusini via the SD to USB adapter.
Update
In case of an update, you will be informed via the notification function in the
mycusini Club. You can download the necessary update files and instructions in “Tips & Tricks” under “Update”.
You need the serial number of your device for the software update. You will find it on the back of your mycusini. You can find your current software version in the display under “Info” in the settings.
Adjusting printing nozzle distance
If the distance between the cartridge and the silicone mat on the printing table is not optimal, it can be adjusted using the adjusting wheel (page. 13, item 2, no. 9) on the side of the mycusini. To do this, select “Menu”,
“More” and press “Calibration”. If you turn the wheel towards the front of the mycusini, the distance increases. Towards the rear it decreases. The distance should be 0.1 0.2 mm.x
![]() NOTE
NOTE
This setting should only be made in exceptional cases. If you have any questions, please contact us at [email protected].
Cleaning
Stainless Steel Cartridge
Remove the refill sleeve with tweezers before cleaning, refilling the cartridge
and at the end of production. The empty cartridge can then be washed in the dishwasher or under warm running water. After cleaning, dry the cartridge thoroughly (also inside).
Printing table
The printing table is magnetically fixed to the machine. To clean it, pull it out of the mycusini towards the front.
Silikone Mat
Clean the silicone mat under warm running water.
Cartridge Holder
Clean the cartridge holder with a damp kitchen towel.
NOTE
- Clean the printing table and silicone mat by hand.
- Use only moderately warm water.
- Do not use scouring pads or abrasive cleaners.
- Do not cut on the silicone mat or print table.
- Do not clean the cartridge holder under running water!
![]() Piston Fast cleaning
Piston Fast cleaning
Select “Menu” and press “Clean”. The piston moves out a little. Follow the instructions on the display.|
Piston Advanced cleaning
Remove the piston completely to clean it thoroughly under warm running
water.
To do this, use the function Piston out under “Menu”, “More”. To reinsert the piston, select the function Piston in.
Place the piston in its original position and hold it in position until it is automatically retracted.

Troubleshooting
You can find more tips, tricks and video tutorials on the various applications
online in the mycusini Club.
Choco
My refill is not empty yet, but I do not want to continue printing.
Leave the machine as it is and switch it off at the power switch so that the Choco can solidify. If you do not print for a longer period of time, you can remove the stainless steel cartridge with the cold Choco using the “Remove” function and store it at room temperature.
No choco comes out of the nozzle.
If you have already restarted and predosed again, check whether the nozzle of
the stainless steel cartridge is clogged. Use a needle, for example, to do this.
Storage
Always store mycusini 3D Choco Refills at room temperature. Storage in the
refrigerator leads to a longer preheating time.
Object
My object has holes
First note
- Make sure the room temperature is suitable (20 22 °C).
- Protect the mycusini from draughts during printing.
- Make sure that the refills are stored correctly at room temperature.
- Check the nozzle for blockages, e.g. with a needle.
When you have checked the above points, note the following:
The first print layer is the most important. The Choco strand must be pressed firmly against the silicone mat by the nozzle and should not have any interruptions. Therefore, predose sufficiently until the strand flows out of the nozzle without interruption.
Can you tell that the strand is coming out of the nozzle correctly, but the strand does not seem to be pressed sufficiently flat, reduce the distance
between the nozzle and the silicone mat by using the “Calibration” function in
the display.
Temp Error
My machine shows “Temperature Error!”
- The refill is too long, shorten it (page 15, item 4.2) and try again.
- Make sure that the gold contacts in the cartridge holder and on the print head are always free of dirt. This can cause faulty contact and the machine will display a temperature error.
- After cleaning, restart the machine
Silikone Mat
The silicone mat slips
Make sure that the silicone mat and the printing table are always clean and free
of dust. Dampen the underside of the silicone mat with a damp cloth, to prevent it from slipping
Service mycusini Credits
Our services offer you the creation of professional 3D Printing Templates

https://mycusini.com/products/mycusinicredits
 mycusini Owner Facebook
Facebook group for exchanging and sharing ideas
www.facebook.com/groups/2376032912619240
Print4Taste GmbH, . 11, 85354 , Germany
[email protected]