DUCO L2003622 Connectivity Board Instruction Manual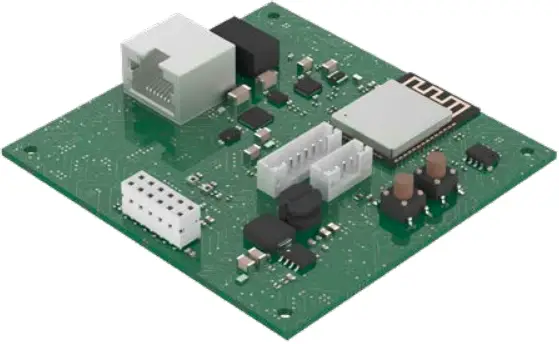
APPLICATION
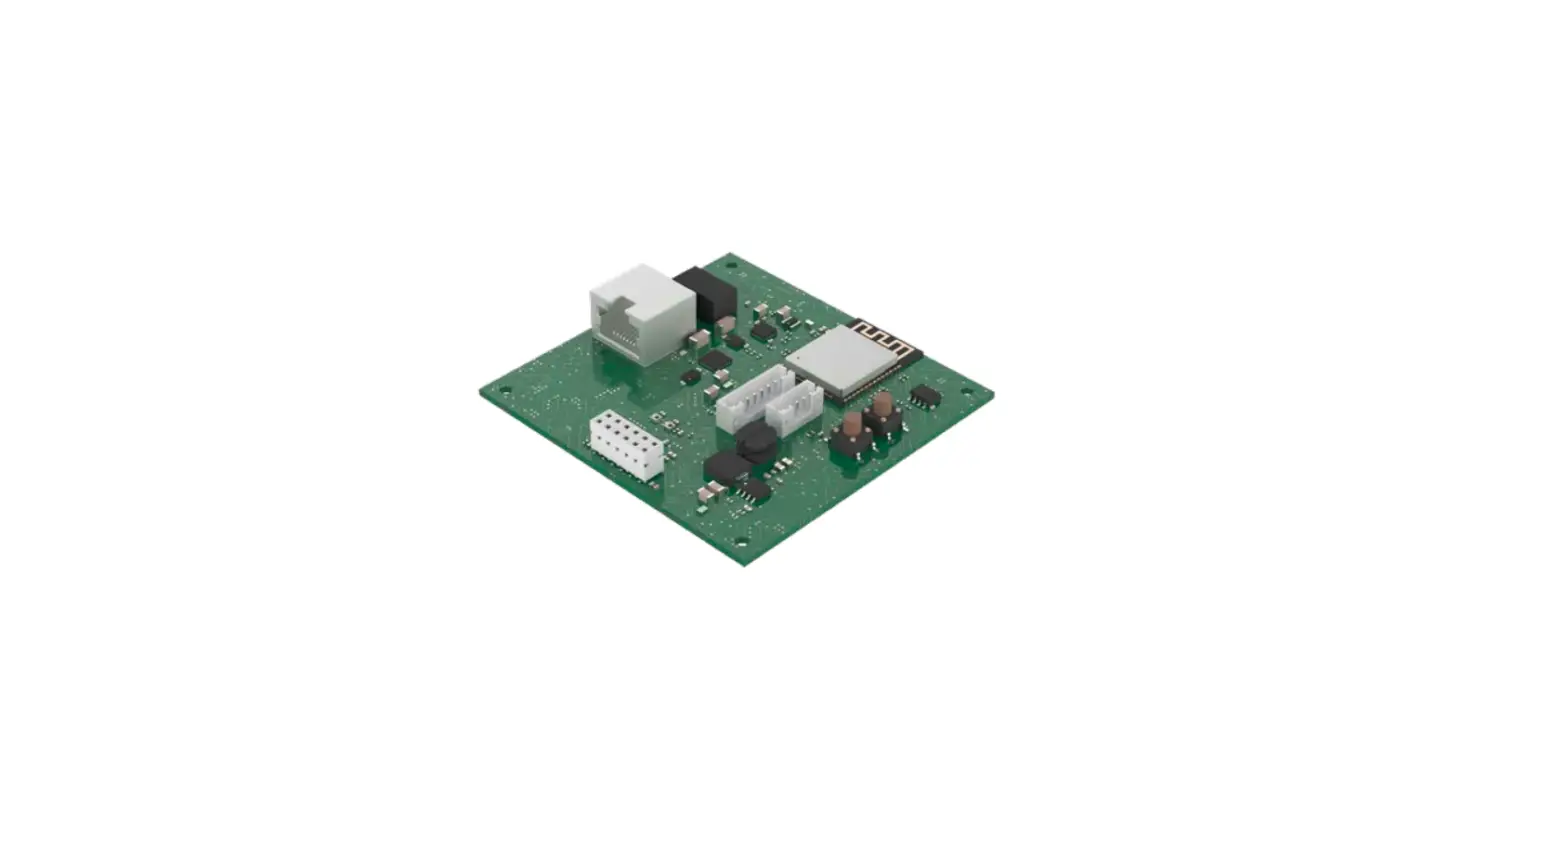
The optional Connectivity Board can be applied to the DucoBox Silent Connect, the DucoBox Focus and the DucoBox Energy. This PCB enables interfacing towards home automation and building management systems via REST API (locally or via the cloud) or ModBus TCP (locally). Both are possible via Ethernet or Wi-Fi. The Connectivity Board also enables the DUCO Installation App to be used.
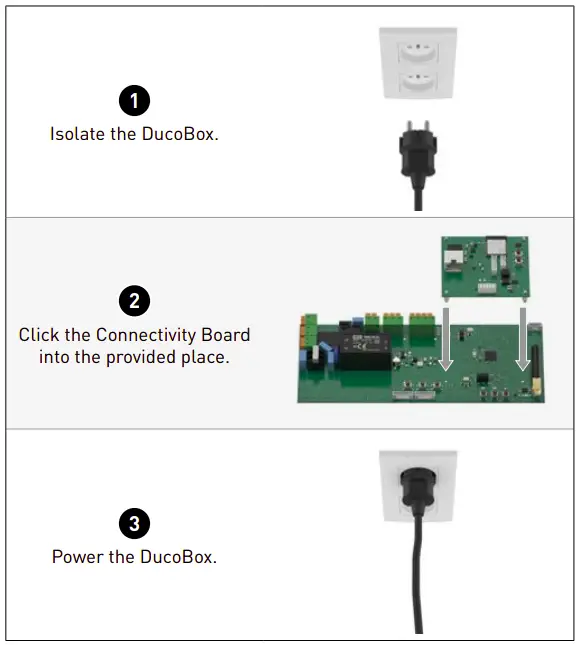
MOUNTING
LED INDICATIONS
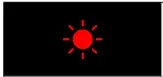 RED (flashing)
Not connected
 ORANGE (flashing)
Transitional phase (please wait)
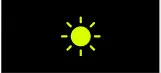 YELLOW (lit)
Local point-to-point Wi-Fi active
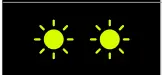 YELLOW (lit)
Connected to local point-to-point Wi-Fi
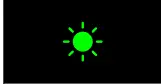 GREEN (flashing)
Connected to the resident’s network (via Ethernet or Wi-Fi)
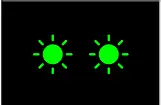 GREEN (flashing)
Connected to the resident’s network (via Ethernet or Wi-Fi) + Cloud connection activated
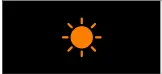
 PURPLE (flashing)
Software update (please wait)
CONNECTION TO THE NETWORK
Connect the Connectivity Board to the local network (of the resident) to link the DucoBox with a home automation or building management system via REST API. Connection on the local network is possible via Ethernet or Wi-Fi. If an Ethernet cable is connected, it is always given priority.
Ethernet
Connect the Connectivity Board to the network router with an Ethernet cable.
The LED on the Connectivity Board flashes green when it is connected to the Wi-Fi network.
Wi-Fi
- Activate the local point-to-point Wi-Fi by pressing the ‘INST’ button on the Connectivity Board or via the DucoBox Energy’s display menu, the LED will flash yellow and then light up.
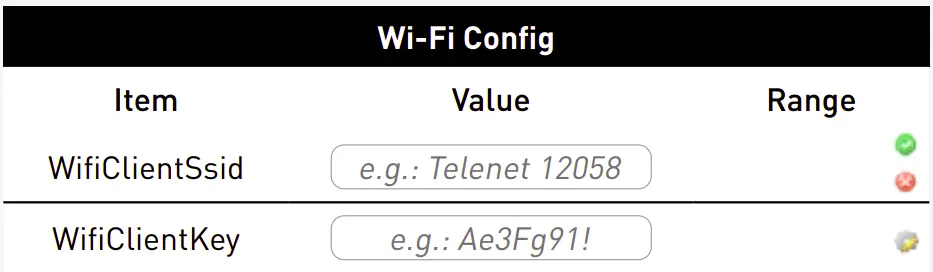
- The SSID and password of the DucoBox can be found on the QR code sticker.
If there is no SSID and password on the QR code, you can connect to the “DUCO” network; the password is 12345678. - Go to your phone or PC settings: activate the Wi-Fi, select the network name (SSID) and enter the password. The 2 yellow LEDs light up when you are connected to the network.
- Using the same device, surf to:
https://192.168.4.1/networkconfig.html If you receive a message that the connection is not private, press advanced and then you can proceed to 192.168.4.1
Press ‘Scan Wi-Fi’ at the bottom of the page Under ‘Wi-Fi Config’ (see example below), select the resident’s Wi-Fi network and confirm by clicking the green tick. Then enter the password and confirm again.
- Press ‘stop access point’ at the bottom of the page. The LED on the Connectivity Board flashes green when it is connected to the Wi-Fi network.
SCOPE OF DELIVERY
Before starting to install the PCB, check to ensure it is complete and undamaged. The Connectivity Board includes the following components:
- Connectivity Board
- Installation manual
Keep the installation manual in a safe place and pass it on it to anyone using the unit after you. The manual for all products can always also be found on the DUCO website: www.duco.eu
TRANSPORT AND PACKAGING

The necessary care must be exercised when transporting and unpacking the product. Avoid violent shocks during transport and handling. When unpacking the unit, check any loose parts and accessories for transport damage. Take care to ensure after unpacking that the packaging material is disposed of in an environmentally-friendly manner. Returning the packaging to the recycling loop saves raw materials and reduces the waste mountain.
END OF SERVICE LIFE
Disposing of the unit: old electric and electronic equipment often contains valuable materials. However, it also contains harmful substances which are necessary for the operation and safety of the unit. Accordingly, never dispose of waste equipment with ordinary waste. Choose to have it disposed of in an environmentally-friendly manner.
SERVICE
Please refer to the maintenance instructions at www.duco.eu and view the videos on duco.tv for more information.
For service problems as a user:
Please contact your installer.
For service problems as an installer:
Please contact your DUCO product retailer.
WARRANTY
All warranty conditions concerning the DucoBox and DUCO’s ventilation systems can be found on the DUCO website.
All complaints are to be reported to DUCO by the DUCO distributor with a clear description and the order/invoice number under which the products were delivered. In order to register the complaint, please use the complaint registration form found on the Duco website (mention the product’s serial number) and send it to [email protected].
LEGISLATION
The Connectivity Board is an (optional) part of a DucoBox.
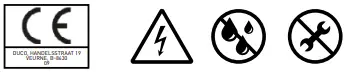
The EC Declaration of Conformity can be consulted and downloaded from www.duco.eu
Translation from Dutch of the original instructions
For information regarding warranty, maintenance, technical data, etc., see www.duco.eu.
Installation, connection, maintenance and repairs are to be carried out by an accredited installer. The electronic components of this product may be live. Avoid contact with water.
Vero DUCO – Handelsstraat 19 – 8630 Veurne – Belgium
tel +32 58 33 00 33 – [email protected] – www.duco.eu
![]()


