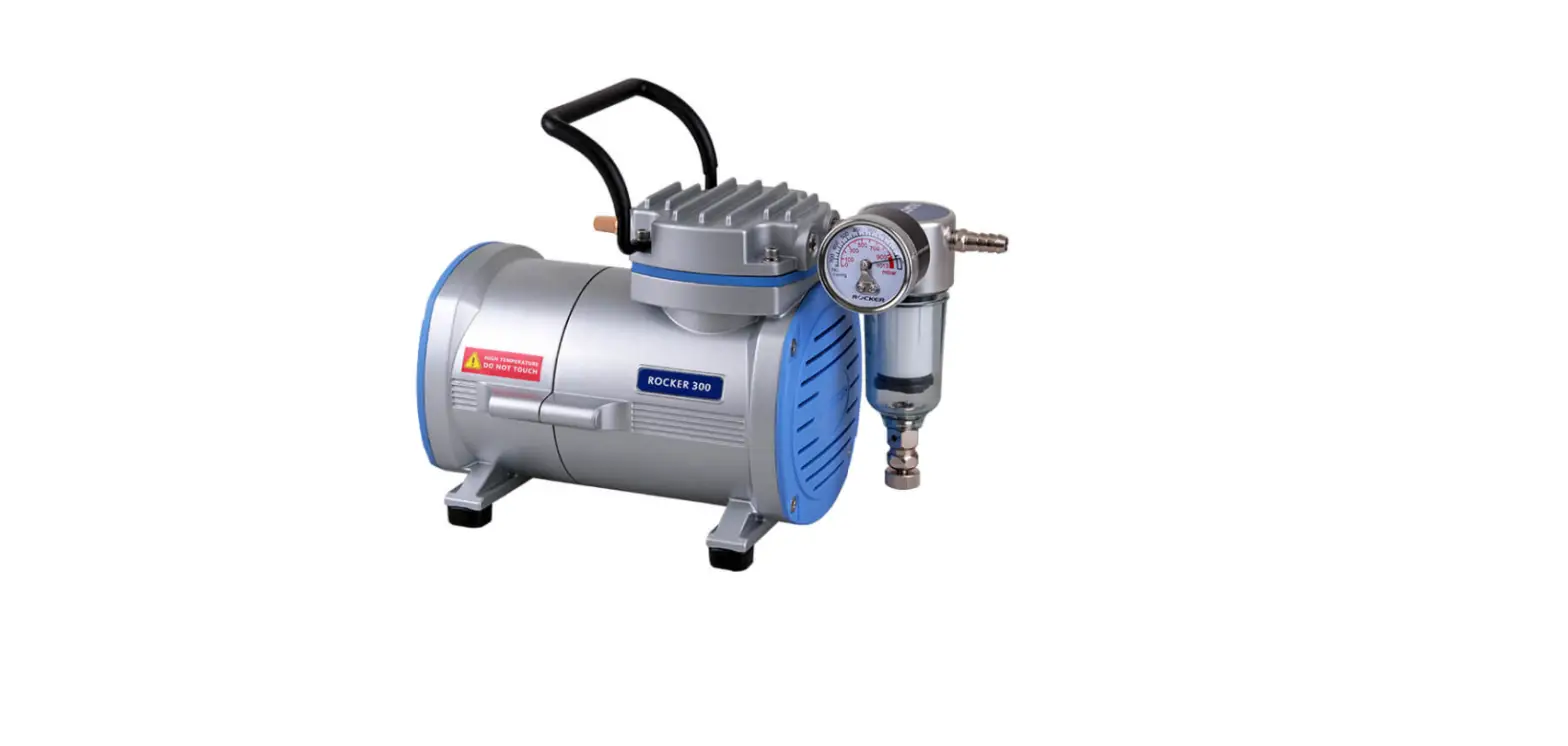
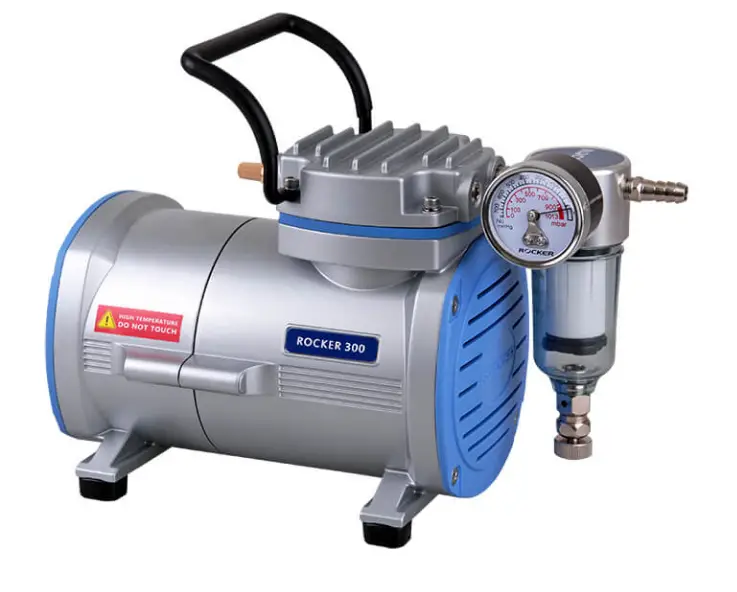
ROCKER 300DC Oil Free Vacuum Pump
INSTRUCTION
Important Notice: This instrument is designed for laboratory usage only. Please read this manual carefully before installing and operating. The instrument shall not be modified in any way. Any modification will void the warranty and may result in potential hazard. We are not responsible for any injury or damage caused by any non-intended purposes and modifying the instrument without authorization.
- Check the voltage specified on the name plate and ensure it matches the line voltage in your location.
- Install the instrument in a clean, dust-less and ventilated area under 40°C.
- Never use the pump with any corrosive, chemical, flammable gas or toxic material.
- Please connect the pump with high-pressure hose or tubes.
- The ProteTM filter cartridge can prevent a large amount of liquid from overflowing into the pump. Please ensure the liquid in the moisture trap not exceed safety level.
- To ensure proper function of the ProteTM protection device, the pump must be installing on a flat level surface and should not be moved when operation. If the buoy closes during operation, it must be manually reset by uninstalling and reinstalling the filter cartridge.
- The filter cartridge is used to absorb moisture and dust. Please replace the cartridge to maintain pumping efficiency when it becomes dirty or color-changing.
- The pump is not designed to start against applied vacuum. To prevent damage, verify that the inlet of pump is at atmospheric pressure before each start. If necessary, the inlet can be vented to atmosphere by partially unscrewing the vacuum regulator knob.
- This pump has a thermal protection device that automatically shuts-off when it becomes overheated.
- The temperature of the surface of pump is very high after use or during work, please don’t touch it to avoid being burnt.
- The instrument must not be used to create vacuum and pressure simultaneously.
- Do not use any lubricant, which may damage the pump.
- If the supply cord is damaged, please contact the manufacturer or your service agent for replacement to avoid hazard.
- Please discard packing material according to local related regulations.
Unpacking
Please check if the package is complete without any damage before unpacking. When unpacking, please make sure you have all accessories that indicated on the list. If there is any problem, please keep the serial number along with packing case and contact your local distributor immediately for assistance.
Main Part Diagram
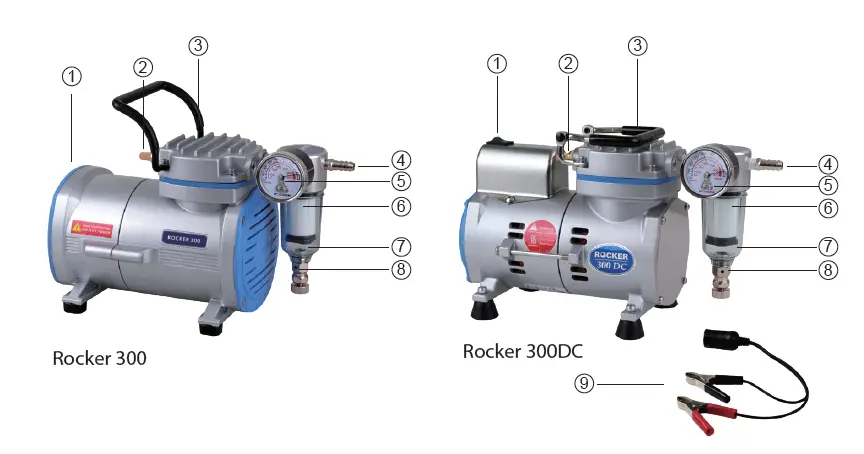
| Position | Designation | Position | Designation |
| 1 | Power Switch | 6 | ProteTM Filter Cartridge |
| 2 | Air Outlet (Muffler) | 7 | Moisture Trap |
| 3 | Handle | 8 | Vacuum Regulator |
| 4 | Air Inlet | 9 | Power Cord |
| 5 | Vacuum Gauge |
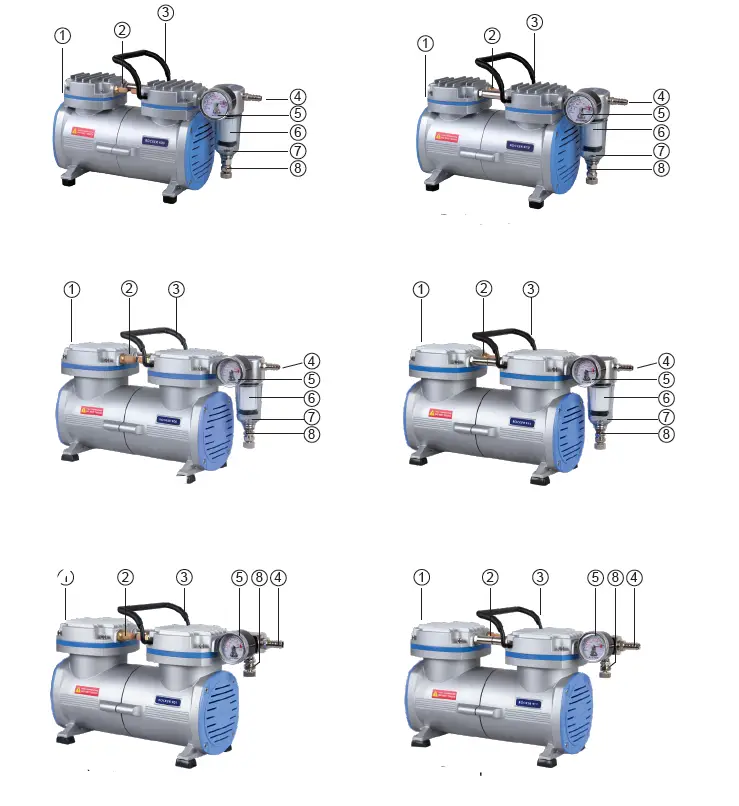
- Rocker 400
- Rocker 410
- Rocker 900
- Rocker 910
- Rocker 901
- Rocker 911
| Position | Designation | Position | Designation |
| 1 | Power Switch | 5 | Vacuum Gauge |
| 2 | Air Outlet (Muffler) | 6 | ProteTM Filter Cartridge |
| 3 | Handle | 7 | Moisture Trap |
| 4 | Air Inlet | 8 | Vacuum Regulator |
Rocker 900 / 910 is equipped with only filter cartridge, no ProteTM protection device.
Operation
- A. Press Power Switch (1) to activate the pump after making sure all tubing are well connected.
- A cold trap or trap bottle is recommended to connect before pump while amount of moisture exists.
- B. To setup vacuum by adjusting the vacuum regulator (8).
- Pilot 100, vacuum controller (Cat. No. 183100-01(02)) is available for precise pressure control.
- C. Check liquid level of moisture trap (7) daily and drain the liquid when it is up to the neck of bottle.
Warning: When pump is used for aqueous solution filtration, please ensure the liquid level of flask not exceed safety level. Failure to comply could result in serious damage to the pump and void the warranty. If it occurs, please contact the distributor immediately for service.
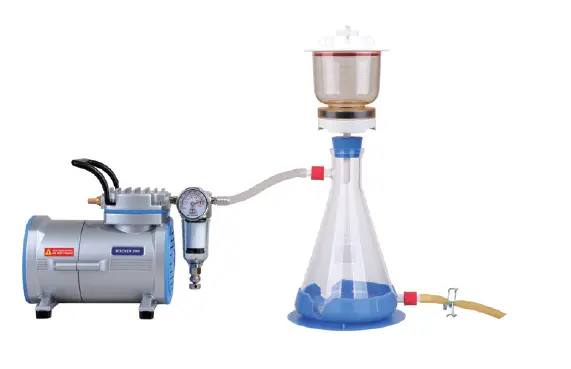
Filtration System Assembly Diagram
Maintenance
- Please remove the liquid in the moisture trap after every use. If the liquid in moisture trap is more than 70%, please stop the experiment immediately to empty the liquid.
- After finishing the experiment, please remove the liquid in the moisture trap and keep pumping the air for at least 2 minutes to withdraw the residual steam.
- The vacuum pump is not autoclavable. Please clean the surface by pure water or 75% ethanol.
- Valve plate(s), O-ring(s), silicone tube(s) are consumables, it is recommended to replace it on a yearly basis or as needed to ensure good operation.
How to reset the ProteTM protection device
- Remove the moisture trap (7) and filter cartridge (6) by rotating clockwise.
- Disassemble the filter cartridge (6) to ensure the buoy is not closed.
- Reinstall all components, filter cartridge and moisture trap back.
How to replace cartridge
- Please replace the cartridge when it becomes dirty or color-changing.
- Please remove the moisture trap (7) by rotating it clockwise.
- Replace the cartridge by the same way.
Troubleshooting
| Problem | Reason and Solution |
| Failed to start | ● Loose plug → Reconnect plug to power supply. ● Wrong voltage → Reconnect to power specified on name plate. ● Vacuum exists → Release vacuum and restart the pump. ● Switch is broken → Contact distributor for assistance. |
|
Poor vacuum | ● Improperly vacuum setting → Adjust the vacuum regulator. ● Faulty vacuum gauge → Replace a new gauge. ● Air leakage → Replace or tighten the tubing and accessories that possible leaks. |
Ordering Information
| 167300-11(22) | Rocker 300 Vacuum pump, AC110V,60Hz (AC 220V,50Hz) |
| 167300-00 | Rocker 300DC Vacuum pump, DC12V |
| 167400-11(22) | Rocker 400 Vacuum pump, AC110V,60Hz (AC 220V,50Hz) |
| 167410-11(22) | Rocker 410 Vacuum pump, AC110V,60Hz (AC 220V,50Hz) |
| 167900-11(22) | Rocker 900 Vacuum pump, AC110V,60Hz (AC 220V,50Hz) |
| 167901-11(22) | Rocker 901 Vacuum pump, AC110V,60Hz (AC 220V,50Hz) |
| 167910-11(22) | Rocker 910 Vacuum pump, AC110V,60Hz (AC 220V,50Hz) |
| 167911-11(22) | Rocker 911 Vacuum pump, AC110V,60Hz (AC 220V,50Hz) |
| 183100-01(02) | Pilot 100, Vacuum Controller, AC100-240V adaptor, US plug (EU plug) |
| 167301-06 | Moisture trap / Vacuum regulator for Rocker 300 / 400 / 410 |
| 167301-07 | ProteTM filter cartridge for Rocker 300 / 400 / 410 |
| 167300-42 | Muffler (Air outlet) for Rocker 300 / 400 / 410 |
| 167801-06 | Moisture trap / Vacuum regulator for Rocker 900 / 910 |
| 167801-07 | Filter cartridge for Rocker 900 / 910 (without ProteTM overflow protection) |
| 167600-42 | Muffler (Air outlet) for Rocker 900 / 901 / 910 / 911 |
| 167300-62-1 | Rocker 300 repair kit |
| 167400-62-1 | Rocker 400 repair kit |
| 167410-62-1 | Rocker 410 repair kit |
| 167900-62 | Rocker 900 repair kit |
| 167901-62 | Rocker 901 repair kit |
| 167910-62 | Rocker 910 repair kit |
| 167911-62 | Rocker 911 repair kit |
| 167300-21 | Hose barb, 1/8 PT, 5/16 in. for Rocker 300 / 300DC / 400 / 410 / 900 / 910 |
| 167300-20 | Hose barb, 1/4 PT, 3/8 in. for Rocker 901 / 911 |
| 167200-38 | Silicone Tube, Ø 6 x 12 mm, 1 m |
| 180300-68 | Silicone Tube, Ø 8 x 14 mm, 2 m |
Rocker Scientific Co., Ltd.
- UTel: +886-2-26033311
- Fax: +886-2-26036622
- E-mail: [email protected]
- https://www.rocker.com.tw


