Shenzhenshi Zoutu Dianzishangwu Youxiang TDL407 Label Printer
Preface
First of all, thank you for purchasing the electronic sheet printer produced by our company.This manual will guide you how to operate this product. Please read it carefully before use, and keep this manual for reference.
Installation and Operation
How to install the paper roll
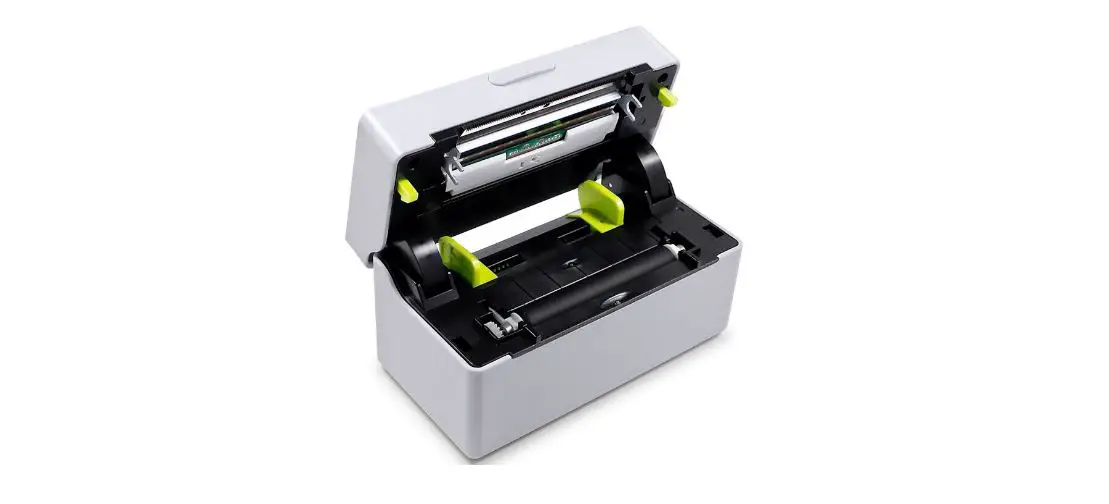
Place the printing paper in the printer paper inlet as shown in the figure below, and then adjust the limit baffle to match the width of the printing paper according to the width of the printing paper.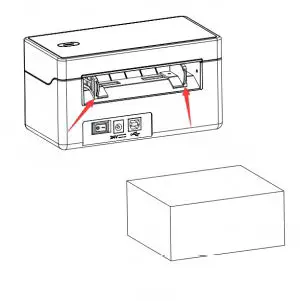 Hold the printer base with one hand to fix the printer, and hold the printer cover with the other hand and press the cover button inward, then turn the printer cover up and open it.
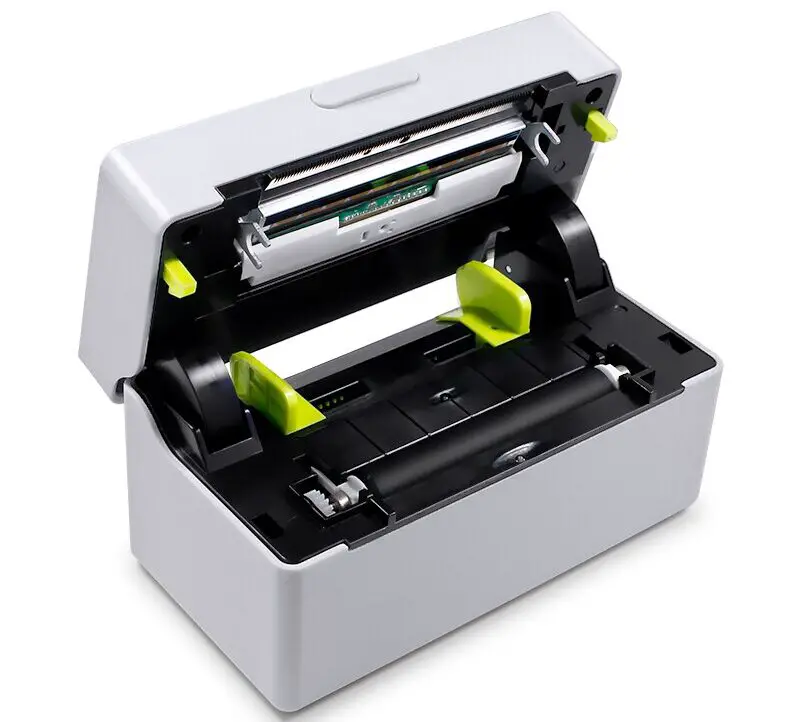
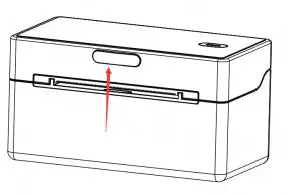 Load the printing paper into the printer as follows and extend the paper head beyond the front cover of the printer.
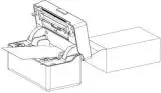 Close the top cover, and paper loading is complete.
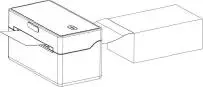
Power Supply and USB Connection
Make sure that the printer switch is off, and plug one end of the power adapter into a DC power socket and one end into a power strip.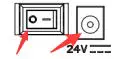 Connect one end of the USB cable to the USB socket of the printer and one end to the PCB end.
Bluetooth connection
After turning on the printer, use the Bluetooth communication device on the Android side to search for theprinter (name: QR-380A), select the corresponding printer, and enter the password “0000” to connect. It can be used normally affter successfully connect.
Download the APP from the application market to connect and use-such as “Printer Label”.
- The printer has three indicator lights, namely the power indicator light, the error indicator light, and the Bluetooth indicator light.
The following is the description of the indicator status:
Working normally: the green light is always on.
Out of paper: The red light turns on and off 4 times at 2 seconds intervals, and the buzzer beeps at the same time.
The cover is open: the red light is always on.
Sewing mark detection error: the red light turns on and off twice at an interval of 3 seconds.
The printer has a button whose main function is to feed paper and perform self- check.
Starting Up
- Pull the printer power switch to the state “1”, and the printer is turned on.
- The printer will start self-learning label paper and positioning when there is paper.
Self-Check
Self-test can detect whether the printer is working properly. If the self-check list can be printed out correctly, it means that everything is normal except for the interface with the host, otherwise it needs to be repaired.
Start self-test
When the printer is in normal state, turn off the power switch first ![]() Press and hold the paper feed button
Press and hold the paper feed button![]() ,turn on the power switch again, wait for about 1 to 2 seconds,until the buzzer will beep. At this time, release the button and the printer will automatically print the self-check list.
,turn on the power switch again, wait for about 1 to 2 seconds,until the buzzer will beep. At this time, release the button and the printer will automatically print the self-check list.
Label learning
- When is label learning needed
- Use the printer for the first time;
- The label cannot be positioned correctly during use;
- Replace the paper roll with another specification;
- Clean the sensor for the first use of loading paper;
- After printing for a long time, load paper for the first time after reuse;
- When the printer usage environment has changed, when the printer is reconnected.
- Label positioning
In the normal state of the printer, press and hold the paper feed button for 2 seconds, and then the buzzer will beep. At this time, release the button and the printer will start label learning.
Note: It is invalid when using continuous paper for label learning.
Daily Maintenance
- When need to maintain the printer
- The printing is not clear;
- Printing noise increased;
- The label positioning is unstable during printing;
- Occasionally report lack of paper or not report;
- Obvious dust or foreign matter appears on the print head chip, sensor,rubber roller and other parts.
In addition to the above, it is recommended to regularly maintain the printer head, sensor, rubber roller and other printing-related parts. The maintenance frequency is recommended to be at least monthly. If the use environment is harsh, the maintenance frequency should be increased.
- Clean the Print Head
When the printer is turned off, open the cover, and use a cleaning pen or a lint-free cloth with a small amount of alcohol to gently wipe the print head from left to right or from right to left. - Clean the Print sensor
When the printer is off, open the cover, and gently wipe the sensor with a cleaning pen or a lint-free cloth moistened with a small amount of alcohol. - Cleaning the printing rubber roller
When the printer is turned off, open the cover and use a cleaning pen or a lint-free cloth with a small amount of alcohol to wipe the printing rubber roller back and forth. During the wiping process, you can gently rotate the rubber roller to ensure that the entire rubber roller is wiped clean.
Note: After cleaning with alcohol, it takes 1~2 minutes to wait for the alcohol to evaporate before turning on the machine.
Common Issues and Troubleshooting
Indicator LED Error
| Indicator LED Status | Possible Causes | Solution |
| The red light turns on and off 4 times at an interval of 2 seconds, and the buzzer beeps at the same time | Out of paper | Reload paper |
| Red light is always on | Cover is open | Press the top cover |
| Red light turns on and off twice in 3 seconds interval | Abnormal label detection | 1.Check whether the label paper is contaminated or damaged. 2. Reload paper. Check whether the sensor is blocked by foreign matter or dust. If so, please refer to the daily maintenance chapter for maintenance. |
Print Quality Problem
| Problem | Possible Causes | Solution |
|
Blurry or smudged printing | Paper roll is not installed correctly | Reload the paper in the correct direction |
| Severe carbon deposits on the print head | Clean the printer head | |
| Dirty print rubber roller | Clean the printing roller | |
| Print density is too low | Set up the print density through the setting tool |
If you can’t use it normally after operating according to the above solutions, please contact our after-sales personnel for handling.
FCC
This device complies with part 15 of the FCC Rules. Operation is subject to the following two conditions:
- This device may not cause harmful interference
- this device must accept any interference received, including interference that may cause undesired operation.
Any Changes or modifications not expressly approved by the party responsible for compliance could void the user’s authority to operate the equipment.
Note: This equipment has been tested and found to comply with the limits for a Class B digital device, pursuant to part 15 of the FCC Rules. These limits are designed to provide reasonable protection against harmful interference in a residential installation. This equipment generates uses and can radiate radio frequency energy and, if not installed and used in accordance with the instructions, may cause harmful interference to radio communications. However, there is no guarantee that interference will not occur in a particular installation. If this equipment does cause harmful interference to radio or television reception, which can be determined by turning the equipment off and on, the user is encouraged to try to correct the interference by one or more of the following measures:
- Reorient or relocate the receiving antenna.
- Increase the separation between the equipment and receiver.
- Connect the equipment into an outlet on a circuit different from that to which the receiver is connected.
- Consult the dealer or an experienced radio/TV technician for help.


