![]()
MODEL: GTT450
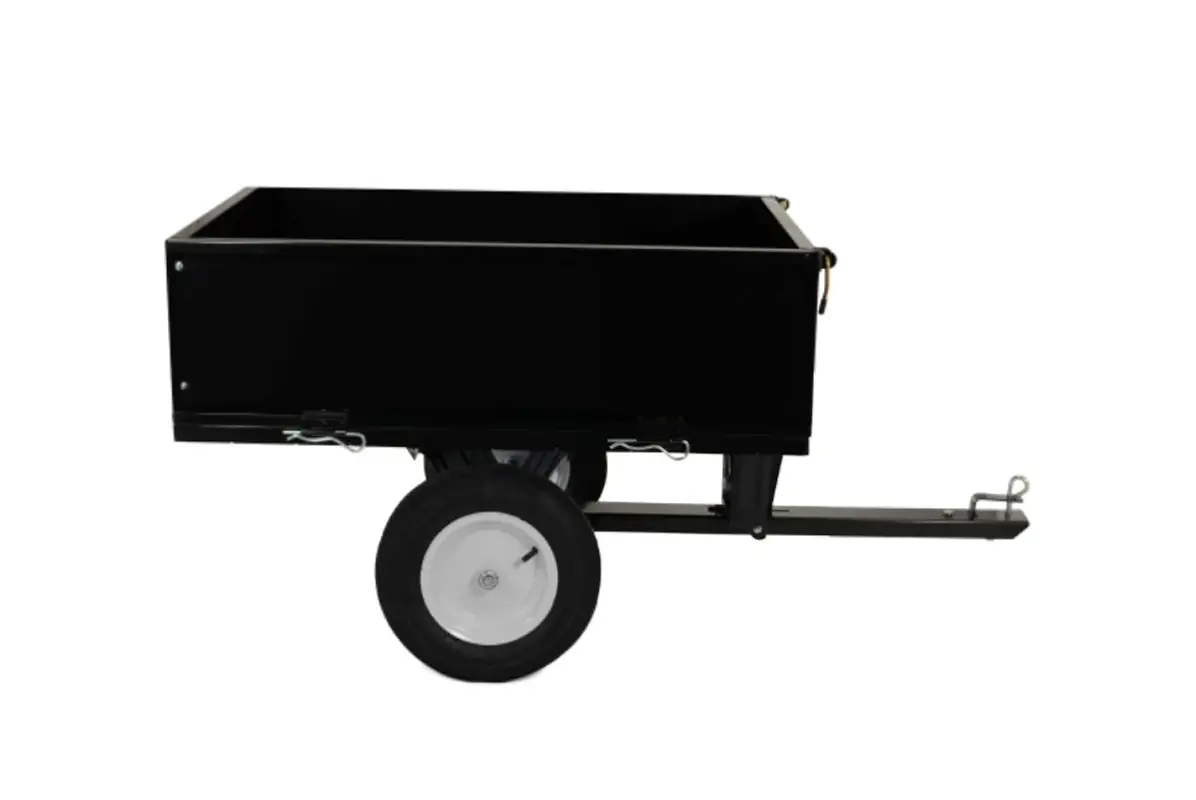
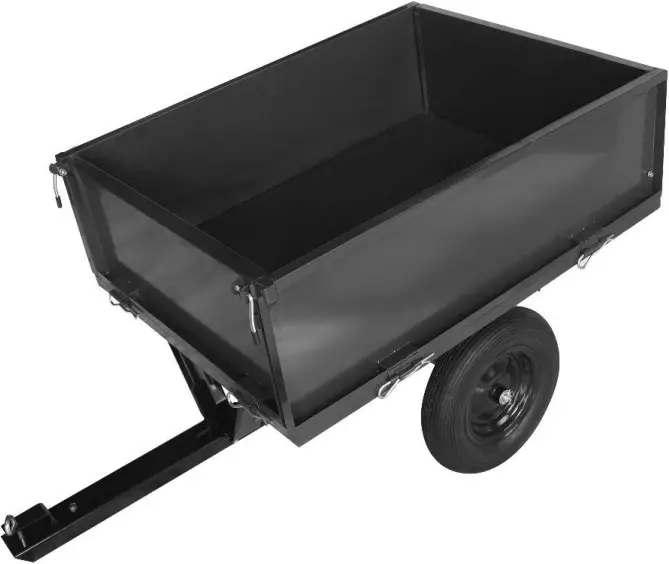
GARDEN TRACTOR TRAILER
OWNERS MANUAL
![]() CAUTION:
CAUTION:
Before using this product, please read this manual carefully to understand the proper use of your garden cart. Please keep this manual for future reference.
Product colours may vary.
PLEASE NOTE: NEVER CARRY PASSENGERS IN THE GARDEN TRACTOR TRAILER
Important Safety Instructions
- Read this entire instruction manual carefully before attempting to use or assemble this trailer.
- Do not load the trailer with more than 660 lbs. (300 kg).
- Do not allow children to play in or around the trailer.
- Always distribute the load evenly over the surface of the trailer bed.
- Do not load items on top of the side rails. Lower the side rails when loading large or heavy objects.
- If any part becomes damaged, broken or misplaced, do not use the trailer until a replacement part has been obtained.
- Do not operate on or roll over objects that could cause damage to the pneumatic tires or tubes.
- Do not inflate tires to more than 28 psi.
- Save these instructions for future reference.
Care and Maintenance
Check tyre pressure regularly. Inflate if necessary. Do not over inflate.
Check bolts periodically to ensure they are secure. Do not over tighten bolts.
Cover or store indoors when not in use.
Preparation
Estimated Assembly Time: Approximately 45 minutes
Tools required for assembly:
- Adjustable Wrench or 7/16 SAE. Socket
- Flat Head Screwdriver
- Pliers
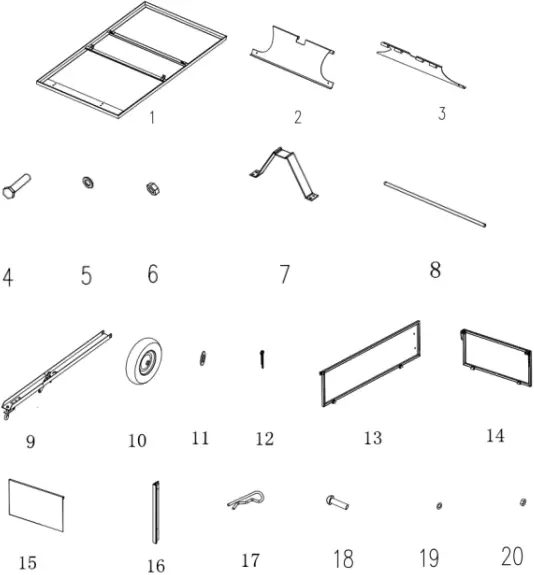
Parts & Hardware List
Part# | Description | Quantity |
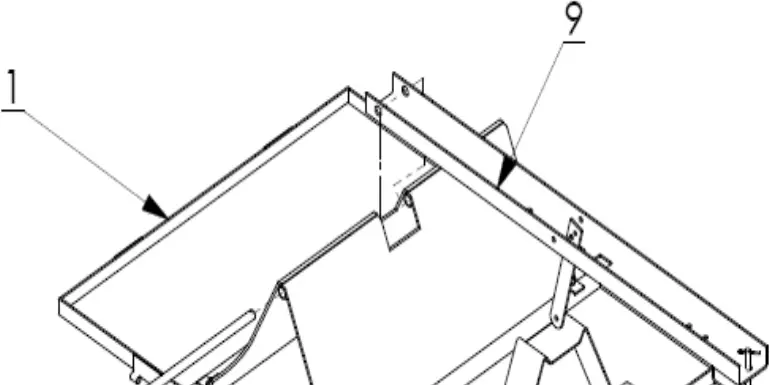
| 1 | Bed | 1 |
| 2 | Left undercarriage support | 1 |
| 3 | Right undercarriage support | 1 |
| 4 | Screw M8x20 | 8 |
| 5 | Small flat washer M8 | 8 |
| 6 | Hex nut M8 | 8 |
| 7 | Front leg | 1 |
| 8 | Axle | 1 |
| 9 | Tow bar | 1 |
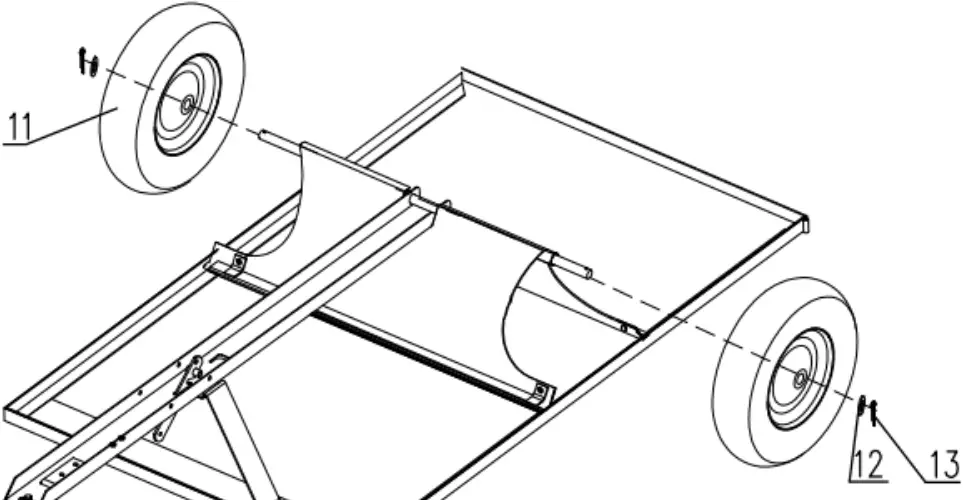
| 10 | Wheel | 2 |
| 11 | Large flat washer | 2 |
| 12 | Cotter pin | 2 |
| 13 | Side panel | 2 |
| 14 | Front panel | 1 |
| 15 | Back panel | 1 |
| 16 | Guiding track | 2 |
| 17 | Quick release pin | 6 |
| 18 | Screw M6x17 | 4 |
| 19 | Flat washer M6 | 4 |
| 20 | Nut M6 | 4 |
STEP 1
Turn the trailer bed upside down. If necessary, use the cardboard from the carton to prevent scratching and damage to the finish.
STEP 2 Undercarriage Support Assembly
Parts and Hardware Required:
Part# | Description | Quantity |
1 | Bed | 1 |
2 | Left undercarriage support | 1 |
3 | Right undercarriage support | 1 |
4 | Screw M8x20 | 4 |
5 | Small flat washer | 4 |
6 | Hex nut | 4 |
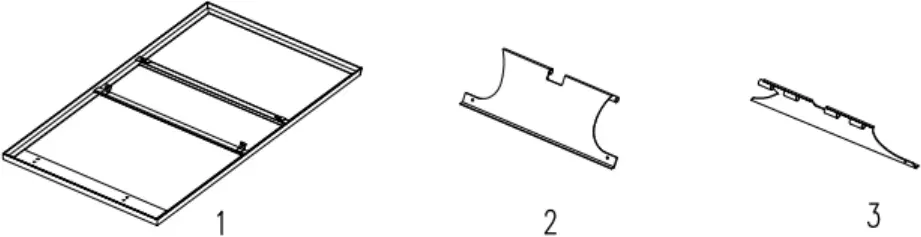

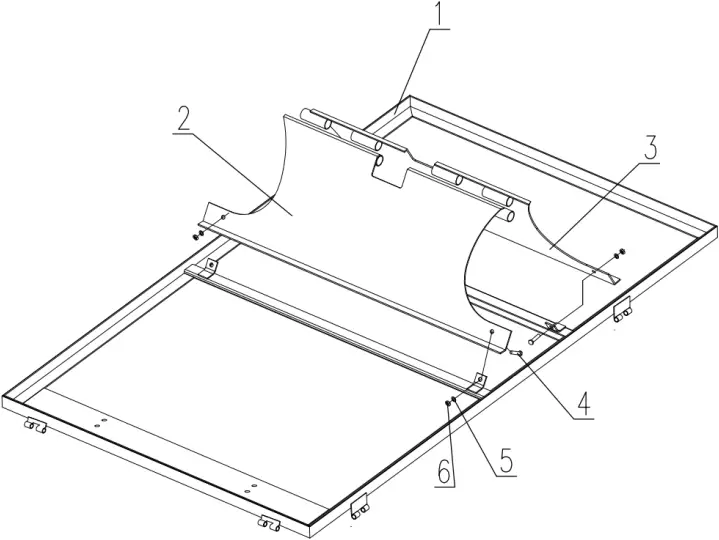
Attach the Left Undercarriage Support (2) and Right Undercarriage Support (3) to the cart bed (1) with Screw M8x20 (4), Small Flat Washer (5) and Hex Nut (6) (Fig. 1).
Fig. 1
STEP 3 – Front Leg Assembly
Parts and Hardware Required:
Part# | Description | Quantity |
4 | Screw M8x20 | 4 |
5 | Small flat washer | 4 |
6 | Hex nut | 4 |
7 | Front leg | 1 |
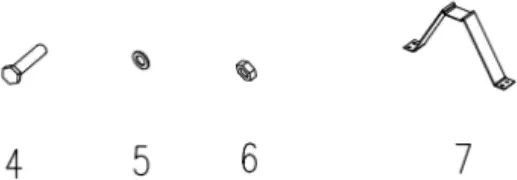
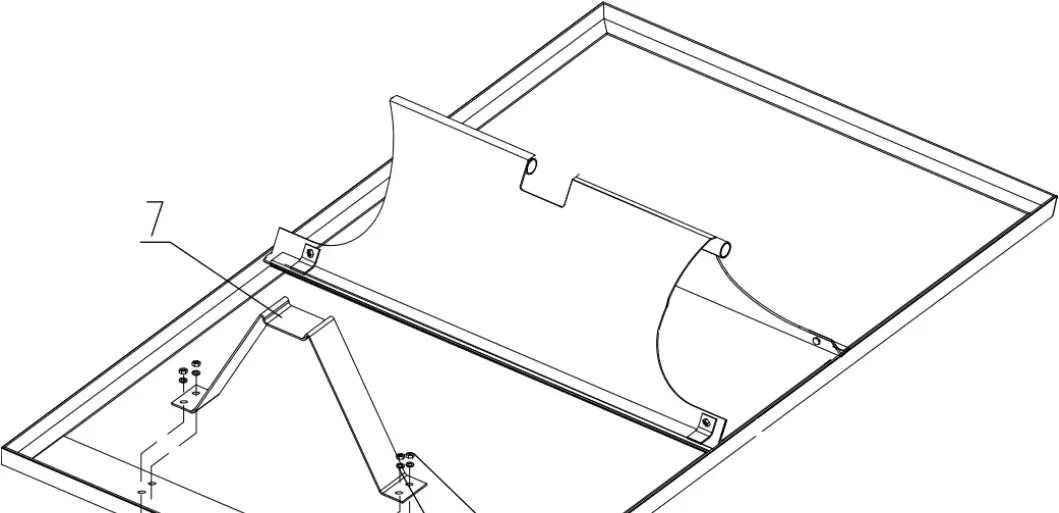
Align the front leg (7) with screw holes on the front of the bed (1) and attach using Screw M8x20 (4), small flat washer (5) and hex nut (6) (Fig. 2).
Fig. 2
STEP 4 Tow Bar and Axle Assembly
Parts and Hardware Required:
Part# | Description | Quantity |
9 | Tow bar | 1 |
8 | Axle | 1 |
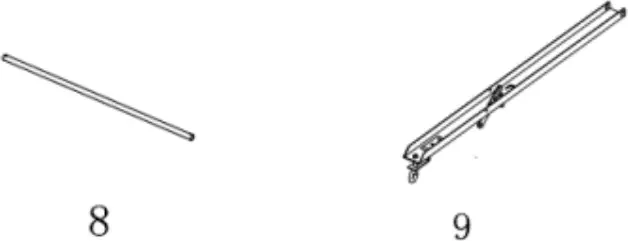
Locate the tow bar (9) in the central notch of the undercarriage supports (2, 3) so the dump bed release lever is facing down and the axle, when installed, will pass through the pivot hole in the end of the tow bar. Slide the axle (8) through the undercarriage supports (2, 3) and the pivot hole in tow bar (9)(Fig. 3).
Fig. 3
STEP 5 Wheel Assembly
Parts and Hardware Required:
| Part# | Description | Quantity |
| 10 | Wheel | 2 |
| 11 | Large flat washer | 2 |
| 12 | Cotter pin | 2 |

Place a wheel (10) on the end of the axle, followed by a large flat washer (11) and cotter pin (12).
(Note: the wheel valve stem should be facing outward.) (Fig. 4).
Fig. 4
STEP 6 Panel Assembly
Parts and Hardware Required:
| Part# | Description | Quantity |
| 13 | Side panel | 2 |
| 14 | Front panel | 1 |
| 15 | Back panel | 1 |
| 16 | Guiding track | 2 |
| 17 | Quick release pin | 6 |
| 18 | Screw M6x17 | 4 |
| 19 | Flat washer M6 | 4 |
| 20 | Nut M6 | 4 |
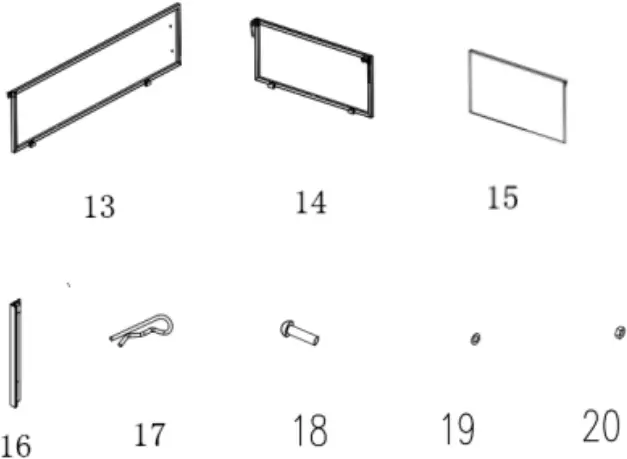
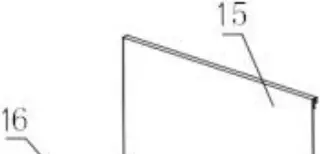
Attach the front panel (14) to the front of bed (1) using release pin (17). Attach the side panels (13) to the bed also with release pin (17). Then attach guiding track(16) to the side panel (13) with Screw M6x17 (4), Flat Washer (19) and Nut (20).Assemble the back panel along the guiding track(16)(Fig. 5).
Fig. 5