HAYWARD Pool Rx Socket Dosing Pum
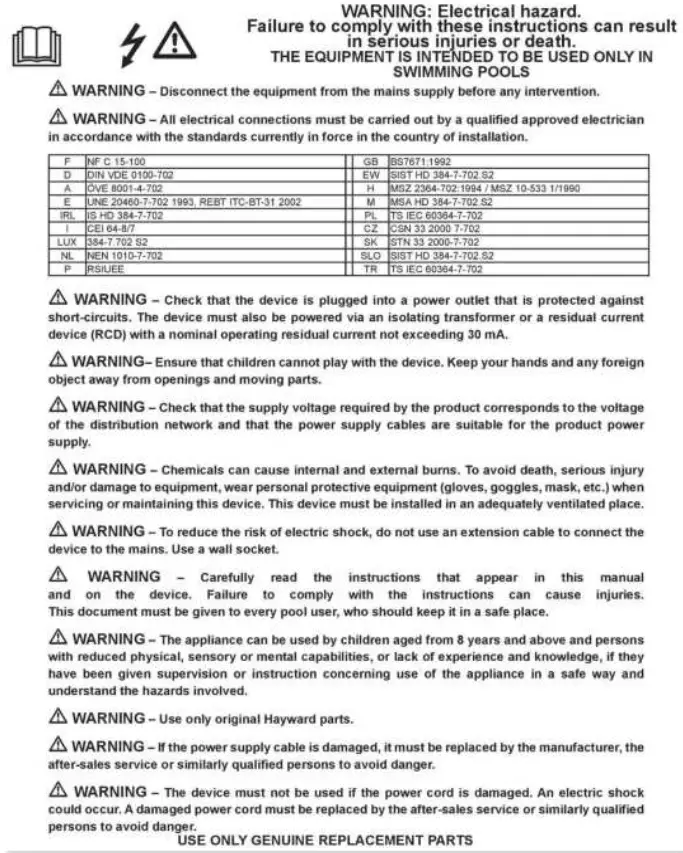
 WARNINGS:
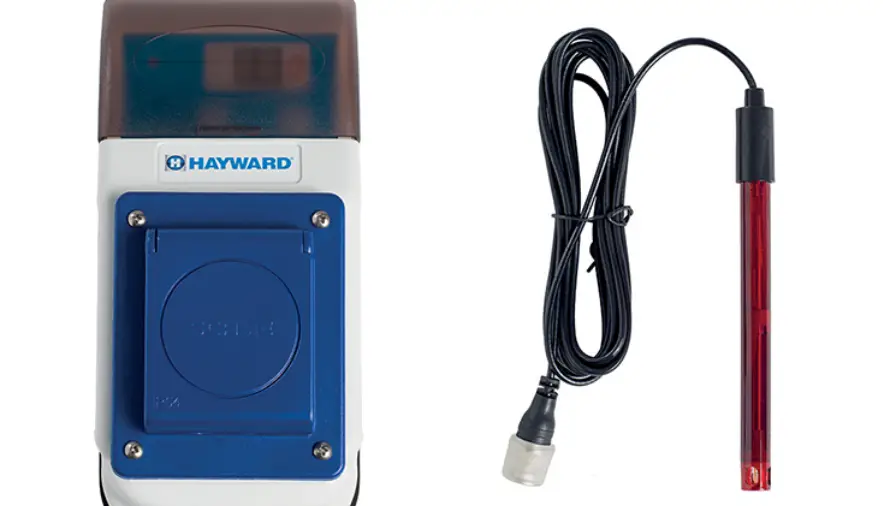
STANDARD SUPPLIED ACCESSORIES
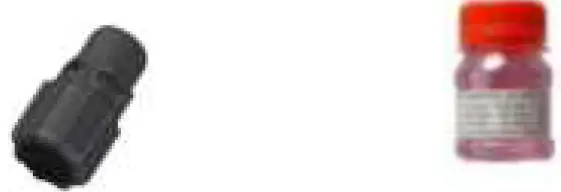
- Probe Holder
- Buffer solution

- Measuring probe
- probe loading collier


INSTALLATION
General rules
Install the equipment:
- on the wall shelf .
- Do not install over a tank of liquids that emanate fumes unless it is hermetically closed.
- At maximum temperature of 45°C, in a ventilated place and easily accessible by an operator for periodical maintenance.

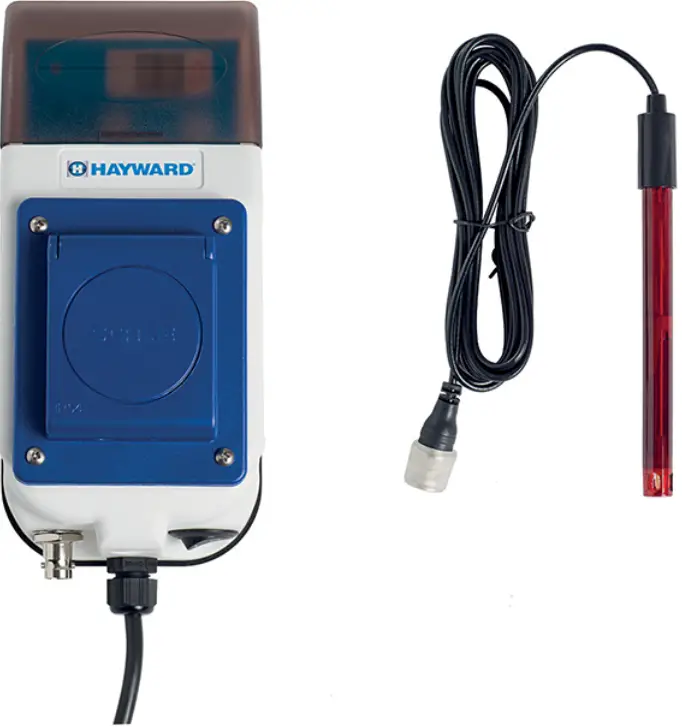
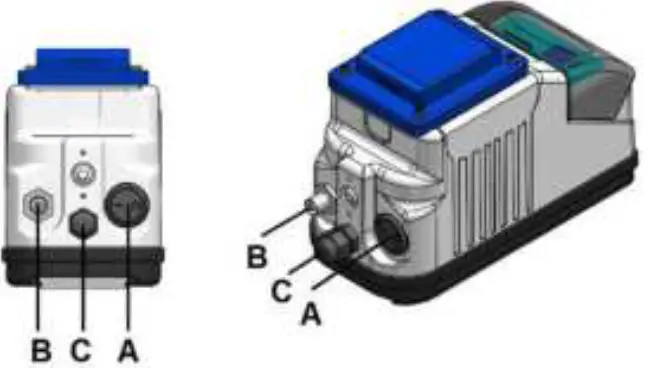
CONNECTIONS
- A= ON/OFF switch
- B=BNC connector of the probe
- C= electric power cable 230V,50Hz

ELECTRIC CONNECTION
ATTENTION! Verify that the unit’s label values are compatible with main power supply.
Generally it is preferred to turn off the unit when the circulation pump is turned off, for this reason it is recommended to follow the electrical installation of the figure
To avoid damages to the circuit board do not install the power supply of the pump directly in parallel with filtration pump power supply but use a relay. The unit is switched on when the display is lit.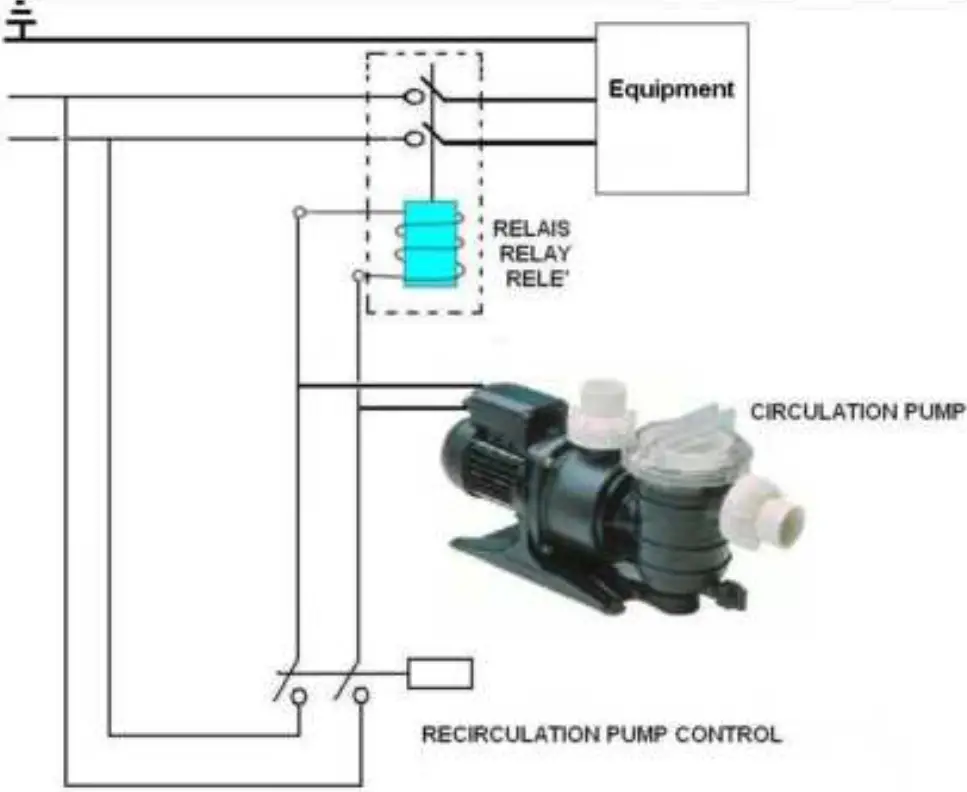
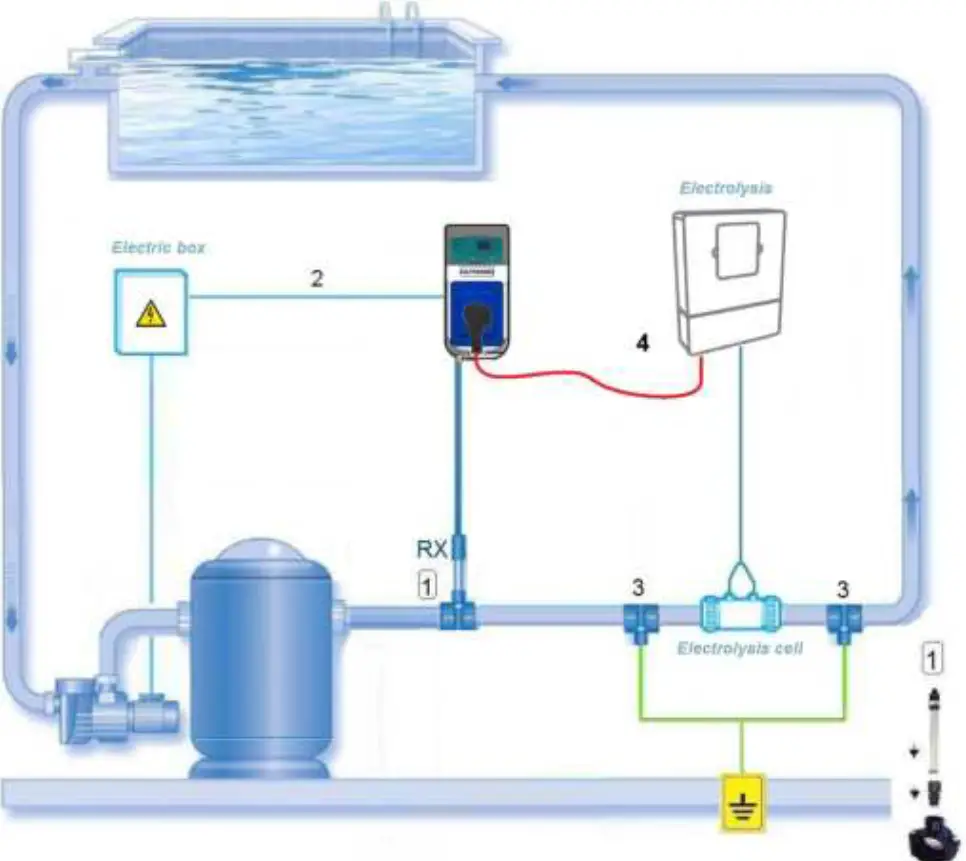
INSTALLATION SCHEME
- Analysis point of the probe
- 230Vac power supply in parallel with the recirculation pump
- Ground socket (optional)
- 230Vac electrolysis power supply (bipolar cable)

PERIODIC MAINTENANCE
Calibration of the unit 1 time every 3 months or in case of measure drift
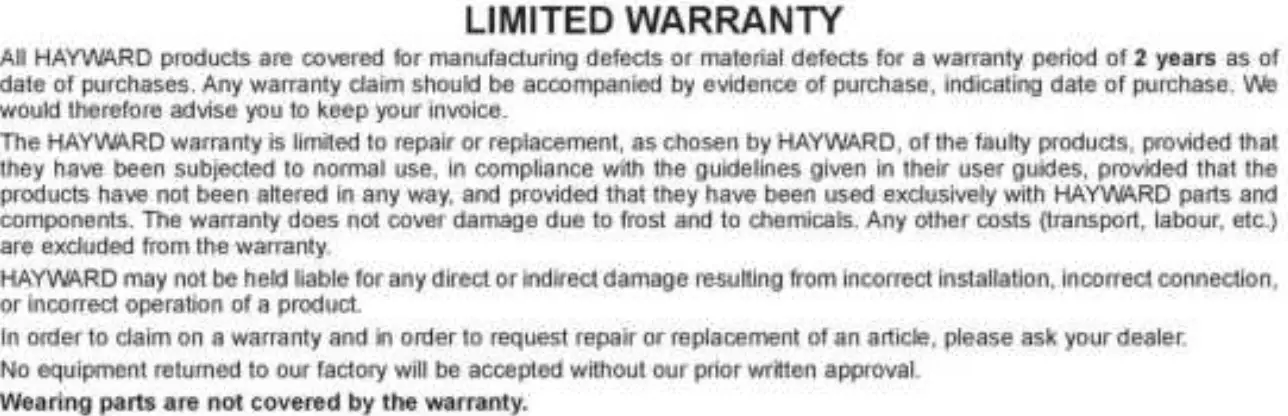
The measuring probe is regarded as a replacing worn part in fact it undergoes a natural aging depending on its use, therefore it does not fall under the warranty.
ELECTRODE CLEANING
Dip the electrode into an acid solution like vinegar (max 2% acid 98% water). Wait five minutes and rinse it with water. It is advisable do not to leave the electrode dry; if it is stored for long time it must be covered with the plastic cap appositely filled with water to keep it with its tip wet
ELECTRODE STORAGE
Always keep the electrodes in the original stocking caps, the liquid inside is a transparent conservation liquid. Never leave the electrodes dry, they will be damaged/ slow response,
PROGRAMMING
- Push and hold the SET button for 3 seconds, on the display the previously stored value will appear. Continue pushing the SET button to select the setpoint value in a range between 300 and 800mV. Once the desired value selected, wait for 5 seconds without pushing any button and the value will automatically be stored.


CALIBRATION
Attention:
- The electrode calibration procedure may require several minutes, for a very accurate reading, it is important to follow the operation sequence indicated here below.
- Be sure that the buffer solution used in calibration always matches the indicated value and that they’re not soiled.
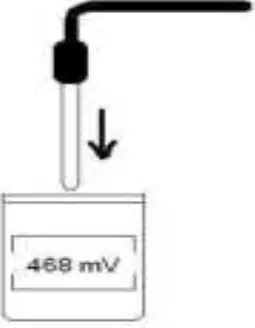
- Dip the probe in the Rx buffer solution at 468mV. Wait a few seconds before reading.

- Push the CAL button for 3 seconds, the value 470 will start blinking on the display. Calibration is done automatically and the display stops blinking when finished.


- If at the end of calibration, the display shows the message “rc”, push the Cal button to exit and return to reading. Repeat the procedure, if after the second try the writing “rc” reappears, the probe is not working correctly and should be changed.


FUNCTIONING AND VISUALIZATION
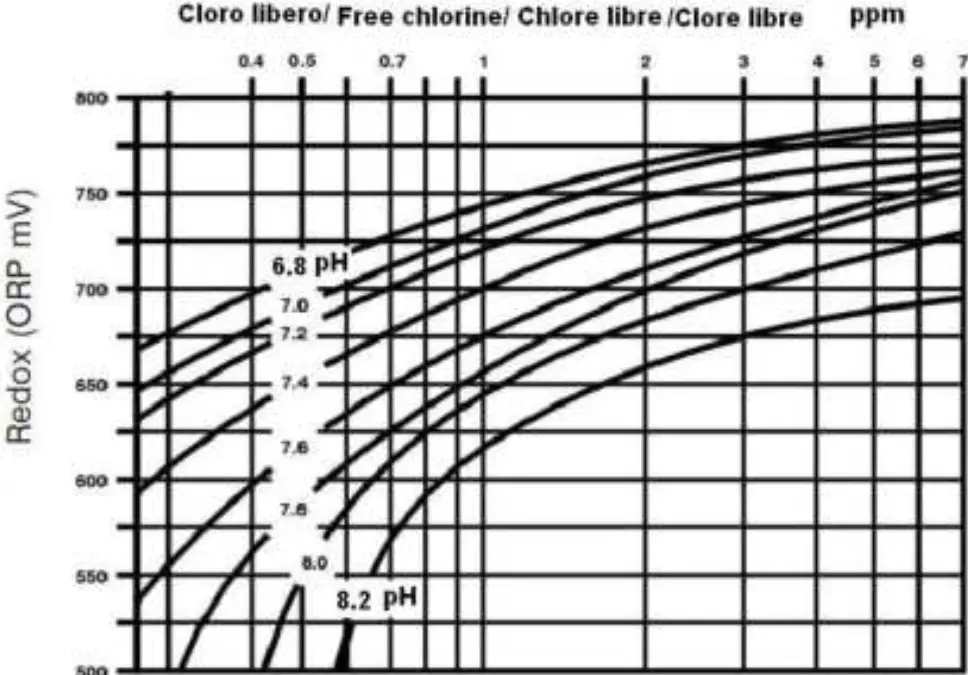
This regulator is a controller that visualizes on the display the value of the mV read from the Rx electrode. It powers the electrical outlet at 230V, 50Hz when the measure is lower than the desired custom’s setpoint
The functioning of the Regulator is ON-OFF type :the electrical outlet will not be powered if the measure is greater than the setpoint while it will be powered at 230V,50Hz if the measure is lower than the setpoint.
Functioning examples: Setpoint 730mV
Reading value 720mV, the Regulator will power the electrical outlet in continuous.
Reading value 740mV, the electrical outlet will not be powered.
DEFAULT SETTINGS
- SETPOINT: Set = 730mV
- PREARRANGEMENT: chlorination

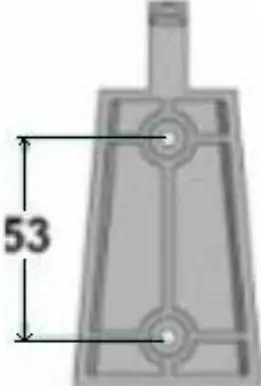
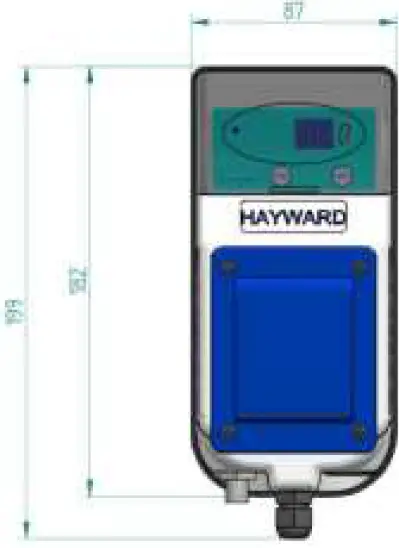
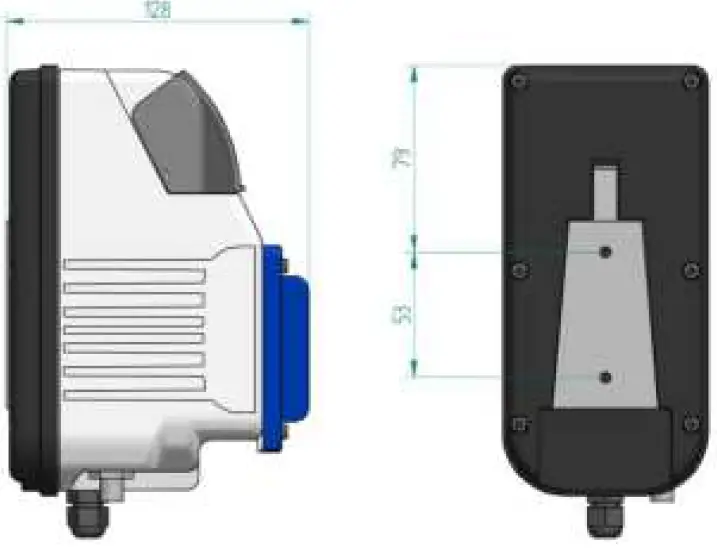
DIMENSIONS
EXPLODED VIEW

| Description | N° | Code | |
| 1 | Pump’s bracket | 1 | 11.100.018 |
| 2 | 3,5×16 TC+ screw | 6 | 00.030.024 |
| 3 | Cover | 1 | 00.010.206 |
| 4 | Gasket | 1 | 00.027.046 |
| 5 | 3×8 TC+ screw | 4 | 00.030.027 |
| 6 | Circuit | 1 | RR.001.645 |
| 7 | Box | 1 | 00.011.133 |
| 8 | Logo label | 1 | 00.006.691 |
| 9 | Front cover | 1 | 00.010.319 |
| 10 | Polycarbonate | 1 | 00.006.336 |
| 11 | 2,9×16 TC+ screw | 4 | 00.030.003 |
| 12 | Schuko socket | 1 | 00.050.119 |
| 13 | REG support | 1 | 00.010.836 |
| 14 | BNC | 1 | 00.050.006 |
| 15 | M12 cable clamp+nut | 1+1 | 00.050.062+00.050.063 |
| 16 | ON-OFF switch | 1 | 00.050.020 |


