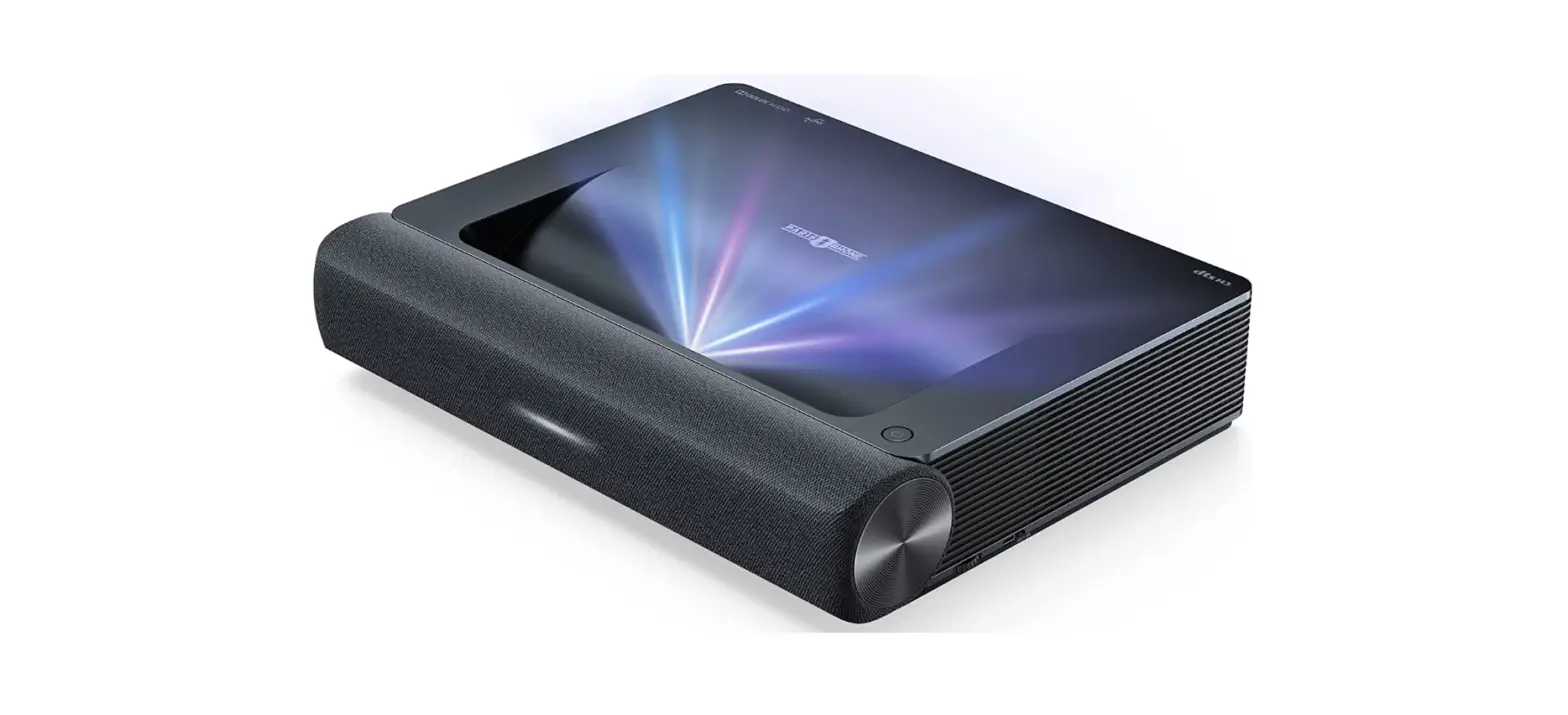
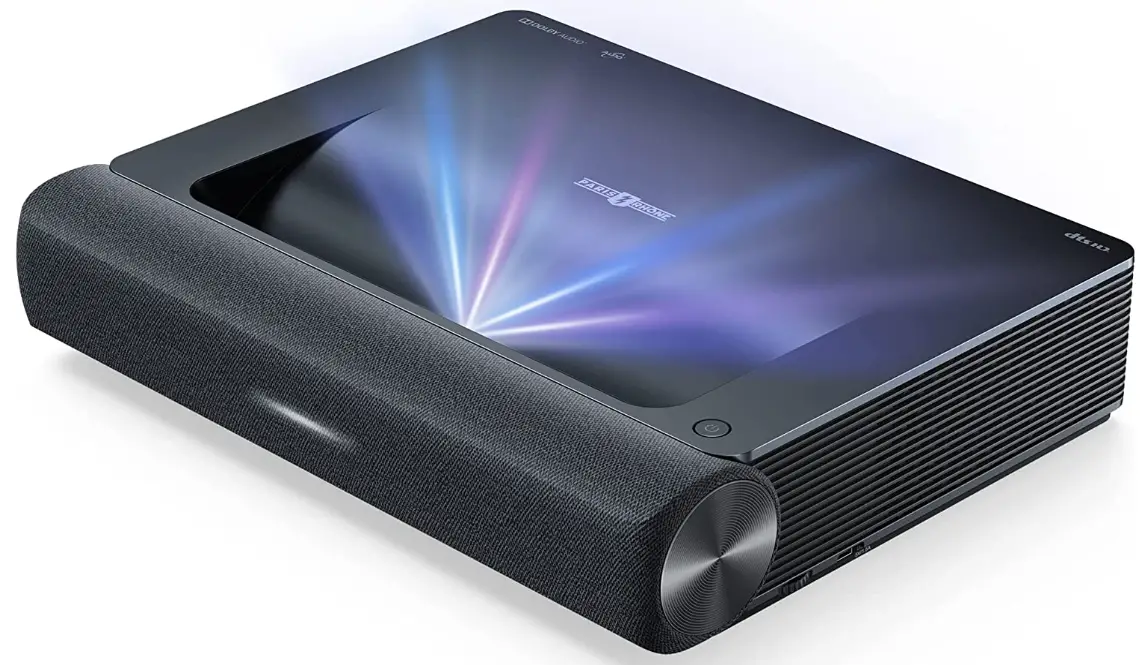
 Paris Rhône PE-LT002Ultra Short Throw Laser Projector
IMPORTANT SAFETY INSTRUCTIONS
ABOUT LASER LIGHT
- Never look into the projector lens when the laser is turned on; this can result in eye damage.
- Do not try to dismantle the projector. It contains a high-power laser component; attempting to modify can result in serious injury.
- Do not allow children to operate the projector. They must be accompanied by an adult for use.
HIGH TEMPERATURE
- Do not place anything that can become warped or damaged by heat near the vents.
- Do not bring your hands or face close to the vents while projection is in progress.
- Do not place flammable materials such as aerosols near the device in case of fire.
FOR HOUSEHOLD USE ONLY READ AND SAVE THESE INSTRUCTIONS
Package Contents
- Parisrhone Laser Projector*1
- Remote Control *1
- AAA Battery 2
- Power Cord 1
- Cleaning Cloth 1
- User Manual 1
- Quick Start Guide
Parts and Components
PROJECTOR
Front/Top 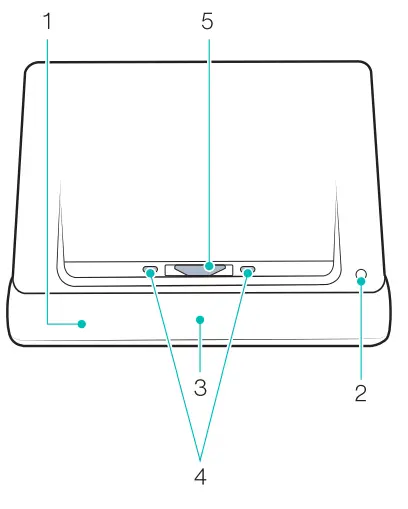
- Speaker
- Power Button
- Status Indicator
- PIR Sensor
- Lens
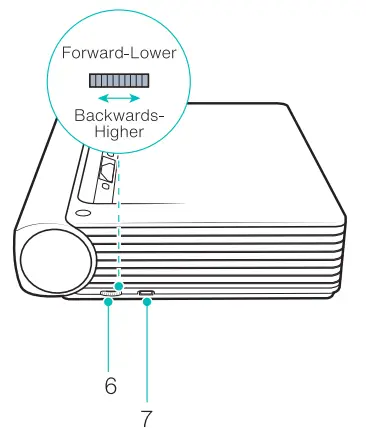
Side
- Height Adjusting Wheels
- USB2.0
Rear/Bottom - USB Port
- HDMI Input 1
- hDMI Input 2 (ARC)
- Audio Output
- AV Input
- Ethernet Port
- Power Port
- eear Foot
- Speaker Air Vents
- Front Foot *2
REMOTE CONTROL
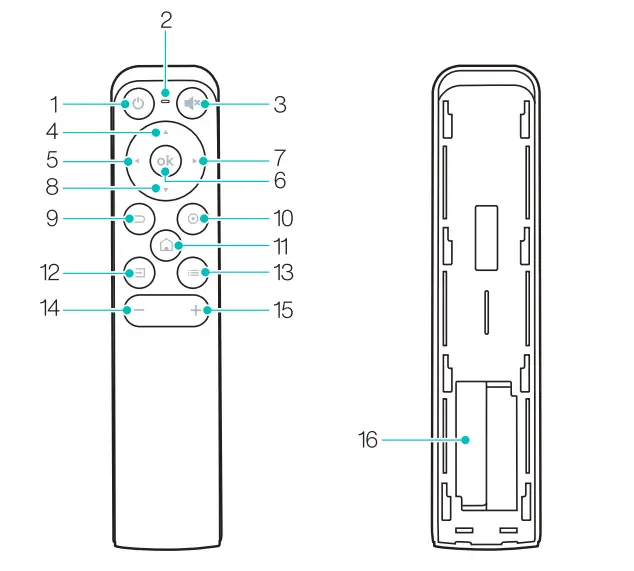
- power
- Indicator Light
- Mute
- Up
- Left
- oK
- Right
- Down
- Return
- Settings
- Home
- Signal
- Menu
- Volume –
- Volume+
- AAA Battery Holder
SPECIFICATION
| Projection Syst | |
| Display Type | DLP |
| Ligh Source | Laser |
| Throw Rate | 0.233 |
| Projection Size | Up o 150″ |
| Resolution | 4K |
| Luminance Uniformity | >80% |
| Contrast Ratio | > 2000:1 (FOFO) |
| Color Gamut | Rec.709 |
| Smart TV System | |
| System | Android 9.0 |
| A | Yes |
| R10 | Yes (decoding) |
| HLG | Yes |
| Keystone Correction | Yes (8 Points) |
| Electric Focus | yES |
| Speaker | 50W |
| Bluetooth In | Yes (connect with mobile phone) |
| Bluetooth Out | Yes (connect with Bluetooth speaker) |
| DTS-HD | Yes (decoding) |
| Dolby Audio | Yes (decoding) |
| m•· | |
| HDMI | 2 ports (1 with ARC) |
| USB | 1 (5V DC,1500mA) |
| Video In | AV(3.5mm) |
| Audio Out | Line out 1 (3.5mm) and S/PDIF 1 |
| -RJ45 | 1 |
| Internet | Wired and wireless
(802.11ac 2.4G / 5G, with DFS) |
| Bluetooth | BT4.2 |
| Input | 100-240V AC, 50/60Hz |
| Power Consumption | <300W |
| Standby Power Consumption | <0.5W |
| miimi | |
| Dimensions | 425*335*100mm/16.73*13.19*3.94 in |
| Weight | 7KG |
| Working Temperature | o-40°c 132-104°F |
| Storage Temperature | -20- 55°C / -4-131°F |
2.1 Quick Installation Guide
PREPARATION
Install the electrical outlet near the equipment. It should be easily accessible. Take the 4 following items into consideration when installing the projector:
- Distance between the projector back and the wall (W1)
- Height: image width (height) (H1), height between the bottom of the image and the desk (H2), height of the desk (H3), and the recommended height of the wall (H4)
- Surface for placing the projector You can place the projector on almost any sturdy, flat and level surface, to project an image.
Dimensions of the desk:- Mobile desk: W2, H3, and L2
- Immobile desk: W2, H3, L2, and W1 (leave enough space to move the device on the desk)
- Image of the projection
The wall for the projection should be larger than the area of your desired image size.
Wall area: length (L3, 2cL 1) x width (H4, 2cH1 + H2 + H3) in the diagram.
Parameters for Projection (100″ for example) 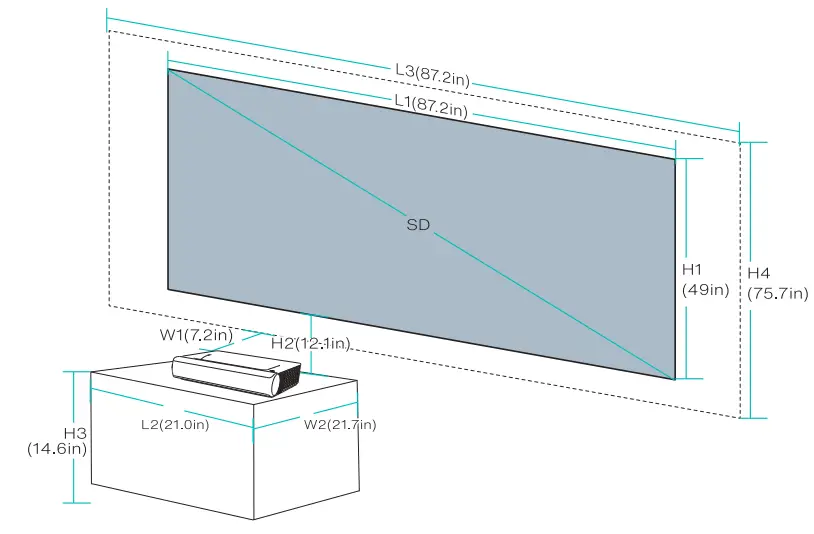 Projection Distance & Image Dimensions
| Device Dimensions
(LxWxH) |
Image SD | Image Length (L1) | Image Width (H1) | Device-Wall Distance (W1) | Image-Desk Height Gap (H2) |
|
80″ | 177.1cm
/ 69.7in | 99.6cm
/ 39.2in |
13.6±1.2cm |
27±1.Scm | |
|
53.3 X 36.8 |
90″ | 199.3cm
/ 78.5in | 112.1cm
/ 44.1in |
18.S±l.4cm |
29.5±1.Scm |
| x 10.7cm I
21.0 X 14.5 X 4.2in |
100″ | 221.4cm
/ 87.2in | 124.5cm
/ 49.0in |
23.4±1.Scm |
32±2.lcm |
|
120″ | 265.7cm
/ 104.6in | 149.4cm
I 58.Bin |
33.1±1.Scm |
37±2.3cm | |
|
150″ | 332.1cm
/ 130.7in | 186.8cm
/ 73.5in |
47.7±2.2cm |
44.5±3.Scm |
|
Image SD | Desk Length (L2) | Desk Width (W2) | Desk Height (H3) | Wall Length (L3) | Wall Width (H4) | |
|
L2;;,L | Mobile
Desk: (W2;;a,W) | Immobile
Desk: (W2;;a,W+W1) | Image
center at 1.3m high |
L3;;,L1 | H4;;,H1+ H2+H3 | |
|
80″ | ;;,45_3cm
/ 178in | 53.9cm
/ 21.2in | ;;,1771cm
/ 69.7in | ;;,179.8cm
/ 70.8in | ||
|
90″ |
;;,50.2cm / 19.8in |
45.4cm / 179in |
;;,199.3cm / 78.5in |
;;,186.5cm / 73.4in | ||
|
100″ |
;;,533cm / 21.0in |
;;,36.8cm / 14.5in |
;;,55cm / 21.7in |
370cm / 14.6in |
;;,221.4cm / 872in |
;;,192.3cm / 75.7in |
|
120″ |
;;a,64.6cm / 25.4in |
20.1cm / 79in |
;;,265.7cm / 104.6in |
;;,204.7cm / 80.6in | ||
|
150″ |
;;,79_2cm / 31.2in |
0cm / Oin |
;;,332.1cm / 130.7in |
;;,228.?cm / 90.0in | ||
Example Calculation for a 100″ Image
- Distance (W1): 18.2cm / 7.2in.
- Heights: H1: 124.5cm I 49.0in; H2: 30.8cm / 12.1in; H3: 37.0cm / 14.6in (thus the image center is at 1.3m I 51.2in high, suitable for audience sitting on a sofa in front); H4: 2:192.3cm / 75.7in.
- Area of the desk (L2 x W2): 2:53.3 x 55cm / 21.0 x 21.7in.
- Area of the wall (L3 x H4): 2:221.4 x 192.3 cm/ 87.2 x 75.7in.
Tips:
- Conversion figures may have been rounded up or down.
- Leave plenty of space around and under the projector for ventilation, and keep the vents unblocked in all directions.
- Position the projector within reach of a grounded electrical outlet or extension cord.
- The projected image size increases as the projector is placed farther from the wall. Move the desk for placing the projector as the distance requires.
- For H3, the provided recommended value of the image center at 1.3 m./51.2 in. high would be most comfortable with the assumption that it will be viewed from a sofa. You can adjust per your personal preference.
INSTALLING THE PROJECTOR
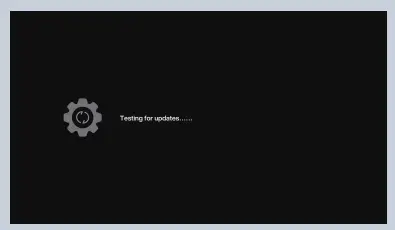
Place the projector on the desk. Move to an appropriate distance for the desired image size while keeping the device parallel with the wall. Connect the projector to a power source and press the Power button on the device or remote to turn it on. Follow the instructions to go through the wizard, including the following operations:
- Choose a language
- Pair with the remote control
- Network settings
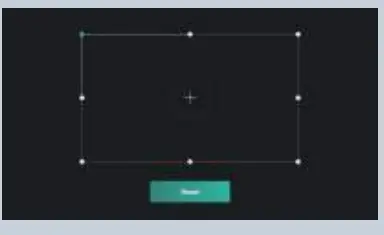
- Adjust the projection area
- Select the time zone

FUNCTION
- MOTION DETECTION
There are two Pl R motion sensors at the front of the projector; when it detects human approaching, the projector will dim the brightness of the laser light to prevent any potential eye damage. This function is active by default and can be disabled in Settings -> General. Press any button on the remote control and the laser light will restore to normal brightness level. - HDR10
This projector supports HDR10, currently the most widely used High Dynamic Range technology, especially for Blu-ray devices and professional game consoles. Compared to devices without HDR10, the projector delivers images with more detail and a wider dynamic range. - DOLBY AUDIO AND DTS DECODING
The projector supports Dolby Audio and DTS (dedicated to sound) decoding, perfect for a home theater.- Manufactured under license from Dolby Laboratories. Dolby, Dolby Audio and the double-D symbol are trademarks of Dolby Laboratories.
- For DTS patents, see http://patents.cits.com. Manufactured under license from DTS Licensing Limited. DTS, the Symbol, DTS and the Symbol together, DTS-HD, and the DTS-HD logo are registered trademarks and/or trademarks of DTS, Inc. in the United States and/or other countries. ©DTS, Inc. All Rights Reserved.
- TEMPERATURE PROTECTION
The built-in temperature protection function can protect the device in the case of a high ambient temperature. The projector will prompt a warning message and enter ECO mode automatically when the ambient temperature is higher than 95° F. If the temperature reaches 104° F, the device will activate the function of protection against
abnormalities and shut off.
Operation Guide
- POWER ON/OFF
Connect the projector to a power source. Press the Power button on the projector or the remote to power it on / off. - POSITION ADJUSTMENT
Refer to the following instructions to adjust the position of the projector and get an undistorted image.
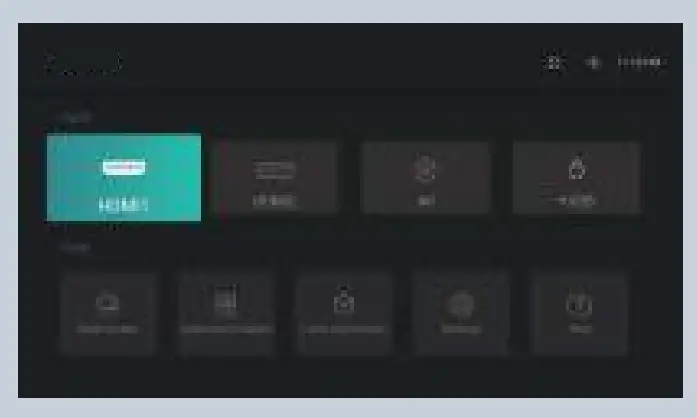
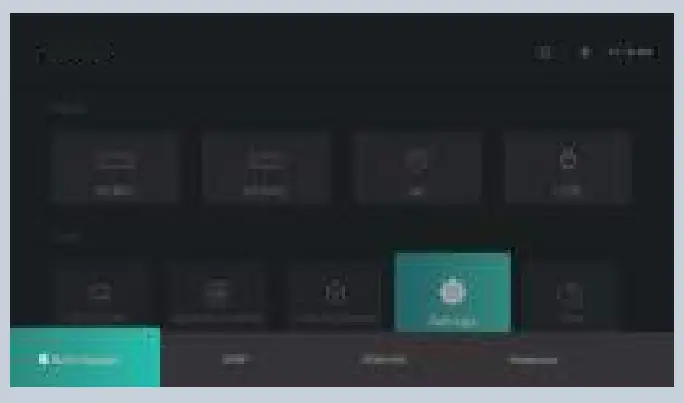
- USER INTERFACE OVERVIEW
There are 2 parts on the homepage: Inputs and Tools.- Signal source: HDMl1, HDMl2 and AV
- Tools: File Manager, App Manager, Local Application, Setting and Help.
On top you can see the Network, Bluetooth, and the time.
- CONNECTION WITH PERIPHERALS
You may connect PS4 game console, ROKU TV, computer, etc., via the HDMI port, DVD device by the AV port, USB device/keyboard/mouse by the USB port (refer to 5. File Management), or professional audio by S/PDIF or LINE OUT port.- Choose the corresponding signal source for the device connected, including HDMl1, HDMl2, and AV.
- Select audio output on the homepage, go to Settings -> Audio, and select the corresponding output method among the following options in Audio Output.
- Speaker: Use the built-in speaker
- Headphone: Connect to headphones
- S/PDIF: Connect to external audio device by S/PDIF port
PCM: All formats will be converted to PCM for output.
RAW: No processing for the source audio. Recommended for Dolby Audio and DTS sources for better performance. - HDMI ARC: Output the sound via the HDMI ARC port
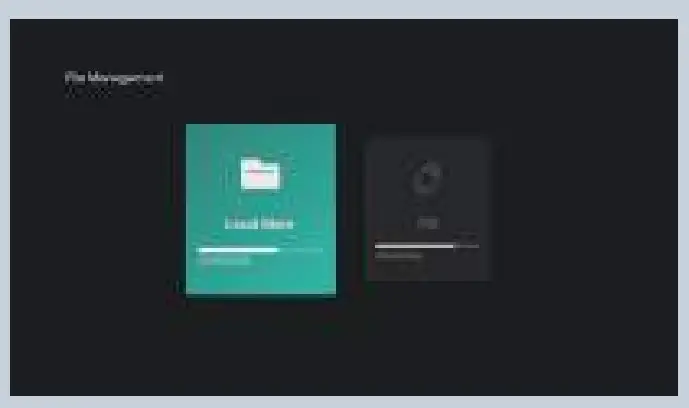
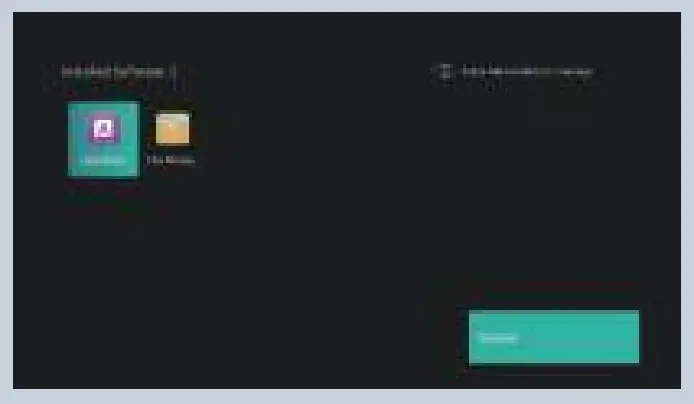
- FILE MANAGEMENT
In File Manager, you can manage the files in the internal flash drive and the plugged USB drive.
- Internal FlashYou can save files to the projector storage, including the apps downloaded, files downloaded in the app, files in the USB drive, etc.
- Using the USB drive
Plug in the USB drive and view files on the interface. - NetHood
You can view files shared by other devices on the same network by NetHood.
Tips:
Support saving, v1ew1ng, copying, and deleting files through the All Files folder under these circumstances.
- SEARCHING FOR/ INSTALLING/ DELETING APPS
The device comes equipped with the Android 9.0 system and the application store. It supports downloading and installation of over 300 apps. Search through, download, and install apps in the Application market.
To delete an app, select the app on the local application, hold down the OK button and select OK on the pop-up window.
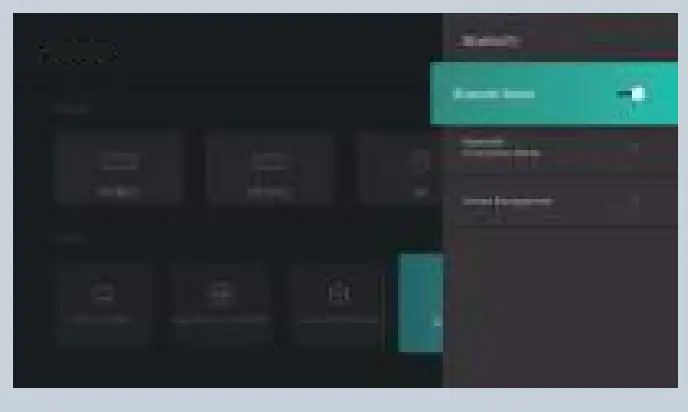
- PAIRING VIA BLUETOOTH
Select the Bluetooth icon at the top right corner to enter the Bluetooth interface.
- Use as Bluetooth speaker
Turn on Open Detection, select Input for Audio Mode on the interface, find and select the projector model under Bluetooth Devices on your phone or laptop to play audio via the built-in speaker of the projector (go to Settings-> General -> Device Name to check the Bluetooth name of the projector). - Pairing with audio devices
Select Output for Audio Mode on the interface, select Search Devices, find and select your audio device under Searched Devices, and the pairing will start automatically. The paired Bluetooth device will appear under Paired Devices. - Pairing with other devices
To pair with a Bluetooth controller, keyboard, mouse, remote, etc., select Search Devices, then select the desired device under Searched Devices to pair.
Tips:
To disconnect with a device, select 1t 1n My Devices and choose the “Disconnect” option.
- Use as Bluetooth speaker
- NETWORK SETTING
Select the Network icon at the top right corner to enter the network setting interface.
For wired connection, plug in the Ethernet cable. For wireless connection, find the network name on the drop-down list, select it, and enter the password to connect. The software supports network anomaly detection.- Show Password cannot be selected when the keyboard is shown. Press the Return button to exit the keyboard and tick the box.
- After entering the password, select the Confirm key to connect.

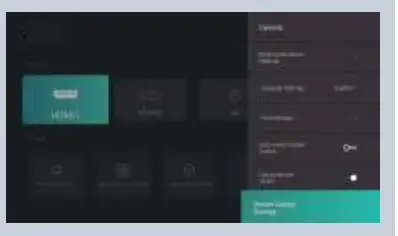
- IMAGE SETTINGS
Go to Settings-> Image, or press the Settings button to enter the interface.
- Image Settings
You can select the image mode or adjust the brightness, contrast, chroma, hue and definition. - Advanced Settings
You can select the MEMC mode or adjust the dynamic contrast, color temperature, refresh rate or reset to factory settings. - Light Source Settings
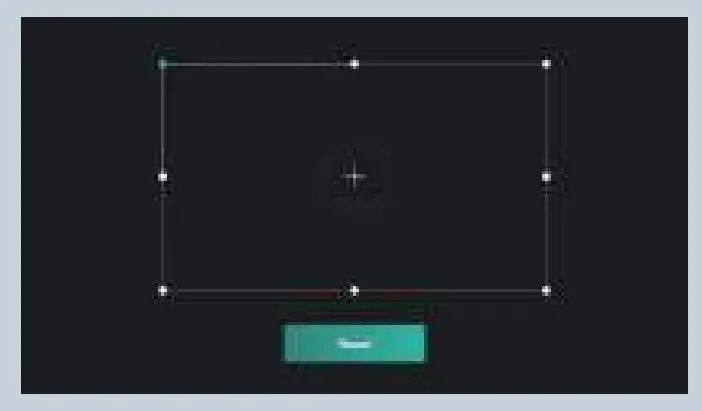
You can select the light source mode or adjust the light source brightness. - Keystone Correction
You can adjust the image.
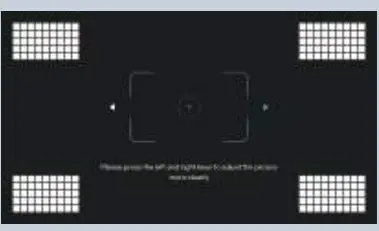
- Electric Focus
You can adjust the focus by the Left/Right button on the remote to get the clearest projection.
- Image Settings
- PLAYBACK SETTINGS
When playing videos, press the Menu button to prompt a sidebar menu which includes the followings: Video ratio, Sound track, Subtitle, Playback settings, Cycle mode, and Audio Effect. - MOUSE MODE
Go to Settings-> General -> Mouse Mode-> On/Off to enter/exit Mouse mode.
While in Mouse mode, you can use the remote as a computer mouse as to control the projector with greater flexibility.
CLEANING AND MAINTENANCE
- Before cleaning, unplug the power cord from the socket. Wipe the exterior of the projector routinely with the provided cleaning cloth or a cloth designed for professional use. Do not apply abrasive detergent, solvent or other coarse chemicals to avoid scrapes.
- Leave plenty of space around the vents for heat dissipation.
- Do not place anything blocking the speaker for better sound.
- Disassembling the device will not only null the warranty but may also cause harm to your or others’ safety.
- Do not use the projector near water, sources of heat, high-voltage electrical wires, or sources of magnetic fields.
- If you use the projector in a country other than where you purchased it, use the correct power cord for that country.
- Do not block the lens during projection using a book or any other object. This could damage the projector or cause a fire.
- Remove the battery from the remote control if not in use for extended amounts of time in case of leakage and damage to the remote.
- Please follow local regulations to promptly and properly dispose of used batteries.
TROUBLESHOOTING
- Do I need to prepare a screen for projection ?
For optimal performance, project onto a flat wall with only one color, preferably white. However, using a recommended screen can provide the best experience. - The motion detection is not working.
Make sure the sensor is not blocked and the function is active in Settings. - The remote control isn’t working.
- Press any button on the remote, if blue light flashes, the remote is still powered.
- Check if there’re obstacles in front of the Parisrhone icon on the projector.
- If the remote can’t work while pointing to the Parisrhone icon, the remote or the infrared function is abnormal.
- If the infrared function is good, check if the remote has been paired Via Bluetooth.
- I can’t play files from my USB drive.
Your USB drive may be in a format that the projector does not Support. Back up the files to your computer, reformat the USB drive, transfer the files back to the drive, and plug the drive into the projector to try again. - I’ve connected a device via the HDMI port, but there’s still no signal.
There are 2 HDMI ports on the projector. Make sure the device is connected to the correct one, the HDMI wire is working, and the HDMI device is powered on. - No sound is playing.
Check whether the correct audio output (built-in speaker/external speaker) is selected in Audio Settings, or if it’s muted. - The image isn’t clear/there is no image.
- Make sure the original video is in high definition.
- Check that the projector is in focus: go to Settings-> Image-> Electric Focus to adjust accordingly.
- Power off the device and unplug the power cord.
- Plug it in again after 1 min and power on the device.
- How do I choose the audio output?
When connecting to a speaker in Settings, there are two output options: PCM and RA- For PCM output, the audio source is decoded. It is compatible with almost all speaker types, but the sound quality may be compromised.
- For RAW output, no decoding is involved for the audio output, thus retaining the original sound (as long as the connected speaker supports the decoded audio). RAW output is generally the optimal choice.
- What do I do if the system breaks down or gets stuck?
Power off the device and unplug the power cord. Plug it in again after 1 min and power on the device.- There may be too much on the system cache. Free up space on Android and delete rarely-used apps.
- There may be a network problem. Check whether your network supports watching videos online. A bandwidth of 8M or higher can usually support 1080p videos.
- The remote control got disconnected / I can’t power on the device wirelessly because the remote isn’t paired.
The projector can only be powered on by pressing the power button on the projector or via infrared. Powering on via Bluetooth is not available. - The system prompts a message of high temperature and the device shuts off automatically.
Make sure the device is working in a proper ambient temperature (within the device’s working temperature range) and that the vents are not blocked. Restart the device. - Q: The device cannot be powered on.
Check whether the device is connected to power properly and that the socket connects to electricity. Press the Power button on the device to start. - How do I use the remote in mouse mode?
Go to Settings-> General -> Mouse Mode -> On/Off to enter mouse mode.
Then you can use the remote as a mouse to control the projector.
Go to Settings-> General -> Mouse Mode-> On/Off to exit mouse mode.
WARRANTY AND SERVICE
We will provide you with after-sales service based on specific local policies. Please contact your local sales representative or after-sales team for more details. If you have any questions, please feel free to reach us via email at [email protected]
FAQS
Can this be used outdoors?
The maximum recommended screen size for the HU715QW projector is 120 inches tall, at 4k UHD (3840 x 2160) resolution.
does a projector like this make since if sitting 12 feet away?
We do not recommend mounting the projector upside down as the screen cannot be reversed.
Can this be mounted upside down and the screen reversed?
Yes, you can adjust the projector so that it displays on a ceiling so that you can watch movies on your bedroom ceiling.
Can this projector be used to project on a ceiling (not mounted to the ceiling, projecting on the ceiling)? I would like to watch movies above my bed.
Yes, you can adjust the projector so that it displays on a ceiling so that you can watch movies on your bedroom ceiling.
It is recommended to install the product through a professional installation services provider. (If installing on the ceiling, modify the projector’s PJT Mode settings) Do not use adhesive, lubricant, oil, etc. when using the mounting equipment. Do not tighten the screws with excessive force since the projector may fall due to the breakage of the screw connection part. Standard screw: M4 x 8 mm, M6 x 10 mm, 1/4-20 UNC x 5 mm (Applicable screw types may vary depending on the model.) Recommended torque: 5-8 kgf.cm (4.34-6.94 lbf-in)
A failure to follow the precautions may result in injury due to the falling projector.u can mount the HU715QW Ultra short throw to the ceiling. When installing the projector on the ceiling, you want to follow the below tips to prevent the projector from falling: It is recommended to install the product through a professional installation
services provider. (If installing on the ceiling, modify the projector’s PJT Mode
settings)
Do not use adhesive, lubricant, oil, etc. when using the mounting equipment. Do not tighten the screws with the excessive force since the projector may fall due to the breakage of the screw connection part. — Standard screw: M4 x 8 mm, M6 x 10 mm, 1/4-20 UNC x 5 mm (Applicable screw types may vary depending on the model.) Recommended torque: 5-8 kg. cm (4.34-6.94 lbs-in) A failure to follow the precautions may result in injury due to the falling projector.
Can you mount this to the ceiling?
Yes, you can mount the HU715QW Ultra short throw to the ceiling. When installing the projector on the ceiling, you want to follow the below tips to prevent the projector from falling:
It is recommended to install the product through a professional installation services provider. (If installing on the ceiling, modify the projector’s PJT Mode settings)
Do not use adhesive, lubricant, oil, etc. when using the mounting equipment.
Do not tighten the screws with an excessive force since the projector may fall due to breakage of the screw connection part Standard screw: M4 x 8 mm, M6 x 10 mm, 1/4-20 UNC x 5 mm (Applicable screw types may vary depending on the model.)
Recommended torque: 5-8 kgf.cm (4.34-6.94 lbf-in)
A failure to follow the precautions may result in injury due to the falling projector.
Does this have the Discovery+ app?
Yes, the HU715QW has the Discovery+ app. For a complete list of streaming apps, check out our library
hong kong 220v is ok ?
Yes, the power supply (voltage/Hz) of the HU715QW is 100V-240V @50-60Hz (PSU Built-in).
What is the latency in gaming mode?
It has been reported that there is an input lag of 53.9ms while in 4k/60p mode. That is more than good enough for casual gaming
For Aspect ratio compatibility, 2.35:1 or 16:9? Which one is the best for movies?
The two standard aspect ratios for cinema are 1.85:1 or 16:9.
VIDEO


