![]()
BUILT TO ENABLE. CREATED TO INSPIRE
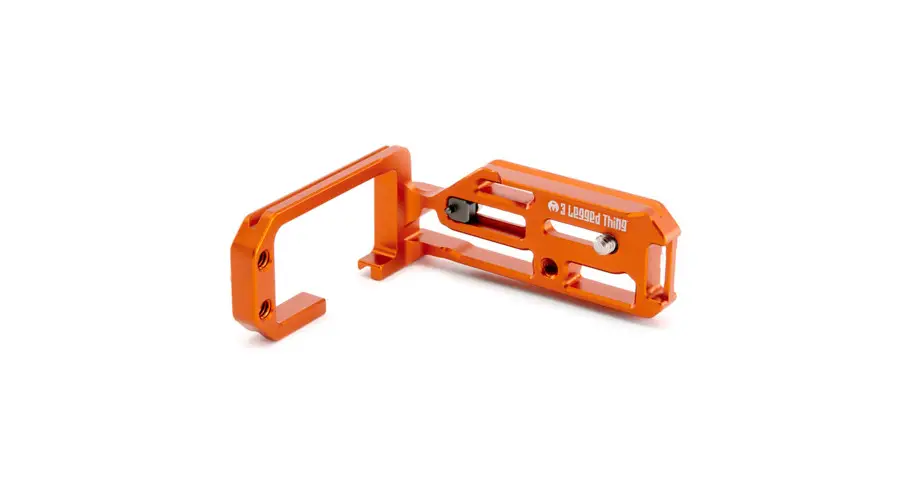
ROXIE
For Canon R5 & R6
Instructions
Look at your box.
See that little sticker with a serial number and a barcode? Peel it off and put it here for safekeeping.
Or don’t.
IMPORTANT
DO NOT USE YOUR L-BRACKET UNTIL YOU HAVE READ THESE INSTRUCTIONS. NO WARRANTY CLAIM WILL BE ENTERED INTO FOR THE MISUSE
OR INCORRECT USE OF THESE PRODUCTS.
Anatomy of ROXIE:
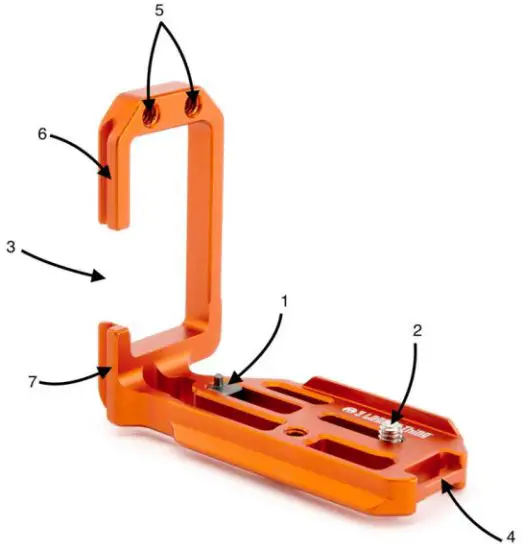
- – Locator Pin
- – ¼”-20 stainless steel mounting screw
- – Door cut-out
- – Strap connector
- – 1/4” Accessory threads
- – Top section of upright
- – Shorter section of upright
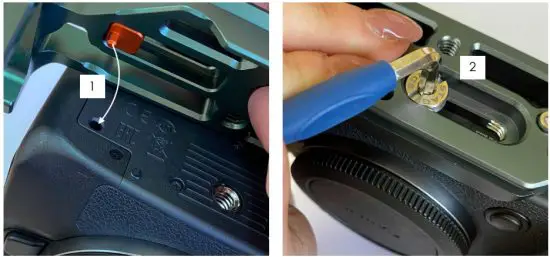
How to set up your ROXIE L-Bracket for use
To it ROXIE to your R5 or R6 body, loosen the locator pin (1) screw and place bracket into the locator slot and tighten. Then tighten the mounting screw (2) to the camera.
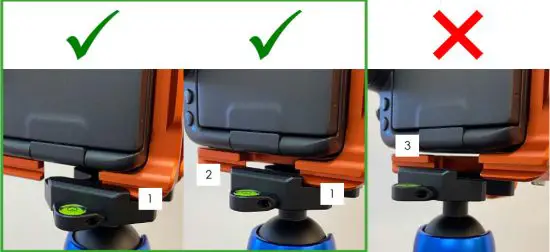
How to clamp the vertical upright
Make sure when you are clamping the bracket into the portrait position you either clamp the shorter section (1) of the upright or have both sections (1 & 2) either side of the ap lamped depending on your clamp length. DO NOT clamp only the top section (3) of the bracket into the clamp.
3LT Social Media

#3LeggedThing
/3LeggedThing
@3LeggedThing
![]()
Unit 9 Kinsbourne Farm
Bury End
Stagsden
Bedfordshire
MK43 8TS
The United Kingdom of
Fadeless Splendour


