![]()
Note Taking Device
User Guide
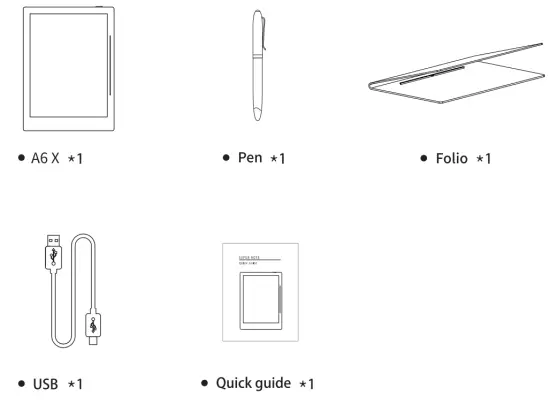
Product bundle list
Product features
Appearance
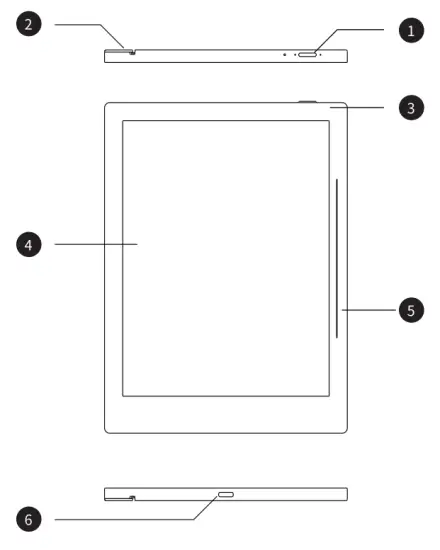
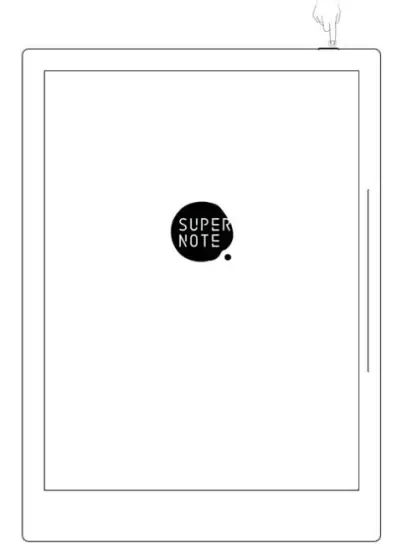
- Power: Short press on the power button to enter sleep/wake up mode. Long press over three seconds to turn on/off the device
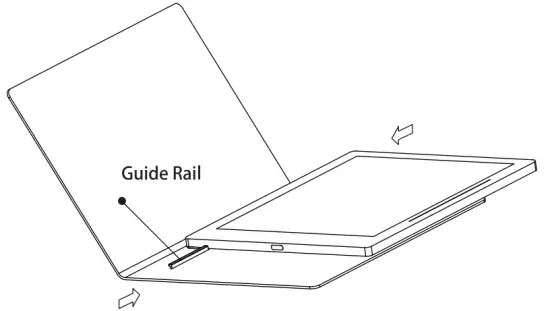
- Folio guide rail groove: For folio assembly and disassembly
- Indicator light Red: Low battery or charging now/Green: Battery charge completed
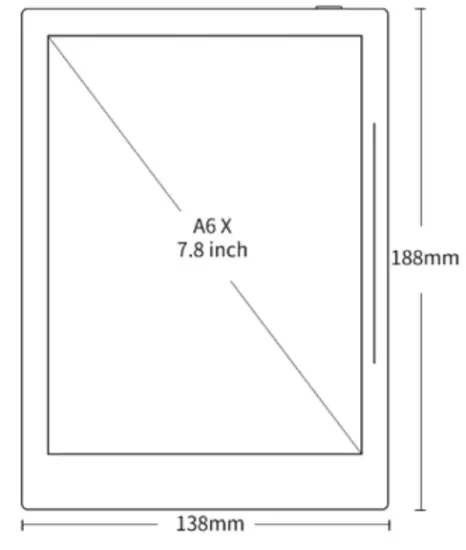
- Display: E Ink EPD/7.8 inches
- Side slide bar: Use your finger to slide from top to bottom to activate the tag menu. Slide from bottom to top to refresh the display
- USB port: Connect to the computer for data transfer or battery charging
Operational function guide
Folio assembly and disassembly
Assembly by fitting guide rail of folio and guide rail groove of the device from top to bottom or vice versa. Same way to remove the cover
Introduction of a tag function
Use a finger to slide from top to bottom to activate the tag menu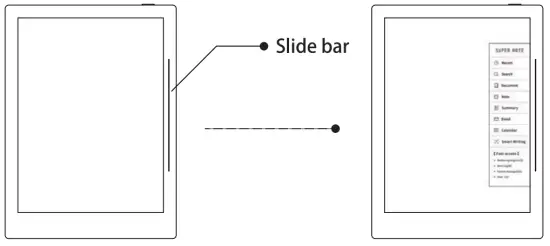
Specifications
| .Display | 7.8″ monochrome digital paper display 1872×1404 resolution (300 DPI) E Ink Carta Display |
| Operation System | Ch a uvet – Handwriting middleware based on Android |
| Memory Storage | 2GB RAM 32GB FLASH |
| Pen | Wacom G14 technology Battery-free, nib-free 4096 levels of pen pressure sensibility |
| Battery | 2900 mAh Rechargeable (Type C USB) |
| Size & Weight | 188mm * 138mm * 7.2mm <255g |
| Work Environment | 0°C-40°C 32°F-104°F . |
Applicable Models
This manual will guide you to use Supernote, and the applicable model is Supernote A6 X.
- Specifications

- Supernote A6 X
Resolution 1872*1404 (300DP1)
Storage: 32G
RAM : 2G
Battery
capacity 2900mAh - Structures
- Supernote A6 X
Resolution 1872*1404 (300DP1)
Storage: 32G
RAM : 2G
1. Battery
capacity 2900mAh
Quick start
1.1 Power on and the initial settings
- Hold the power button on the top right corner of the device, until the Supernote logo appears If cannot turn on, the device might need to be charged (Please refer to FAQ: Unable to power on or freezing problem for help).

- After first power on, please follow the instructions to complete the initial settings :
- System languages: English, Japanese, Simplified Chinese, and Complex Chinese (Please refer to the chapter language, date& time for more help)
- Wi-Fi settings (Please refer to Connect to Wi-Fi)
- Account registration and login(Please refer to Register and login)
- Preferred Setting( Please refer to Preferred settings, all Illustrations in this user manual take the right-hand mode as an example.
- User experience project(Please refer to User experience project on/off)
- Create your first E-Notebook (Please refer to Create a notebook)
1.2 Connect to Wi-Fi
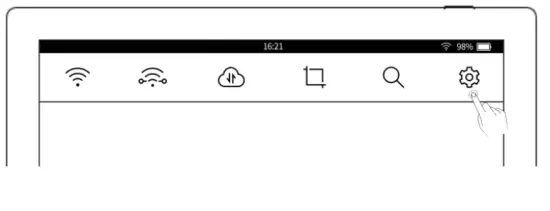
- Activate the top status bar Swipe down from the top of the screen
• Tap the settings icon on the top status bar
• Tap “WiFi”
- Wi-Fi

- Tap “WLAN ON”
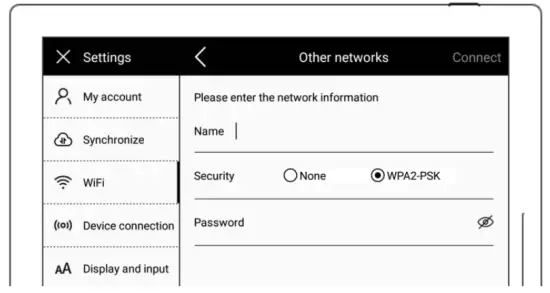
- Select an SSID to connect (enter the password if needed)


- Tap “Other” to join a hidden network (enter SSID, security and password)
 If the Wi-Fi icon
  is lit up, the device is connected. (You can try to log in to your account from your device to confirm the connection status).
 If the Wi-Fi icon
 1.3 Register and log in
- Activate the top status bar
• Tap the setting icon
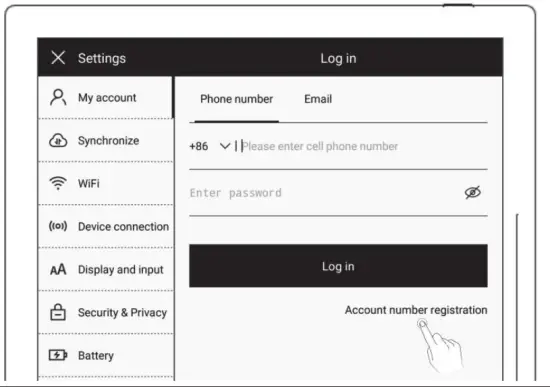
- My account
• Tap”Account number registration” (If already registered, you can log in directly)
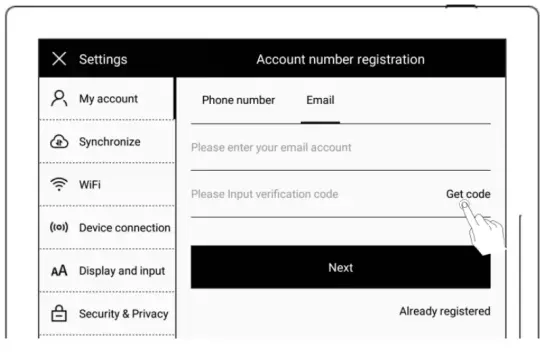
- Account number registration: both a mobile phone number and email are available
• Enter mobile phone number or email address
• Tap “Get code” (The verification code will be sent via SMS or email)
• Enter the verification code
• Tap “Next”
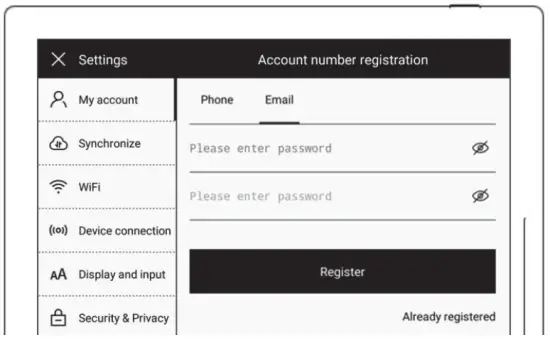
- Set account password
• Enter the password twice
• Tap “Register” *Note: After completing registration, it will jump to the “Successful login” page to bind your account to the device (Refer to “Cloud register and log in” or “Mobile APP quick login” to get more registration methods).
The device can be only bound to a sole account and you have to reset the device to factory settings if you want to switch to another account (Refer to “Reset” to restore factory initialization settings).

 *Note: After completing registration, it will jump to the “Successful login” page to bind your account to the device (Refer to “Cloud register and log in” or “Mobile APP quick login” to get more registration methods).
Bluetooth
- Activate the top status bar
• Tap the setting icon
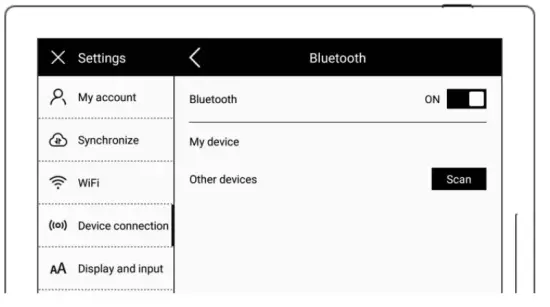
• Tap “connect device”
• Tap”Bluetooth”
- On the “Bluetooth” page
• Turn Bluetooth ON
• Tap”Pairing”
• Select the device to be paired, input pairing code if required
Office
Support WORD document editing and browsing (support Bluetooth keyboard input editing)
1.1Browse Mode
Click the thumbnail page on the right to jump to the page directly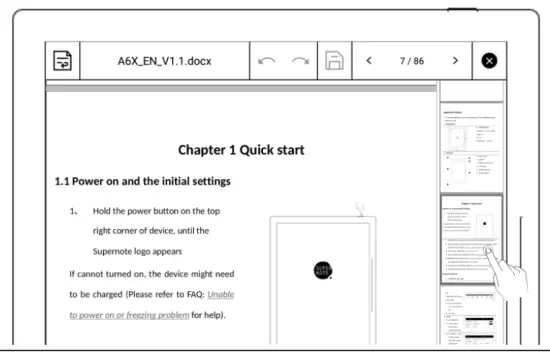 Click the left/right buttons of the page number on the top-right of the screen to turn pages
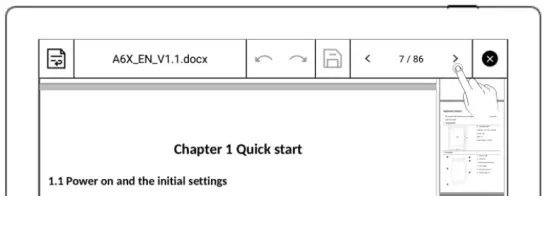 Use a finger or stylus to slide up/down to turn the page directly
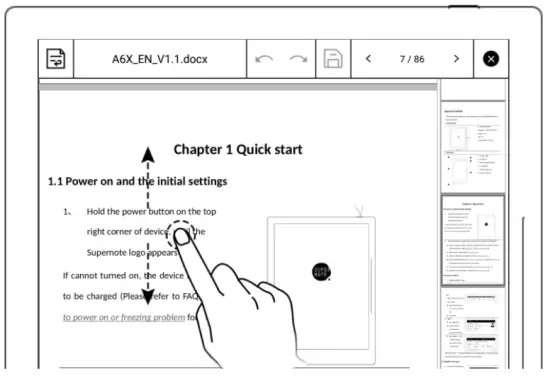 Note: Click page number to close thumbnail pages
 1.2 Gesture to zoom in/out the page
Use two fingers on the screen to zoom in and out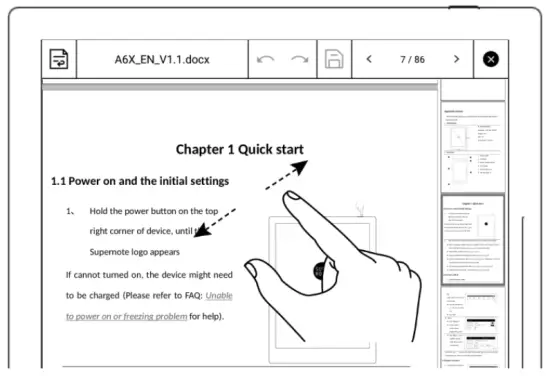 1.3 Repage View
Click ![]() to enter the page view. In this view, the text can be adjusted by gestures to zoom in/out the page
to enter the page view. In this view, the text can be adjusted by gestures to zoom in/out the page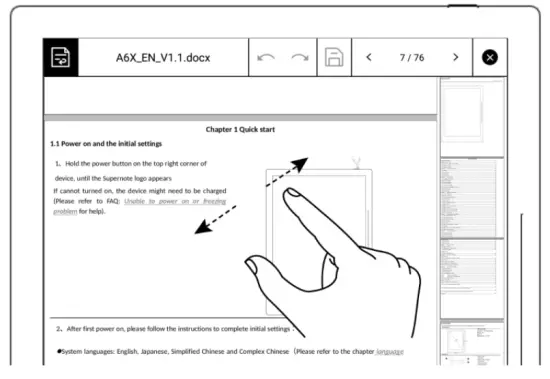 1.4 Editing
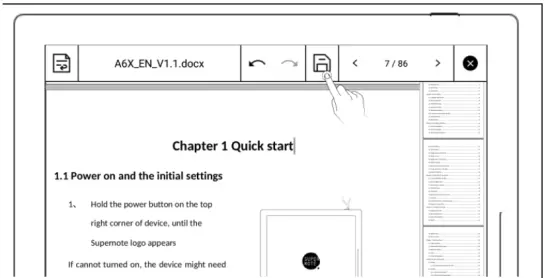
- Tap the text area of the page, input the editing text on the keyboard
- Tap
 to save the change
Convenient Features
Organize your files
You can organize (Rename/add/move/delete) all your files
Create a new folder
- Use the sliding bar menu, tap “Inbox” to access the file management directory page; or tap
 to close the note or document and return to the file management page
- Then tap the icon
 to create a new folder

Attentions
| • Fragile Screen. No Extrusion | • Disassembly only by the Professionals |
 | |
| • Keep Away from Liquid | • Keep Away from Strong Magnetic and Strong Electrostatic Fields |
 | |
- Supernote Pen is only used for Supernote devices with FeelWrite film Please do not use it on other devices to avoid scratch or damage
- The screen is fragile, keep away from extrusion, bump, drop, sharps
- Keep away from strong magnetic and strong electrostatic fields to avoid any damage
- Please do not disassemble the device, a warranty is only provided by professionals
- Please keep away from severe environments such as high/low temperatures, dry, humidity, smoke, and dust
- Do not disassemble, crush, and squeeze Lithium-Ion battery Keep away from fire and heat
- The device is not waterproof, please avoid water and other liquids
- The Company shall not be liable for damage or deletion of in-flight data due to personal abnormal operation or other unexpected circumstances, nor any indirect loss
FCC Statement
Any changes or modifications not expressly approved by the party responsible for compliance could void the user’s authority to operate the equipment. This device complies with part 15 of the FCC Rules. Operation is subject to the following two conditions: (1) This device may not cause harmful interference, and (2) This device must accept any interference received, including interference that may cause undesired operation.
Note: This equipment has been tested and found to comply with the limits for a Class B digital device, pursuant to part 15 of the FCC Rules. These limits are designed to provide reasonable protection against harmful interference in a residential installation. This equipment generates, uses, and can radiate radio frequency energy and, if not installed and used in accordance with the instructions, may cause harmful interference to radio communications. However, there is no guarantee that interference will not occur in a particular installation. If this equipment does cause harmful interference to radio or television reception, which can be determined by turning the equipment off and on, the user is encouraged to try to correct the interference by one or more of the following measures:
- Reorient or relocate the receiving antenna.
- Increase the separation between the equipment and receiver.
- Connect the equipment into an outlet on a circuit different from that to which the receiver is connected.
- Consult the dealer or an experienced radio/TV technician for help.
RF Exposure Information (FCC SAR):
This device has been tested for FCC SAR and meets the FCC limit.
ISED RSS Warning/ISED RF Exposure Statement ISED RSS Warning: This device complies with Innovation, Science, and Economic Development Canada licence-exempt RSS standard(s). Operation is subject to the following two conditions: (1) this device may not cause interference, and (2) this device must accept any interference, including interference that may cause undesired operation of the device.
Note: For 5150-5250MHz is only for indoor use.
RF Exposure Information (ISED SAR) : This device has been tested for ISED SAR and meets the ISED limit.


