VT310 InHand Networks Vehicle Tracker User Manual![]()
Copyright © 2019. All rights are reserved by InHand Networks and its licensors. Without the written permission of the Company, no unit or individual is allowed to excerpt, reproduce or transmit in any form part or all of the contents in the manual.
Structure of VT310
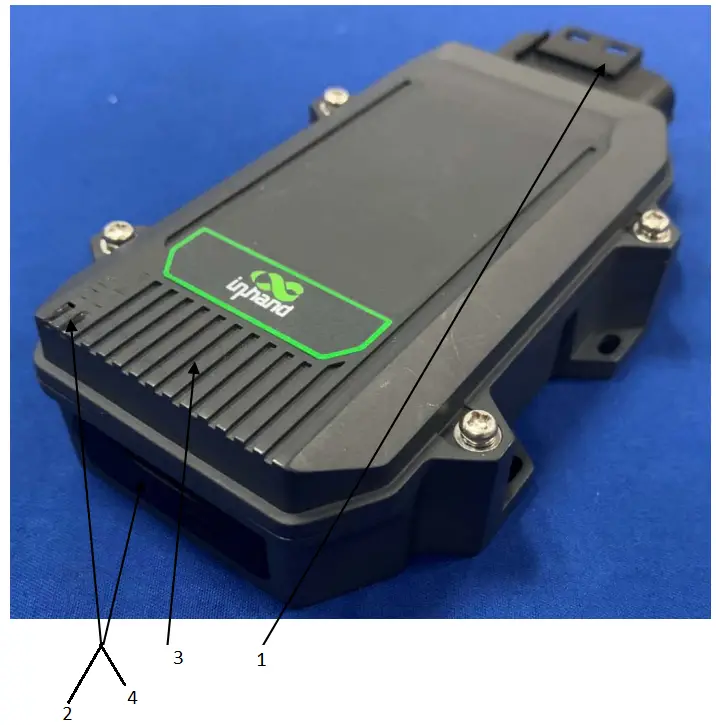
- Cable Interface
- Cellular Indicator
- GNSS Indicator
- SIM Card
Installation and Wiring
VT310 comes with a built-in battery. The VT310 device can be powered by a built-in battery or an external DC power supply. Generally, when an external DC power supply is available, the external power supply is preferred.
LTE antenna and GNSS antenna are built in VT310. Users can use without operation.
The information of the LTE Module:
Mode Number: EMS31-X, FCC ID: QIPEMS31-X, IC: 7830A-EMS31X
Installing the SIM card
Before using the device, you need to install the SIM card. When the device is powered on, it will automatically dial up the network.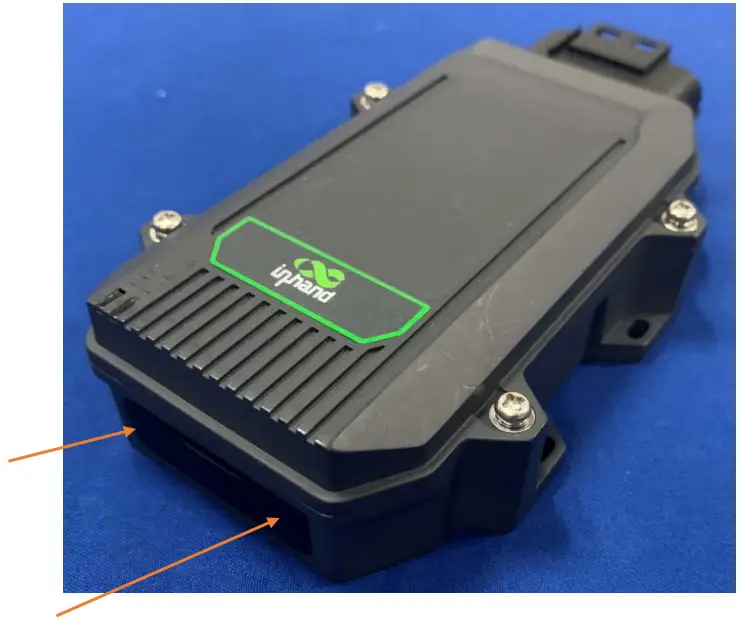
Arrow position for SIM card cover. Open the cover and insert the SIM card according to the SIM card direction indicated on the cover.
Power to VT310
- a) Use external power supply
Connect the positive and negative terminals of the external power supply with X-V+ and X-V- respectively: - b) Use built-in battery for power
VT310 provides 1200mAbuilt-in rechargeable battery. When there is no external power input, stable power input can be provided for the equipment.
Confirm Work Status
Confirm by Indicator Status
a) GNSS Indicator (Green)
| Function | Indicator status |
| GPS disable | OFF |
| GPS enable | FLASH(0.5Hz) |
| GPS to timing success | FLASH(5Hz) |
| GPS to position success | Always on |
b) Cellular Indicator (Orange)
| Function | Indicator status |
| Module disable | OFF |
| Module enable | FLASH(0.5Hz) |
| Dial succeeded | FLASH(5Hz) |
Confirm by Configuration Mode
a) Wiring: Serial port (check in device Manager after connecting PC with USB to serial port line):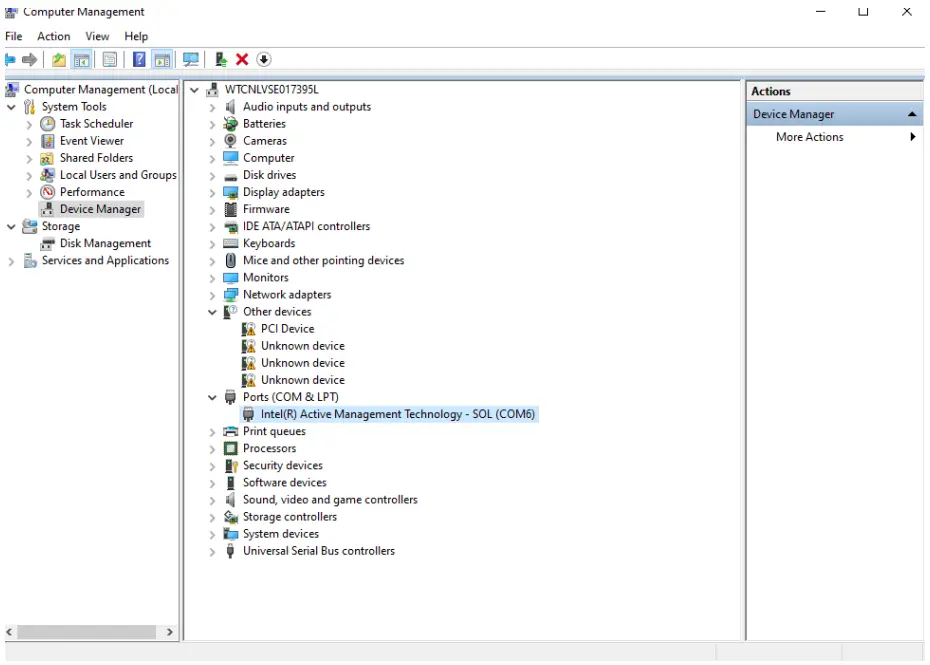
VT310 devices connect serial ports (cables R232-Tx1, RS232-Rx1, GND connect USB to 232 serial ports):
b) Open the serial port to enter the Configuration Mode:
Use “SSCOM42”, click open serial port, enter +++ in the character box, and then click Send. notice:
- The serial port number corresponding to VT310 should be selected; Baud rate: 115200; Data bit: 8; Stop bit: 1; Check bit: None; Asthenosphere control is not supported.
- When sending “+++” into configuration mode, be careful not to check “HEX Send” or “send new line”.


The window enters the configuration mode, then closes the serial port.
Windows Install serial port tools , eg : SecureCRT , as follow configuration: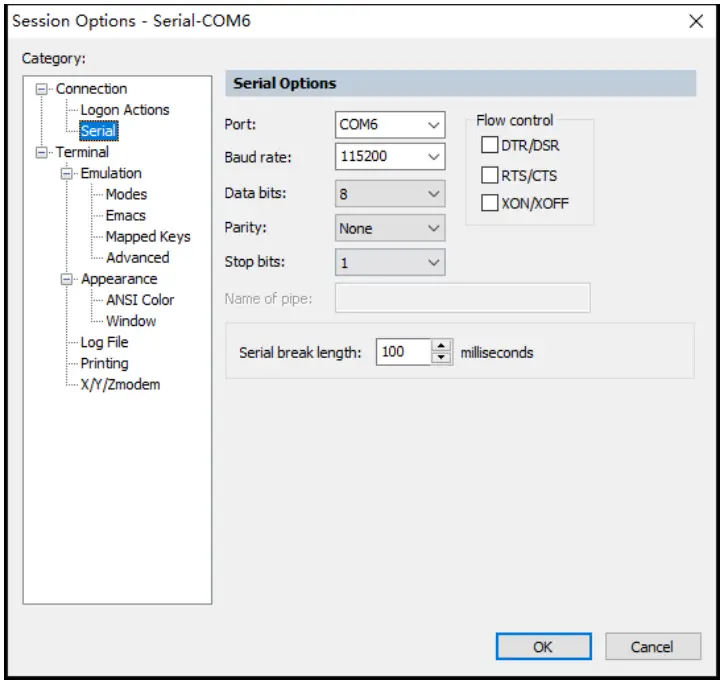
c) Show work status by commond:
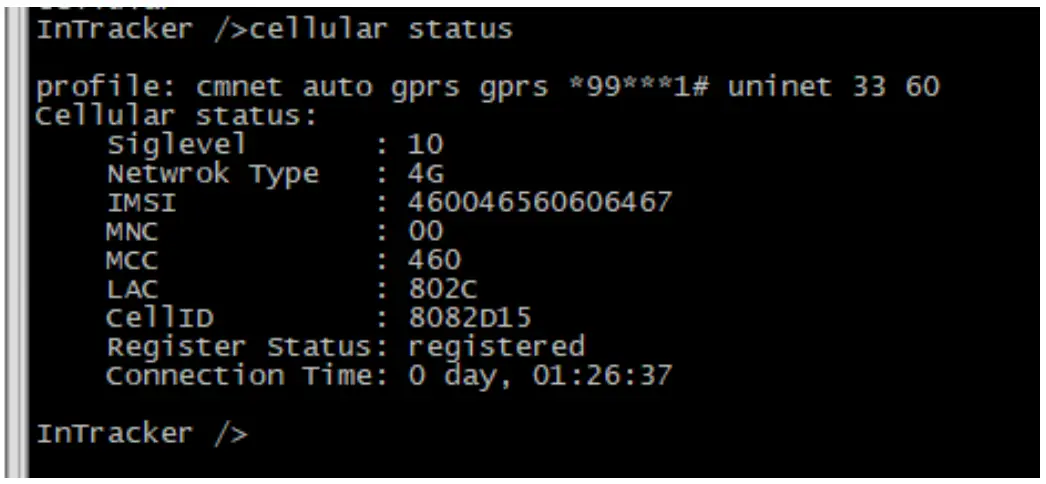
- cellular status
commond: cellular status
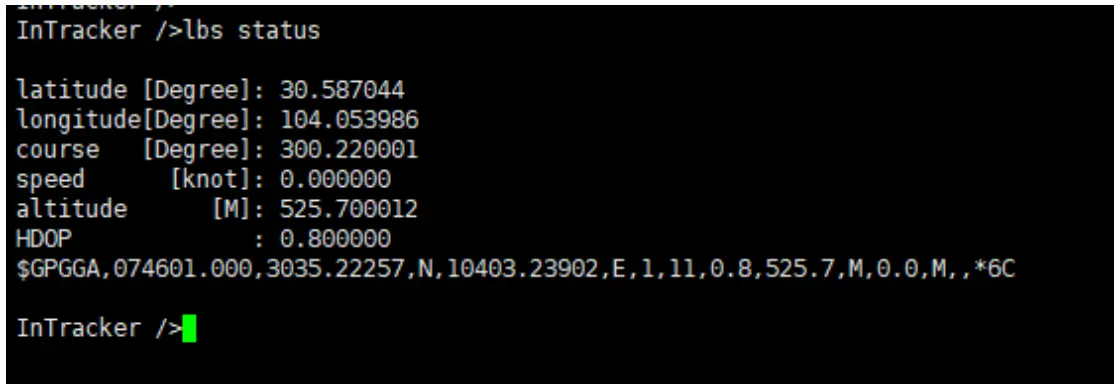
- GNSS status
Commond: lbs status
Connect to Wialon
Wialon – the platform for GPS tracking and IoT.
Configuration to VT310
commond: wialonClound set 1
notice: commond to take effect after restart
Configuration to Wialon
| URL | https://hosting.wialon.com/ |
| NAME | inhand_free |
| PWD | evan1234 |
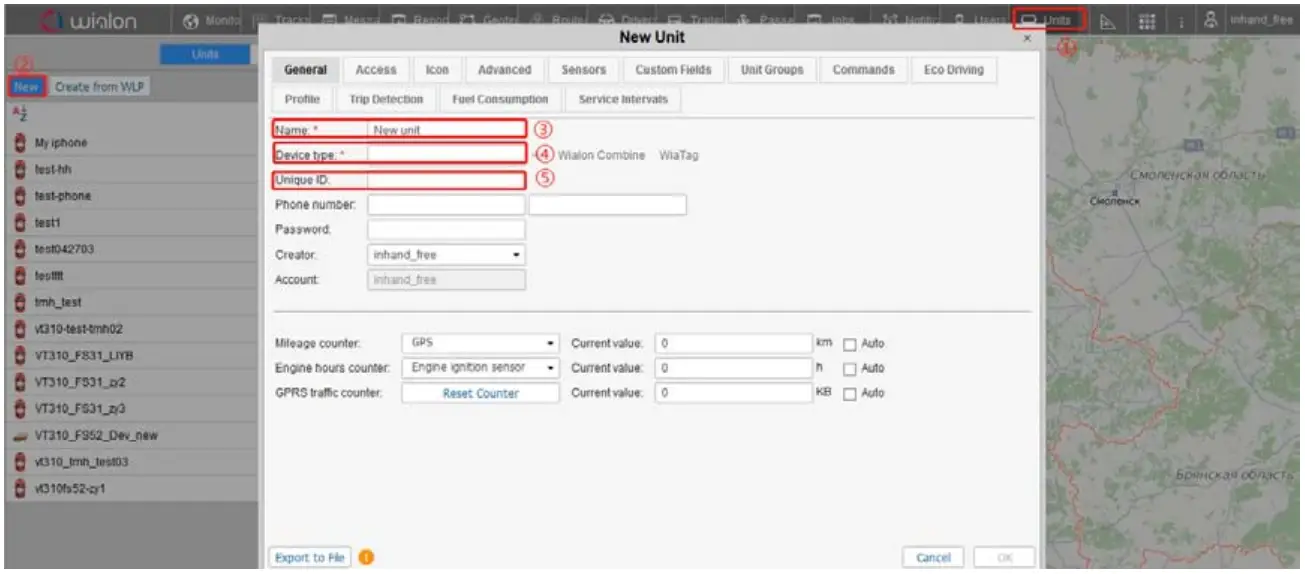
| Add VT310 to the Wialon , Please in the order indicated above. | |
| ③ | user defined |
| ④ | Choose Wialon Combine |
| ⑤ | SN |
Enters VT310 configuration mode to get SN: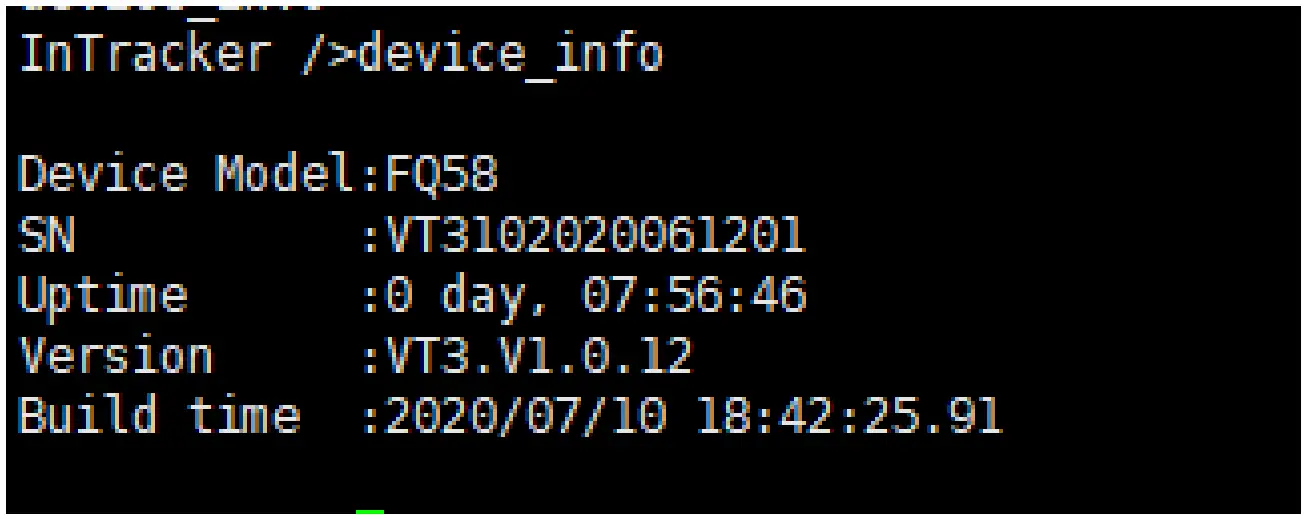
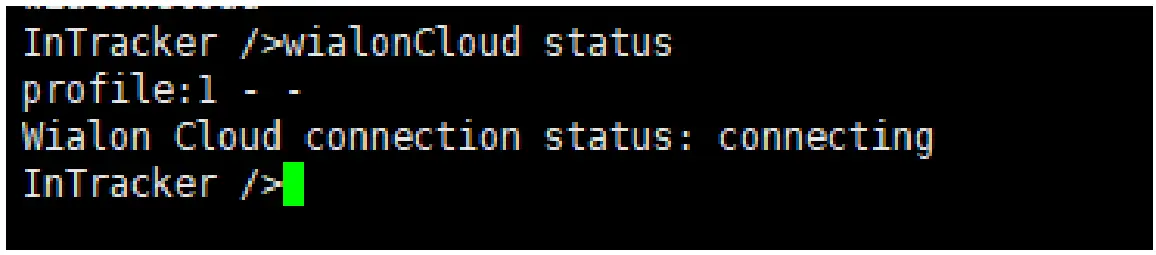
Confirm Wialon connection status
- By commond
Commond: wialon status
Connect success: connected
Connecting: connecting
Connect failed: disabled - By Wialon
Switch to “Monitor” , When the device is online , it appears green ; When the device goes offline, it appears grey.

Notice
Parameters of Cellular
VT310 supports ordinary card automatic dialing, The default dialing parameter for white CARDS is ”internet auto gprs gprs *99# internet 2 60” . if dial by white CARDS , Please use ”cellular set ” to Configure dialing parameters , eg: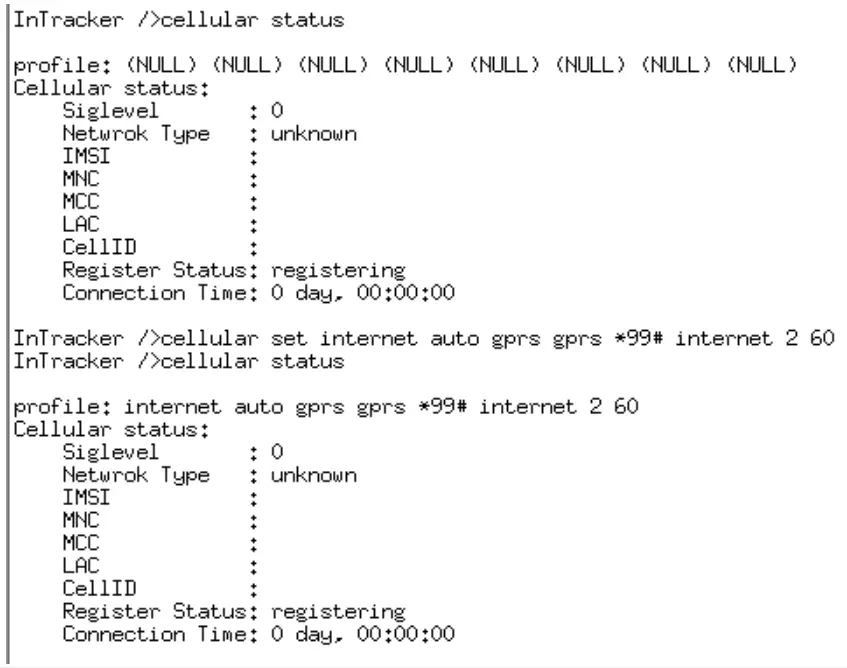
When the configuration is complete, enter the command“ reboot”to restart the device.
ISED STATEMENT
This device complies with Industry Canada’s license-exempt RSSs. Operation is subject to the following two conditions:
- This device may not cause interference; and
- This device must accept any interference, including interference that may cause undesired operation of the device.
FCC warning
This device complies with part 15 of the FCC Rules. Operation is subject to the following two conditions:
- This device may not cause harmful interference, and
- this device must accept any interference received, including interference that may cause undesired operation.
This equipment has been tested and found to comply with the limits for a Class B digital device, pursuant to part 15 of the FCC Rules. These limits are designed to provide reasonable protection against harmful interference in a residential installation. This equipment generates, uses and can radiate radio frequency energy and, if not installed and used in accordance with the instructions, may cause harmful interference to radio communications. However, there is no guarantee that interference will not occur in a particular installation. If this equipment does cause harmful interference to radio or television reception, which can be determined by turning the equipment off and on, the user is encouraged to try to correct the interference by one or more of the following measures:
- Reorient or relocate the receiving antenna.
- Increase the separation between the equipment and receiver.
- Connect the equipment into an outlet on a circuit different from that to which the receiver is connected.
- Consult the dealer or an experienced radio/TV technician for help.
Any modification to the product is not permitted unless authorized by In Hand Networks . It’s not allowed to disassemble the product. It is not allowed to replace the system or change components unless with permission and certification. Please contact the technical support department of In Hand Networks or local branches for help.
RF Exposure Statement
This equipment complies with radiation exposure limits set forth for an uncontrolled environment. This equipment should be installed and operated with minimum distance 21 cm between the radiator& your body. This transmitter must not be co-located or operating in conjunction with any other antenna or transmitter.
Contact Us
InHand Networks
www.inhandnetworks.com
Version: V1.0
February, 2020


