AKEEYO AKY-610L Motorcycle Driving Recorder and Action Camera Instruction Manual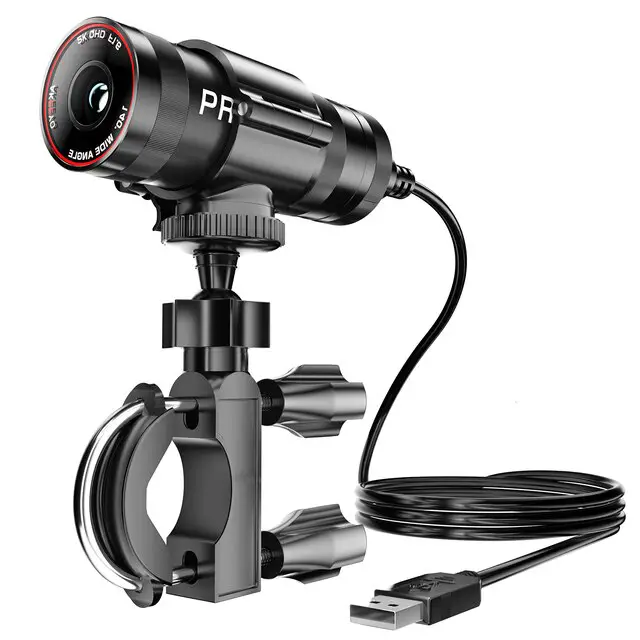
Thank you for purchasing our products. Please check this instruction manual before use.
If you have any questions, please contact the support center
For Safe Use
The following headings are used to safely and effectively apply this product.
Please fully understand and use the product correctly
![]() Warning
Warning
Improper operation can result in death or severe injuries
![]() Notice
Notice
Improper operation can result in injury or property damage
The meaning of the symbols
![]() This symbol reminds you that this is prohibited
This symbol reminds you that this is prohibited![]() This marker is a reminder to follow the instructions
This marker is a reminder to follow the instructions
![]() Warning
Warning
![]() When using this product, obey the laws of your local government and the traffic laws of each district
When using this product, obey the laws of your local government and the traffic laws of each district
![]() Do not operate while riding a motorcycle or bicycle
Do not operate while riding a motorcycle or bicycle
![]() Do not install the motor camera in a location that obstructs the line of sight or
Do not install the motor camera in a location that obstructs the line of sight or
interferes with driving, it may result in an accident or personal injury
![]() Do not put metal objects, water, flammable substances, chemicals or other liquids
Do not put metal objects, water, flammable substances, chemicals or other liquids
into this product. This can result in short circuit and cause fire.
![]() Do not disassemble or modify this product.
Do not disassemble or modify this product.
This may result in electric shock, fire, or burn
![]() If the liquid leaks from the battery on the eyes or splashes on the skin, wash it off with clean water. After washing, ask your ophthalmologist or dermatologist for help.
If the liquid leaks from the battery on the eyes or splashes on the skin, wash it off with clean water. After washing, ask your ophthalmologist or dermatologist for help.
In addition, the leaked liquid can remain in this product.
Therefore, contact the store where you bought the product
![]() Notice
Notice
![]() If you smell any particular smell or hear any noise, stop using it immediately
If you smell any particular smell or hear any noise, stop using it immediately
![]() Do not charge or store in high temperature and humid places
Do not charge or store in high temperature and humid places
![]() This product is IP65 waterproof, which is not completely waterproof.
This product is IP65 waterproof, which is not completely waterproof.
Be careful when using it, do not use it in heavy rain, or put the host in the water
![]() Please follow local regulations when disposing of this product
Please follow local regulations when disposing of this product
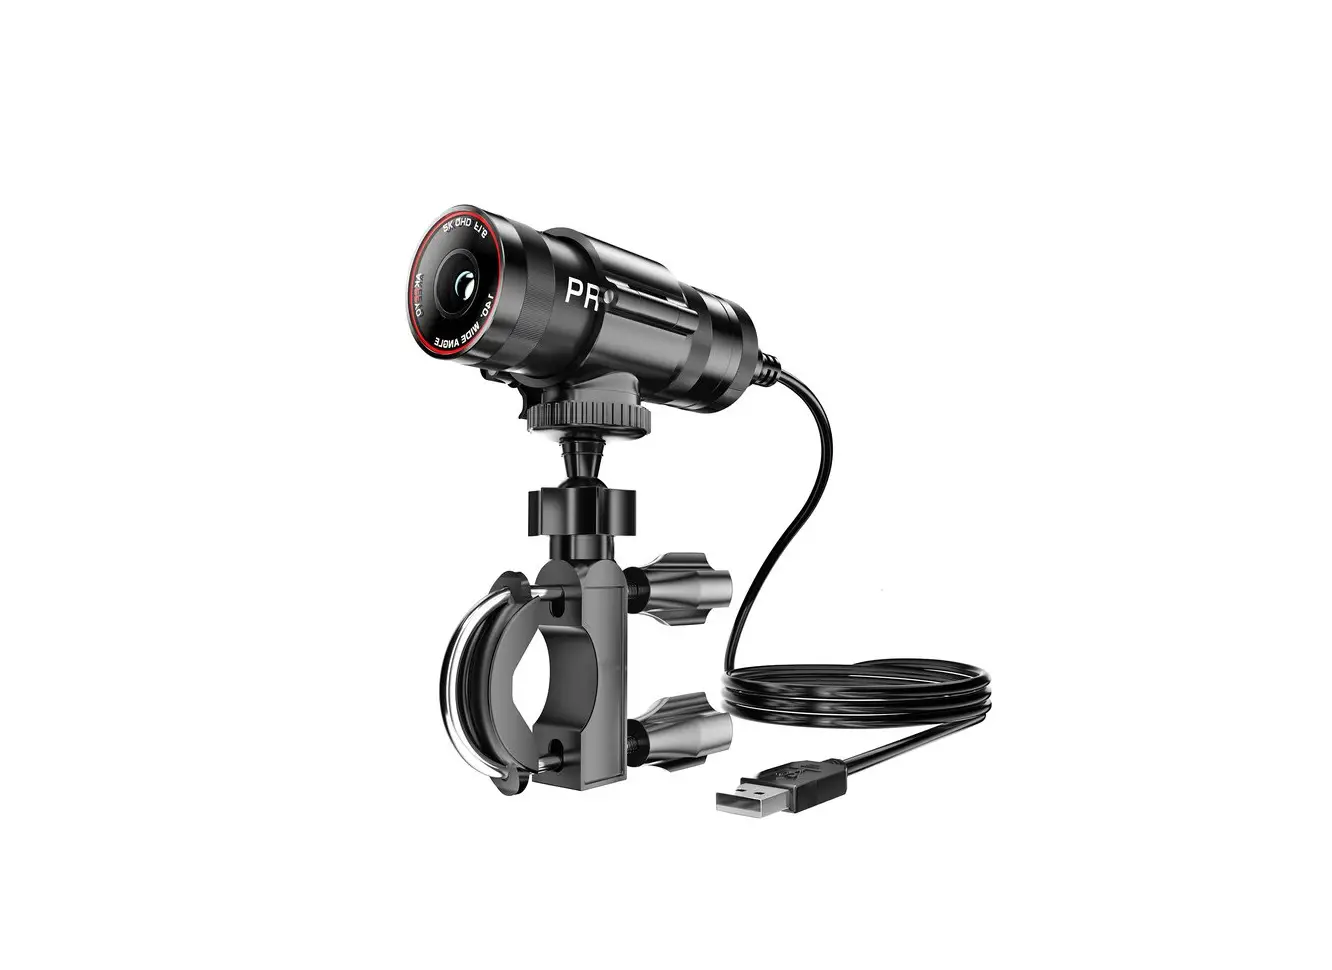
Name of Each Part
The Host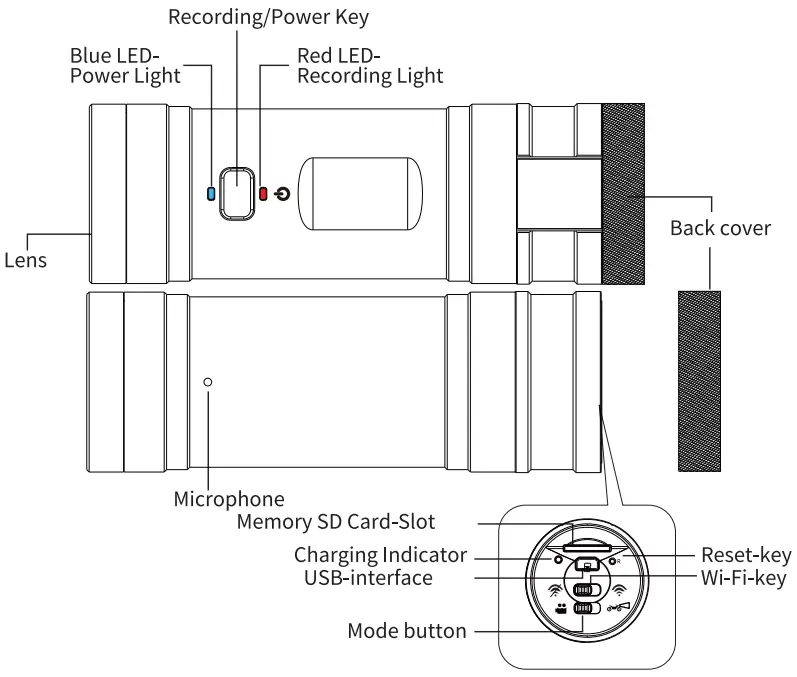
Accessories
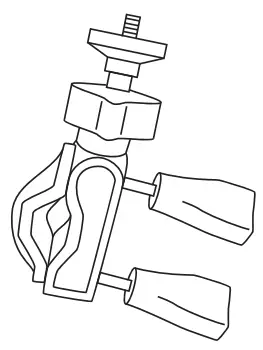
- Mainframe bracket

- Motorcycle handlebars. bracket

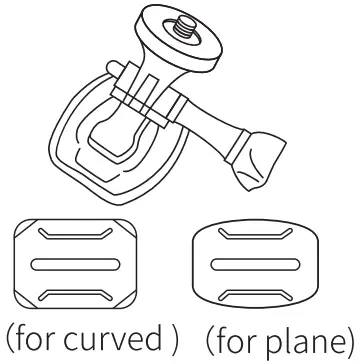
- Two types of double-sided tape

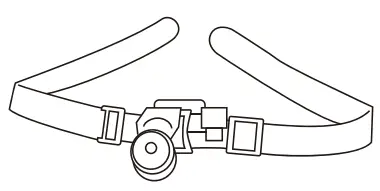
- Velcro

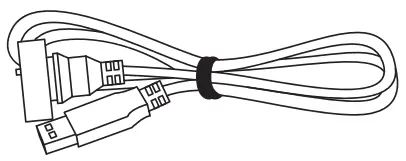
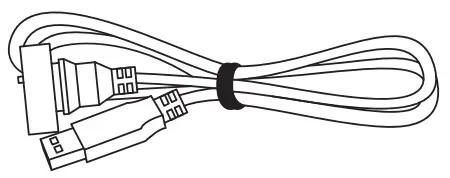
- USB-Charging Cable

- Waterproof USB charging cable for continuous video recording

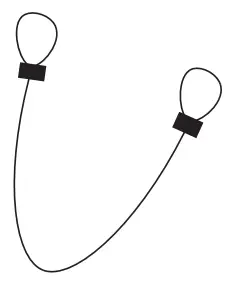
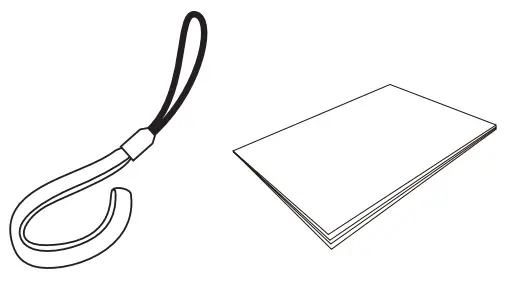
- Steel wire anti-drop rope

- Anti-Fall-Lanyard Manual


Before Use
1) Charge
- Open the back cover and connect the charging cable to the socket for charging
- Connect to AC adapter (sold separately) or other external power source for charging
- The charging indicator lights up and charging begins. When charging is complete, the indicator light will go out
- If the charging voltage and current of the PC are less than 5V/ 1A, the charging speed may slow down 3X If the drive recorder is not used for a long period of time, the battery may run out of voltage and power, and the host may not start. (even if the power cord is connected).
- In this case, please charge the host for longer than 10 minutes.
After a certain time, the charging process can be started normally again
- When using a USB charging cable for continuous recording, you can charge the camera body by plugging it into the motorcycle’s USB slot (sold separately) or the power block (sold separately)
Waterproof charging cable for continuous recording
(2) Format SD Card
For the device to function normally, the microSD card need to be formatted
- SD card sold separately
- Note :Formatting will erase all data on the memory SD card ,Please copy in advance
- Connect the SD card to a Windows 7/8/10 PC using a card reader (sold separately)
- Select the removable media that appears at the bottom of the mobile device, then choose Format from the pop-up menu with the right mouse button
- Choose FAT32 as the file system and run the format.
After completing the above settings, format the SD card correctly
Note
- Please use a SD card from 8 GB to 64 GB with a speed of class 10 or higher.
If you are using an unqualified card, you may not be able to start and record normally konnen Sie moglicherweise nicht normal starten und aufnehmen. - When setting, the range value must not be exceeded. If you set a value out of range, ‘ou may not be able to start the machine.
Note that the malfunction of the machine caused by your operating error is not covered by the warrantylhren Betriebsfehler verursachte Fehlfunktion der Maschine nicht von der Garantie abgedeckt ist.
Wi-Fi Connection
Equipped with Wi-Fi, the AKY-610L can Perform various operations by downloading a dedicated smartphone application from a smartphone and realizing various operations such as checking, playing, saving and deleting videos on the smartphone
- Download the app.
Download the “Car_DVR” app from the Google Play Store / Apple Store [Car_DVRJ app
 - WiFi connection
- Equipped with Wi-Fi, the AKY-610L can perform various operations by downloading a dedicated smartphone application from a smartphone and realizing various operations such as checking, playing, saving and deleting videos on the smartphone
WIFI :XSY_DVR_WIFI_B177
Passport : 1234567890
The last 4 digits of each product’s WIFI name are random. The name is different.
If the drive recorder is not switched on, the WIFI name will not be displayed.
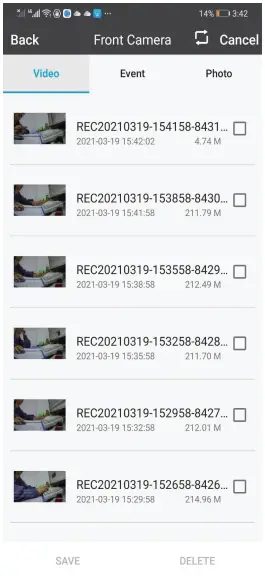
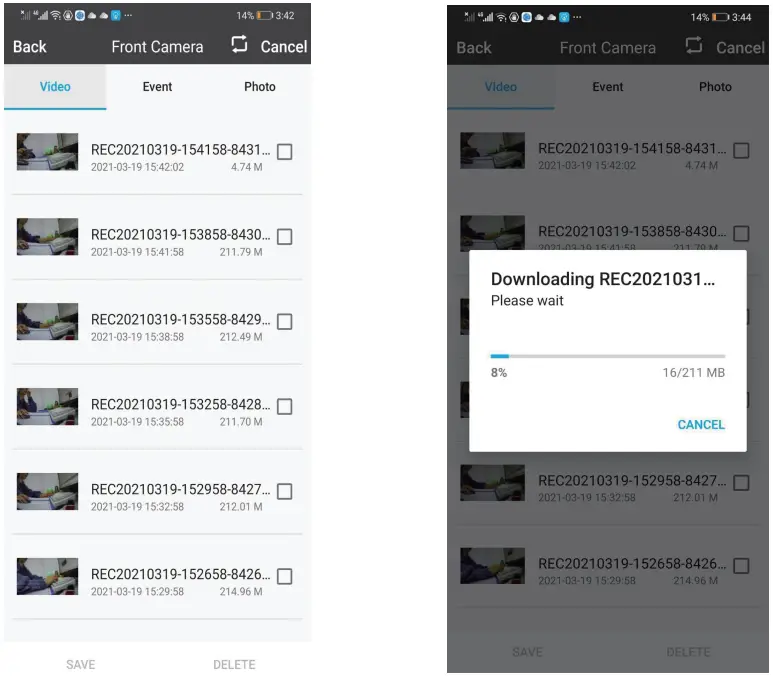
After the correct connection, you can set up and operate using the smartphone app (Please make sure the connected WI-FI name is correct) - Open the application [Car_DVR] and go to the main interface.
Touch the [Picture / Video] key to enter playback mode
Main interface
Play mode

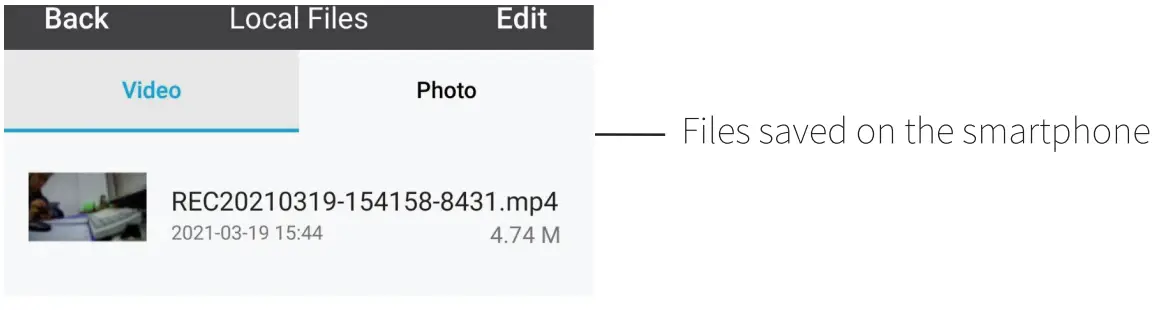
- Open the file [Car_DVR] and go to the main interface.
You can check the files on the smartphone by touching the [Local File] key
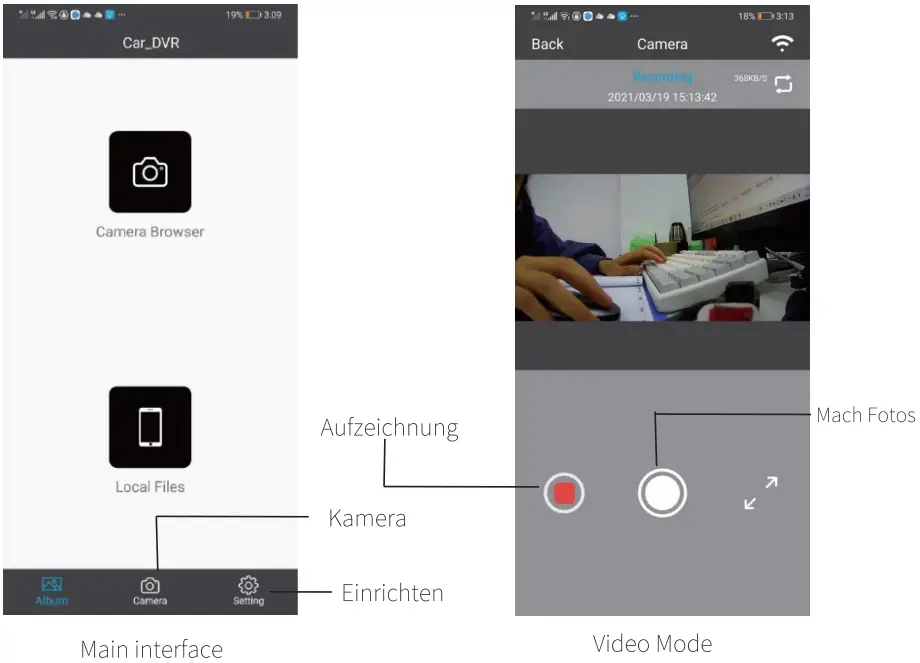
- Open the application [Car_DVR] and go to the main interface.
You can switch to Capture mode by touching the [Camera] key
- Equipped with Wi-Fi, the AKY-610L can perform various operations by downloading a dedicated smartphone application from a smartphone and realizing various operations such as checking, playing, saving and deleting videos on the smartphone
 [Car_DVRJ app
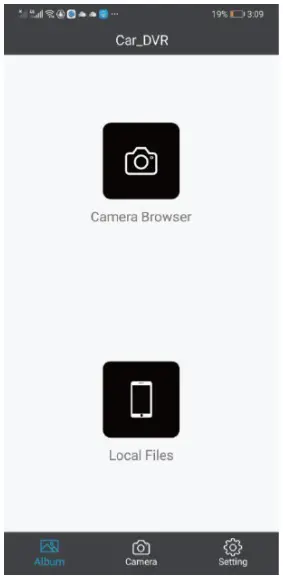
System Settings
- After connecting the WiFi, you can set up the driving recorder from the smartphone app
- Open the application [Car_DVR] and go to the main interface. You can switch to this setting by EO [Settings] key. Select [Camera Settings] to display the setting items.

- Open the application [Car_DVR] and go to the main interface. You can switch to this setting by EO [Settings] key. Select [Camera Settings] to display the setting items.
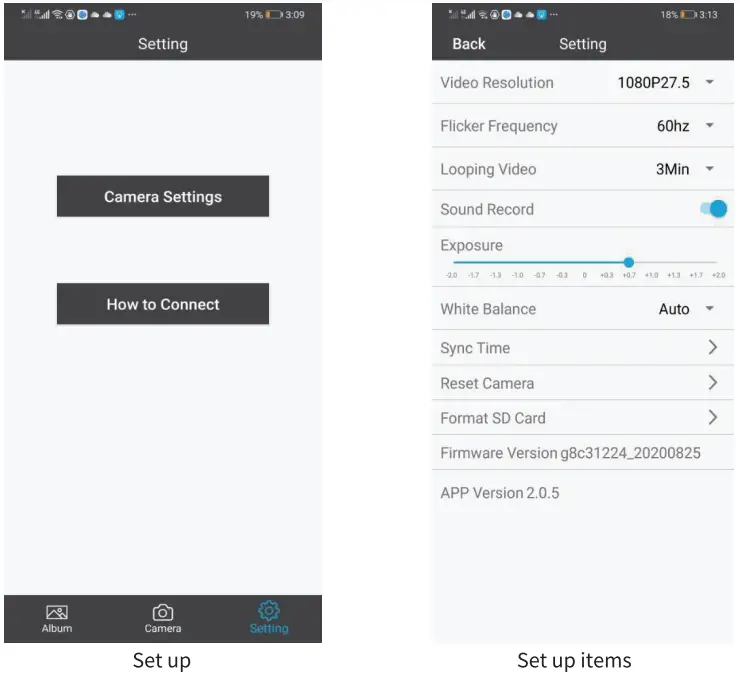
Video resolution: 1080P 27,5 fps (![]() )
)
Flicker frequency: 60 Hz (![]() ) / 50 Hz
) / 50 Hz
Circular recording time: 1 Minute / 3 Minuten (![]() ) /5 Minuten
) /5 Minuten
Voice recording: Ein (![]() ) / Aus
) / Aus
Exposure (Exposure Compensation): 0 (![]() ) (It is recommended to keep the default value.)
) (It is recommended to keep the default value.)
White balance: Automatically (![]() )
)
Time-based (data synchronization): Automatically synchronizes the date on the recorder drive with your mobile phone.
Reset the driving recorder. After resetting with APP, the host will automatically restart and WiFi will be cut off. If you cannot use the APP to reset, please use a needle-like object to press the reset button on the host to reset
Format SD card: Erase all data on the SD card
(![]() ) Items marked with (
) Items marked with (![]() ) are factory default values
) are factory default values
Install the Host
3€ Please note that the shooting direction should not face the ground when installing
$8 To prevent the main unit from falling, please install an anti-dropping rope on the back cover
of the main unit
Connect the mainframe bracket to the
The main frame is divided into three parts: A, B and C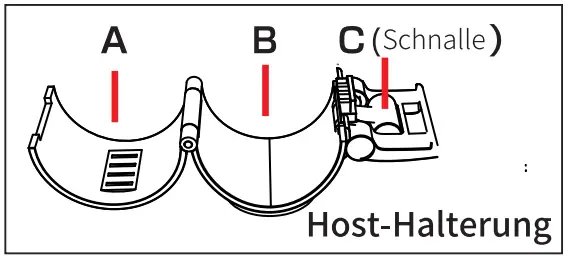
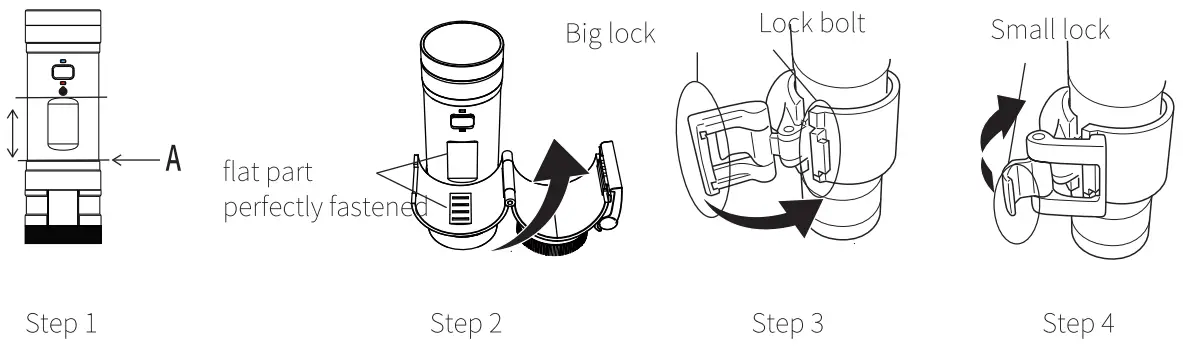
- Install the bracket of the host to the center of the host. (The red line in the picture (1))
Align the groove part of the main body with part A of the bracket - Align the flat part of the main frame A with the flat part of the upper part of the main frame.
- Fasten the big lock and lock bolt on the bracket
- Press the small latch to secure the stand firmly

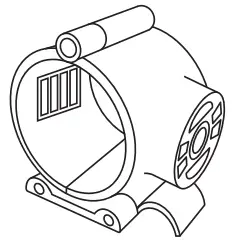
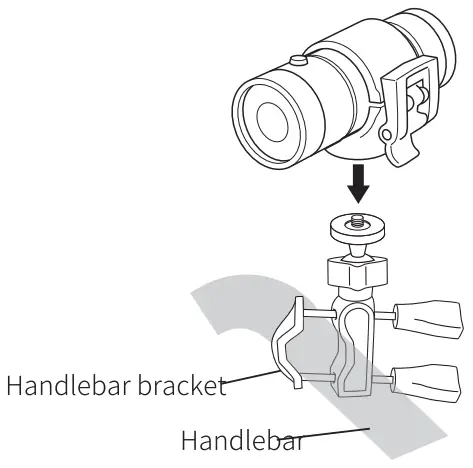
Installed on the handlebar
- Install the handlebar mounting bracket to the strapping rod and tighten the screws to fix it.
Tighten the flat part of the host bracket evenly to make it completely match the flat part of the upper part of the host - Fix the main frame to the handlebar mounting bracket

Installed on the helmet or fuel tank
- Attach the double-sided tape to the helmet, fuel tank or front panel
- Attach the host’s bracket to the double-sided tape bracket

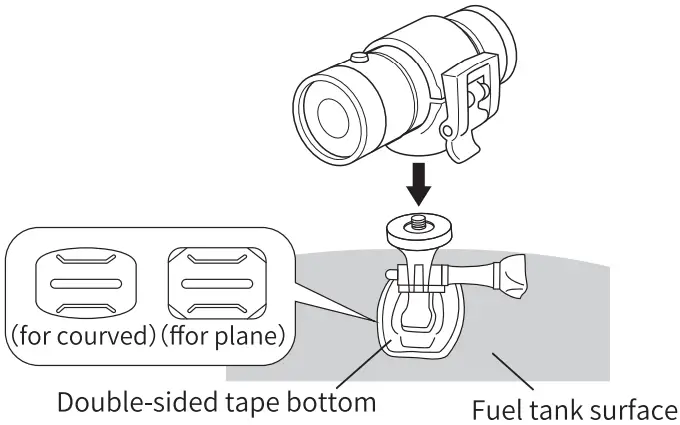
Notice:
- Wrap the Velcro tape to the place where it needs to be fixed
- Fix the main frame head to the Velcro mount
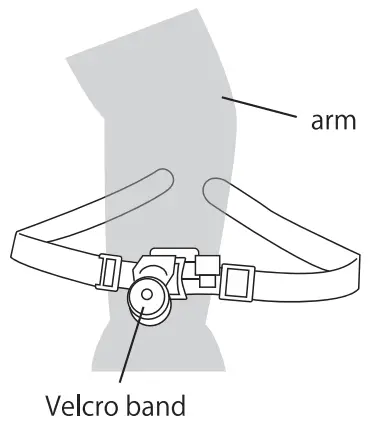
Installed on the arm or other places where it can be woundkann
- Wrap the Velcro tape to the place where it needs to be fixed.
- Attach the host’ s bracket to the double-sided tape bracket.

Recording
Start recording
- Open the back cover and select the mode
- Choose to turn on or turn off Wi-Fi

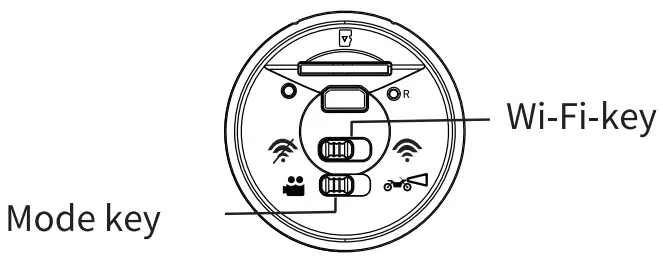
Note:
Please switch between Wi-Fi when the power is off.
If the power state is switched, an abnormality may occur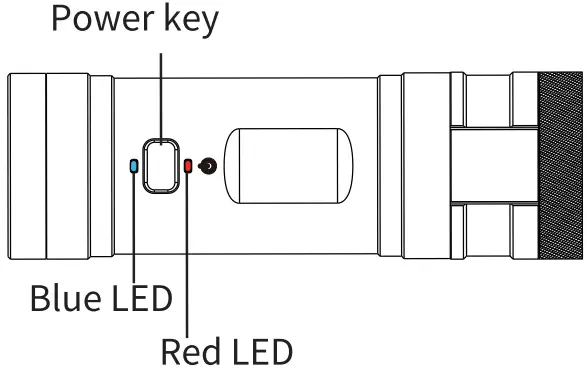
Power-Key Operation
- Press and hold for 3 seconds: power on/of
- Turn on: Press and hold the power button for about 3 seconds, release your finger, the LED light will light up, and the host will vibrate 3 times to complete the boot
- Shut down: press and hold the power button for about 3 seconds, release your finger, then the motor vibrates twice, the LED light is off, and the power is turned of
- Short press: start/stop recording
- Press twice quickly: start emergency recording
2 Recording modes
<1>Action-Camera mode
- Press and hold the power button for about 3 seconds, the host will vibrate 3 times, and the blue LED light will light up.
- Short press the power button, the motor will automatically vibrate once, the blue LED indicator will light up, and the red LED indicator will flash at the same time. Start recording
- Press the power button twice, the red LED indicator will flash quickly.
Start emergency video recording and emergency video recording for 20 seconds.
After the emergency recording is over, the red LED indicator will change from fast flashing to slow flashing, and continuous recording will automatically continue.
During emergency recording, short press the power button, the red and blue indicator lights will light up at the same time to stop recording.
Short press again, the host will vibrate once, and then return to continuous recording
Notice:
- Continuously recorded files will not be automatically overwritten.
When the capacity of the continuous recording folder is reached, the recording will stop automatically, the red and blue LED lights will light up at the same time, and it will enter the standby state. When the power is turned on again, if it is detected that the capacity of the continuous recording folder has reached the upper limit, the recording will automatically stop again and enter the standby state. - Emergency log files can be automatically cycled
(2) Driving recorder-Mode
- Press and hold the power button for about 3 seconds, the host motor vibrates 3 times, the red and blue indicator lights are on, and then the host vibrates again, the red indicator light starts to flash, and the recording starts
- Press the power switch twice. The red LED indicator flashes quickly.
Start emergency video recording and emergency video recording for 20 seconds
After the emergency recording is over, the red LED indicator will change from fast flashing to slow flashing, and continuous recording will automatically resume.
During emergency recording, briefly press the power button.
The red and blue indicators will light up at the same time, and then the recording will stop.
Short press again, the motor will vibrate once, and then return to continuous recording
Note:
Continuous file recording and emergency recording files will cycle automatically.
<3>Comparison of two shooting modes
SLED lights status
| Power on with built-in battery | Cannot record automatically after turning on the power | Automatic recording after power on |
| Link with the power cord after the power is on | Cannot record automatically after turning on the power | Automatic recording after power on |
| Use built-in battery, connect to power source when shooting is stopped | The status of the host is unchanged | Recording starts automatically |
| Shoot with the built-in battery connect the power cable | The status of the host is unchanged | The status of the host is unchanged |
| The capacity of a normal folder has been reached | Stop recording automatically, turn off the power | Overwrite from old file |
| Event (emergency record) folder capacity limit ) | Overwrite from old file | Overwrite from old file |
LED lights status
| Turn off the power | The blue indicator light is off, the red indicator light is off | The blue indicator light is off, the red indicator light is off |
| Stop recording | The blue indicator light is on, the red indicator light is on | The blue indicator light is on, the red indicator light is on |
| Continuous recording | The blue indicator light is on, the red indicator light is flashing slowly | The blue indicator light is on, the red indicator light is flashing slowly |
| Emergency recording | The blue indicator light is on, the red indicator light is flashing quickly | The blue indicator light is on, the red indicator light is flashing quickly |
| Continuous recording reaches the capacity limit | The blue indicator light is on, the red indicator light is on | Files can be automatically cycled |
| Boot without SD card | The blue indicator light is on, the red indicator light is flashing quickly | The blue indicator light is on, the red indicator light is flashing quickly |
If you insert or remove the SD card with the power on, the data may be damaged or the unit may malfunction
Stop recording
During recording, short press the power button to stop recording
When recording is stopped, short press the power button again to resume recording
Emergency Recording
- Start emergency recording
During continuous recording, short press the power button twice in quick succession to start emergency recording
During the emergency recording, the red indicator light flashes quickly - Stop emergency recording
Automatic stop: After the emergency recording is completed, the continuous recording will start automatically Manual stop: during emergency recording, short press the power button to stop emergency recording, and then short press again to start continuous recording
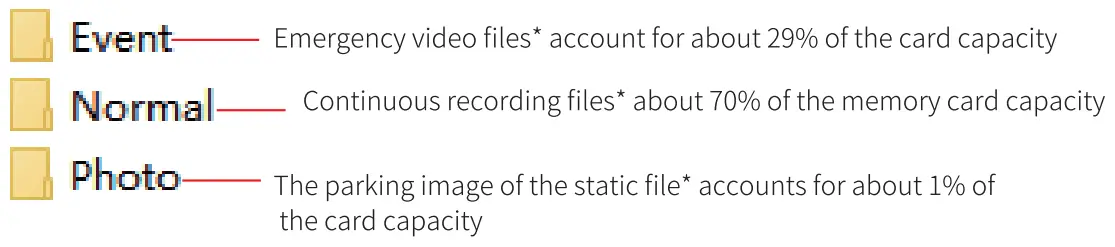
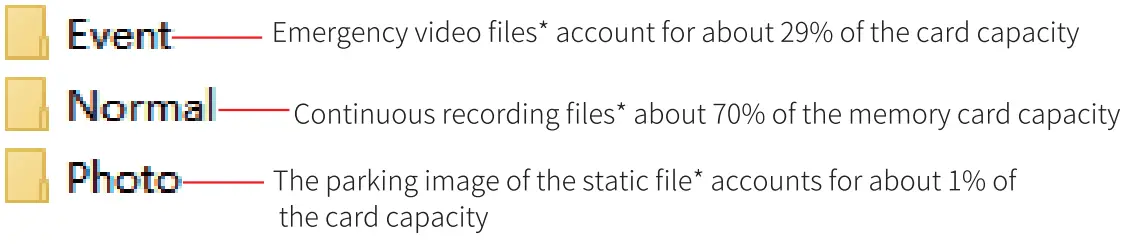
“Video files recorded by emergency recording are saved in the [Event] folder of the SD card, and will be automatically overwritten when the [Event] folder reaches the capacity limit - Save emergency videos
When you start emergency recording, you can shoot for 20 seconds from the beginning.
The video of the emergency recording is saved in the [event] file
![]() Notice:
Notice:
- If the number of emergency video files increases, the capacity of the card may be full and recording may not be possible. Need to format the Memory SD card regularly
- It is recommended to set the loop recording time to 3 minutes
- The number of saved videos varies according to the recording status
- We cannot guarantee that all emergency video files can be saved
- When the capacity of the emergency video file is reached, the oldest video file will be overwritten
Static Images
When the driving recorder is connected to a smartphone via Wi-Fi, you can use a dedicated application to take pictures.
When you press the photo button during shooting, the motor will vibrate once and you can take a still image.
Open the [Car_DVR] application and enter the main interface
You can switch to recording mode by touching the [Camera] button
Touch the “Photo” button in the middle to switch to still image shooting mode
The captured static image files are saved in the [Photo] folder of the card
Record video/playback
Play on Windows
Supported operating system: Windows7, Windows8.1, Windows10 *We recommend Windows Media Player 10 or higher
- Turn off the power of the host and take out the SD card. Use a card reader (sold separately) to connect the SD card to the computer
- Find the SD card device in “Devices in Removable Storage Area”, and then double-click it
- Find 3 files of “event”, “normal” and “photo”. You can click to play recorded videos and captured photos

Play on Mac
Supported operating system: Mac OSX10.3.6 or higher
- We recommend potplayer
- Before playing, please download Potplayer through APP STORE
- Turn off the power of the host and take out the SD card. Use a card reader (sold separately) to connect the SD card to the computer
- Find the SD card device in “Devices in Removable Storage Area”, and then double-click it
- Find 3 files of “event”, “normal” and “photo”. You can click to play recorded videos and captured photos.

Reset
Reset when the operation of the host is unstable or stops working
- After turning on the power, press the reset button with a needle-like object
- Use APP may not be able to reset
Specifications
| Model | AKY-610L |
| Product name | Motorcycle driving recorder |
| Pixel | Full HD 1080P |
| Frame rate | 1080P 27.5fps |
| Pixel | GC2053 2 million Pixel |
| Fov (horizontal) | 120° |
| Waterproof /Dustproof | IP65 |
| Loop recording | Support |
| Emergency recording | Support |
| SD card | SD card 8 – 64GB (* Recommend Class 10) |
| Power | 51/ 1A |
| Batterie | Built-in lithium polymer battery (680mAh) |
| System | Windows7, Windows& 1, Windows10, Mac OSX 10.3 or higher |
Recording time
| Card capacity | 1920 x 1080P |
| 64GB | 550 Minutes |
| 326R | 750 Vinutes |
- The above values are for reference only, and these values are not guaranteed.
- The recording time is the recording time of continuous recording.
- The recording time will vary according to the environment used
Troubleshooting
| Conditions | Check here |
| Unable to start | Make sure that the battery is fully charged. Usually (when the main unit is turned on) to charge for 2 hours |
| Can’t record | With the blue LED on, press the power button, and then confirm that the red LED flashes. |
| Ensure that there is enough storage space on the SD card. When the memory. card reaches its capacity limit in operation mode, recording will stop | |
| Can not read SD card | Make sure that the SD card is inserted correctly. The MicroSD card may not be formatted, please format it. Please use a genuine SD card of 32 GB— 128 GB (Class 10 or above) |
| The video file can not be played | Depending on the video playback software, it may not be able to play It is recommended to use Windows Media Player. |
| Video files play slowly or cannot play smoothly | Make sure that the host and computer are properly connected via USB data cable |
| .Before playing the video file, please transfer the video file to the computer | |
| Please update the video playback software to the latest version. Please use playback software other than Windows Media Player to check. (PotPlayer and KMPlayer) | |
| The video file transfer to the computer is slow | Make sure you are connected to USB 2.0. Replace the SD card reader |
| Remove all unused USB devices | |
| PC can not recognize the host | Make sure the power of the host is turned on |
| Make sure that the Memory SD card is inserted correctly. The SD card may not be formatted, please format it. Please use a genuine SD card of 32 GB– 128 GB (Class 10 or above) | |
| The video file on the Memory SD card may be damaged. Try reformatting | |
| Excessive noise | Try to stick the tape in the hole of the microphone. |
| Change the direction of the audio microphone and do not face the driving direction | |
| The operation of the host is unstable or does not work | Please reset the host |
| Restart the host and replace the recording card | |
| WiFi is unstable | Please open the WiFi key and set it up. Make sure the WiFi is properly connected. During use, please make sure you are connected to another WiFi |
Guarantee
Disclaimer
- Regarding the use of this product , please comply with local government regulations and the road traffic laws of each state.
The user is fully responsible for the use of this product, and the manufacturer, importer and distributor of this product do not bear any legal responsibility. - The warranty only covers the main body of the product, and does not guarantee the loss or damage of customer stored data due to the malfunction or use of this product
- We are not responsible for any accidents or vehicle breakdowns, loss of time or profit or damages caused by the use of our products, malfunctions or malfunctions
- Except for personal viewing, images and images taken by this product cannot be used without the permission of the right holder. Use without the permission of the right holder-Unauthorized copying, screening, renting Photographing other people’s portraits without the permission of others*Opening to the public (such as SNS) We do not take any responsibility for any trouble.
- We can not guarantee that images can be stored under all conditions
- There is no guarantee that the captured video can be effectively used as evidence of the accident
- Install correctly according to the instruction manual. In order to comply with the safety standards based on the “Road Transport Vehicle Act”, please install it where it will not hinder driving or visibility.
- The LED traffic lights may flicker and the color may not be recognized. We are not responsible for content related to identifying and recording traffic lights
The warranty does not include the following.
- When using a disassembled or modified battery. (If the battery is disassembled or modified, it may explode or leak.)
- Battery is aging. (Because the battery is a consumable item)
Product-Quality guarantee
The product warranty period is one year from the date of purchase (for accessories other than the host, 30 days from the date of purchase). However, the product warranty may not apply when malfunctions or malfunctions are caused due to the user’s responsibility.
Contact us: Support Center
Email: [email protected]
9:30-13:00 14:30-19:00
(Except for Saturdays, Sundays, holidays and the beginning and the end of the year)