 AVerMedia A200P AVerTV Hybrid TVBox
Important Safety Instructions and Disclaimer
WARNING: Failure to follow these safety instructions could result in fire, electric shock, other injury or damage to device or other property, and/or loss of life. AVerMedia is not responsible for damage or injury arising from failure to follow safety instructions relating to the product’s use.
General Guidelines and Warning
- Read and follow these instructions.
- Do not use the device on uneven or unstable surfaces.
- Do not use this device in a wet environment or near water.
- Unplug the device before cleaning. Clean only with a dry cloth.
- Use in a well-ventilated environment. Do not block any ventilation openings.
- Use the device within the specified temperature range.
- Use power sources within the specified voltage range.
- Do not place heavy objects on the device.
- Do not install near heat sources such as radiators or stoves.
- Do not defeat the safety purposes of the polarized or grounding-type plug.
- Protect the power cord from being walked on or pinched, particularly where the cord connects with plugs or adapters.
- Only use the attachments and accessories specified by the manufacturer.
- Unplug this device during lightning storms or when unused for a prolonged time.
- Do not modify or disassemble the device in any way.
- Refer all servicing to qualified personnel.
- Do not dispose of the device as general household waste. Dispose of in accordance with local environmental laws.
General Battery Instructions
- Never short-circuit the battery terminals.
- Store the batteries in a cool dry place.
- Keep the battery away from children.
- Keep the battery away from fire.
- Stop using or charging the battery immediately if the battery becomes or appears damaged, gives off an odor, becomes discolored or deformed, starts to balloon or swell, or leaks.
- Never store or charge the battery inside your car or in extreme temperatures. Extreme temperatures might ignite the battery and cause a fire.
- Do not dispose of used batteries in domestic waste. Dispose of batteries at special collection points or return them to point of sale if applicable.
Removable Battery for Remote Control - Do not charge the batteries.
- Do not mix old with new batteries.
- Do not attempt to disassemble the battery.
- Do not expose the battery to water or rain.
- The use of a carbon-zinc battery for remote control is strongly recommended. Use of other types of batteries, such as alkaline or rechargeable (nickel-cadmium) may cause battery current overload or battery leakage and corrosion which can damage the remote control.
- Do not mix different types of batteries: alkaline, standard (carbon-zinc) or rechargeable (nickel-cadmium).
- Remove the batteries during long periods of non-use. Always remove exhausted batteries from the remote control. Battery leakage and corrosion can damage the remote control, and dispose of batteries safely.
Tuner product
- Read Instructions – Read all the safety and operating instructions before connecting and operating your TV tuner to help ensure your own personal safety and to protect your product from potential damage.
- Retain Instructions – Retain all the safety and operating instructions for future reference.
- Heed Warnings – Adhere to all warnings on the product and the operating instructions.
- Grounding – For continued protection against risk of electric shock and fire, this accessory should be installed/connected only to the products, such as a computer, equipped with a three-wire grounding plug, a plug having a third (grounding) pin. This plug will only fit into a grounding-type
power outlet. This is a safety feature. If you are unable to insert the plug into the outlet, contact your electrician to replace the obsolete outlet. Do not defeat the safety purpose of the grounding-type plug. - Lightning – For added protection and to prevent damage due to lightning and power-line surges, unplug the host system, such as a computer, from the wall power outlet and disconnect the antenna or cable system. Unplug the host system from the wall power outlet when left unattended or unused for long periods of time.
- Never insert anything metallic into the TV tuner openings. Doing so may create the danger of electric shock.
- Openings in the TV tuner cabinet are provided for ventilation. To prevent overheating, these openings should not be blocked or covered. Avoid using the TV tuner on a bed, sofa, rug, or other soft surface, as doing so may block the ventilation openings in the cabinet. If you place the TV tuner in a bookcase or an enclosed space, be sure to provide adequate ventilation and air flow.
- Power Lines – An outside antenna system should not be located in the vicinity of overhead power lines or other light or power circuits, or where it can fall into such power lines or circuits.
- Antenna Installation – When installing an outside antenna system, extreme care should be taken to prevent it from touching such power lines or circuits, as contact with them may be fatal.
- Antenna Installation – When installing an outside antenna system, extreme care should be taken to prevent it from touching such power lines or circuits, as contact with them may be fatal.
- Outdoor Antenna Grounding – If an outside antenna is connected to the product, be sure that the antenna system is grounded so as to provide some protection against voltage surges and built up static charges. Article 810.21 of the National Electric Code, ANSI/NFPA No.70, provides information with regard to proper grounding of the mast and supporting structure, grounding of the lead-in wire to the antenna discharge unit, size of grounding conductors, location of antenna-discharge unit, connection of grounding electrodes, and requirements for the grounding electrode.
- Caution for users/installers in Norway – In Norway, there exists a possibility of a hazardous situation due to voltage difference between the screen of the coaxial cable of the cable distribution system and the local equipment earth (typically, earthed chassis of the PC system). To avoid any hazards, antenna/cable input connection from the TV tuner card to a Cable Distribution System must be provided through a galvanic isolator (not included).
- NOTE to CATV System Installer-This reminder is provided to call the CATV systems installer’s attention to Section 820.93 of the National Electric Code, ANSI/NFPA 70:2005 (for US/Canada) and/or EN60728-11:2005 standard (for Europe), which provide guidelines for proper grounding
and, in particular, specify that the Coaxial cable shield shall be connected to the grounding system of the building, as close to the point of cable entry as practical.
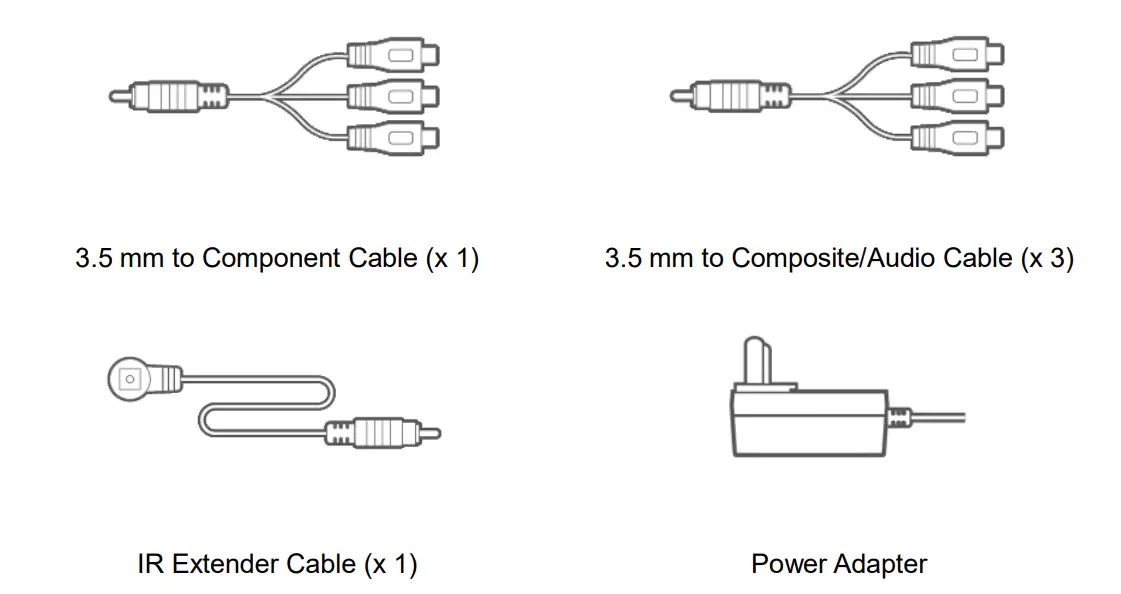
What’s in the Package
AVerTV Hybrid TVBox 13 package contains the following items: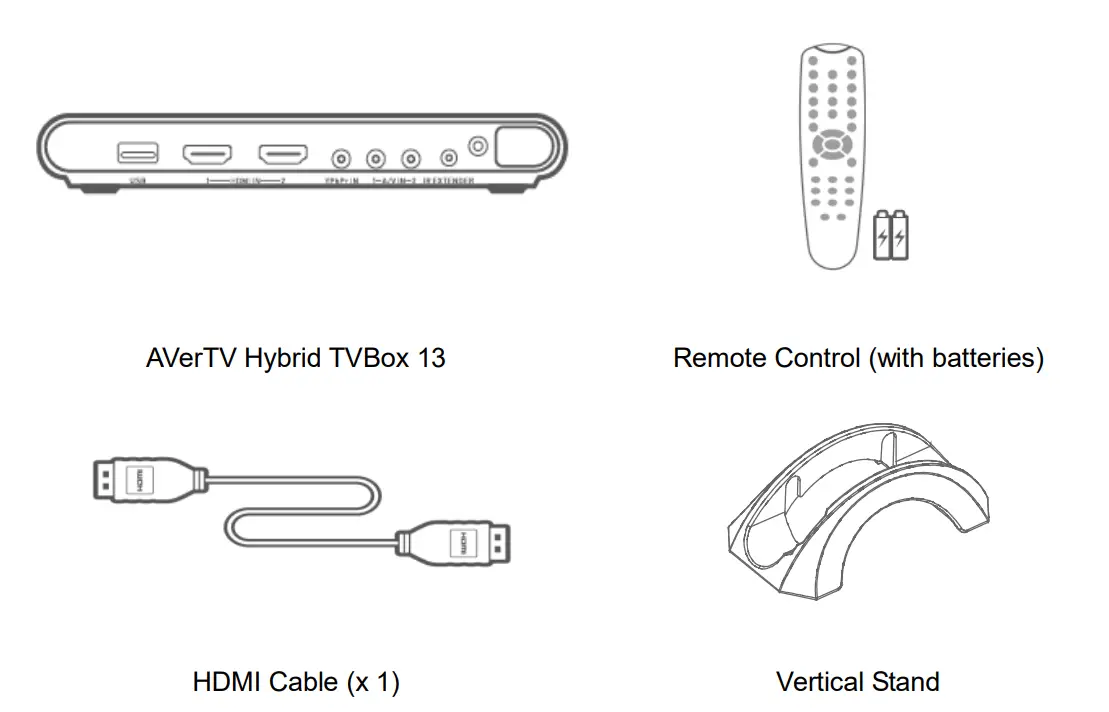
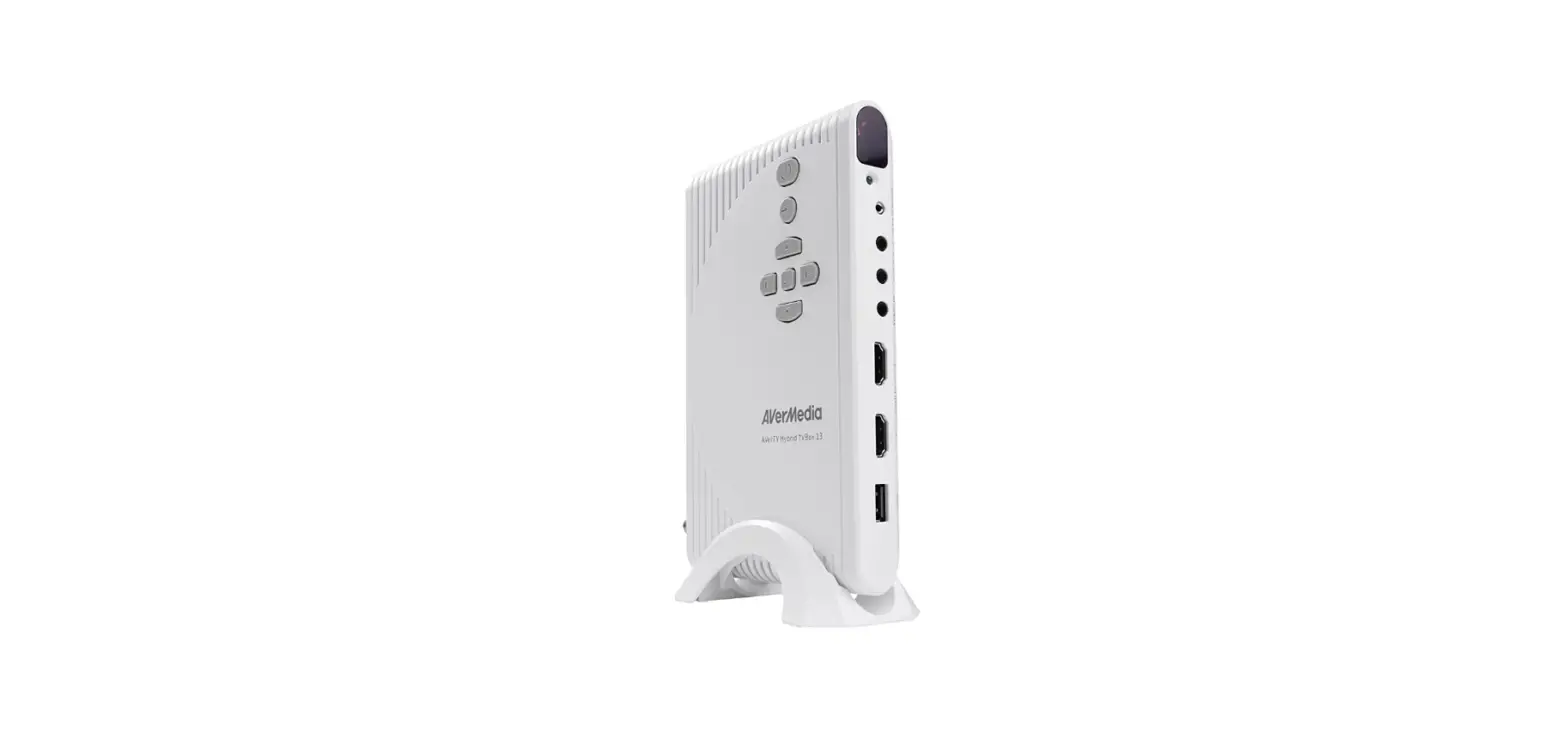
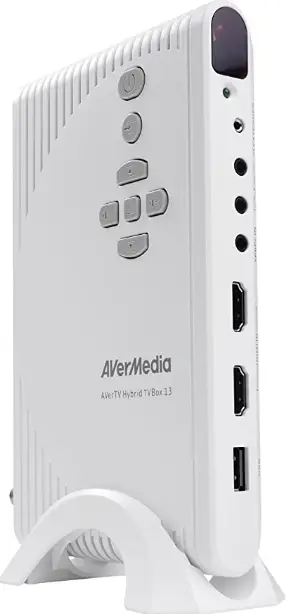
The Unit Parts
Touch Button Control Panel
The Touch Button Panel found on the top side of the unit provides quick access to commonly used functions.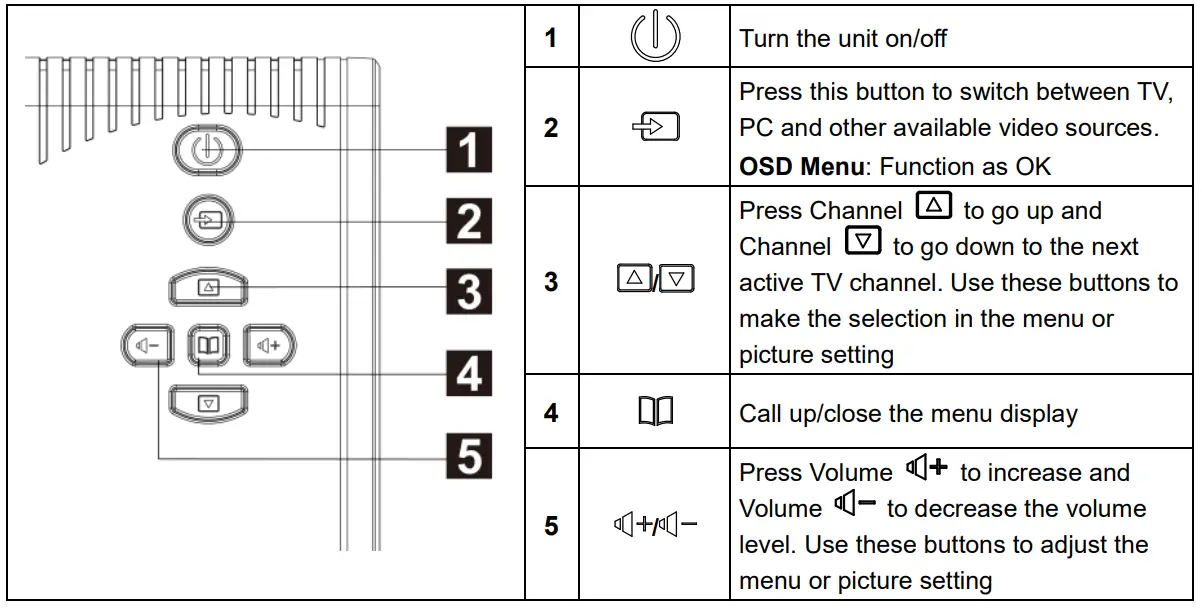
Infrared Sensor
When using the remote control, aim it at the Infrared Sensor which is located at the front panel of the unit.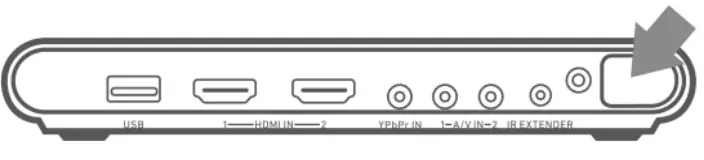
Connection Ports
The port connectors allow connection of your TV Signal, PC, VGA Monitor, LCD Monitor or Projector, speakers, DVD Players, Camcorders, Gaming Console, or other Video Devices.
Installation and Setup
The figure below shows the proper cable connections for installing AVerTV Hybrid TVBox 13 and connecting it to your audio/video equipment.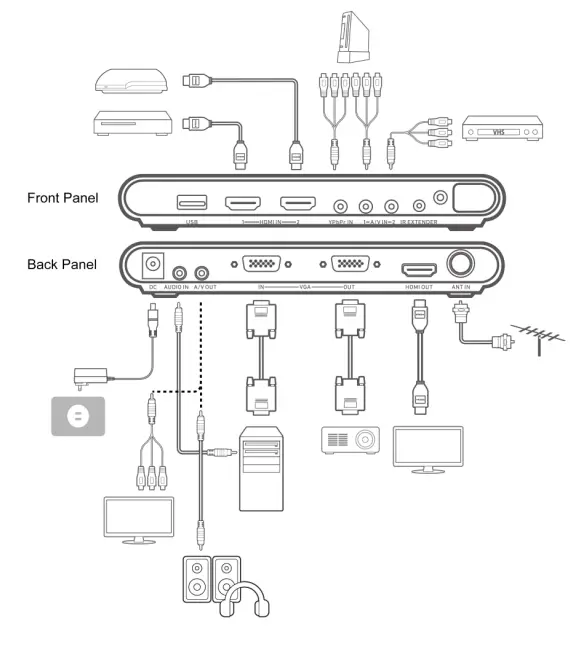
The Remote Control
The diagram below shows the remote control unit layout.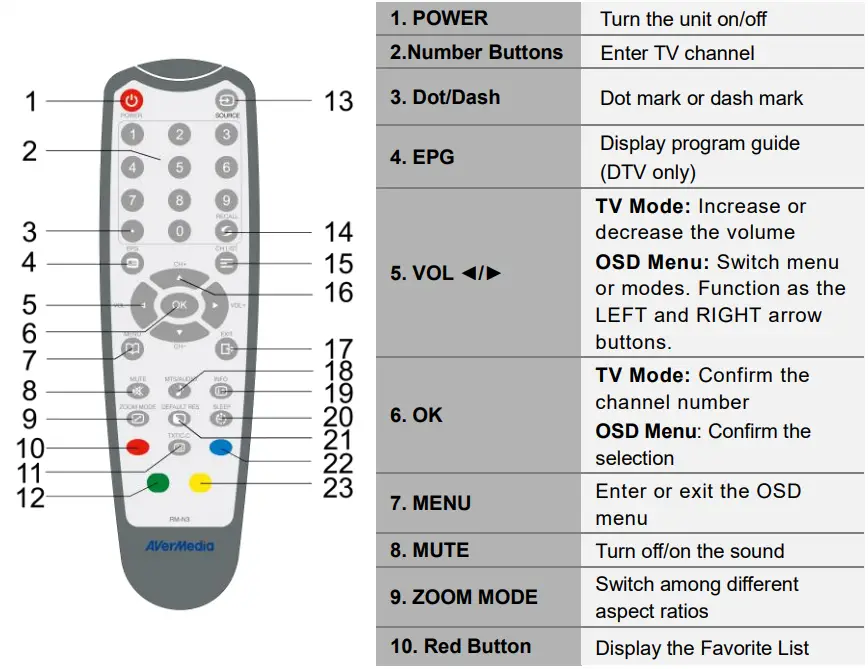
| 11. TXT/C.C | View closed caption information |
| 12. Green Button | On-screen function |
| 13. Source | Switch among TV or external video sources |
| 14. RECALL | Go to the previously selected channel |
| 15. CH LIST | Display a list of available channels |
|
16. CH▲/▼ | TV Mode: Go to next or previous program.
OSD Menu: Function as the UP and DOWN arrow button |
| 17. EXIT | OSD Menu: Exit menu |
| 18. MTS/AUDIO | Switch among different audio modes (mono, stereo, etc.) |
| 19. INFO | Display channel number and name |
| 20. SLEEP | Automatically turn off the unit after 30, 60, 90, 120 or 150 minutes |
| 21. DEFAULT RES. | Switch between 1024×768 60 Hz and 1280×720 60Hz |
| 22. Blue Button | On-screen function |
| 23. Yellow Button | On-screen function |
Supported Display Setting
The reference table below lists the monitor display resolution and refresh rate settings that AVerTV Hybrid TVBox 13 supports.
| VGA | HDMI |
| 640X480 60Hz | 480p 60Hz |
| 800×600 60Hz | 720p 60Hz |
| 1024×768 60Hz | 1080i 60Hz |
| 1280×720 60Hz | 1080p 60Hz |
| 1280×1024 60Hz | 576p 50Hz |
| 1600×1200 60Hz | 720p 50Hz |
| 1920×1080 60Hz | 1080i 50Hz |
| 1080p 50Hz |
If the resolution setting is not in 4:3 or 16:9 aspect ratio, the image will still be kept in 4:3 or 16:9 aspect ratio (with black bars on sides) for the best viewing
experience.
Calling Up a Menu Display
Press [MENU] on the remote control to call up the main menu display. Then, you can use [Vol◄] or [Vol ►] to move among menus; and use [CH▲] or [CH▼] to select functions under each menu, and then press [OK] to enter each function. Press [Exit] to exit the menu. The table below lists the different functions you will find in the menu.
Menu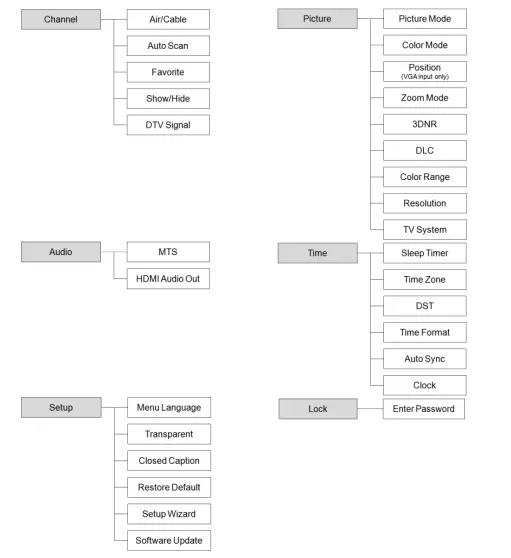
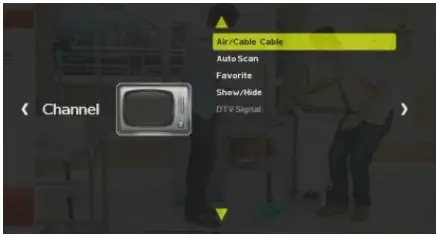
- Setup the TV Source
- Press [MENU] to display the menu.
- Press [Vol◄] or [Vol►] to go to the Channel menu.
- Use [CH▲] or [CH▼] to select Air/Cable and press [OK] to switch between Air and Cable.

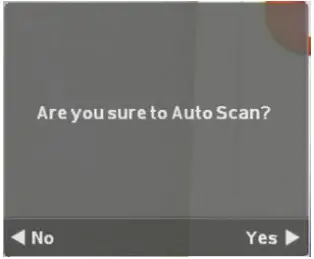
- Auto Scan
- After finishing setting TV source, press [MENU] to display the menu.
- Press [Vol◄] or [Vol►] to go to the Channel menu.
- Use [CH▲] or [CH▼] to select Auto Scan and press [OK].
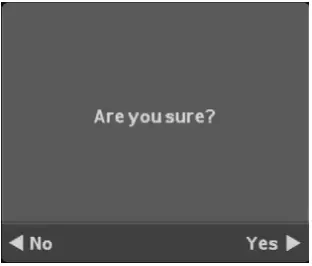
- A confirmation dialog will appear. If you want to scan or overwrite the previous program list, select Yes [Vol►] to confirm or select No [Vol◄] to abort this operation.

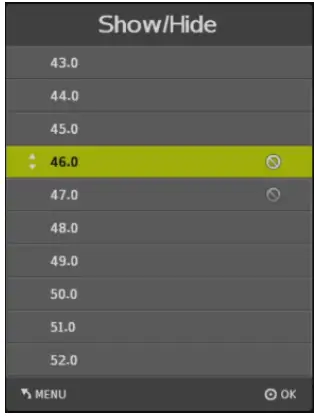
- Show/Hide Channels
After scanning, available channels will then be listed. Now you can hide the unwanted programs.- Press [Vol◄] or [Vol►] to go to the Channel menu.
- Press [CH▲] or [CH▼] to select Show/Hide and press [OK].
- Use [CH▲] or [CH▼] to highlight a listed channel and press [OK].
The mark will appear, indicating that the channel has been hidden. To show the hidden channels, simply press [OK] again. - If you want to hide more channels, repeat step 3.

Picture Menu
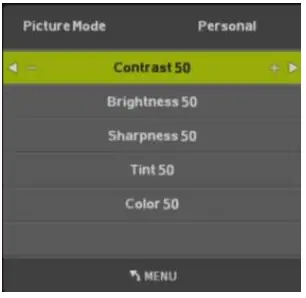
- Picture Mode
You can choose different picture modes in the Picture menu.- Press [MENU] to display the menu.
- Press [Vol◄] or [Vol►] to go to the Picture menu.
- Use [CH▲] or [CH▼] to select Picture Mode and press [OK].
- Press [Vol◄] or [Vol►] to choose a mode or choose Personal to adjust Contrast, Brightness, Sharpness, Tint, and Color.

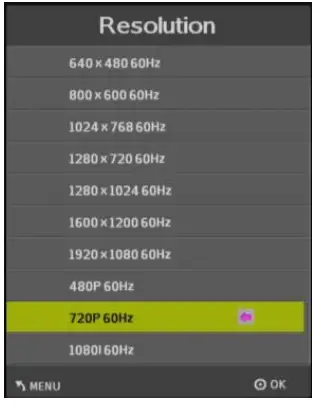
- Changing the Resolution
In the Picture menu, you can change the video output resolution.- Press [MENU] to display the menu.
- Press [Vol◄] or [Vol►] to go to the Picture menu.
- Use [CH▲] or [CH▼] to select Resolution and press [OK].
- Use [CH▲] or [CH▼] to select the resolution.
- Press [OK] and Yes [Vol►] to save the change.

Check the maximum resolution supported by your LCD/CRT monitor or projector before adjusting the resolution. If the screen cannot display images for extremely high resolutions, please reset resolution to 1024×768 or 1280×720 by pressing DEFAULT RES. button on the remote control.
Time Menu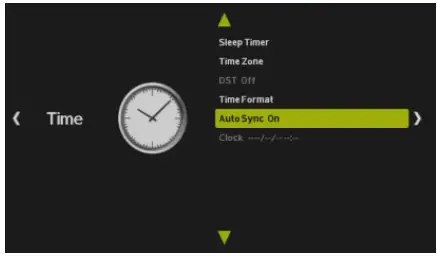
- Turning on the Auto Sync
You can automatically sync the unit time with EPG.- Press [MENU] to display the menu.
- Press [Vol◄] or [Vol►] to go to the Time menu.
- Use [CH▲] or [CH▼] to select Auto Sync and press [OK] to turn on Auto Sync.
Setup Menu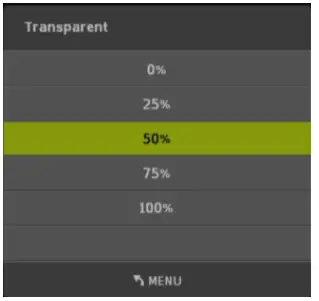
- Changing the Menu Transparency
- Press [MENU] to display the menu.
- Press [Vol◄] or [Vol►] to go to the Setup menu.
- Use [CH▲] or [CH▼] to select Transparent and press [OK].
- Press [CH▲] or [CH▼] to select the on-screen display’s transparency.
Enabling/Disabling Closed Caption Function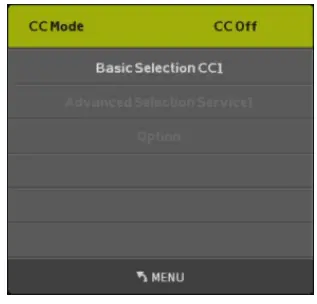
This product has the ability to decode and display closed caption content. You can enable/disable the closed caption function and select a closed caption service from the Closed Caption menu.
- Press [MENU] to display the menu.
- Press [Vol◄] or [Vol►] to go to the Setup menu.
- Use [CH▲] or [CH▼] to select Closed Caption and press [OK].
- Press [Vol◄] or [Vol►] to turn the closed caption on, off, or on when mute.
Restoring to Default Settings
This feature allows you to revert to the default factory settings
- Press [MENU] to display the menu.
- Press [Vol◄] or [Vol►] to go to the Setup menu.
- Use [CH▲] or [CH▼] to select Restore Default and press [OK].
- A confirmation dialog will appear. Use [Vol►] to select YES, or use [Vol◄] to select No and exit the dialog.

Lock Menu
Enter Password
You can change your password and access other settings in the Lock menu.
- Press [MENU] to display the menu.
- Press [Vol◄] or [Vol►] to go to the Lock menu.
- Key in 0000 to enter the menu for more settings like Change Password, System Lock, Input Block, etc.
FAQS
Yes, right. You can tune in to a channel and send out that a/v feed to your computer monitor.
No remote was included in mine
Yes, there are different possible resolutions to choose.
No.
Input signal: 75 Ω TV Antenna, HDMI x 2, VGA, 3.5 mm audio, Composite x 2, Component, USB 2.0 (for firmware updates)
Output signal: HDMI, VGA, 3.5 mm audio & composite combo
No DVR or channel guide. There are two buttons that allow you to change the channels in an upward or downward direction
Sure, but most computer monitors don’t give sound, so you probably need to hook up speakers to get sound.
We use these “TV Hybrids” all over our campus and they generally work quite well.


