tp-link TL-WR841N 300Mbps Wireless N Router Installation Guide
Connect the Hardware
If your Internet connection is through an Ethernet cable from the wall instead of through a DSL / Cable / Satellite modem, connect the Ethernet cable directly to the router’s WAN port, then follow steps 4 and 5 to complete the hardware connection.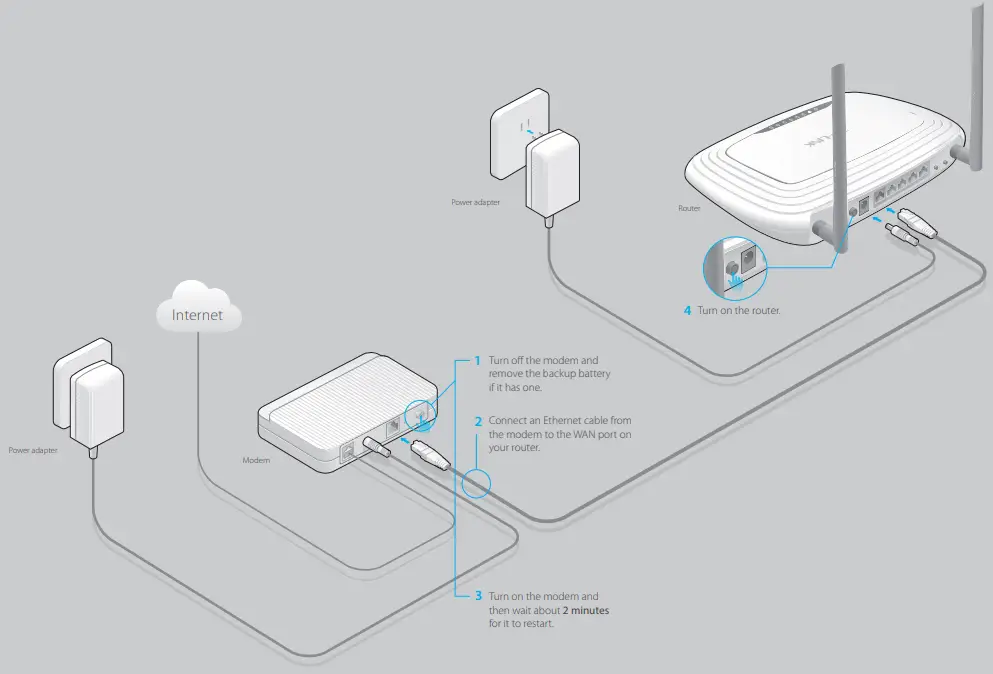
- Turn off the modem and remove the backup battery if it has one.
- Connect an Ethernet cable from the modem to the WAN port on your router.
- Turn on the modem and then wait about 2 minutes for it to restart.
- Turn on the router.
- Verify that the hardware connection is correct by checking these LEDs.

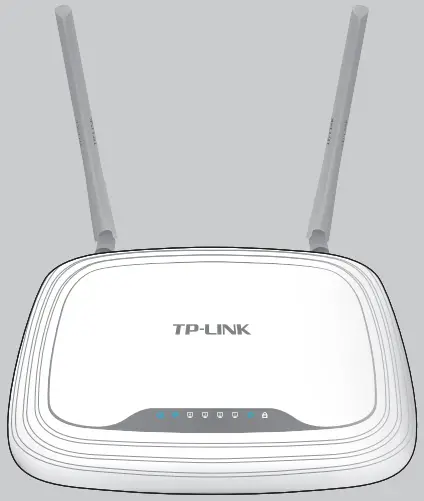
![]() Power On
Power On![]() WLAN On
WLAN On![]() WAN On
WAN On
Note: If the WLAN LED is not on, please press the WIFI ON/OFF button on the back panel for 4 seconds and check the LEDs again in a few seconds later.
Configure the Router
Connect your computer to the router (Wired or Wireless)
Wired
Turn off Wi-Fi on your computer and connect the devices as shown below.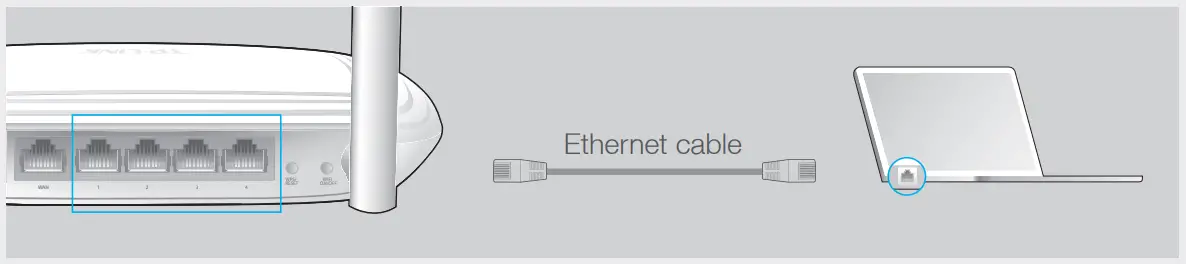
Wireless
Connect wirelessly by using the SSID (Network Name) and Wireless Password/PIN printed on the product label at the bottom of the router.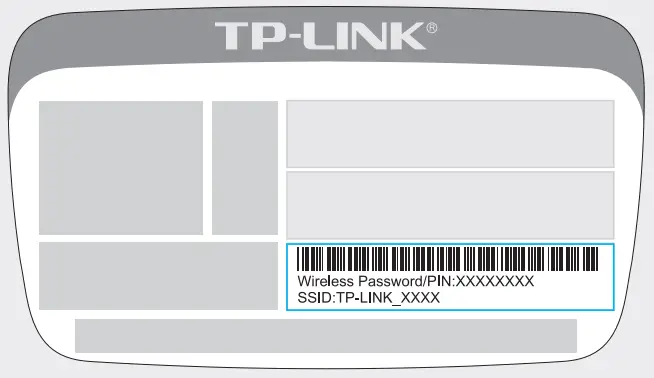
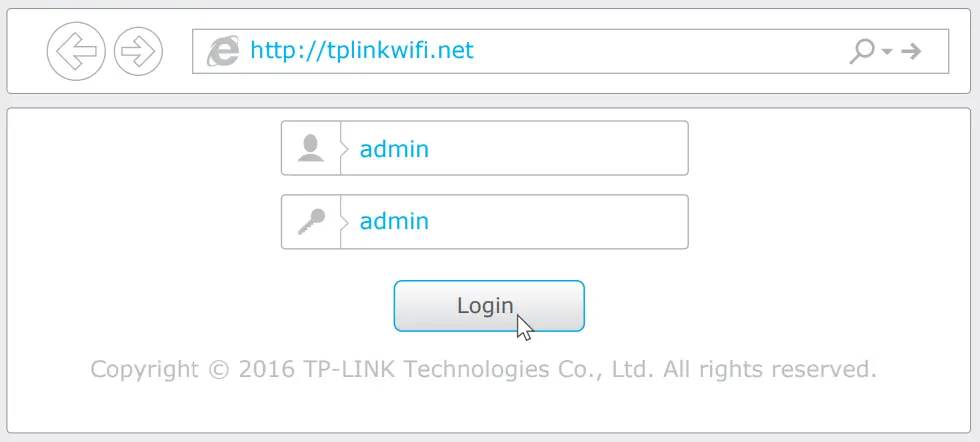
Configure the router using a web browser
- Enter http://tplinkwifi.net/192.168.0.1 in the address bar of the web browser. Enter admin for both username and password, and then click Login.
Note: If the login window does not appear, please refer to FAQ > Q1.
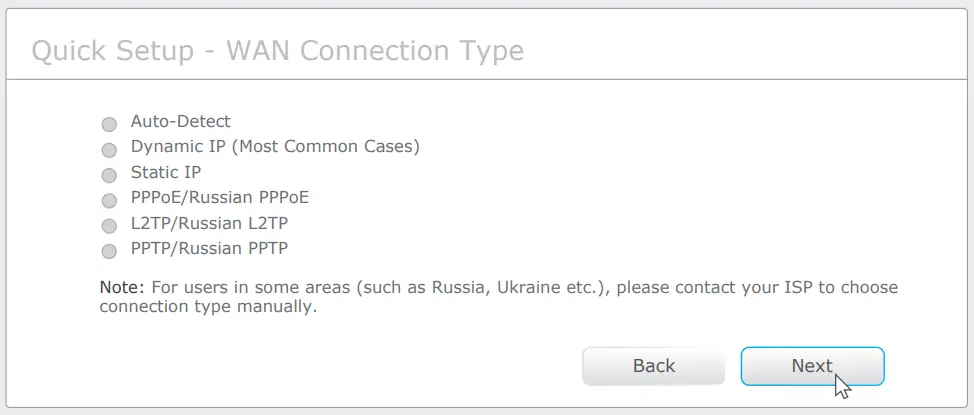
- Click Quick Setup on the left menu, and click Next. Select your WAN Connection Type. If you are unsure of your connection type, select Auto-Dectect. Click Next and follow the onscreen instructions.

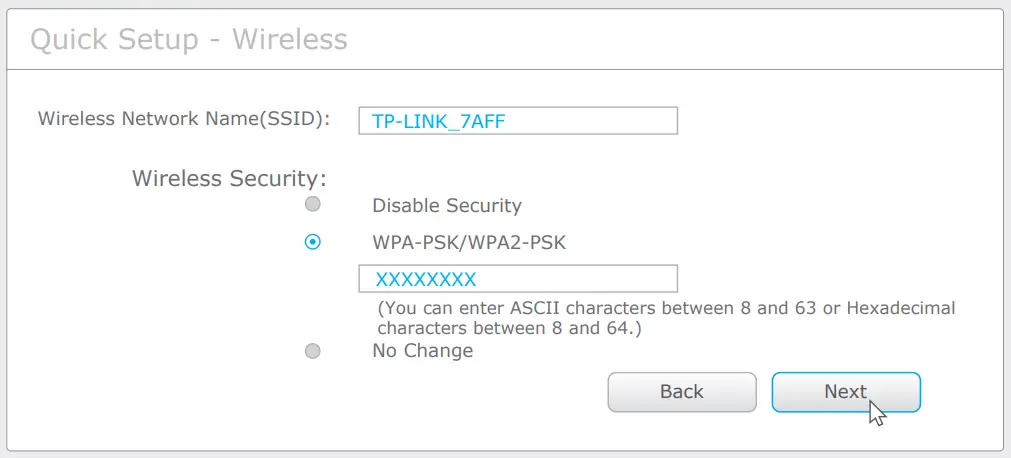
- Either use the default or customize your wireless settings, and click Next
Note: If you change the default SSID and password, write down the new wireless settings.
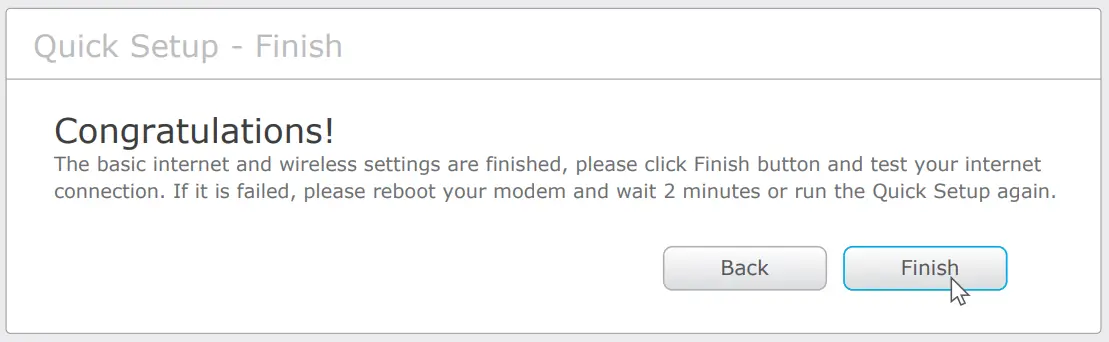
- Click Finish to complete the Quick Setup.

Configure via Tether App
TP-LINK’s Tether app lets you conveniently access the router and:
- View information about the clients on your network.
- Block network access from specific users or devices.
- Set up Parental Control with access time and content restrictions.
- Change the basic wireless network settings easily.
How to start?
- Scan the QR code to download the TP-LINK Tether app from the Apple App Store or Google Play.
- Ensure your smart device is wirelessly connected to the home network.
- Launch the Tether app and start managing your home network.


FAQ (Frequently Asked Questions)
1 If the computer is set to a static or fixed IP address, change the settings to obtain an IP address automatically.
2 Verify if http://tplinkwifi.net or http://192.168.0.1 is correctly entered in the web browser.
3 Alternatively, enter http://192.168.1.1 in the web browser and press Enter.
4 Use another web browser and try again.
5 Reboot your router and try again.
6 Disable the network adapter used currently and then enable it again.
1 Check if the Internet is working properly by connecting a computer directly to the modem via Ethernet cable. If not, contact your Internet Service Provider.
2 Open a web browser, enter http://tplinkwifi.net or http://192.168.0.1 and run the setup again.
3 Reboot your router and try again.
Note: For cable modem users, reboot the modem first. If the problem still exists, log in to the Web Management page of the router, and go to Network > MAC Clone, click Clone MAC Address and then click Save.
1 While the router is powered on, press and hold the WPS/RESET button on the rear panel of the router for approximately 8 seconds.
2 Log in to the Web Management page of the router, and go to System tools > Factory Defaults, click Restore, and then wait until the p rogress bar is finished.
Refer to FAQ > Q3 to reset the router, and then use the default admin (all ilower case) for both username and password to log in.
1 If you have not changed the default Wireless Password, it can be found on the product label of the router.
2 If you have changed your password, log in to the router’s Web Management page, go to Wireless > Wireless Security to obtain or reset your password.
Note: If your questions are not answered here, please refer to http://www.tp-link.com/en/support/faq and click Contact Technical Support for further assistance.


